- Home
- Things to carve
- Little guy wood carving
Little guy wood carving tutorial
Carve yourself a fun caricature with a turned head.
LEVEL: SOME CHALLENGES
Welcome to this little guy wood carving tutorial, where I'll guide you to easily create a charming little character with a long head that is turned to the left. He is also sporting a delightfully big nose. This project is designed to be both fun and engaging, perfect for carvers looking for a mix of enjoyment and a bit of a challenge. Along the way, you'll also carve out expressive eye sockets to give your character even more personality.
This tutorial also introduces a technique for carving the nose–and setting up the eye socket–that is slightly different compared to my previous tutorials. This technique (combined with the character's distinctive features) provides a clean and rewarding carving experience.
Whether you're a seasoned carver, or just getting started, grab your tools and let's bring this adorable little caricature to life!
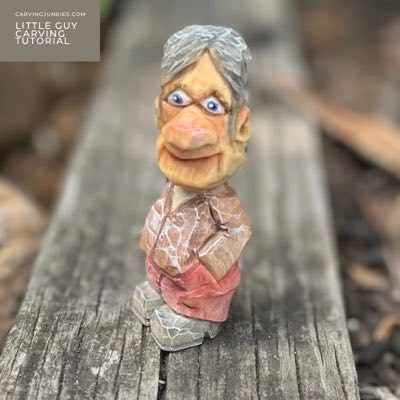
What you need
- For this little guy wood carving tutorial, you will need a block of wood that is 1 x 1 x 3 inches (2.5 x 2.5 x 7.6 cm). I used basswood, which is an easy-to-carve wood.
- You will need a ruler to measure your guidelines and a pencil (or other writing instrument) to draw them (and the other details).
- A free painting guide is included at the end of this page if you want your little guy to look like mine.
- As always, if you want to carve a much larger little guy (and want to use a bandsaw to create your roughout) there is a free pattern at the bottom of the page. You will simply have to adapt the instructions below, which are geared to carving with a knife from the original wood block.
- Please always use a good carving glove and protect your lap with something flat and hard if you lap carve.
- For this tutorial, I used a roughout knife, a smaller detail knife, and a #11 U-gouge to carve the nostrils and ears. I provide instructions for using a knife if you do not have a gouge.
Little guy wood carving at-a-glance
Watch this simple video before you start carving to see all the steps in one place.
Set up your little guy wood carving
Your little guy’s head will be turned to the left for this project.
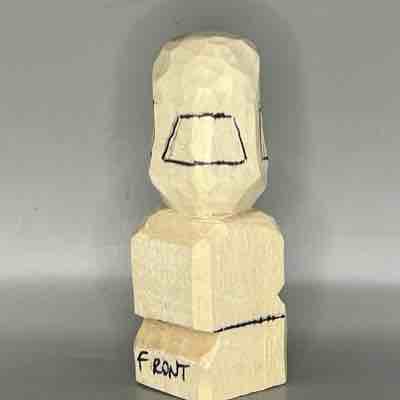
Draw a guideline all around that is 1.5 inches (3.8 cm) from the top to mark the bottom of the head (photo 1).
Draw another guideline 2.5 inches (6.4 cm) from the top all around to mark the top of the shoes on the front (photo 1).
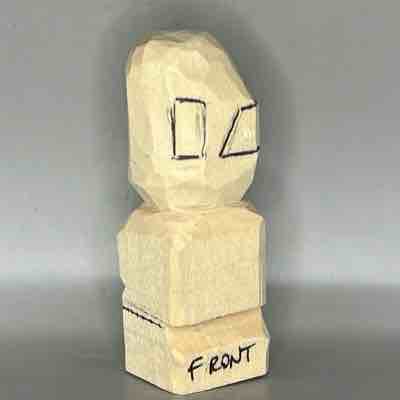
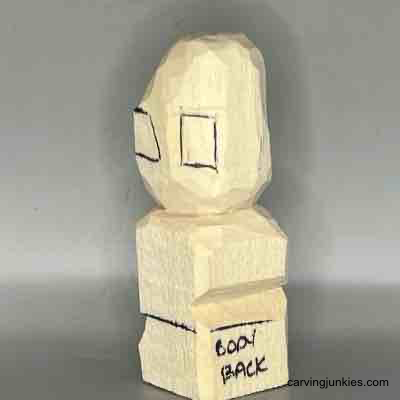
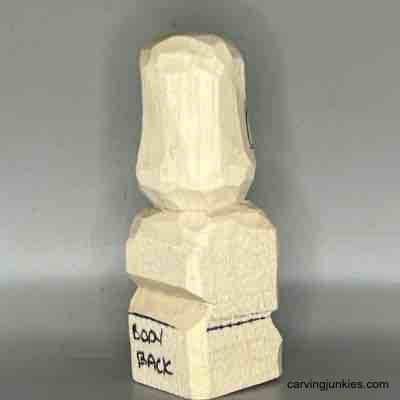
Label the corner where the head will be facing (photo 1). I used “head front.” Also mark the back where the back of the shoes will be (photo 2). I used “body back.” I left the sides (photos 3,4) blank but you could add “left” and “right.” Trust me, you definitely want to label your wood. It's easy to get confused and mess up your carving!
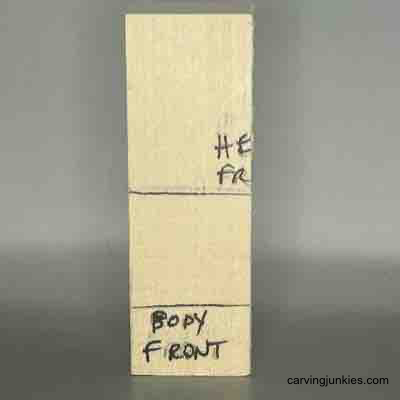 1. Front guidelines are drawn
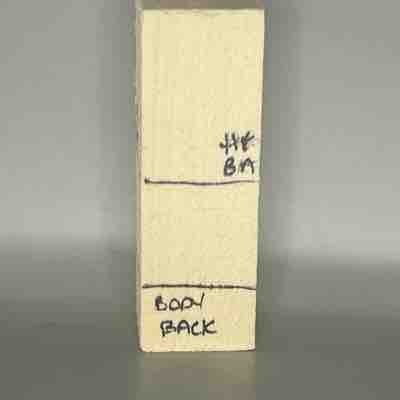 2. Back guidelines
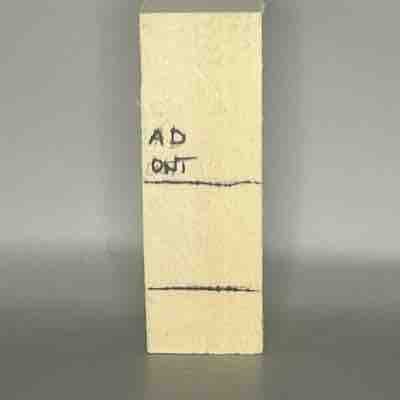 3. Right view
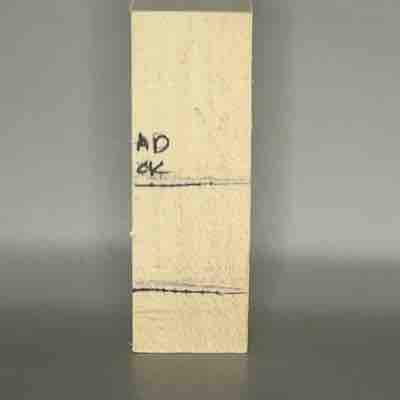 4. Left view
Make your first cuts
Use a stop cut to separate the feet on the front, removing wood from underneath (photo 5). Carve up to your stop cut at an angle (visible in photo 8). I start in each corner and work my way into the middle. If you have a lot of hand strength, you can make one large stop cut.
Using the same method, separate the bottom of the head all around (photo 6). Also, sightly round all the corners.
On the back, make a wide V-cut above the bottom guideline that will help you know where to carve the back of the little guy's arms, which are set back (completed in photo 10). Mine is about a 1/4 inch (6.4 cm) higher than the bottom guideline.
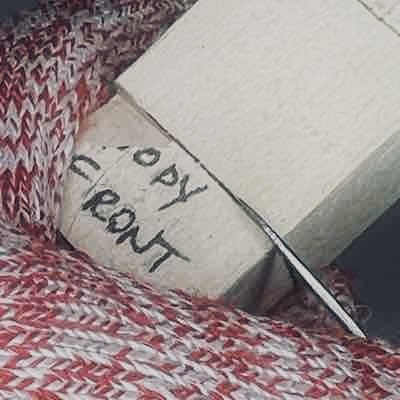 5. Making a stop cut
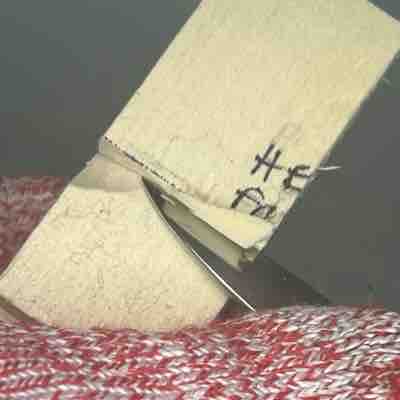 6. Separating head all around
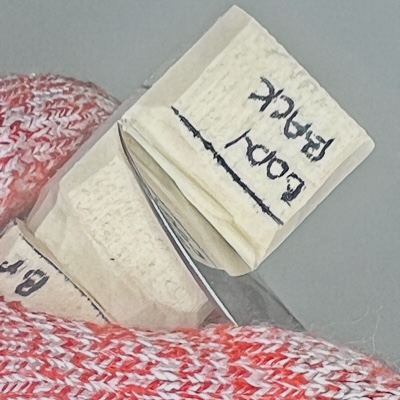 7. Completing a V-cut
Shape the head of your little guy
Use your knife to round, narrow, and shape the head of your little guy wood carving (completed in photos 8-11).
Sketch the nose box on the front (photo 8). Mine is about 1.5 inches (3.8 cm) at the widest point.
Add an ear box on the little guy's right side of the head (photo 9) and the left side (photo 10). Mine are about 1/4 inch (0.6 cm) wide and 1/2 inch (1.3 cm) tall. Tip: If you have a tendency to carve too much wood off, make your ear boxes larger!
 8. Nose box is drawn
 9. Right ear box is drawn
 10. Left ear box is drawn
 11. View of the back of the head
Separate the ears and nose
Use whatever cuts you want to separate the ear boxes all around. I like to run my knife along the guideline and make a second slicing cut (photo 12) to remove wood. You will shape and refine the ears later, but this helps you secure placement and reserve enough wood before you carve the nose.
Make a stop cut under the nose (photo 13) and remove wood from underneath. Make a stop cut along the top of the nose and remove wood from above (photo 14).
I used a #11 U-gouge to carve each nostril (photo 15) before separating the sides of the nose. On small wood carvings I find this helps prevent the wood from crumbling. Simply twirl the gouge halfway around. If you don't have a gouge, draw your nostrils and use a knife to remove the wood. Turn your wrist as you carve to help slice the wood off. If you run into grain issues, stop and make your cut from the opposite side.
To separate the nose on each side, I made one cut that is angled out (away from the nose) and made a second slicing cut. With this method you can easily shape the nose cleanly all around (completed in photo 16). I like to carve a big nose that forms a triangle at the top (visible in photo 17).
Now, sketch the top of the eye socket, the smile lines, mouth, and hair (photo 17).
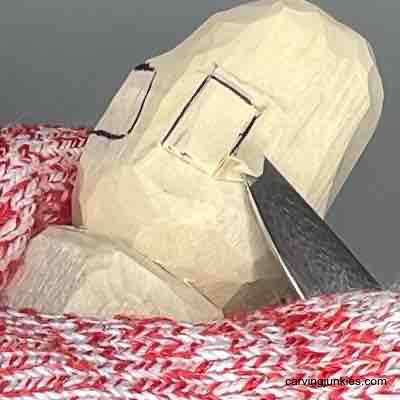 12. Separating the ear
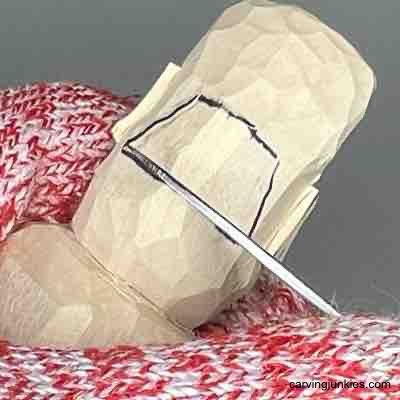 13. Making a stop cut
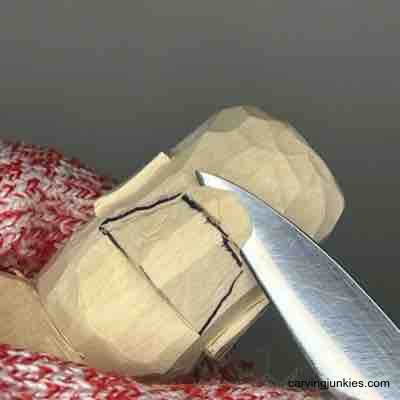 14. Carving top of the nose
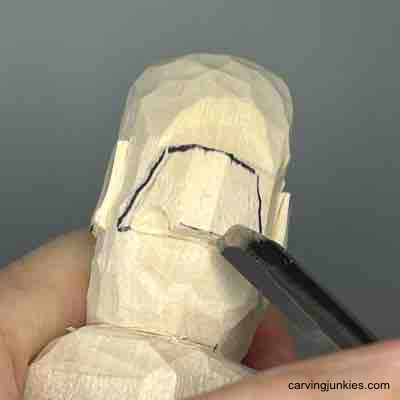 15. Carving the nostrils
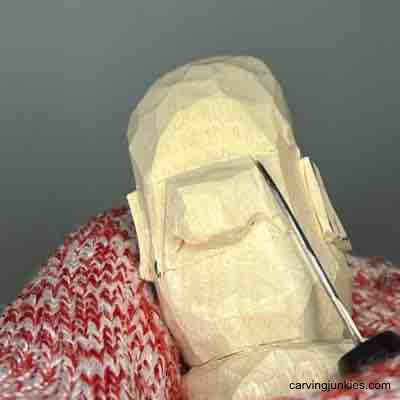 16. Carving the nose sides
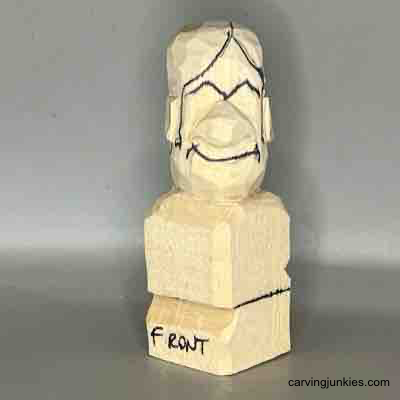 17. Details are drawn
Separate the facial details
For the eyebrows I used a stop cut and cut up to them (photo 18). You can continue to use stop cuts (or any other type of cut) followed by a second, slicing cut to separate the details.
Shave some wood off the lower back of your little guy wood carving (photo 19 and completed in photos 21-23) to narrow the shape of the pants.
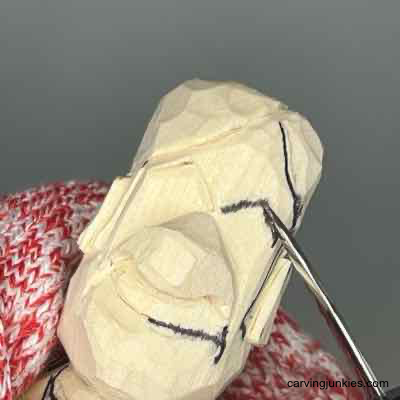 18. Separating the eyebrows
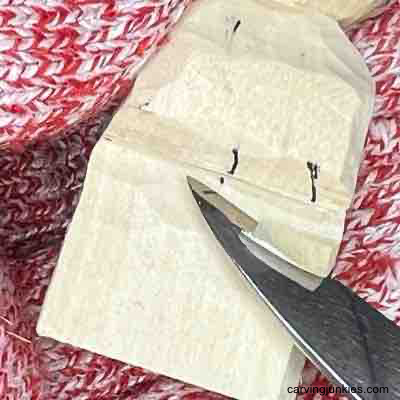 19. Narrowing back
Sketch more details
Sketch the details on the front, including the neckline and sweater, pants, and the shoes (photo 20). Tip: draw a center line first, which will help you know where you will split the shoes.
Sketch the arms on the right and left sides. Also, sketch the bottom of the pants, which are longer in the back and drape over the shoes on the front (photos 21,22).
Also, sketch the back of the arms and pants (photo 23). Tip: Give yourself almost about 1/2 inch (1.3 cm) width on the arms so you will have enough wood to work with.
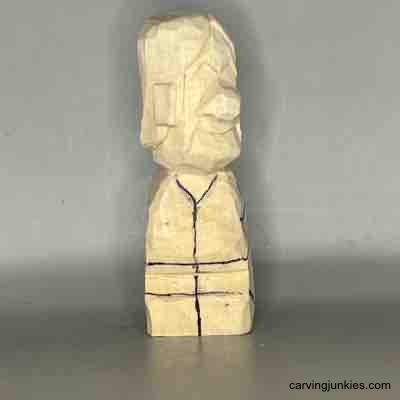 20. Front details are drawn
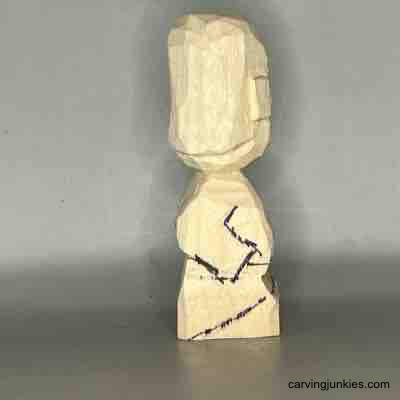 21. Details on the right side
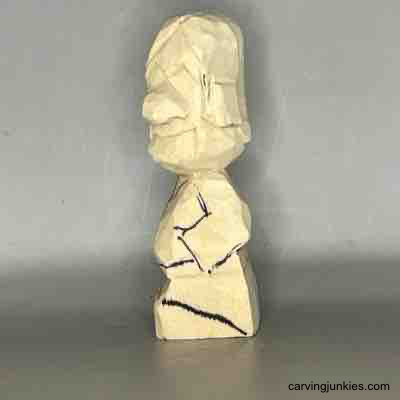 22. Left view of details
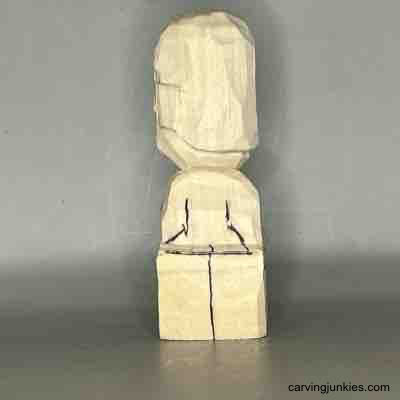 23. Back details are drawn
Carve the details
Use pyramid cuts to carve the crook of the arms on the front (photo 24). For the back of the arms, I held my knife like a pencil (photo 25) to make my first cut, and made second slicing cut.
Now, refine the shape of the body and separate the details on the front. I used stop cuts to carve the pant legs and shoes on the front (photo 26). Once the shoes are shaped you can use a V-cut on each side to create the heels (visible in photos 31,32).
Sketch a Y on the back for the tush (photo 27). Use narrow V-cuts to carve the tush.
Use a mix of V-cuts to carve the hair and a few S cuts (with second slicing cuts) to vary the hair (photo 28). Add some small V-cuts in the corners of the elbows and the knees of the pants for interest.
Carve off the corners of the ears all around and use a #11 U-gouge to carve the inner ear (photo 29). Take your time here. If you don’t have a U-gouge, you can use a V-cut to carve each inner ear.
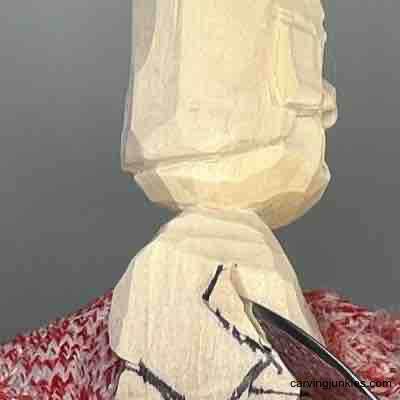 24. Making a pyramid cut
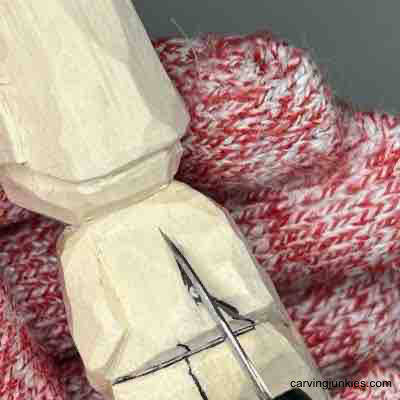 25. Carving back arm
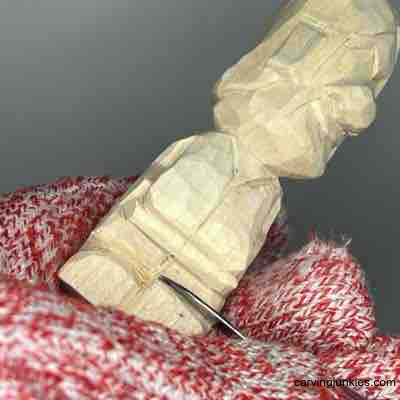 26. Carving the shoes
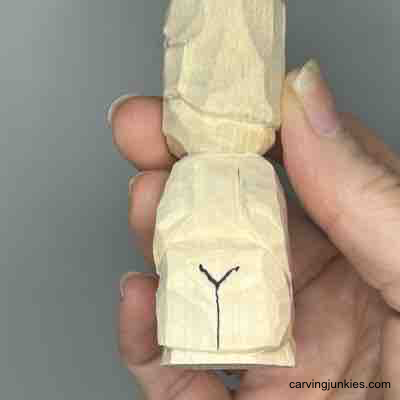 27. Adding the tush
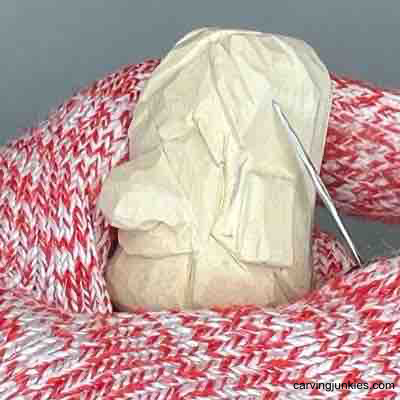 28. Carving the hair
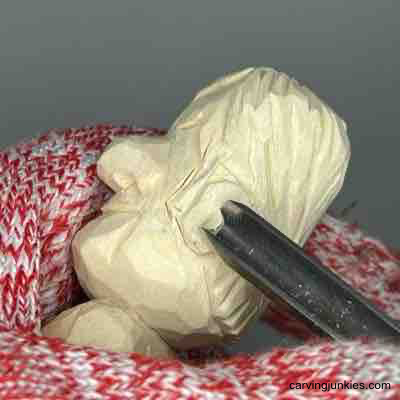 29. Shaping the ear
Refine the shape of your little guy wood carving
Refine the final shape of your little guy wood carving. I removed a little more wood under the lip and used small pyramid cuts along the hairline at the neck (visible in photos 31,33). I switched to a smaller detail knife here.
I also carved the bottoms of the eyes (visible in photos 30,32) in the same manner I carved the other facial details. Tip: Sketch the bottom of the eyes before you carve them.
Add a tiny pyramid cut in each corner of the eye for shadow.
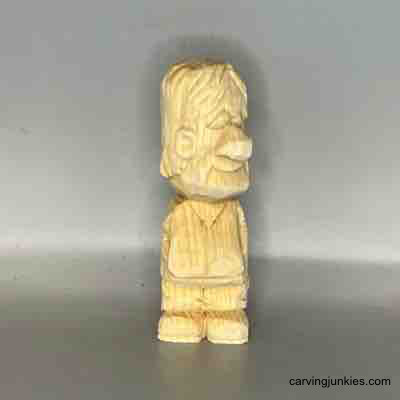 30. Front view of unpainted little guy
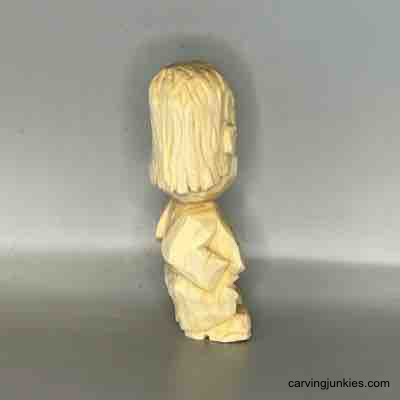 31. Right view of unpainted little guy
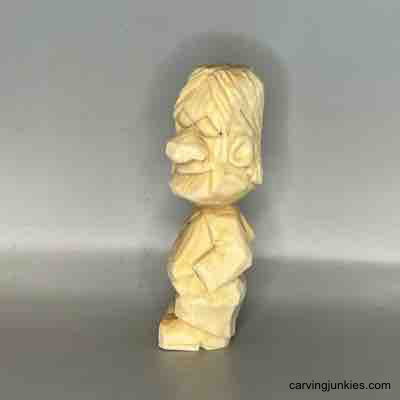 32. Left view of unpainted little guy
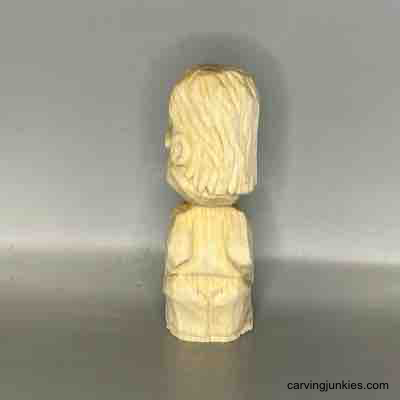 33. Back view of unpainted little guy
Paint your little guy wood carving
For great tips, read this page about painting a wood carving.
To make a wash, simply dilute the paint with drops of water. I use about 10 drops of water and build color in several coats.
Here are the colors/brands I used if you would like to get a similar look:
- Face and ears: Walnut oil medium.
- Sweater: FolkArt dark brown wash.
- Neck: DecoArt buttermilk wash.
- Pants: CraftSmart brick red wash.
- Eye whites: CraftSmart vanilla 100% paint.
- Hair and shoes: Ceramcoat black wash.
- Hair highlights: 100% FolkArt steel gray.
- Pupils: 100% FolkArt true blue for outer rim. Let dry and apply 100% Ceramcoat black paint for inner rim. Let dry and apply a dot of 100% Ceramcoat vanilla paint. Tip: Use a mandala dot tool or the round end of a toothpick for the pupils.
- Eyebrows: 100% CraftSmart chocolate brown applied with a toothpick.
- Nose, lips, tops of ears: A touch of FolkArt lipstick red wash.
- Allow piece to dry completely and dry brush with 100% Ceramcoat vanilla paint.
- Seal with Howard’s Feed ‘N Wax or other preferred sealant.
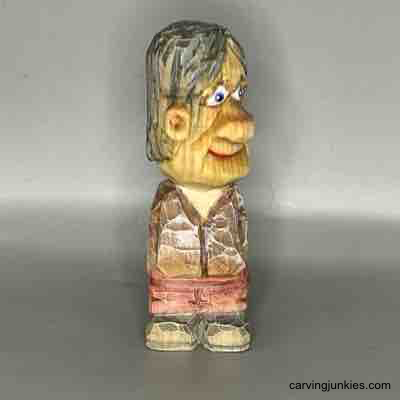 34. Painted front of little guy
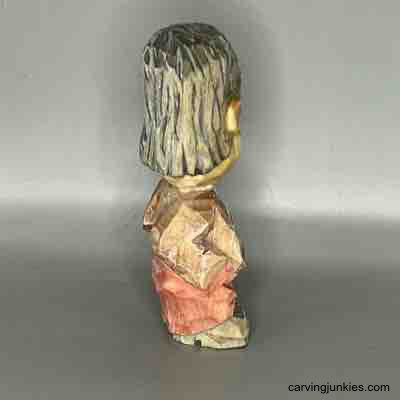 35. Painted right view of little guy
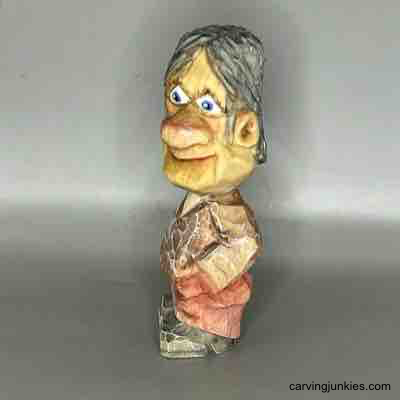 36. Painted left view of little guy
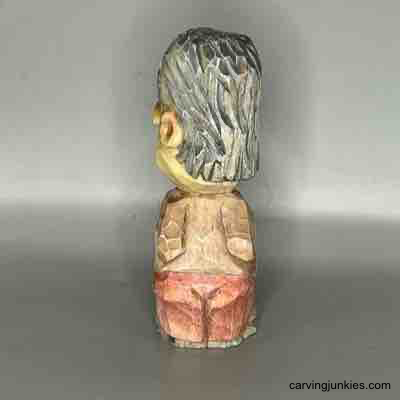 37. Painted back of little guy
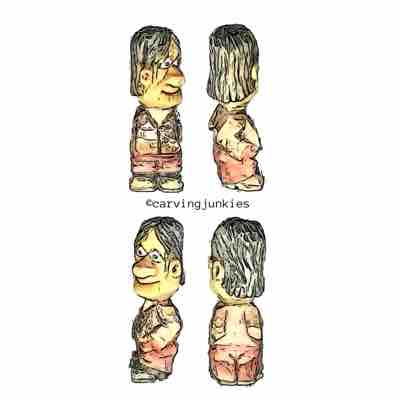
Little guy wood carving pattern
Photocopy this pattern to size to fit your wood block.
Little guy wood carving tutorial summary
- This little guy wood carving tutorial is super fun and a great way to incorporate some movement with his left-turned head.
- There are a number of intricate details to practice, such as carving hair and ears.
- Having a #11 U-gouge is a great tool to perfect your nose and ears, but you could also use a detail knife.
- This little caricature carving will bring a smile to everyone's face!
Get 50 Wood Carving & Painting Tips when you join our FREE Covered in Chips club.
Share this page
carvingjunkies.com never sells your personal information.
This site uses cookies for its operation and to enhance your experience. As an Amazon Associate and Focuser Carving affiliate we earn from qualifying purchases.
Home | About Us | Privacy Policy | Terms of Use | Contact | Sitemap


