- Home
- Wood carving caricatures
- Caricature carving tutorial
Free caricature carving tutorial
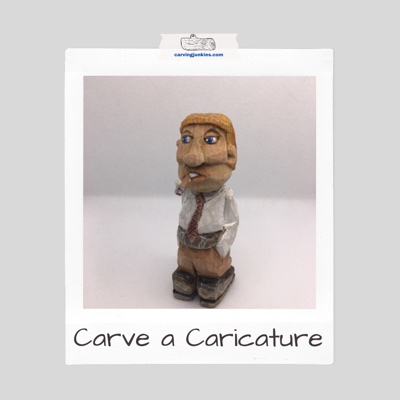
With just a knife you can carve this cigar-smoking little guy.
Our caricature carving tutorial includes a simple pattern (at bottom) that makes it easy to create "Cigar Charlie.” This is a great tutorial for beginners because it details every step. Be sure to check out our more recent caricatures, which are more advanced.
You can easily continue to use our pattern and add a hat, beard, or different clothing.
What you will need for this caricature carving tutorial
- 1.5 x 1.5 x 4-inch (3.81 x 3.81 x 10.16 cm) basswood block.
- Our free template.
- Pencil and magic marker (optional).
- Knife of choice.
- Paint of choice (we use acrylic) and brushes.
- Carving gloves (always for safety).
You will work from the top down. This process is similar to caricature carver Jack Price, but we like to leave the head as a block to let the caricature emerge while carving (in other words, let the block "speak" to you).
Caricature carving tutorial at a glance
Getting started
- Photocopy the template (at bottom) to size to fit your wood block, cut the template out, and trace it on the left and right sides of the wood block.
- Tip: you can make a cardboard cutout of the pattern and reuse for other caricatures.
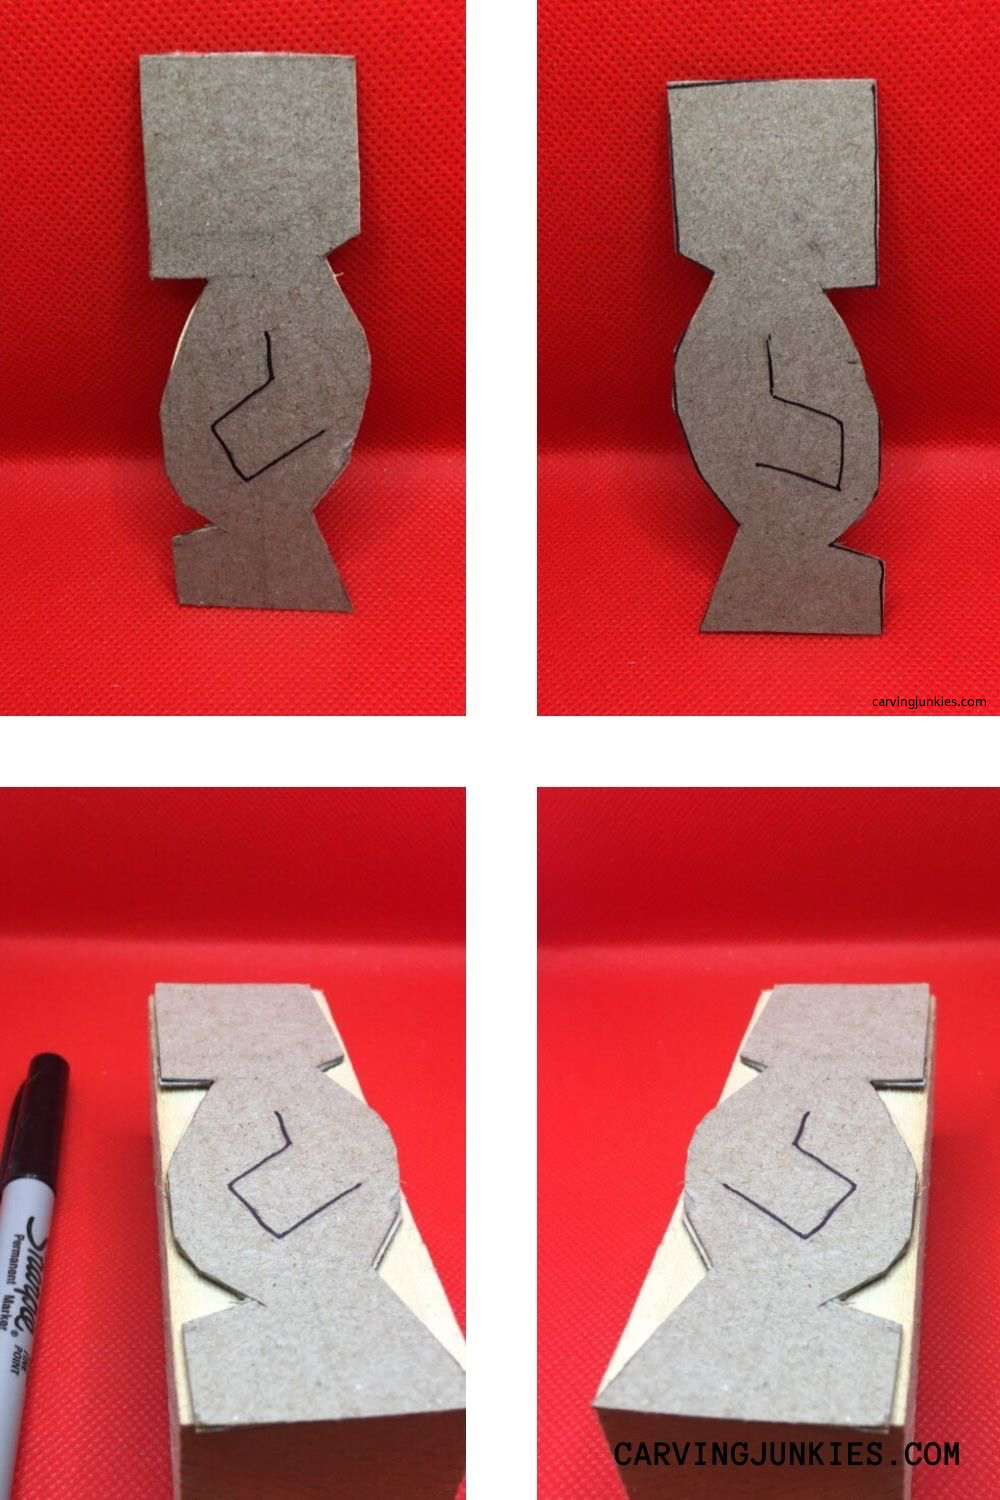 Place the pattern on the block and trace it
Mark areas of wood to remove
- Mark the the right and left sides to indicate where you will cut and remove wood (upper photos).
- Also mark the front and back where you will remove wood (lower photos).
- Note: the angle for the head and neck are a little higher in the back.
 Mark areas of wood to remove
First cuts
- Remove some wood slices from the back of the head (top left photo).
- Use stop cuts to remove wood from the back of the neck (top right photo). Start at the edges and work your way inward (bottom photos).
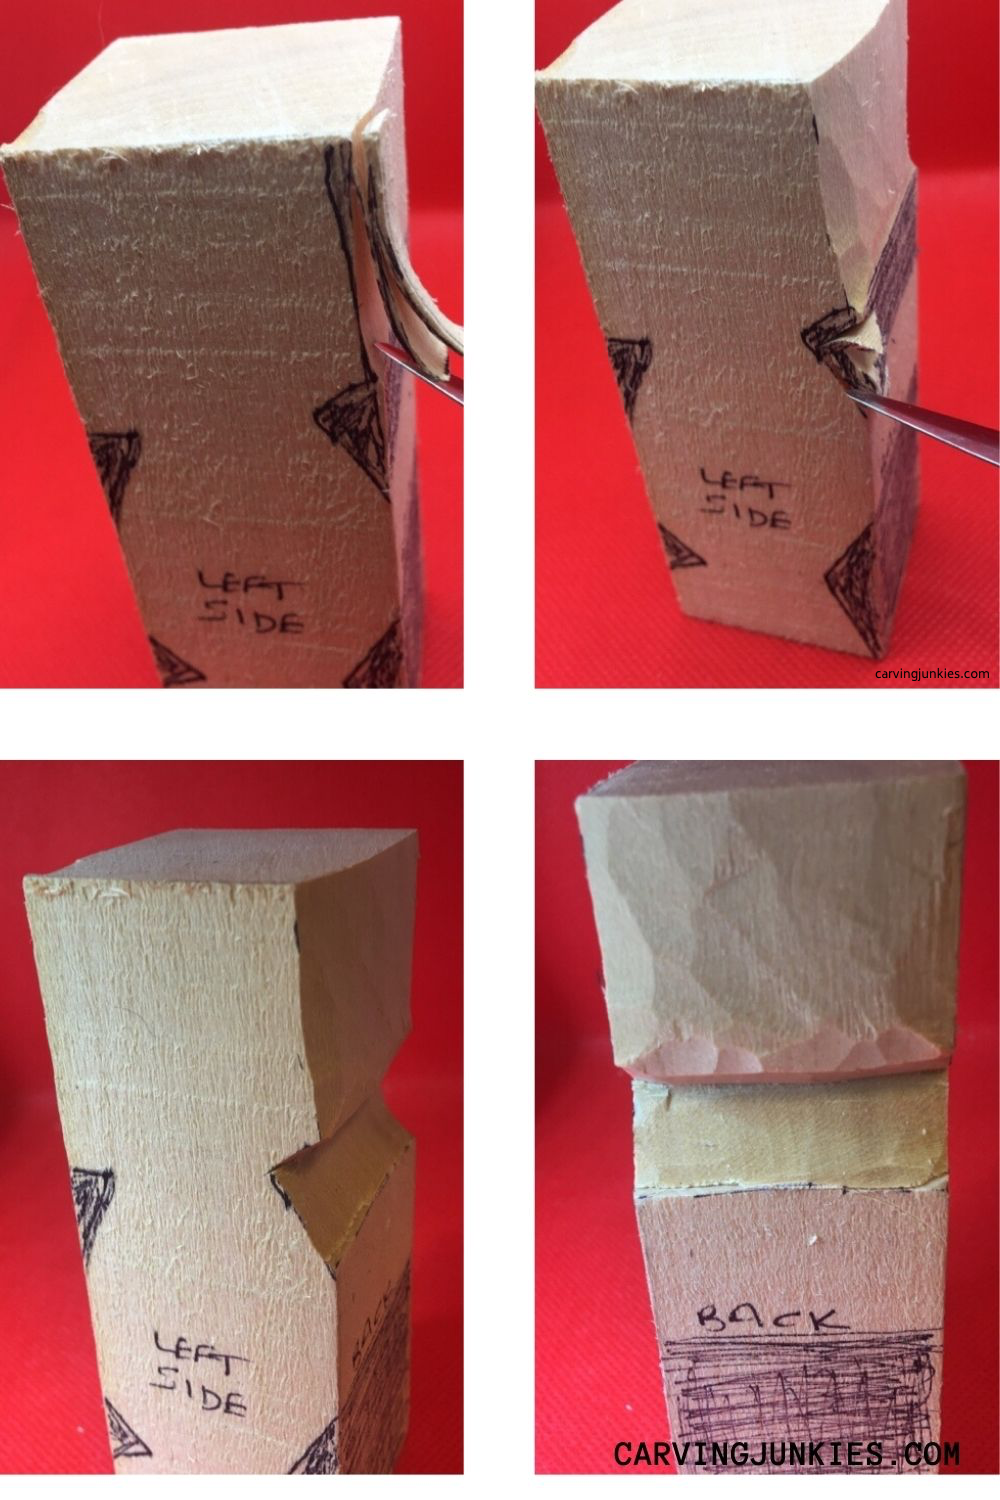 Forming the neck
Shape the front and back
- Remove wood from the front of the neck (top left photo).
- Use deep V-cuts to separate the feet (will be shoes) in the front and back (top photo right and bottom photo left).
- Draw a triangle on the front and back to mark where the legs will be split (top photo left and bottom photo right).
 Feet and neck are started and triangles are drawn where feet will be split
Reserve wood for the ears
- Draw a square on each side to reserve wood for the ears (caricature carver Pete LeClair does this using a band saw).
- Also mark where you will remove wood from the top and bottom of the head for the face.
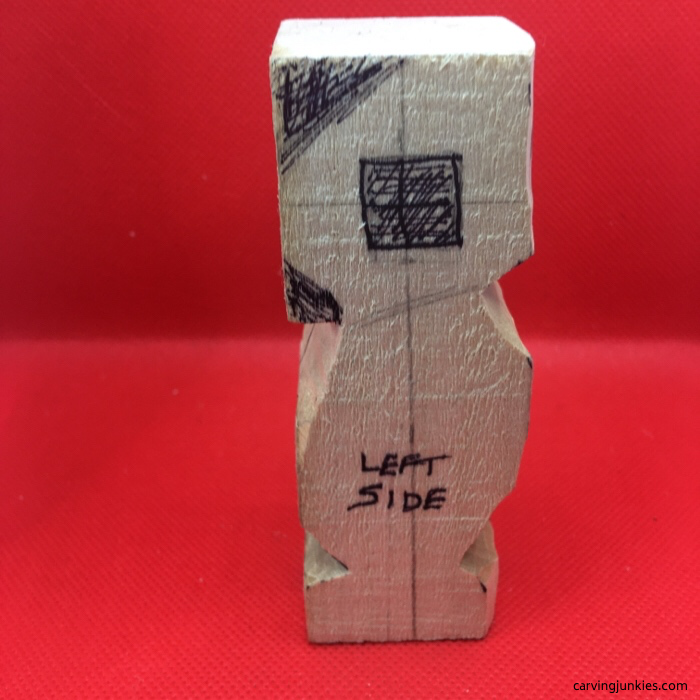 Wood to remove and square to reserve for left ear
 Right view
Round the face
- Remove wood to round the front of the head (we use push cuts).
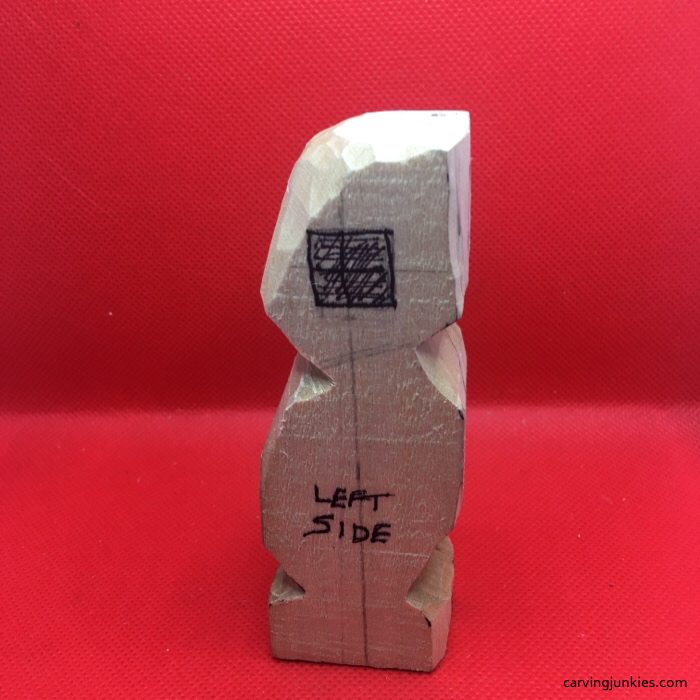 Wood is removed to shape the head
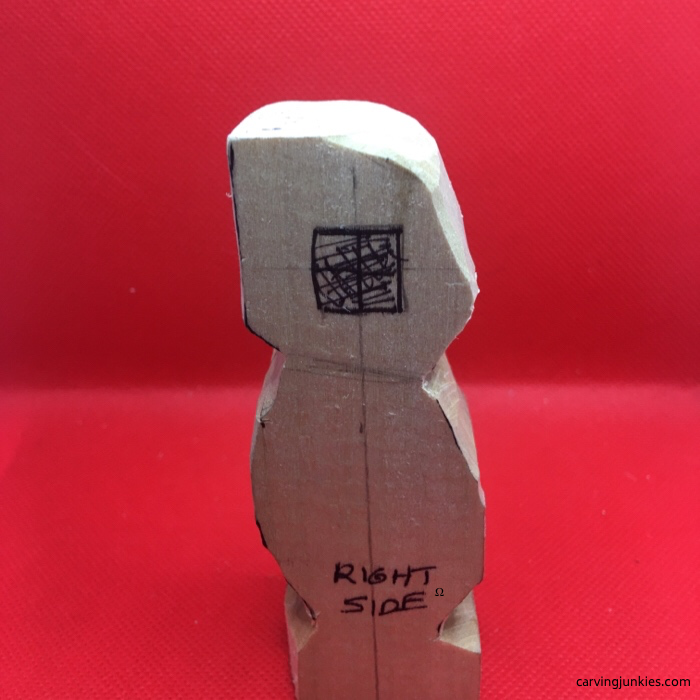 Right view
Split the feet
- Use a triangle cut to slightly split the feet (legs will be split further later).
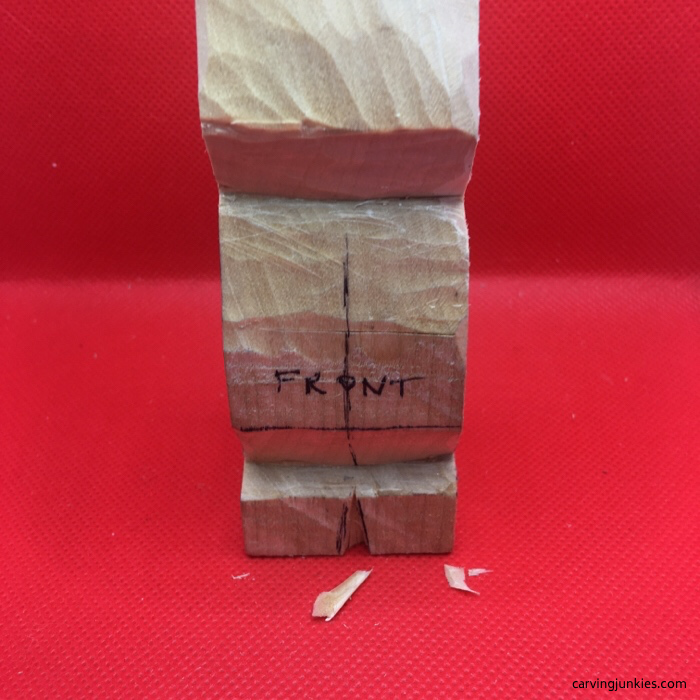 Triangle cut is made in front
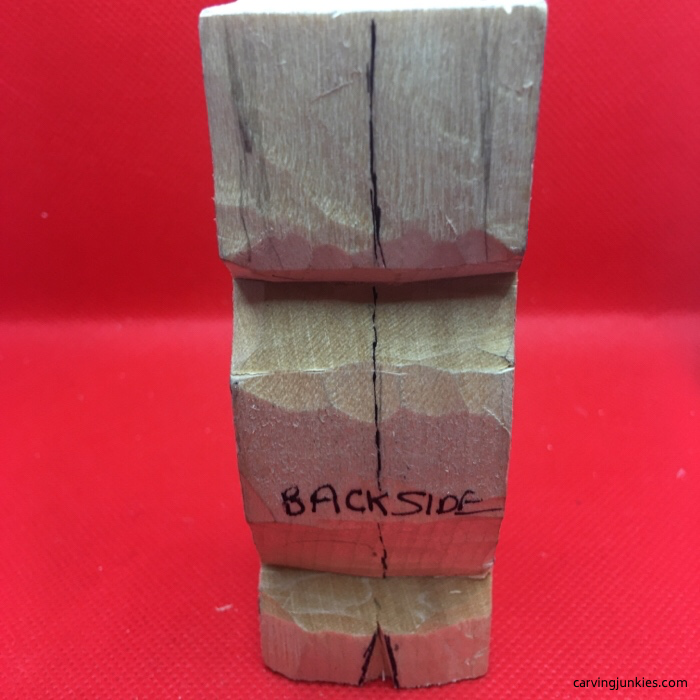 Back triangle cut is made
Round the back top of the head
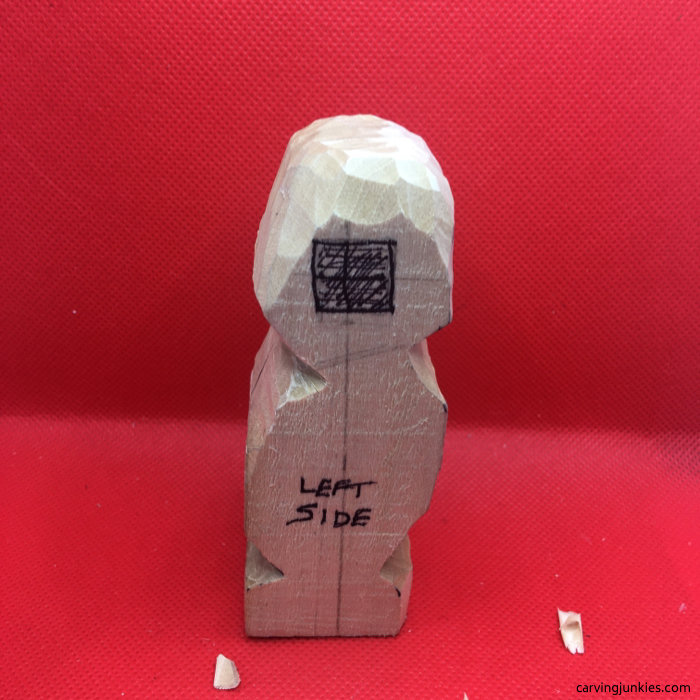 Rounded head for caricature
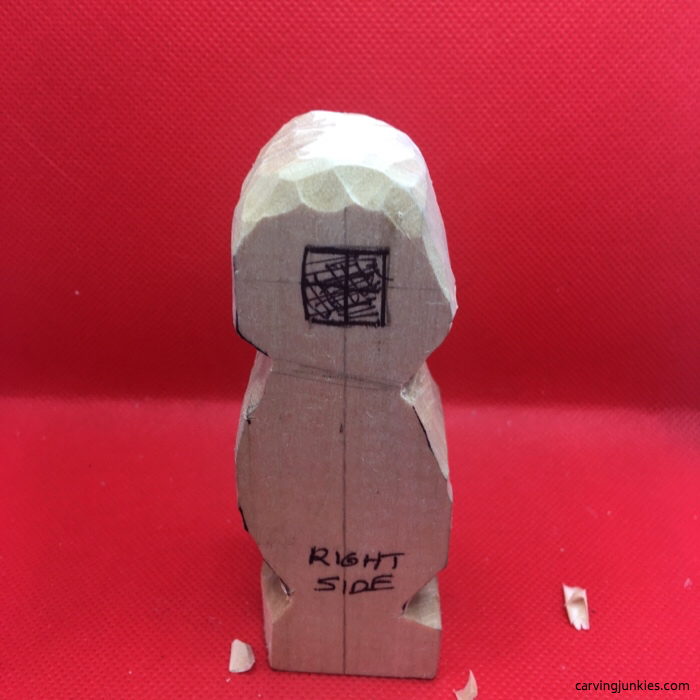 Right view
Add the arms
- Add a centerline on each side and draw on the arms.
- Remove some wood to start to shape the chest (we use push cuts).
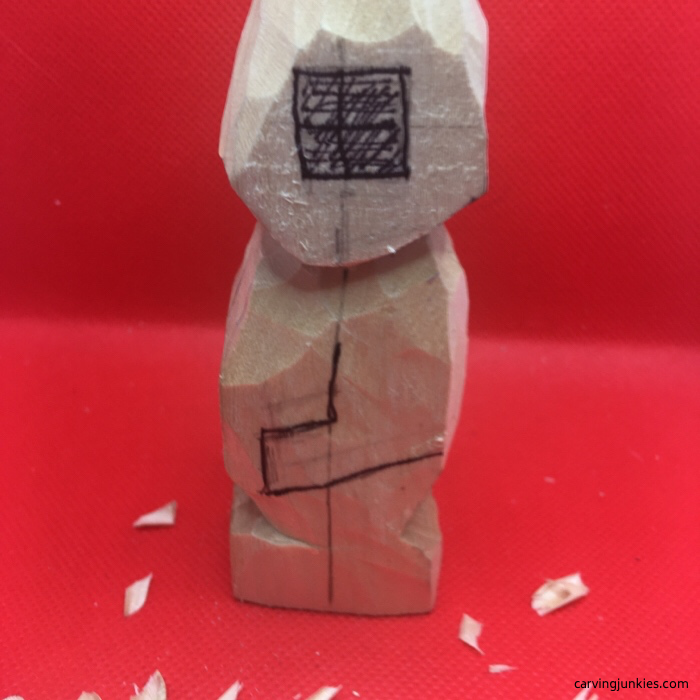

Continue shaping the head and body
- Use line cuts to remove wood on each side of the head to separate the squares reserved for the ears (all photos).
- Narrow the face (top photo left).
- Use line cuts to define the arms (top photos, bottom left photo).
- Round the belly (top photo left).
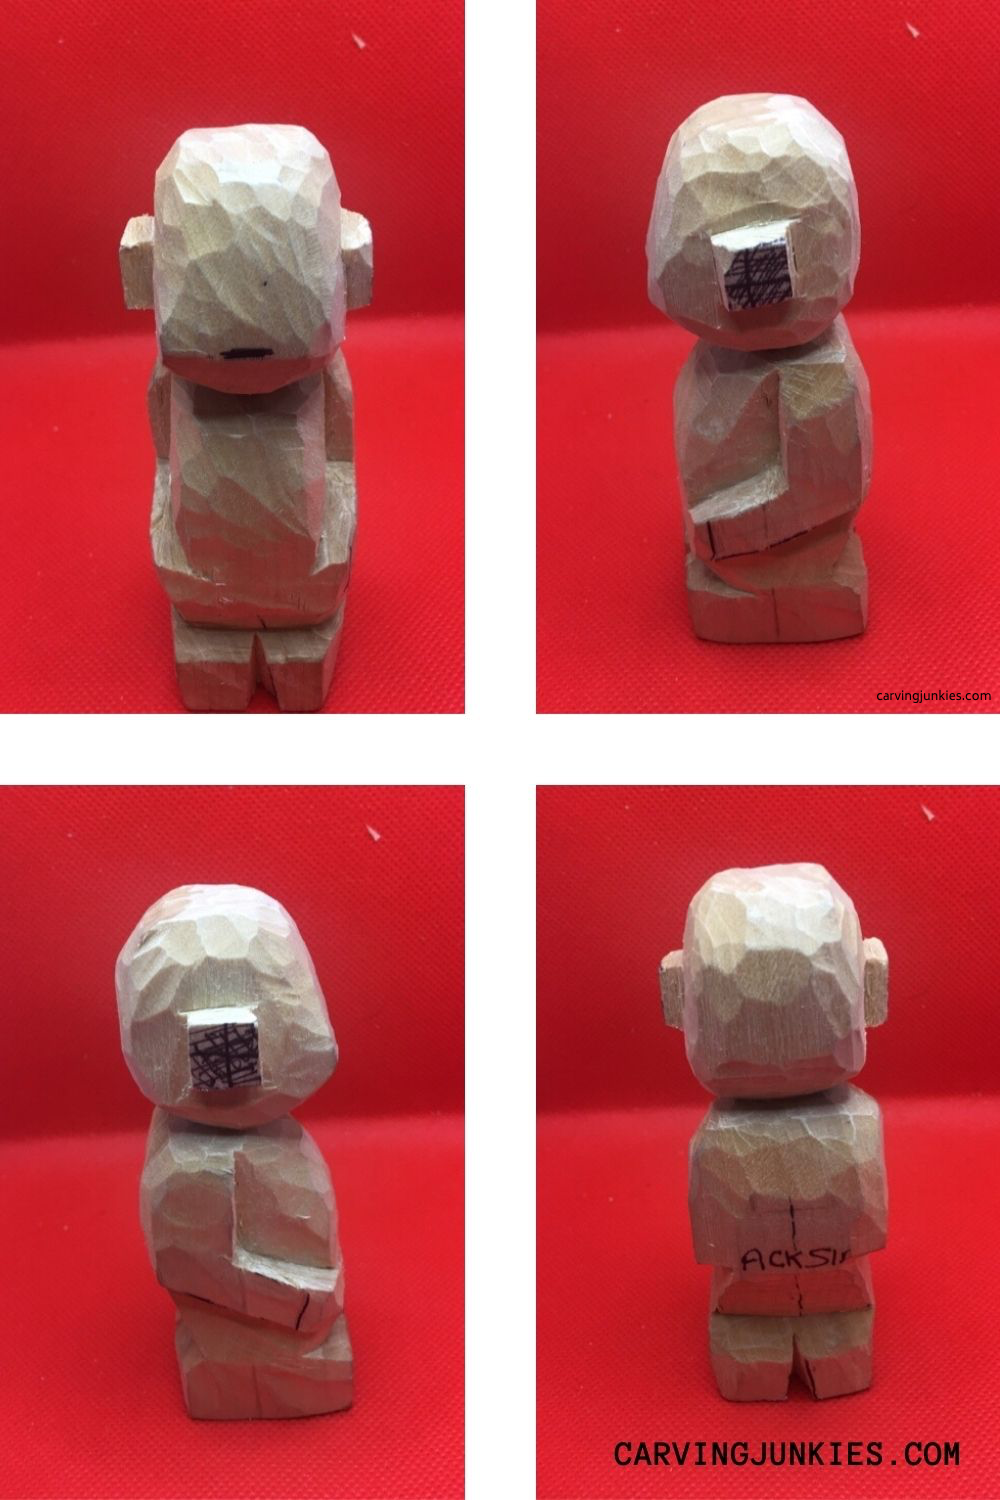 Wood for ears is separated and arms are defined
Add some details with our caricature carving tutorial
- Draw on the dress shirt, tie, belt, and shoes (top photo left). Pants will drape over the back of the shoes (top photo right and bottom photo left).
- Shape the arms and use V-cuts to add wrinkles to the sleeves (top photo right, bottom photo left).
- Cut the end of the arms off at an angle and make deep cuts to give the illusion his hands are in his pant pockets.
- Define the arms on the back with line cuts and shape the shoulders (bottom photo right).
- Split the legs a little higher.
- Use a V-cut to separate the heel of each shoe (top right and bottom left).
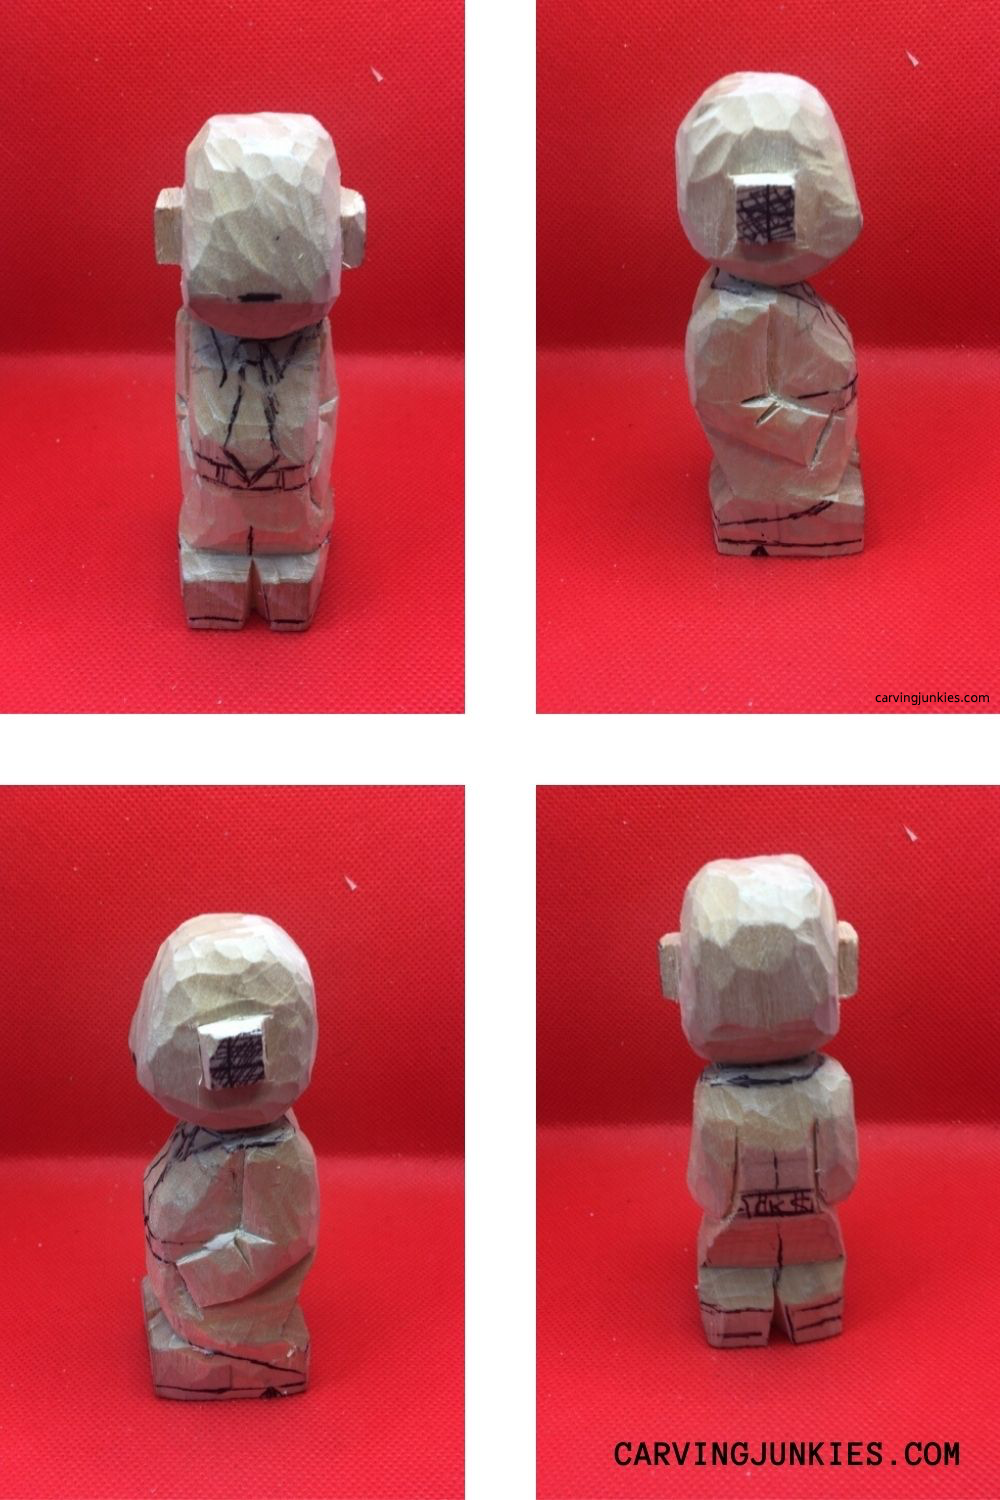 Clothing details are drawn and shirt wrinkles are added
Start the nose with our caricature carving tutorial
- Draw lines to mark the bottom and top of the nose (top photo left).
- Use a stop cut under the nose and remove wood below it. Also make a deep V-cut on either side of the nose (top photo right).
- Draw lines marking wood to remove on each side of the nose (bottom photo left).
- Add smile lines below the nose and (all bottom photo right):
-Make a small triangle cut in both corners of the nose (for shadow).
-Use sweep cuts to create a smooth area for the eyes.
-Draw the hairline on the front and extend around the head.
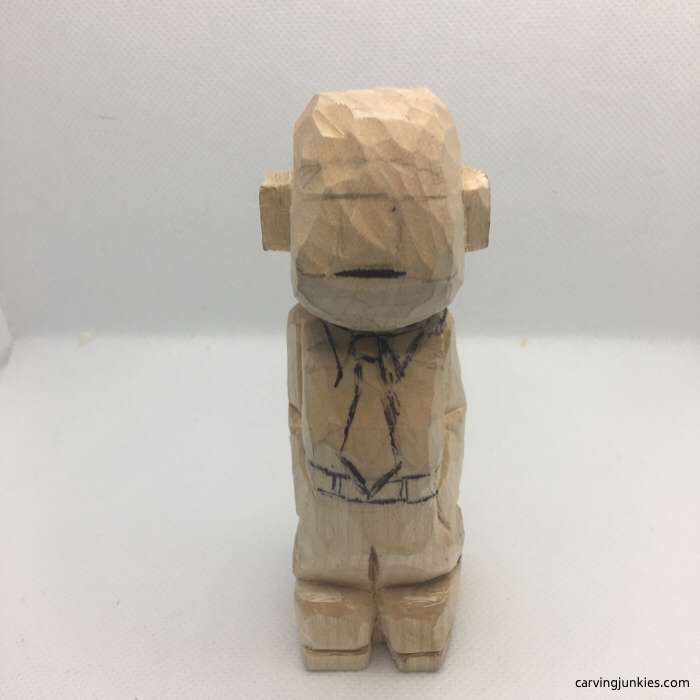 Nose top and bottom cut lines are added
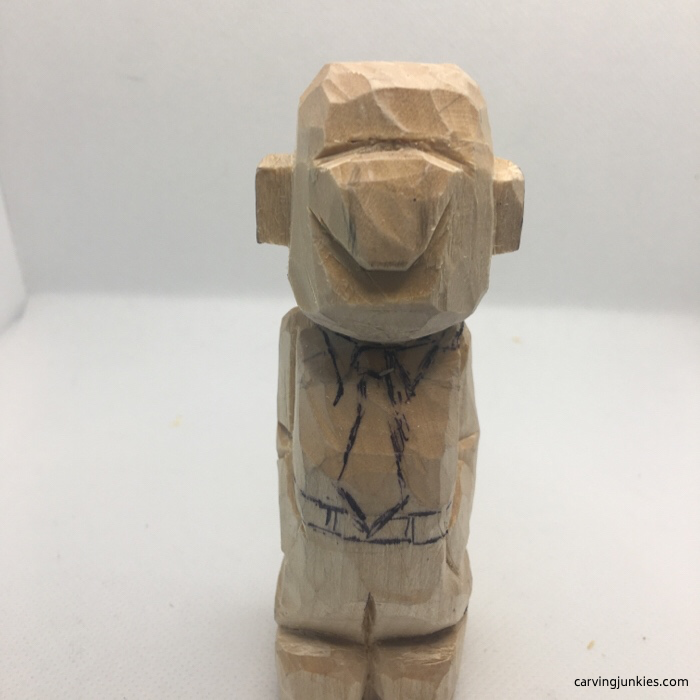 Initial cuts are made on the nose
 Basic shape of the nose (refine later)
Carve more details with our caricature carving tutorial
- Separate the hairline from the head (all photos).
- Define the tie, shirt and belt with stop cuts on the front and back (top photo left).
- Use a line cut to make the tush (bottom photo right).
- Narrow both sides of the pants (bottom photo right).
- Round the tops of the shoes (tip: toes curl up in shoes so use sweep cuts).
- Use V-cuts to define the shoe soles and deep cuts to create shadow (all photos).
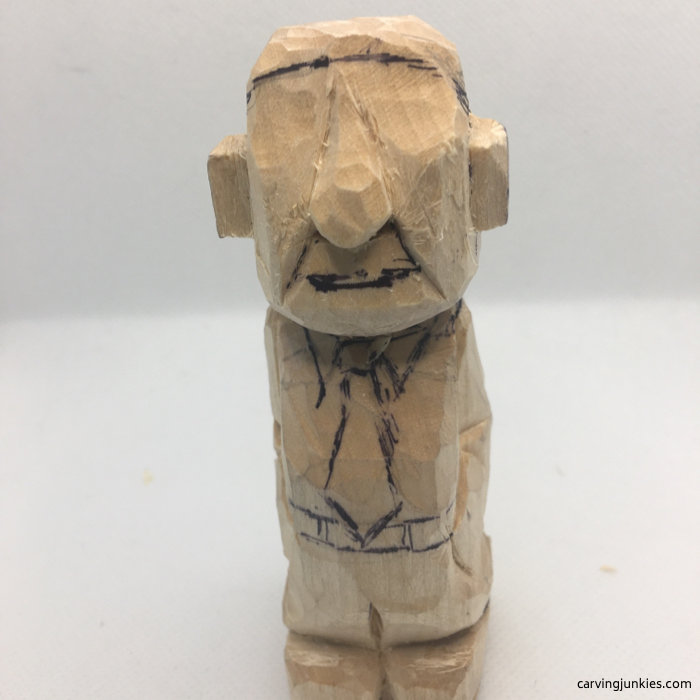
- Redraw the mouth to make an opening for the cigar and add the cartoon eyes (top photo left).
 Mouth and eyes are drawn on
 All drawn details are defined
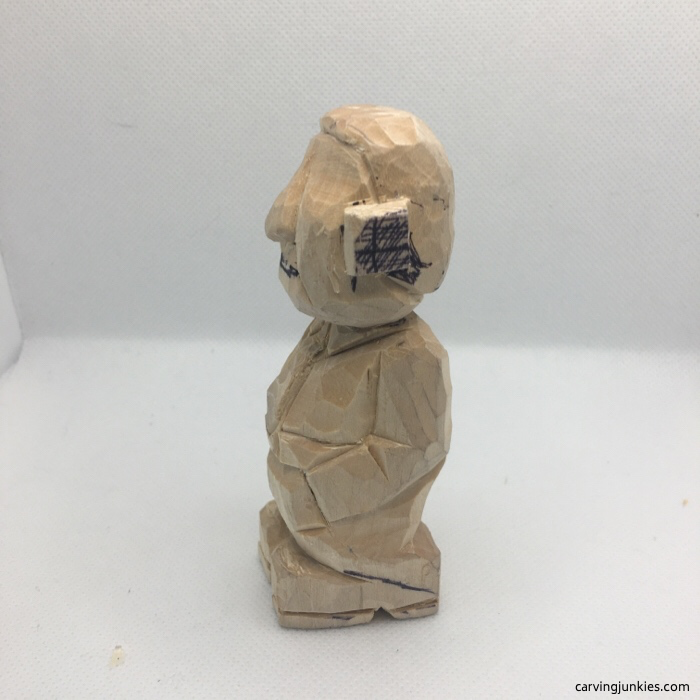
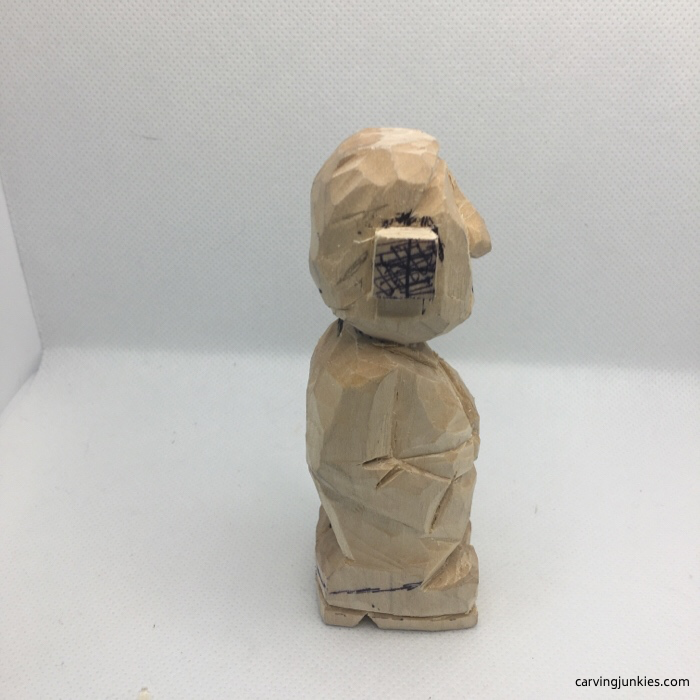 Right side view
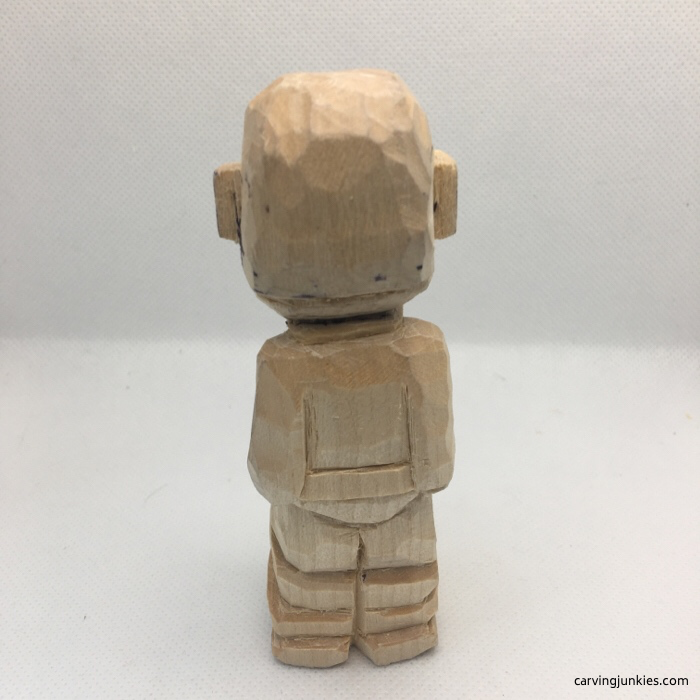 Back view
Finish the face with our caricature carving tutorial
- Define the mouth and cut a small hole on the left side for the cigar.
- Use a scrap of wood to carve the cigar (glue after painting).
- Use sweep cuts to define the upper and lower lip.
- Carve the outer line of the eyes (the top line is the eyebrow).
- Add a cut across the middle of each eye to create a droopy eyelid.
- Make a small hole in each nostril while holding the carving upside down (be careful not to break the nose or tip of your knife).
- Carve the ears into a crescent shape and use a V-cut to make the indentation.
- Remove more wood off the back legs (at the knees) to give him a bent-back posture.
- Noodle the shape of the nose and carefully shape the cheeks by shaving off some wood.
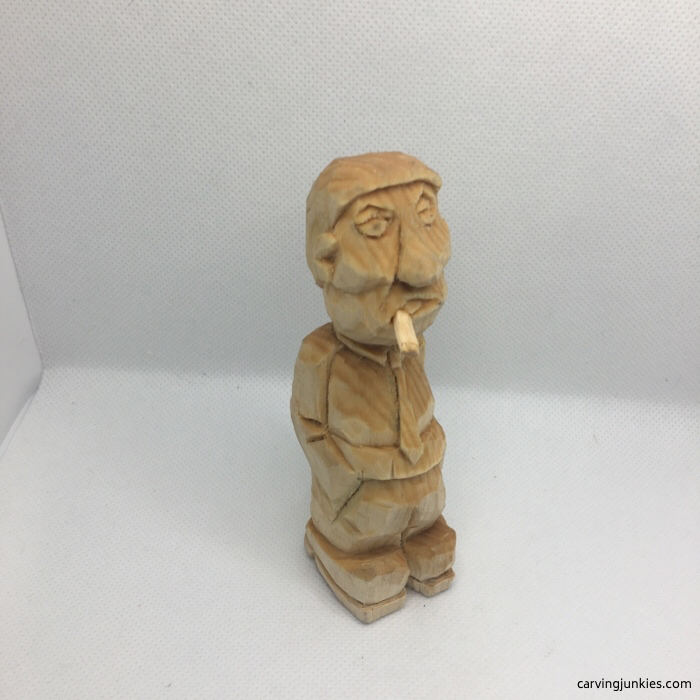 Eyes are added and cigar is fit (will be glued later)
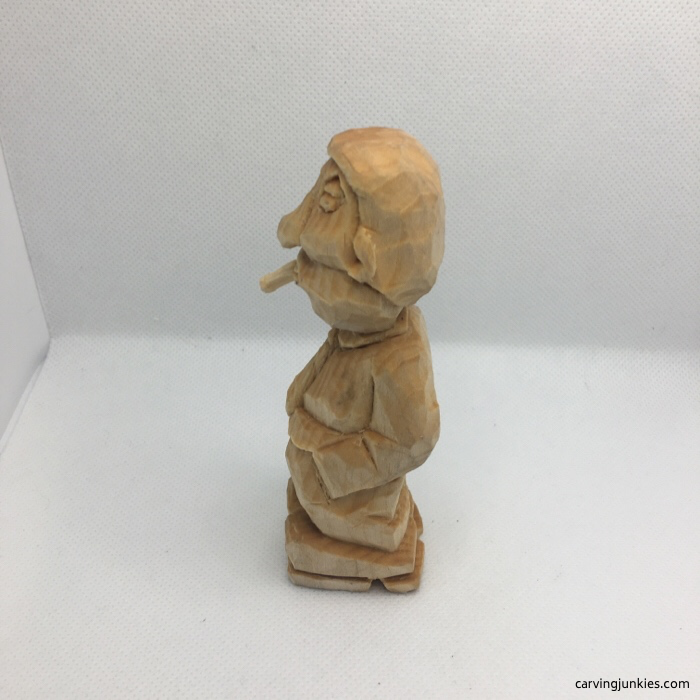 Wood is removed from the back legs (knee area) to change posture
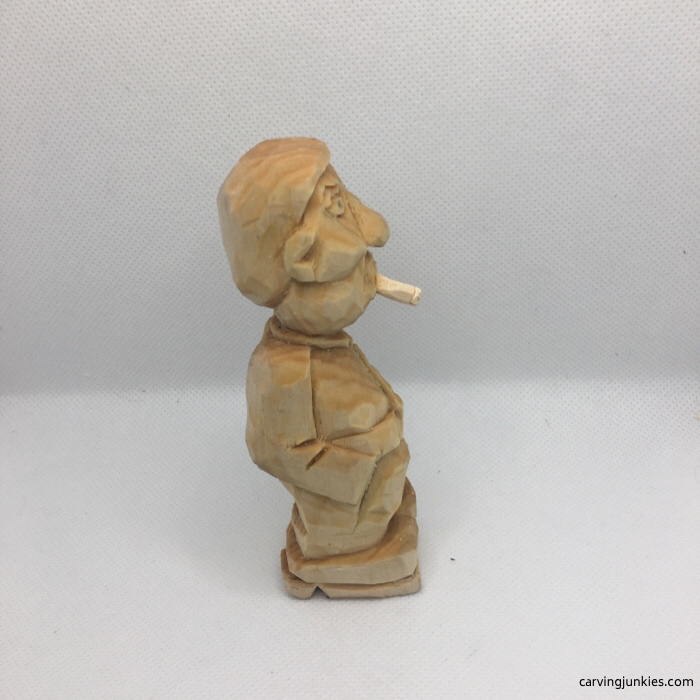 Right side view
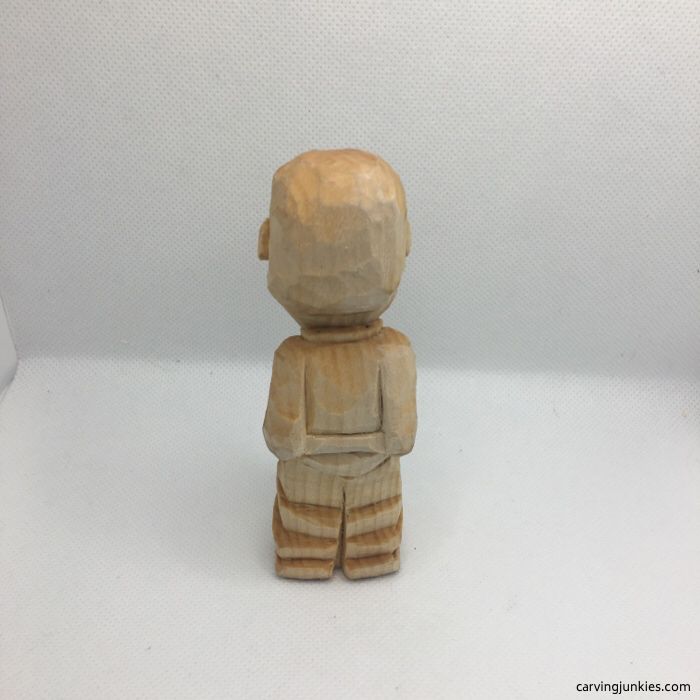 Back view
 Two small holes are carefully added
Caricature carving tutorial: prepare for painting
- Clean any pencil marks, soil, or dirt with water and a little dish soap after finishing this caricature carving tutorial.
- We decided to add some hair cuts prior to painting using a new (Ramelson) 60 degree V tool (3 mm) and you can get the same effect using a detail knife. The gouge was very easy to work with and arrived super sharp. Some of the cuts should intersect.
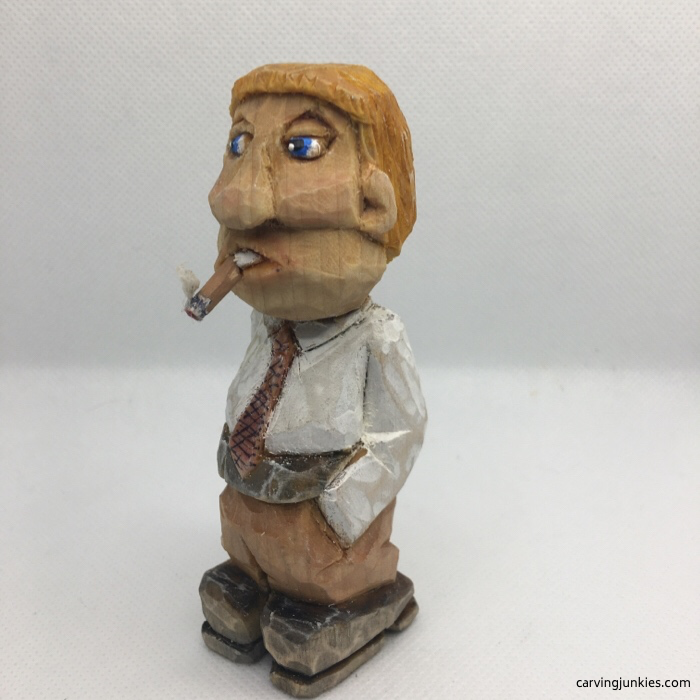 Fully painted front
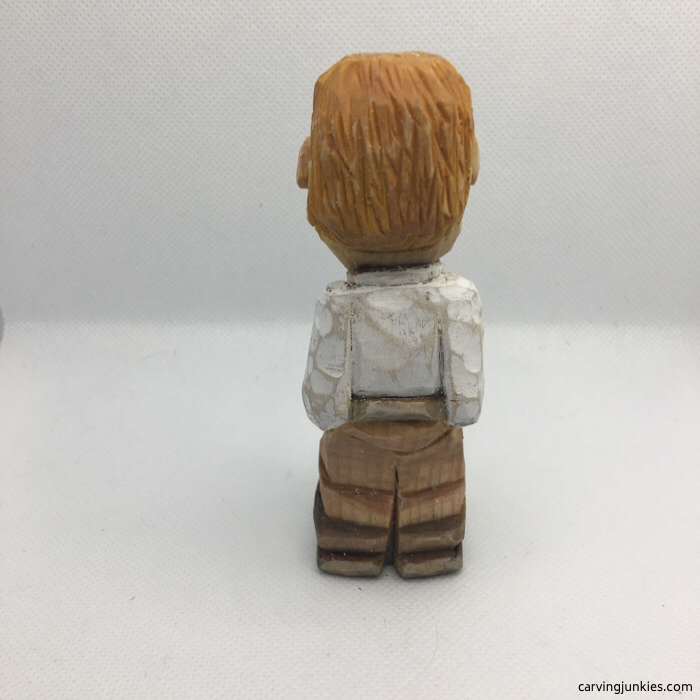 Back
Back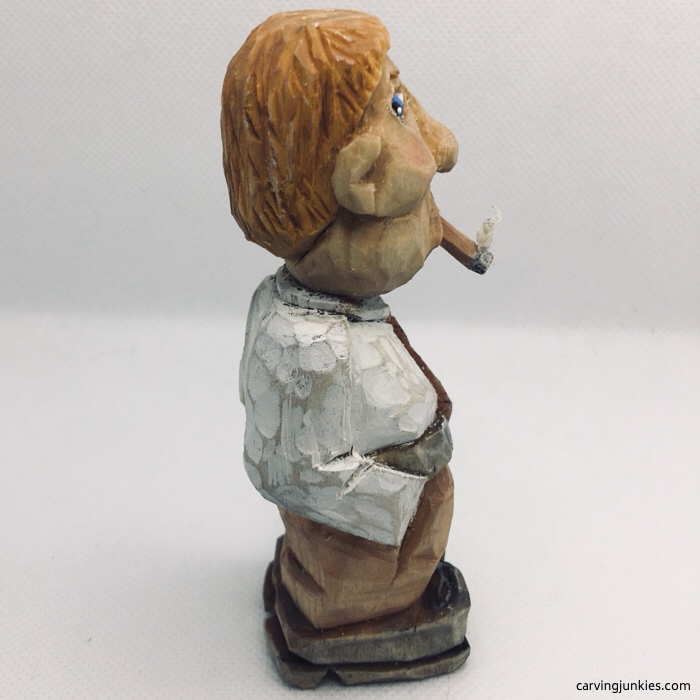 Right view
 Left view
Want to get the same look?
After painting the eyes, shirt, and tooth with 100% acrylic white paint (Craftsmart), we dipped the caricature into a jar filled with boiled linseed oil* and let it set for 10 minutes.
We then wiped him down with paper towels and painted while wet using the following (all Craftsmart acrylic paint except for burnt sienna):
- Tie: 1 drop bright red paint and 25 drops of water.
- Pants: 3 drops golden brown paint mixed with 2 drops burnt sienna (Academy) and 2 drops dark brown and and 125 drops of water.
- Shoes and belt: 1 drop black and 25 drops of water.
- Belt buckle: 100% gray.
- First layer of hair: 1 drop yellow paint and 1 drop orange and 2 drops golden brown with 40 drops of water. Second layer: 1 drop yellow paint and 25 drops of water.
- Face, ears, and neck: 2 drops sunkissed peach and 25 drops of water.
- Eyes: 100% bright blue for the iris (let dry completely), 100% black for the pupil and 100% white for accent.
- Cigar: 100% white (outer tip), 100% golden brown, 100% bright red (inner tip), 100% gray specks (dry bushed) on dried white and dots on white with black magic marker. Smoke is a piece of a cotton ball twisted into shape with glue and added at end.
- After painting we used a small piece of light sandpaper to antique the white shirt and rubbed it on the pants, belt, and shoes to highlight the cuts (similar to dry brushing).
- Finish: Howard's Feed and Wax.*
*Promptly dispose of all paper towels or cloths outside as they can spontaneously combust.
General caricature carving tutorial template (reusable)
- Photo copy to size to fit your wood block.
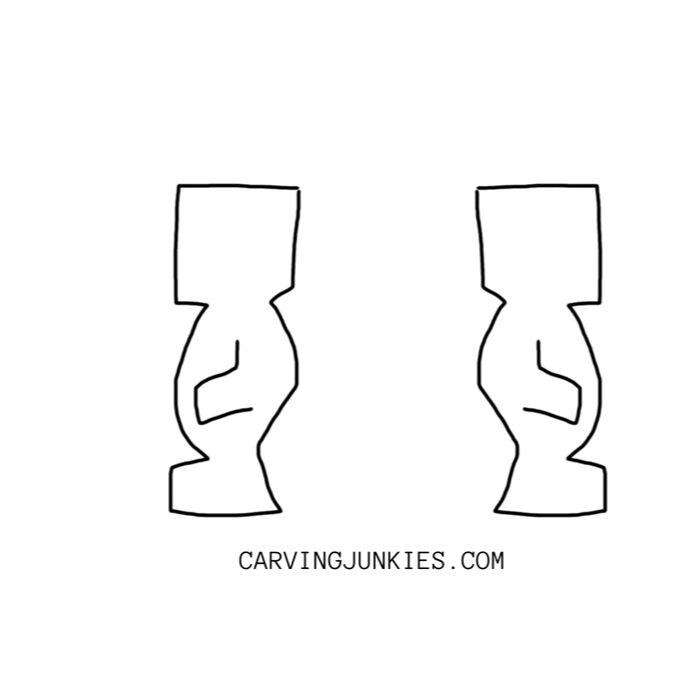
Summary of our caricature carving tutorial
- Carving caricatures is immensely fun and rewarding.
- This caricature carving tutorial is designed to make it easy for you to carve a caricature.
- Use our general template (and your imagination) to carve future caricatures.
Get 50 Wood Carving & Painting Tips
FREE when you join our free Covered in Chips Club
Your information is 100% private and is never shared. Unsubscribe anytime. See our Privacy Policy .
Share page on:
Home | Privacy Policy | Terms of Use | Contact | Sitemap
