- Home
- Things to carve
- How to carve an acorn
How to carve an acorn caricature
Make these cranky nuts!
LEVEL: SOME CHALLENGES
Curious about how to carve an acorn with a quirky, funny face? This step-by-step tutorial will guide you through the process of creating two acorn caricatures at once, which makes it easier to handle the small pieces.
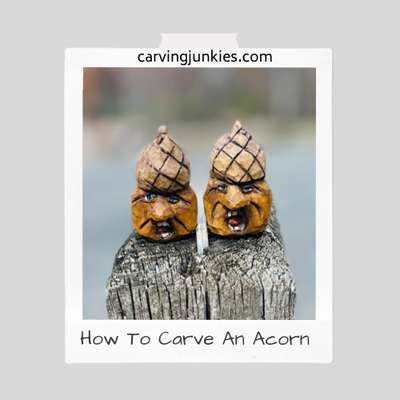
As you carve, you’ll get plenty of practice perfecting facial features like expressive eyes and big, open mouths. The best part? Once you've mastered these charming little acorns, you can carve a whole bunch and display them in a fun, decorative bowl.
Ready to dive into this delightful project? Grab your tools and let’s carve some personality into these tiny acorns!
How to carve an acorn: Supplies needed
- I used a basswood block that is 1 x 1 x 4 inches (2.5 x 2.5 x 10 cm). You will carve 2 acorns from one block. If you only want to carve one small acorn, you may want to use a vise to hold the wood. You can see my favorite, inexpensive vise here (scroll down to middle of the page).
- A ruler and pen or pencil can be helpful to draw your initial guidelines.
- You will need a wood carving knife that is both sharp and comfortable to use. I used a smaller detail knife to carve the faces.
- A 5mm micro U-gouge can help you carve perfect nostrils. But I'll give you instructions if you only have a knife.
- Protect your lap with something flat and hard if you are a lap carver.
- Always, always use a good carving glove for your safety during this how to carve an acorn tutorial.
Quick how to carve an acorn tutorial overview
Before you begin carving, it may help to watch this quick video that provides all the key steps in one place. Note: The photos below walk you through the process of carving one acorn, which you will repeat for carving your second acorn. You can completely carve one before you start the second, or carve them both at the same time.
Start your acorn wood carving
We’re going to carve the acorn caricatures off the corner of your wood block, which provides instant depth for carving your noses.
- Draw a guideline that is 1 inch (2.5 cm) from the bottom of the wood block (photo 1).
- Add another guideline that is 1 inch (2.5 cm) higher from the first guideline (photo 1).
- Finally, add a third guideline that is 1 inch (2.5 cm) above your second guideline (photo 1).
Use stop cuts to separate the top guideline in each corner, removing wood from underneath (photo 2). Use the same method to separate the bottom guideline (photo 3).
Sketch the bottom of each nose (photo 4) on each side of the corner. Make them as wide as you want!
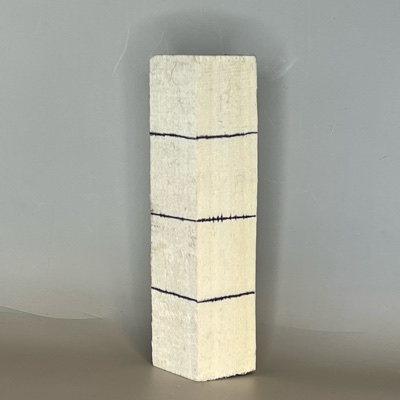 1. Guidelines are sketched
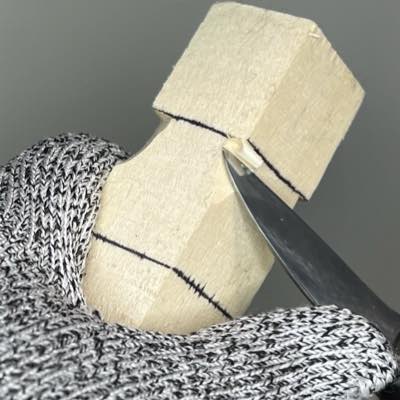 2. Separating top corners
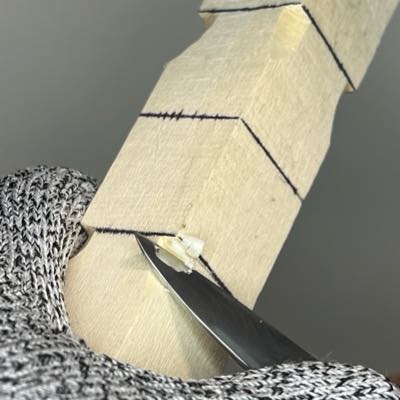 3. Separating bottom corners
 4. Nose guidelines are sketched
Continue your acorn carving
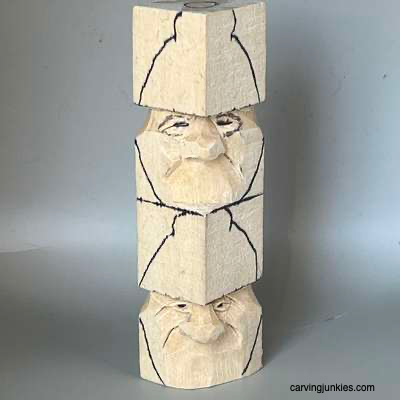
Separate the remaining guidelines all around (photo 5).
Roughly sketch the tops and bottoms of the acorns (photo 6).
Sketch a small circle on the top (photo 7), which will help you carve toward the center when you shape the top of your acorn.
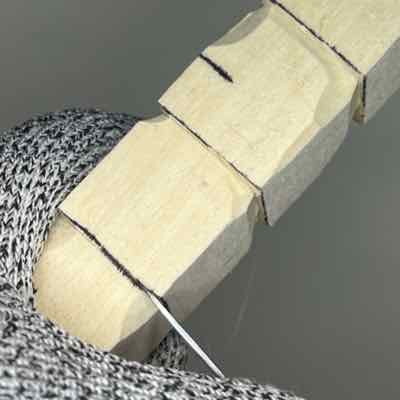 5. Separating the guideline
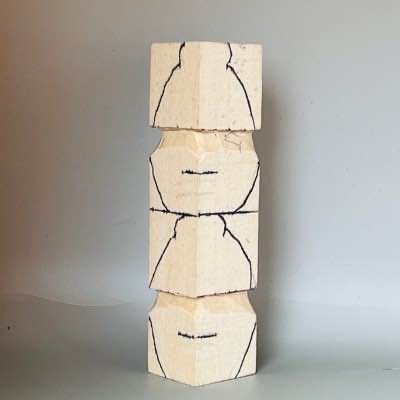 6. Heads are sketched
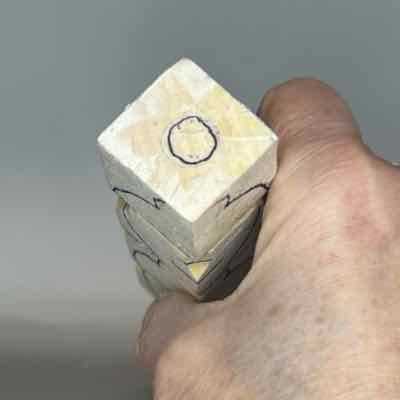 7. Circle is sketched
Carve the nose
Make a stop cut under the nose guideline (photo 8) and remove wood from underneath.
Use a micro U-gouge (5mm) to rough out the eye sockets (photo 9). If you don't have one, turn your wrist as you carve with a knife to get the same effect.
Sketch the nose, smile lines, and eyes (photo 10).
Use the micro U-gouge to carve the outer side of the nostrils (photo 11). I twisted the gouge to make my first cut. Then, I used the gouge to remove wood, pushing it toward my first cut. If you don't have a gouge, follow the guideline with your knife and make a second slicing cut.
Make a cut along the smile line guideline (13). I made a second slicing cut to remove wood. Tip: you may want to switch to a detail knife here.
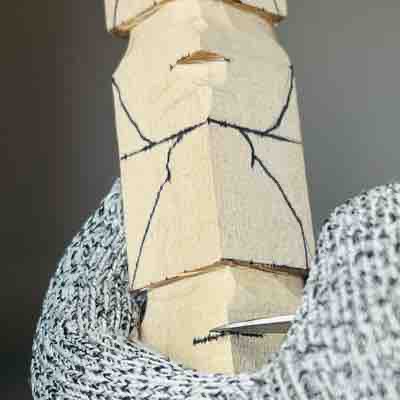 8. Making a stop cut
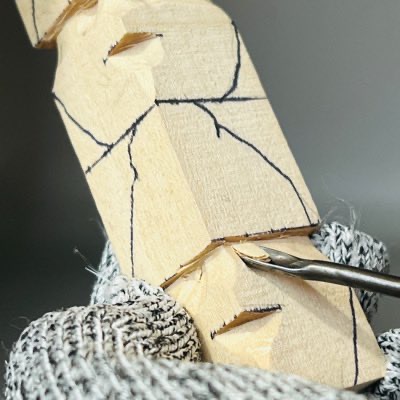 9. Creating eye sockets
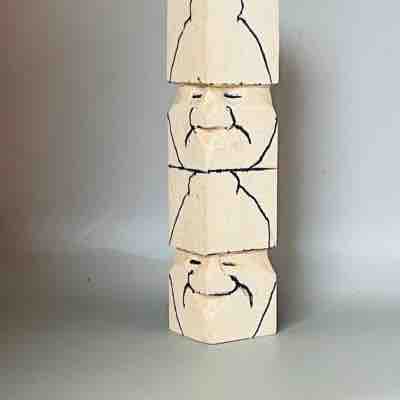 10. Faces are sketched
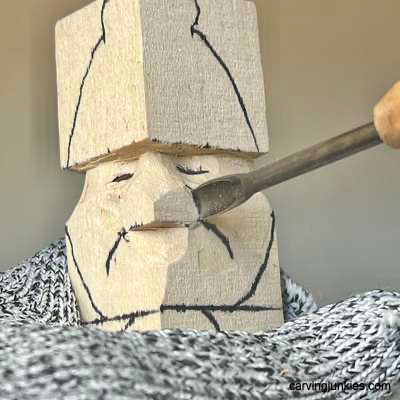 11. Shaping outer nose
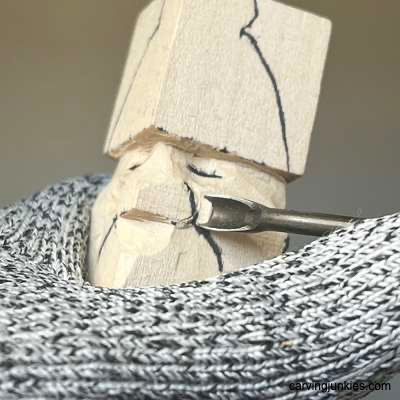 12. Removing wood
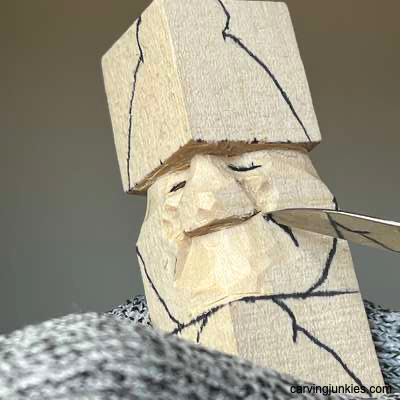 13. Carving smile line
Shape the nose
Shape the bridge of the nose (photo 14).
Use the micro U-gouge to carve each nostril. I hold mine in the middle and twist from side to side (photo 15). Undercut with a knife to remove the wood. If you don't have a gouge, hold your piece upside down and carefully create each curve with your knife. Tip: Mark the wood to remove before using your knife.
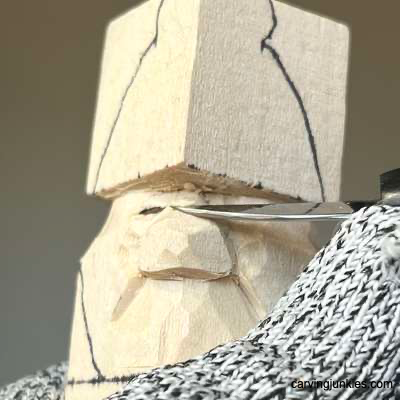 14. Shaping the bridge
 15. Shaping the nostril
Carve the eyes
Sketch where you will carve the lids around the eyes (photo 16).
Run your knife along the guideline for the eyelids (photo 17). Carefully carve up to your cuts (photo 18). Tip: Take your time here and do not carve too deeply to avoid cracking the wood.
After shaping the eyelids, use your knife to carve the eyes. Be very careful here and do not cut too deeply. I made a slicing cut (photo 19) and carefully removed wood from above it. This is a small wood carving so your eyes will not be very wide (you will add the eyeballs with paint).
 16. Eyelids are sketched
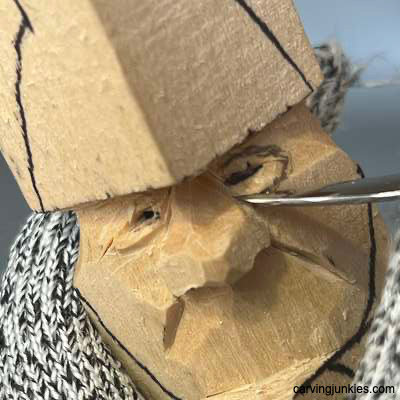 17. Carving along guideline
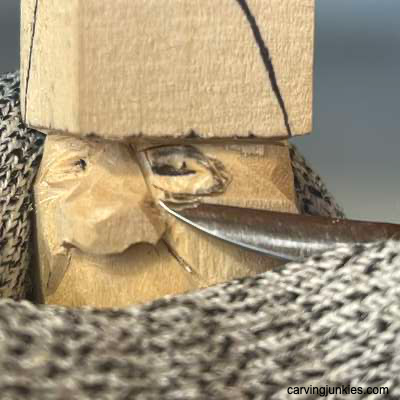 18. Carving up to cut
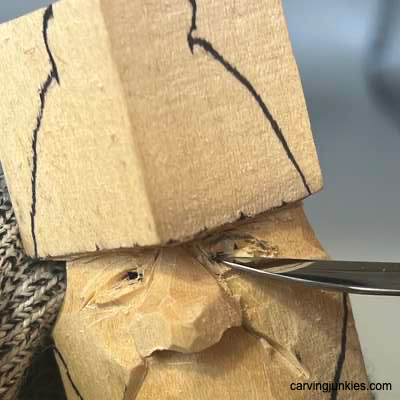 19. Carving the eyes
Set up up the mouth
Carve down the wood below the nose to set up the mouth on your acorn (photo 20). Tip: For the top acorn, I made a stop cut below the acorn to make it easier to remove wood.
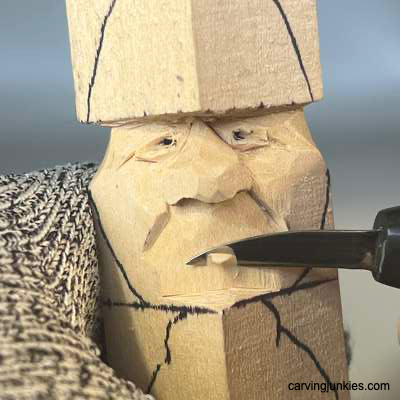 20. Carving down wood
Carve the mouth
Sketch the open mouth of your acorn wood carving (photo 21). I’ve used the open-mouth style that was created by CCA member Bruce Ankeny, which is detailed in the great book “Read My Lips.”
Separate the mouth all around (photo 22). I held my knife like a pencil and pushed it along the guideline. I then made slicing cuts to remove wood.
Sketch the top teeth and bottom teeth (photo 23).
Separate the top and bottom teeth (photo 24). I used stop cuts and carefully removed wood (photo 25) to begin shaping the tongue (completed in photo 26). You may have to dig a little with your knife here to get the wood out.
Tip: I used a sweeping cut (by turning my wrist) to shave wood off behind the teeth. I also avoided cutting my teeth straight across. Instead, try to curve them to the back. Don’t pick your teeth to death as the wood can easily crumble!
If you are using a small wood block like mine, simply push your knife into the wood once to separate the teeth (completed in photo 26). I added tiny pyramid cuts in the corners to give the teeth some depth.
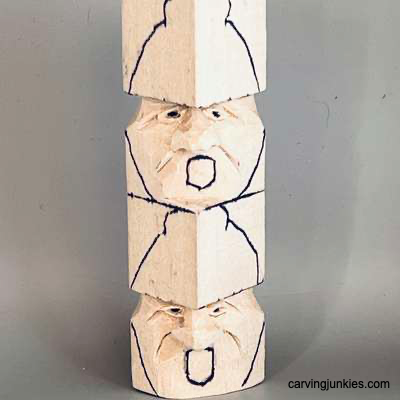 21. Mouths are sketched
 22. Carving the mouth
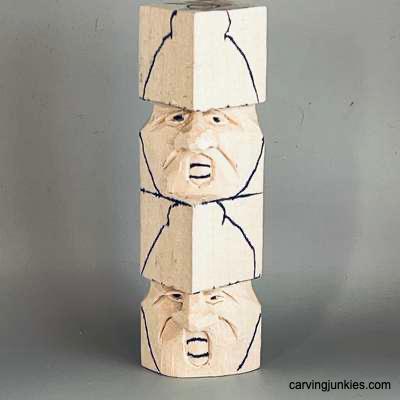 23. More details are added
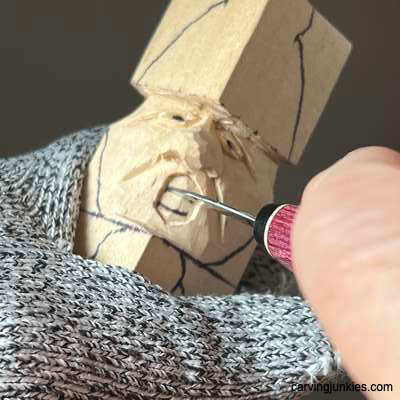 24. Separating teeth
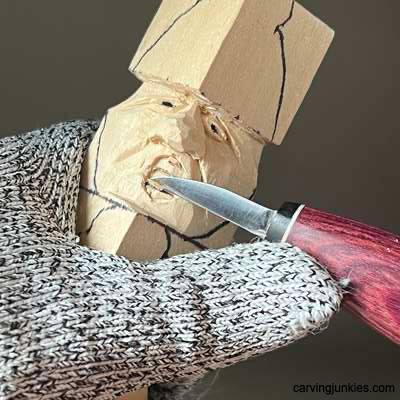 25. Shaping the mouth
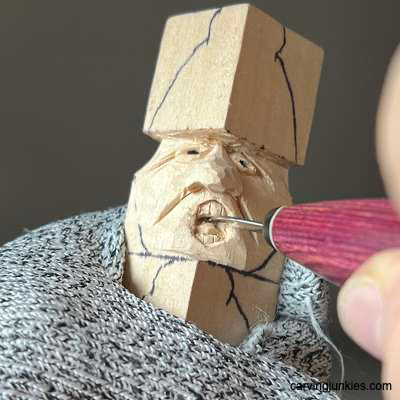 26. Shaping the tongue
How to carve an acorn: Shaping
Remove wood to shape the bottom of the acorn. I used stop cuts all around the guideline and removed wood from above my cuts (photo 27). While acorns typically have a tip I have not included one so your caricatures can stand on their own.
Shape the top of the top acorn (photo 28), starting about halfway from the top. I made sweeping cuts, turning my wrist as I carved upward. Turn your piece as you carve to maintain symmetry. It’s a bit like sharpening a pencil! Tip: Start in each corner and work your way toward the middle of the circle guideline that you drew previously.
Shape the bottom of the acorn all around (photo 29).
When your piece is skinny enough after carving both acorns (photo 30), you can carefully cut in from each side to split the two acorns.
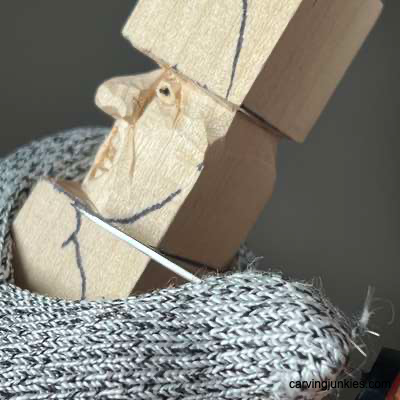 27. Shaping the acorn
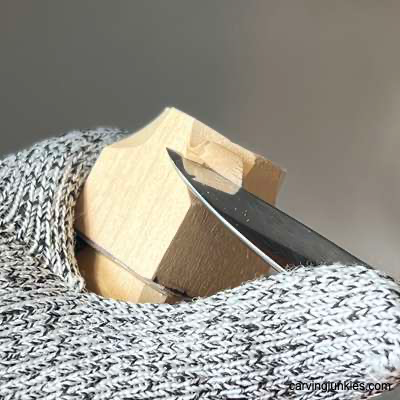 28. Shaping the top
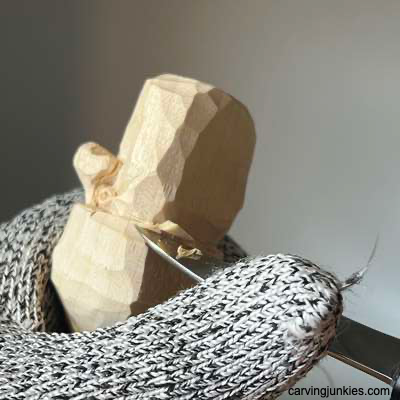 29. Carving the rim
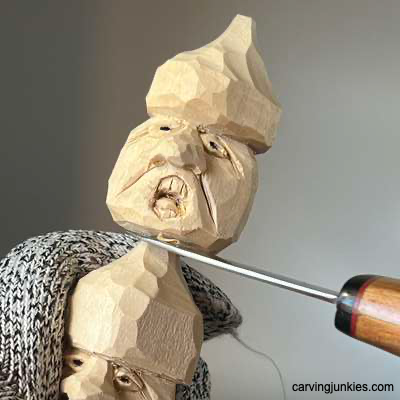 30. Separating the acorns
Add final detail
After refining the shapes of your acorns, sketch the scales on the front of the cap (photo 31) and all around (photo 32). I used a simple cross-hatched design.
Use narrow V-cuts or stop cuts to separate the scales (photo 33). You could also use a V-tool here.
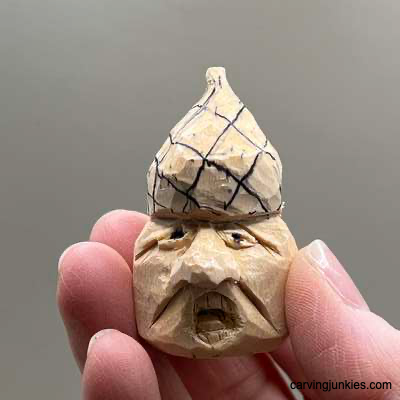 31. Front scales are sketched
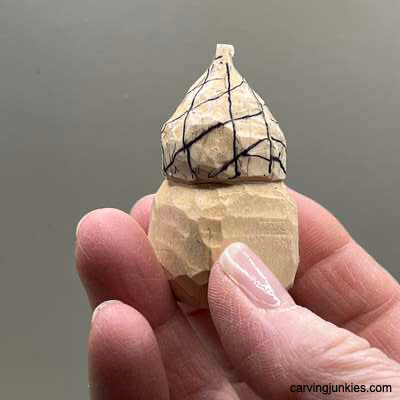 32. Scales all around
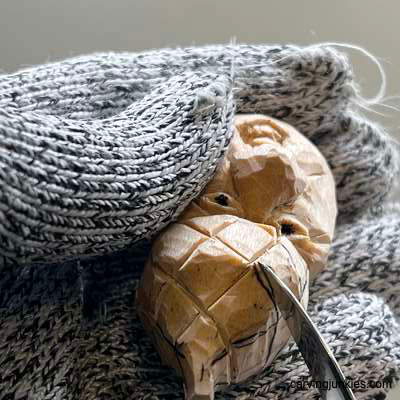 33. Separating the scales
Finish your acorn wood carvings
Prior to painting, clean up your cuts and finalize the shapes of your acorn wood carvings (photos 34-37). I added some frown lines around the eyes. I also used some sandpaper to smooth out some rough edges around the eyes where the wood crumbled.
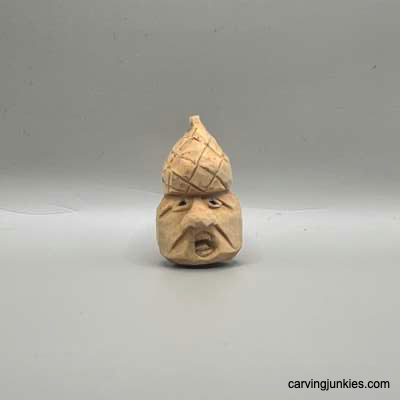 34. Front view of unpainted acorn
 35. Right view of unpainted acorn
 36. Back view of unpainted acorn
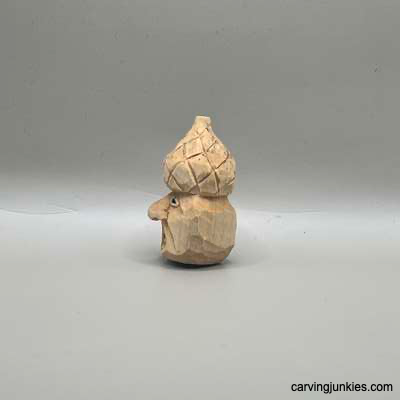 37. Left view of unpainted acorn
How to carve an acorn: Complete the look

If you are new to wood carving, read this article about painting a wood carving. You can use whatever acrylic paints and paint brushes you want. You can see my recommendations here (bottom of the page). Here are the paints I used:
- Eye whites: CraftSmart vanilla (100% paint).
- Pupils: Ceramcoat black (100% paint) applied with round end of a toothpick.
- Eye iris: CraftSmart bright blue (100% paint).
- Tongue: Americana calico red wash.
- Acorn bottom: 2 layers of CraftSmart milk chocolate wash.
- Acorn top: Create a wash with both Ceramcoat burnt umber and FolkArt medium gray.
- Top eyeline: Ceramcoat burnt umber (100% paint) applied with toothpick.
- Finish (optional): Seal with polyurethane spray twice and use your antique medium of choice. I make my own using 3 parts Minwax Aged Oak Gel Stain and 1 part mineral spirits. Apply with an old brush and quickly remove most of the polish with paper towels. Throw the used paper towels outside in the trash (they are combustible).
How to carve an acorn summary
- Follow this easy, step-by-step tutorial to carve fun acorn wood carving caricatures.
- Vary up the faces of your acorns for added interest and whimsy.
- Or, you can forgo the faces altogether and simply carve realistic acorns.
Get 50 Wood Carving & Painting Tips
FREE when you join our free Covered in Chips Club
Your information is 100% private and is never shared. Unsubscribe anytime. See our Privacy Policy .
Share page on:
Home | Privacy Policy | Terms of Use | Contact | Sitemap

