- Home
- Things to carve
- Wood carved pumpkins
Wonderful wood carved pumpkins tutorial
Carve yourself these adorable stacked Halloween pumpkins!
LEVEL: EASY
Want to create a trio of festive wood carved pumpkins that are sure to make your Halloween décor stand out?
In this step-by-step tutorial, you'll learn how to craft three stacked pumpkins that spell out "BOO!" It is a perfect wood carving project for adding a charming touch to your seasonal decorations.

I saw a similar design in a ceramic sculpture (shout out to NooliesKnickKnacks) and knew I had to carve it!
This simple project is easy to follow and brings a fun, handmade element to your Halloween setup.
Dive in, follow along, and let’s bring these playful pumpkins to life!
Wood carving pumpkins supplies
I used a basswood block that is 1 x1 x 4 inches (2.5 x 2.5 x 10 cm). Feel free to double or triple the size of your wood block. Simply adjust the measurements listed below. To go even bigger—and use a band saw to create your roughout—photocopy the pattern at the end of the page to size to fit any wood block.
You will also need:
- A pencil or pen to draw your guidelines.
- A sharp wood carving knife (tip: you may want to use a smaller detail knife to separate the eyes and faces).
- A good wood carving glove, and something flat and hard to protect your lap (if you carve over your lap). A piece of wood or a cutting board will do.
- To get a similar look, check out the free painting guide at the end of the tutorial.
Wood carved pumpkins tutorial video
Watch this quick video before you start carving that covers the key steps for carving your wood carved pumpkins.
Setting up your wood block
You will carve off the corner for this wood carved pumpkins tutorial. Draw three guidelines all around (photo 1):
- The first guideline is .25 inches (0.6 cm) from the bottom.
- The second guideline is about 1.5 inches (3.8 cm) from the bottom.
- Your third guideline is about 2 inches (5 cm) from the bottom.
Free sketch the pumpkins. The bottom pumpkin is leaning to the left and the middle and top pumpkins are leaning to the right (photo 1). Make sure the bottom of the top pumpkin extends just below the top guideline.
 1. Guidelines are sketched
Make your first cuts
Use a stop cut to separate the bottom guideline on the front (photo 2) of your wood carved pumpkins. On the back side, make a stop cut in each corner and remove wood from underneath (photo 3).
Separate the bottom and middle guidelines on the back, which will give you access to round and shape the first pumpkin (photo 4).
Reserve the stem on the first pumpkin (photo 5). You can use whatever cuts are most comfortable for you here. I used a mix of stop cuts and second slicing cuts.
 2. Making a stop cut
 3. Separating each corner
 4. Rounding the pumpkin
 5. Reserving the stem
Continue roughing out your wood carved pumpkins
Start to separate the second pumpkin (photo 6). I used V-cuts to remove the wood on each side of the second pumpkin (photo 7). You can also round off the corners in the front and back of the pumpkin.
Shape the stem of the first pumpkin (photo 8) and start to round the backs of the first two pumpkins (photo 9).
 6. Separating the second pumpkin
 7. Using V-cuts
 8. Shaping the stem
 9. Shaping the back
Carve your third pumpkin
Shape the bottom of the third pumpkin all around (photo 10). Note: The third pumpkin is more oblong in shape.
As you roughout this pumpkin, you will also need to round down the front (photo 11) and back corners (photo 12).
Separate the top stem (photo 12).
 10. Carving the third pumpkin
 11. Rounding down the front corner
 12. Rounding down back corner
 13. Separating the final stem
Add some details to your wood carved pumpkins
Sketch the letter “B”, round faces, and eyes (photo 14). Also, mark where you will slice wood off (photo 14) and use a V-cut to make the “B” stand out (completed in photo 16).
Separate the ”B”. I held my knife like a pencil (photo 15) to cut along the guideline and made a second slicing cut. I also removed some wood, cutting up to my previous cut.
Carve the eyes (completed in photo 16) in the same manner that you carved the letter B. You could also use a micro U-gouge to remove wood from the eyes. Once the eyes are carved, separate the circular guidelines of the two faces (completed in photo 16).
Sketch the lines on the front (photo 16) and back (photo 17) of your wood carved pumpkins.
 14. Letters are sketched
 15. Separating the letter
 16. Front of pumpkins
 17. Back of pumpkins
Finish your wood carved pumpkins
Separate the lines you just sketched all around (completed in photos 18-21). You can use narrow V-cuts, or stop cuts with second slicing cuts.
Clean up all your cuts and refine your shapes (if needed) prior to painting your wood carved pumpkins.
 18. Front view of pumpkins
 19. Right view of pumpkins
 20. Left view of pumpkins
 21. Back view of pumpkins
Paint your wood carved pumpkins
Read this page about painting a wood carving for some general tips. Dilute your paint with several drops of water to create a translucent "wash." I use anywhere from 8-10 drops of water and build my paint in layers by applying several coats.
To get a similar look, use:
- Eyes: Ceramcoat white (100% paint). I used a toothpick to apply.
- Pupils: Ceramcoat black (100% paint). Also used a toothpick.
- Base pumpkin layer: Ceramcoat pumpkin wash.
- Pumpkin highlights: Apple Barrel Jack O’ lantern wash.
- Pumpkin centers: Ceramcoat black (100% paint).
- Stems: FolkArt apple orchard wash.
- “B” indentation: Ceramcoat black (very diluted wash). Reserve some paint to highlight the pumpkin lines all around.
- Seal with finish of choice (if desired).
 22. Painted pumpkins (front)
 23. Painted pumpkins (left)
 24. Painted pumpkins (right)
 25. Painted pumpkins (back)
Wood carved pumpkins pattern
Photocopy this pattern to size to fit any wood block.

Wood carved pumpkins summary
- Carving this adorable trio of wood carved pumpkins is easy with this step-by-step tutorial.
- This little stack of pumpkins would look great on a window sill or on a table top.
- Use your imagination and carve some additional wood carved pumpkins to complete your Halloween decorations.
You might like these
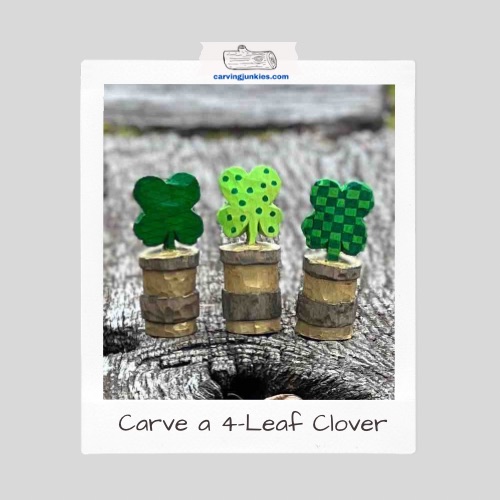
Four-Leaf Clover Wood Carving Tutorial
Easy four-leaf clover wood carving tutorial to make a fun decoration with a knife and a block of wood.

Get 50 Wood Carving & Painting Tips
FREE when you join our free Covered in Chips Club
Your information is 100% private and is never shared. Unsubscribe anytime. See our Privacy Policy .
Share page on:
Home | Privacy Policy | Terms of Use | Contact | Sitemap