- Home
- Things to carve
- Scarecrow wood carving tutorial
Charming scarecrow wood carving
Carve yourself a cute female scarecrow.
LEVEL: SOME CHALLENGES
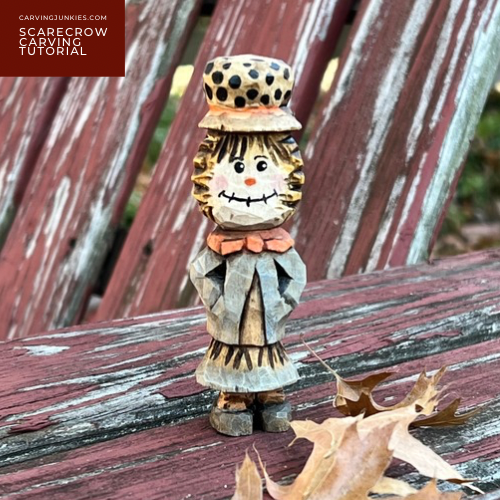
Get ready to carve up some charm with our unique scarecrow wood carving! In this easy-to-follow tutorial, you’ll create a lovely female scarecrow who is wearing a playful polka dot hat. And this scarecrow is more about garnering smiles than spooking crows.
Perfect for all skill levels, our picture-by-picture instructions will walk you through the process of bringing this delightful wood carving to life.
Whether you’re adding a fall touch to your decor, or creating a special gift, this little scarecrow is sure to brighten any space! It is perfectly sized for carving outdoors while enjoying the fall weather (like I did at the beach).
Let’s get started!
Supplies needed
- I used a basswood block that is 1 x 1 x 4 inches (2.5 x 2.5 x 10 cm). As always, feel free to go bigger by simply doubling or tripling your wood block and the measurements provided.
- Like to create a roughout using a band saw? Photocopy the pattern at the end of this page to size to fit any wood block.
- ALWAYS use a good safety glove whenever you carve. If carving over your lap, use a flat piece of wood (or something just as hard) to protect your leg arteries.
- Use a pencil, pen, or magic marker to sketch your guidelines. You will need a ruler too.
- I used one knife and a V-tool to carve the straw, but provide instructions for using just a knife if you don’t have a V-tool.
- A painting guide is included at the end of this page if you would like to paint your scarecrow wood carving like mine.
Scarecrow wood carving tutorial preview
It may help to watch this short video of all the steps before you start your scarecrow wood carving.
Set up your wood block for your scarecrow
You will carve off the corner for this project. Sketch your guidelines (photo 1):
- 3/4 inch (1.9 cm) from the top to mark the bottom of the hat.
- 1 inch (2.5 cm) below the first guideline to mark the bottom of the head.
- 1 1/4 inch (3.2 cm) below the head guideline to mark the bottom of the body.
- 1/4 inch (0.6 cm) from the bottom to mark the top of the scarecrow’s legs.
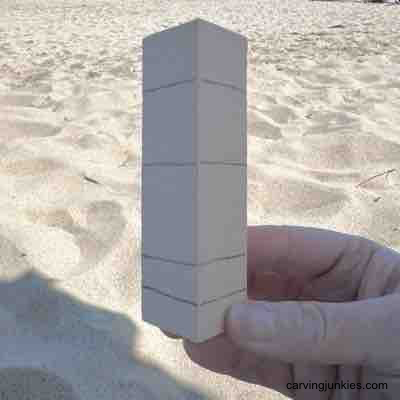 1. Guidelines are drawn
Make your first cuts
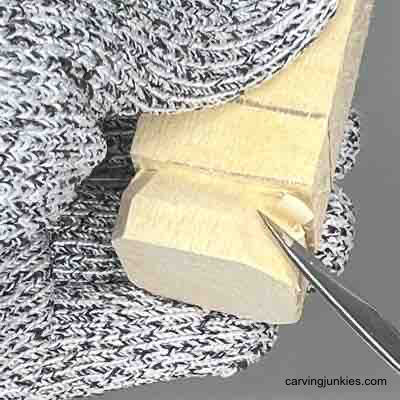
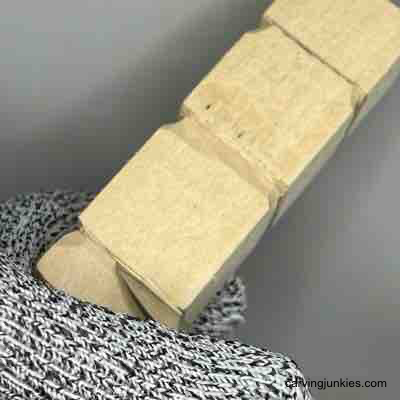
Use a stop cut to separate the top of the legs guideline all around (photo 2) and remove wood from above your cuts (photo 3).
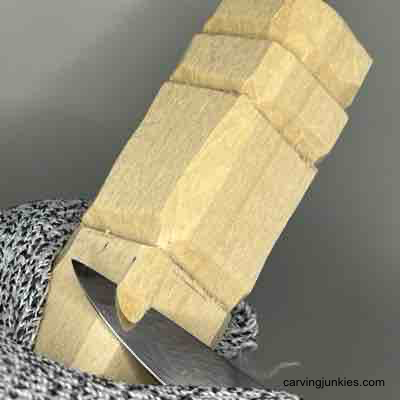
Round the corners on the bottom (photo 4).
Separate the other guidelines all around (photo 5). Tip: Start by making stop cuts at the corners, removing wood from underneath. Use stop cuts to work your way across.
Round all the other corners on your wood block (photo 6).
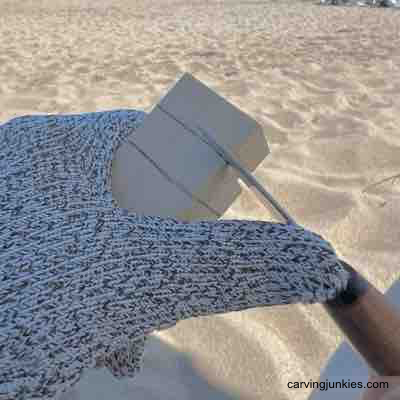 2. Make a stop cut
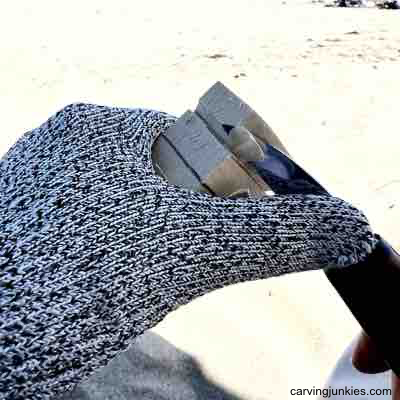 3. Removing wood from above
 4. Rounding the corners
 5. Separating guidelines
 6. Rounding off corners
Roughout your scarecrow wood carving
Sketch the wood that you will remove on each side. Note: I carved the left side (photo 7) so you can see the roughout shape that you want to achieve.
To avoid grain issues, use a sweeping cut—from the bottom up to the middle—to carve wood on each side of the hat (photo 8). Repeat from the top down to the middle to meet your bottom cut and remove the wood cleanly. Tip: Rotate your wrist as you cut.
If your knife doesn’t flex enough to make a sweeping cut, you can use a V-cut. Be careful not to break your knife tip here.
Use stop cuts (or V-cuts) to remove wood to roughout the head and body (photo 9).
Use a pyramid cut to shape the crook of the arms (photo 10).
Use a stop cut to roughout the shoes, removing wood from above your cut (photo 11). Continue all around the wood block (photo 12). You will refine the shape of the shoes later.
Note: you will paint the scarecrow’s face rather than carve it.
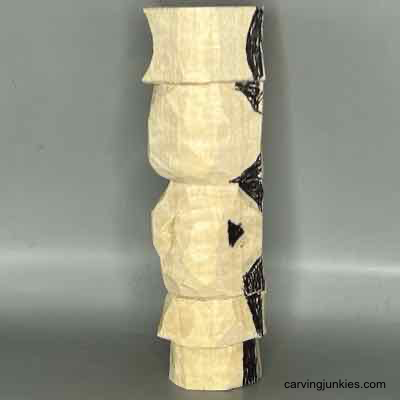 7. Wood to remove is marked
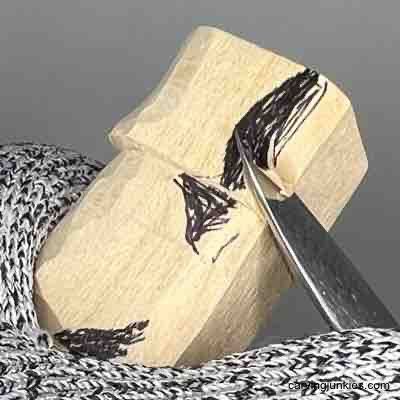 8. Making a swoop cut
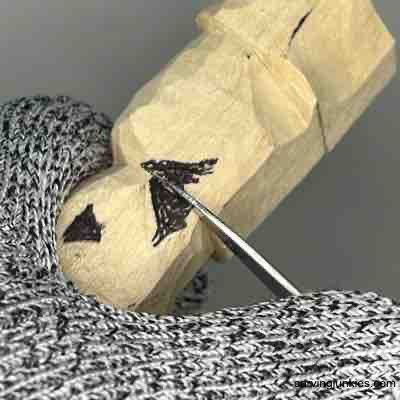 9. Making a stop cut
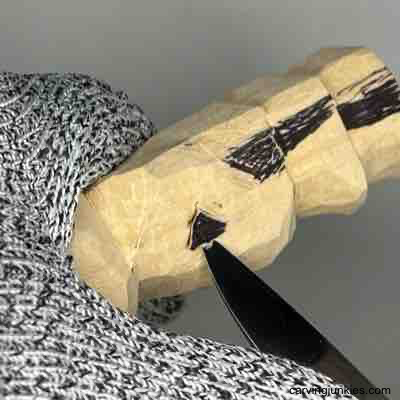 10. Starting pyramid cut
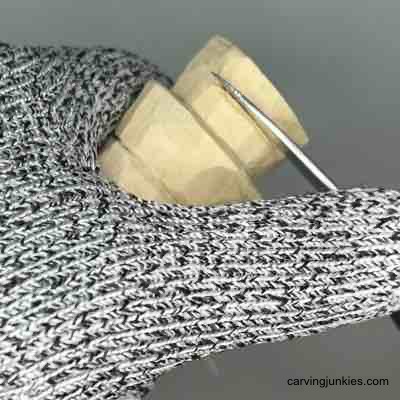 11. Starting the legs and shoes
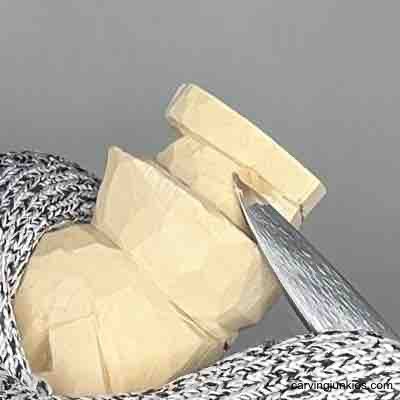 12. Removing wood all around
Roughout the back of your scarecrow wood carving
Using stop cuts, work from the front around to the back to roughout the head of your scarecrow wood carving (photo 13). Do the same for the bottom of the jacket all around (photo 14).
Use sweeping cuts to shape the skirt (photo 15) and reduce wood off the belly and the back.
You may need to further reduce wood on the front (photo 16).
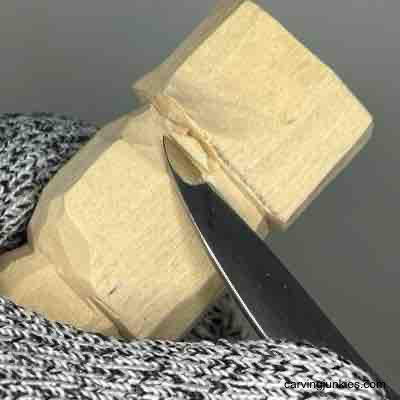 13. Shaping head around
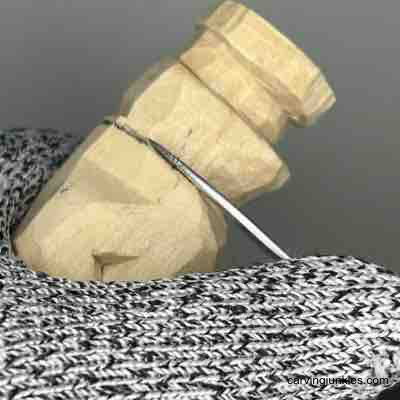 14. Separating the jacket
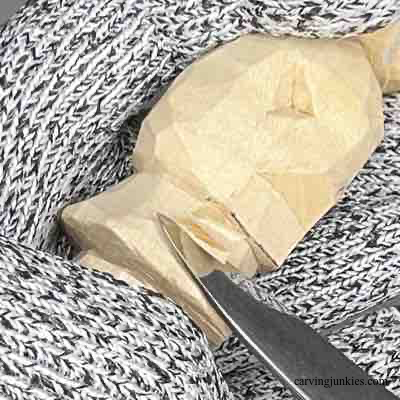 15. Shaping skirt
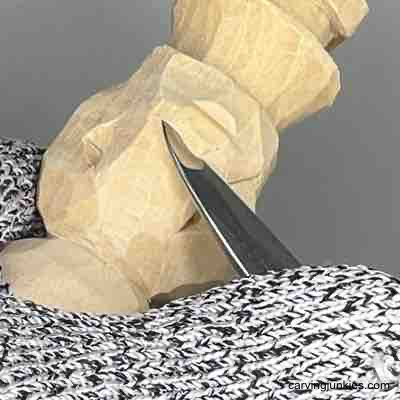 16. Reducing wood on the front
Sketch some details
Sketch the hat brim line, bow tie, jacket opening, and lines where you will separate the arms from the jacket (photo 17). You can use a stop cut and make a second slicing cut—or hold your knife like a pencil—to separate all of these details (photo 18).
I decided to add a wide scarf around the neck by sketching a guideline all around (photo 19) and separating it with stop cuts.
Use stop cuts to separate the hat brim all around, removing wood from above your cuts (photo 20). Shape the hat (photo 21).
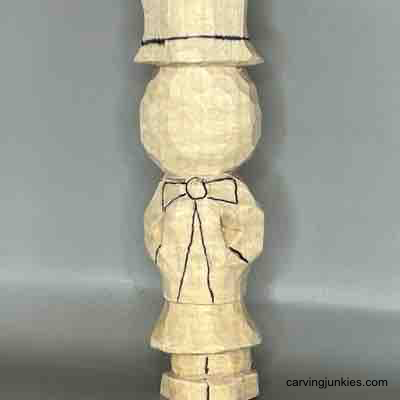 17. Details are sketched
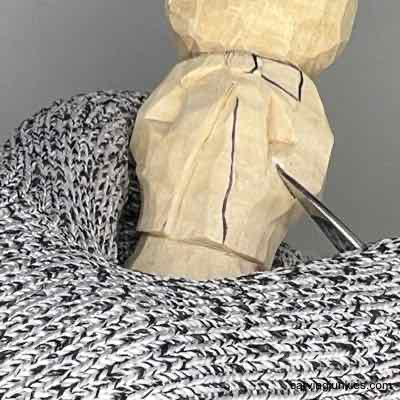 18. Separating the details
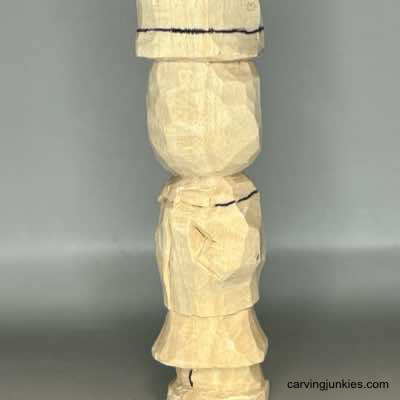 19. Scarf is sketched
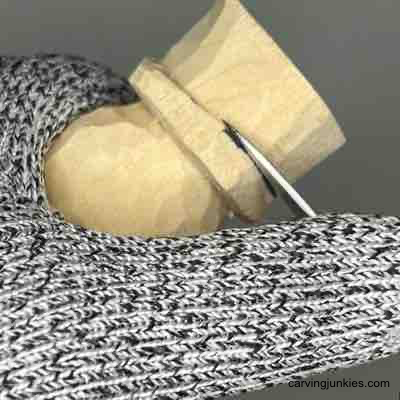 20. Separating hat brim
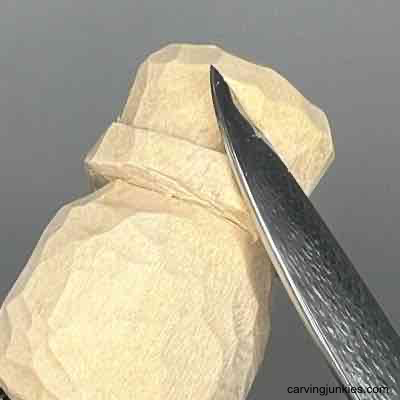 21. Shaping the hat
Carve textured details
Make some deep V-cuts along each side of the head for the straw hair (photo 22). Use a V-tool to carve the straw hair bangs—and in between your V-cuts—to add texture (photo 23). If you don’t have a V-tool make narrow V-cuts with a detail knife.
Continue to carve the hair with a V-tool on the back side.
In the same fashion, carve the straw coming out of the bottom of the scarecrow’s jacket (photo 24) all around.
Carefully make a wide V-cut to split the shoes on the front (photo 25) and use your knife to shape them (completed in photos 26-29).
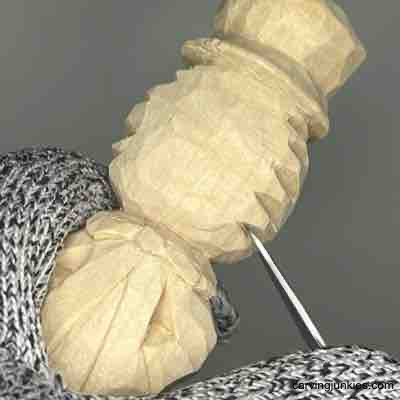 22. Carving the straw hair
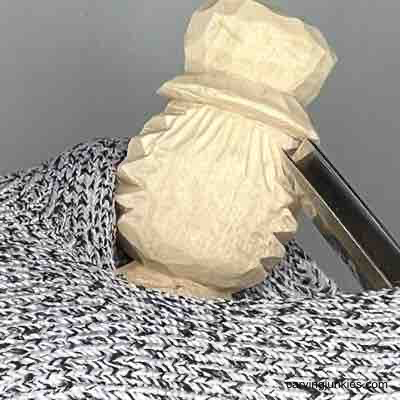 23. Adding more texture
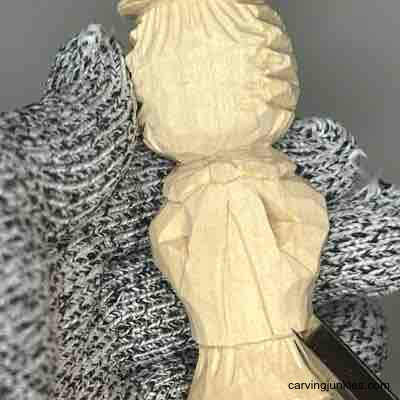 24. Adding more straw
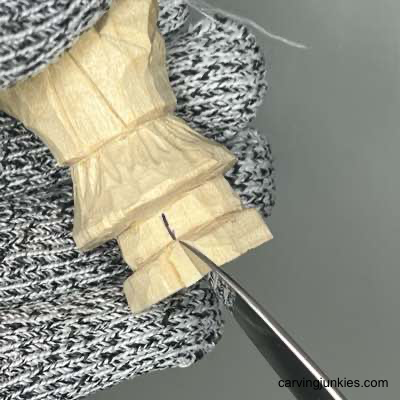 25. Splitting the shoes
Finish your scarecrow wood carving
Clean up your cuts and refine the overall shape of your scarecrow wood carving (photos 26-29).
I added some wrinkles with V-cuts on the arms and back (completed in photos 28,29).
Carefully thin the brim of the hat to avoid breaking the wood (completed in photos 26-29).
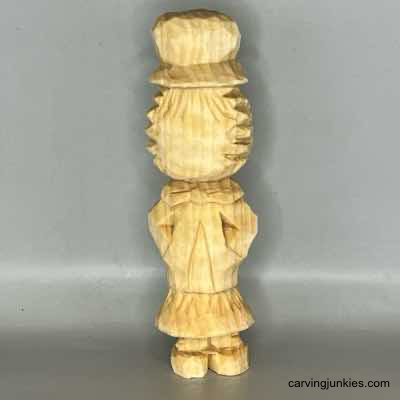 26. Front view of unpainted scarecrow
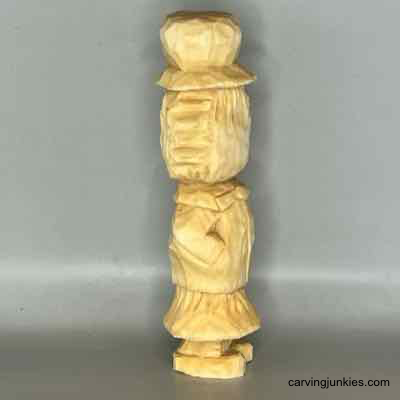 27. Right view of scarecrow
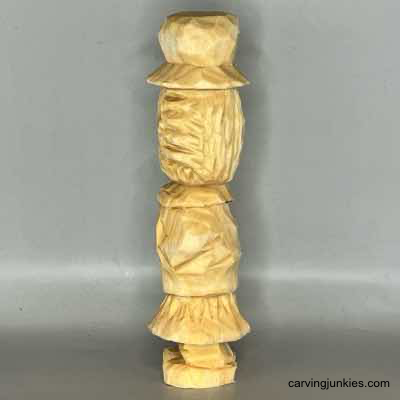 28. Left view of unpainted scarecrow
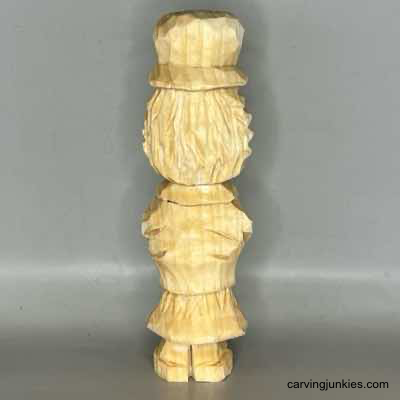 29. Left view of scarecrow
Paint your scarecrow wood carving
Check out this page about painting wood carvings for some awesome tips. I dilute my acrylic paints with drops of water to create a "wash." This allows you to build your paint in layers by using multiple coats—and still see some wood grain.
To get this same look, use:
- Face: Apple Barrel antique parchment 100% paint.
- Scarf, socks, nose, and hat brim: FolkArt tangerine wash.
- Jacket: Ceramcoat denim blue wash.
- Straw hair and straw under jacket: FolkArt yellow ochre wash.
- Hat: Apple Barrel lite mocha wash.
- Eyes, mouth, and polka dots: Ceramcoat black 100% paint applied with a toothpick.
- Shoes: Ceramcoat black wash.
- Cheeks: Apple Barrel cameo pink wash.
- Finish: Seal with polyurethane spray twice and apply turd polish or other antiquing stain. To make turd polish, use 3 parts Minwax Aged Oak Gel Stain and 1 part mineral spirits. Remove immediately with paper towels and throw the towels away outside (could be combustible).
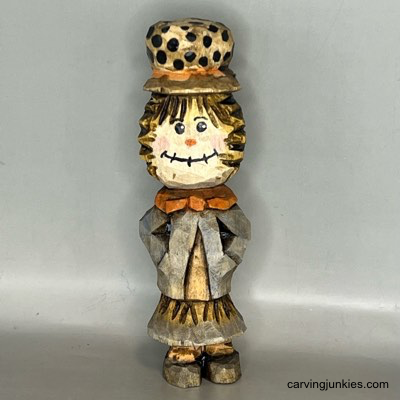 28. Front of painted scarecrow
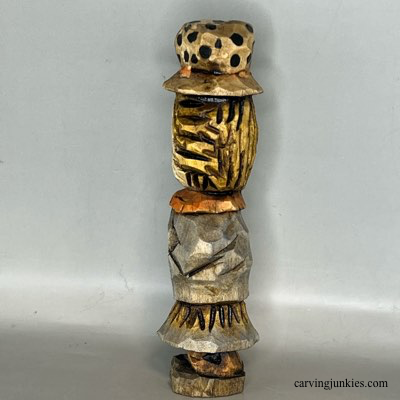 30. Left side of scarecrow
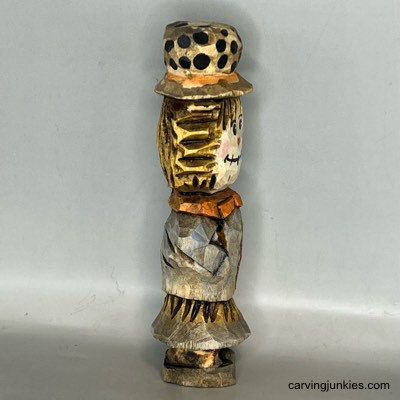 29. Right side of scarecrow
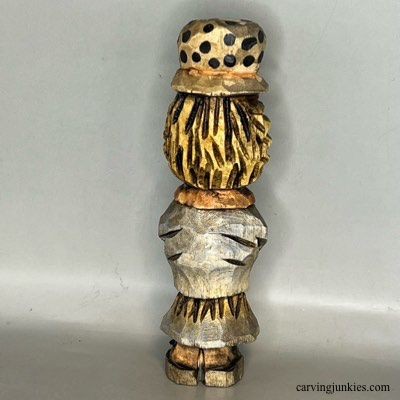 31. Back of scarecrow
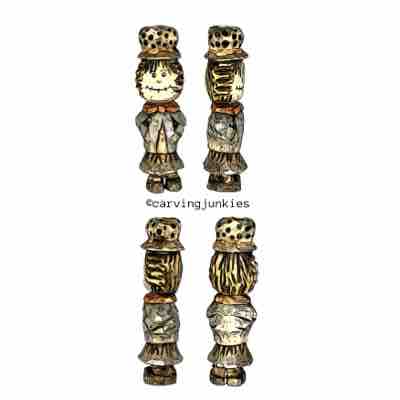
Scarecrow wood carving pattern
Photocopy this pattern to size to fit any wood block.
Scarecrow wood carving tutorial summary
- This adorable female scarecrow is fun to carve and pairs perfectly with my easy ghost wood carving and wooden Halloween gnome carving.
- I used a V-tool to carve the straw but you could also use V-cuts with a sharp detail knife.
- A handy painting guide is included to get a similar look.
Get 50 Wood Carving & Painting Tips when you join our FREE Covered in Chips club.
Share this page
carvingjunkies.com never sells your personal information.
This site uses cookies for its operation and to enhance your experience. As an Amazon Associate and Focuser Carving affiliate we earn from qualifying purchases.
Home | About Us | Privacy Policy | Terms of Use | Contact | Sitemap
