- Home
- Carving wood animals
- Pig wood carving
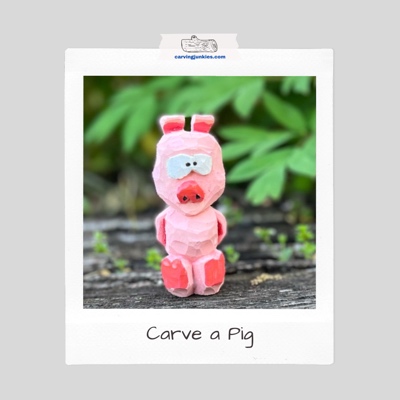
Adorable pig wood carving tutorial
This cutie patootie is quick to carve and effortless to paint.
LEVEL: EASY
This little pig wood carving is ready for market (to shop, but not eat!). He is easy to carve and makes a great gift to brighten anyone’s day.
The simple cartoon eyes (and minimal painting) make him the perfect choice to carve while you’re watching your favorite television show or movie. You can complete him with just a knife (or two if you use a roughout knife and a detail knife).
Let’s get started!
Pig wood carving tutorial at-a-glance
What you will need for your pig wood carving
We use a basswood block that is 1 x 1 x 3 inches (2.5 cm x 2.5 x 7.6 cm). You can easily double or triple the size if you want a larger pig wood carving.
We use a roughout knife for removing wood and a detail knife for carving the facial details.
A ruler and pen (or pencil) will be useful to measure and sketch your pig wood carving guidelines.
For the tail (optional), we use a small piece of 12-gauge wire that will be painted. It can be glued into the pig wood carving after making a small hole with a pin vise (an inexpensive hand tool that comes in handy).
Always, always, always wear a carving glove for safety and protect your lap as well.
We will also provide a painting guide at the end of the tutorial.
Starting your pig wood carving
Round all four corners of the wood block (photo 1). This is a great way to determine the direction of the wood grain. Tip: Draw a little arrow in pencil (it’s easy to forget the right direction).
Draw a guideline about a half an inch (1.3 cm) from the top (all around the wood block) to mark where you will carve the top of the pig’s head (photo 1).
Also, draw two boxes on the top of the wood block to reserve wood for the ears, which will flop over on your pig wood carving (photo 2).
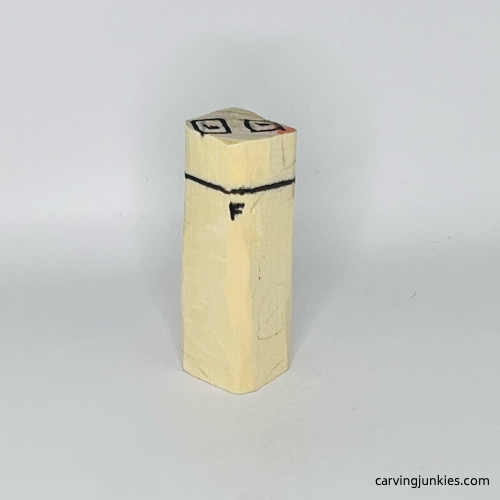 1. Corners are rounded
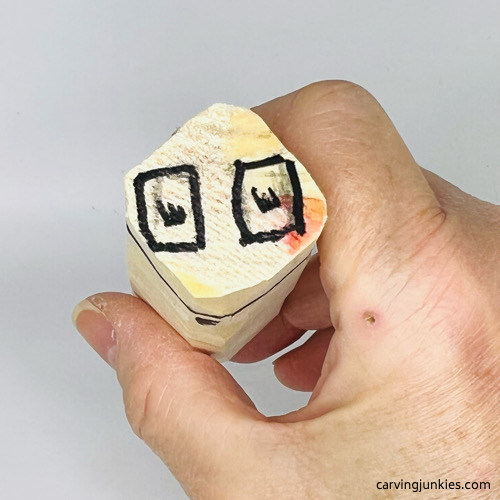 2. Ear boxes are drawn
Round the head of the pig wood carving
Using a sturdy roughout knife, start to round the head of pig wood carving (photo 3). Take care to leave the ear boxes intact so you will have enough wood to carve the ears.
Make a stop cut into the side of the pig wood carving (photo 4). Make a second cut that is perpendicular to your first cut, from the top of the pig wood carving (photo 5), to remove wood and shape the ears.
Once wood is removed from the front and back of the ears (photo 6), carefully make cuts between the ears to remove wood from the middle (photo 6). You may need to make several V-cuts to carefully remove wood a little at a time.
Note: Be very careful not to snap your knife here. You may have to make several passes with your knife. If your cut isn’t as clean as you like, you can use a piece of sandpaper to smooth the wood.
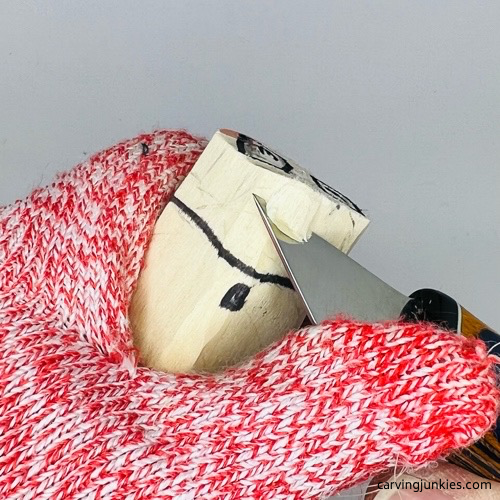 3. Rounding the head
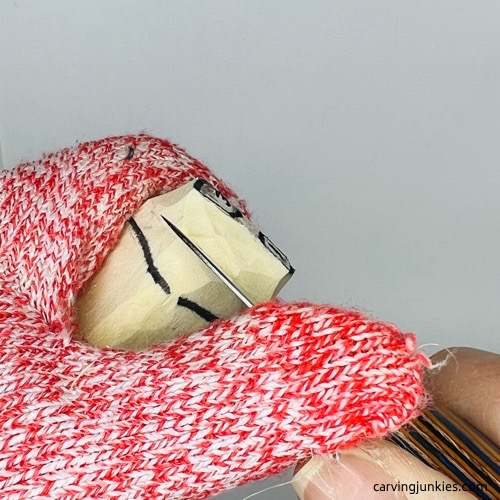 4. Making first stop cut
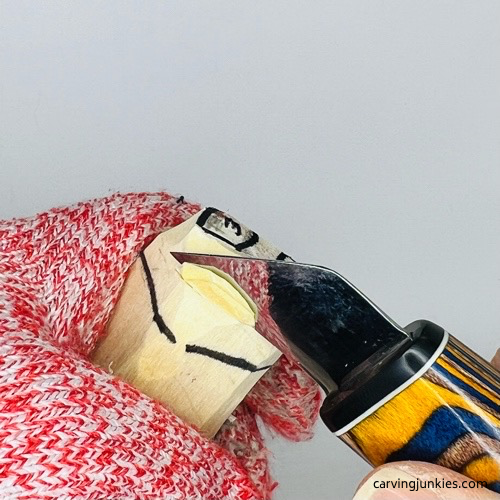 5. Making perpendicular top cut
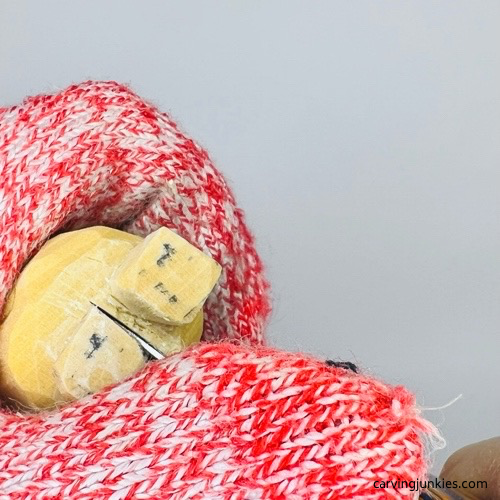 6. Ears are split
Add some details to your pig wood carving
Draw on the pig’s face, the front hooves, and the side feet (photos 7-9).
Also, draw a guideline around the back that is about an inch (2.5 cm) from the top to mark the bottom of the pig’s head (photos 8-10).
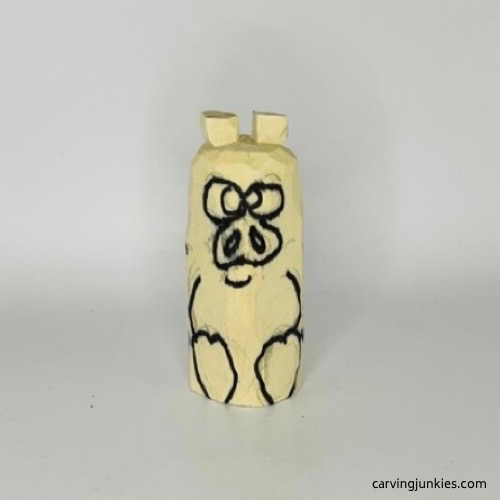 7. Front details are drawn
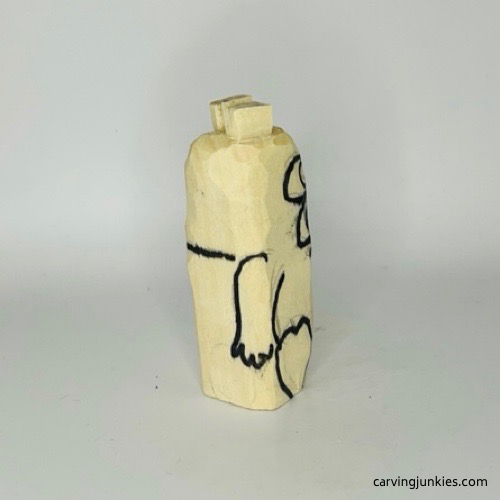 8. Right view of details
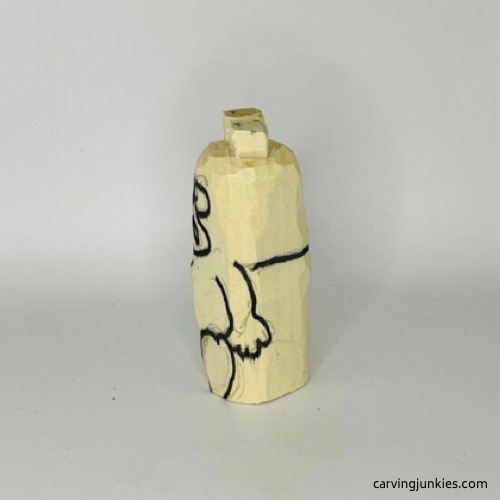 9. Left view of details
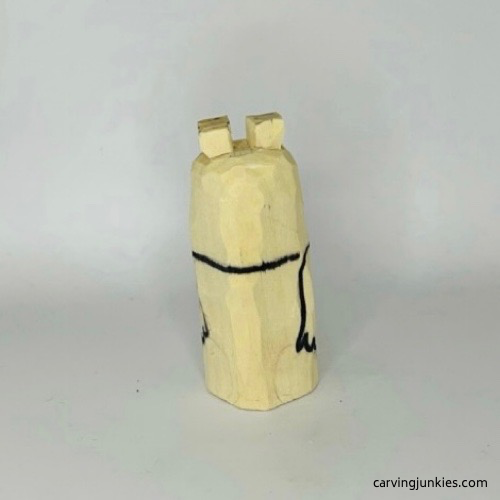 10. Back view of details
Carve the face of the pig wood carving
Make stop cuts to separate the head all around (photo 11), removing wood from underneath. Also, cut into the shoulders to remove wood below the head (photo 12).
Use your knife to separate the front hooves (photo 13). You can use a stop cut along the guideline, or a slicing cut to remove wood (make one cut along the guideline and another a little below it to slice off the wood).
Use a V-cut to split the bottom hooves (photo 14) and shape them. This will also give you access to round the belly of the pig wood carving.
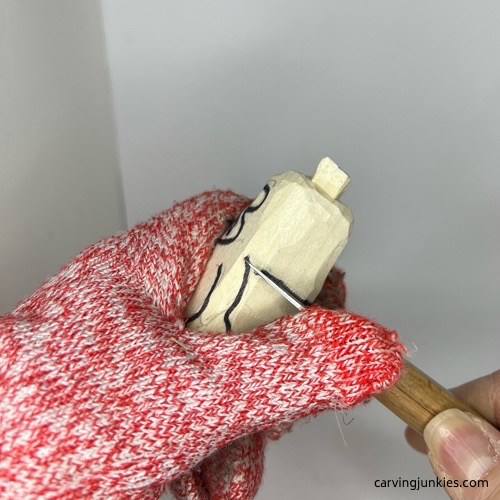 11. Making a stop cut
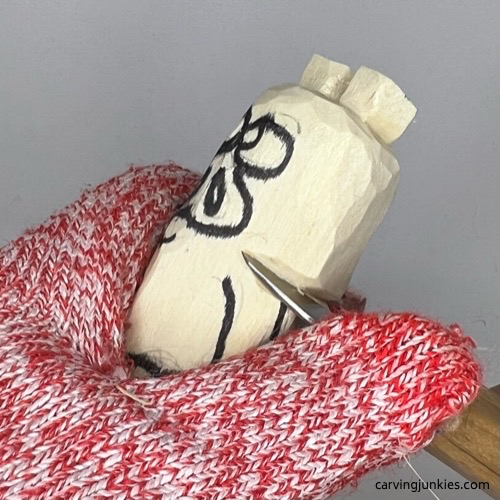 12. Cutting into the shoulders
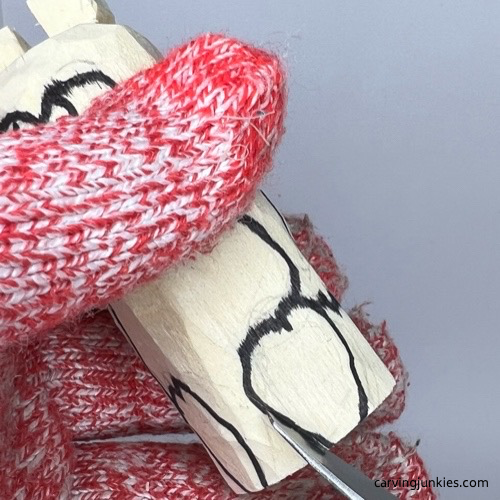 13. Separating the hooves
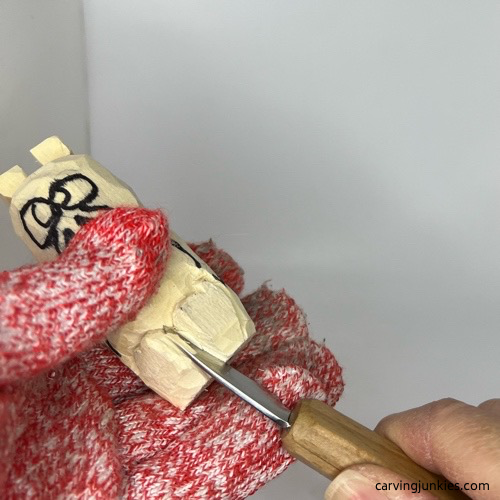 14. Splitting the hooves
Cut the arms of the pig wood carving
Use stop cuts to separate the arms on the pig wood carving (photo 15).
Draw a line a 1/4-inch (0.6 cm) from around the bottom of the pig that you will follow to separate the back of the pig belly (photo 16).
Note: We didn’t like the separated fingers after carving them and ended up cutting them off at an angle (see photos 19-22). Of course, you are free to keep them.
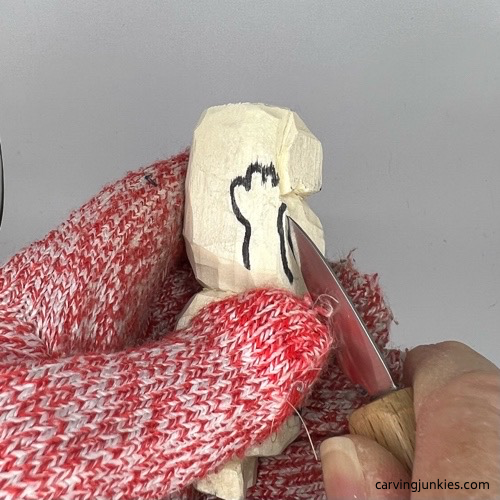 15. Separating the arms
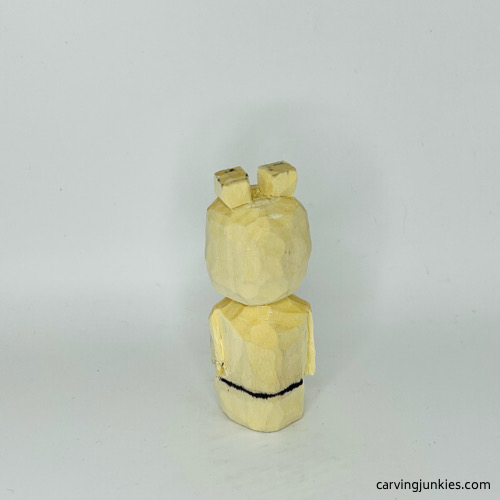 16. Guideline on back
Carve the face of the pig wood carving
Follow your knife along the guidelines on the face, removing wood in layers around your cuts to get the raised wood for the eyes and snout (visible in photos 17,18) . We use a series of stop cuts as well as pull cuts.
To make the ears flap over the front, very carefully make a V-cut or two in the middle of the ear (photo 17). Take your time here. We find it helps to support the back of the ear with an index finger as we push the knife into the wood (visible in photo 17).
After you separate the pig’s snout, cut the front at a downward angle (photo 19). Also make a tiny pyramid cut on each side for the nostrils (visible in photo 19) on your pig wood carving.
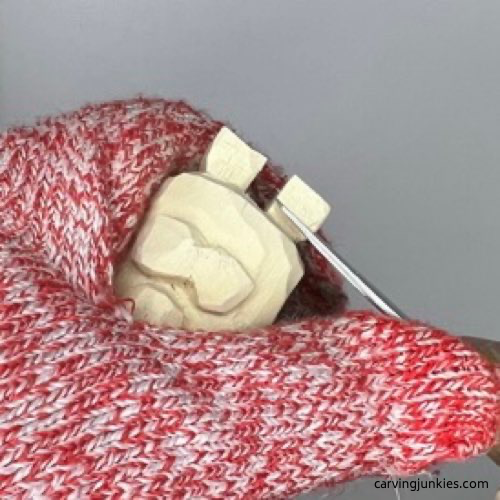 17. Making a V-cut
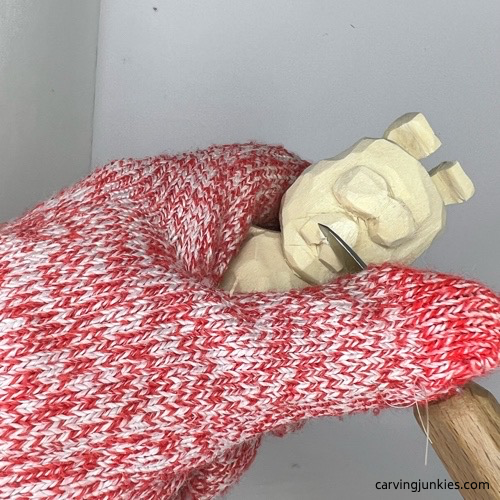 18. Cutting snout at an angle
Paint your pig wood carving
Unless marked 100%, all paints are watered down (we typically dip a brush into water, swirl it into 1-2 drops of paint, and repeat until you get a milky consistency for your wash.)
- Eye sockets: 100% Artist’s Loft titanium white.
- Pig body: Apple Barrel cameo pink wash (reserve leftover for highlights).
- Inner ears, nose, hooves, inner arms: Mix 1 drop of Ceramcoat bright red into the leftover cameo pink wash and add more water (reserve leftover for painting the wire tail).
- Eye pupils: Black magic marker.
- Nostrils: 100% Ceramcoat black applied with a toothpick.
- Tail (optional): Use small piece of 12-gauge wire and curl tail by wrapping it around a needle nose plier. Paint with leftover highlight mixture. Use a pin vise (photo 24) to create a small hole in the back and glue the tail on (allow paint to dry thoroughly first).
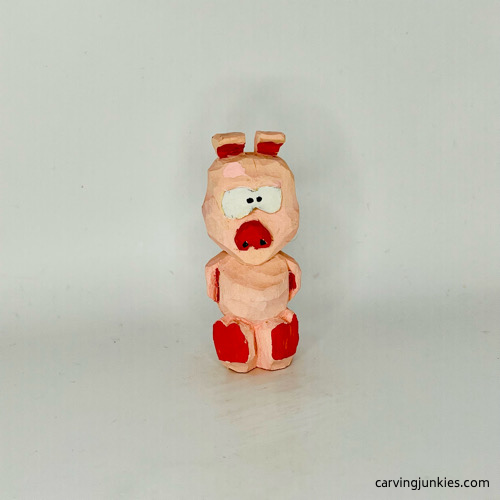 19. Front view of painted pig wood carving
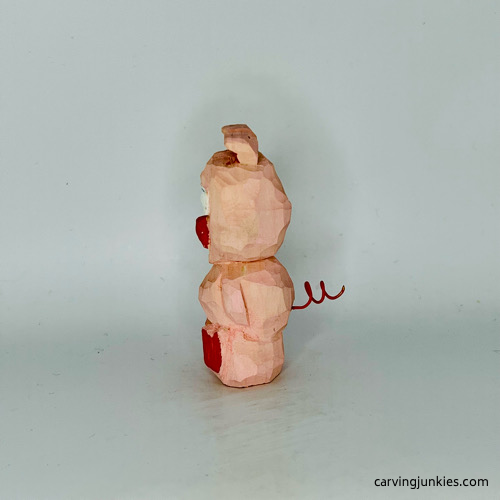 21. Left view of painted pig wood carving
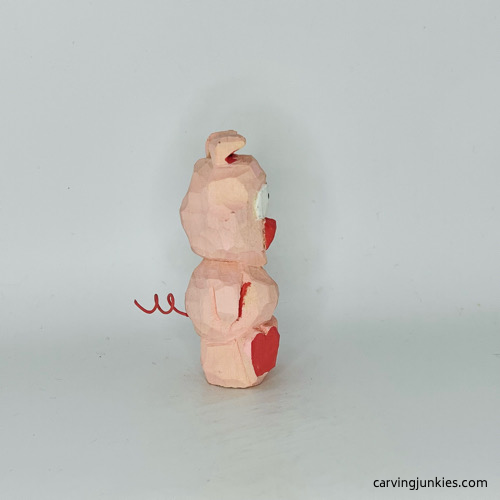 20. Right view of painted pig wood carving
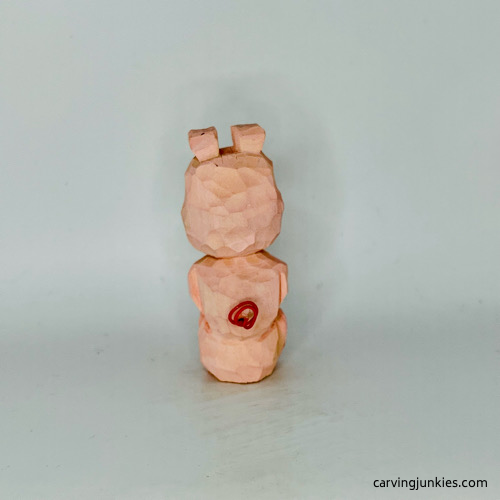 22. Back view of painted pig wood carving
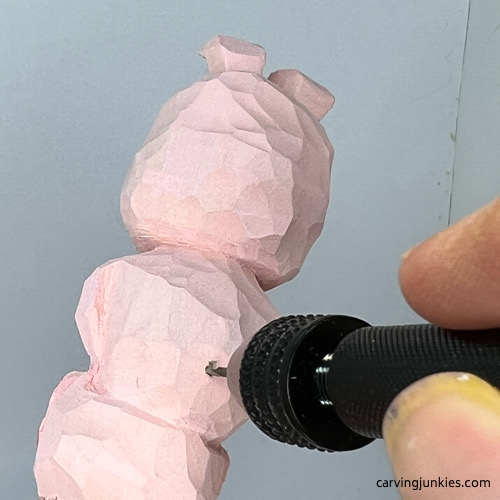 23. Creating hole for tail
Pig wood carving tutorial summary
- This little piggy is super fun and easy to carve.
- The painting goes very quickly on this pig wood carving.
- The curly tail is optional, but makes this simple pig wood carving more interesting.
- Feel free to increase the size of your pig wood carving.
- Your finished pig wood carving makes a great gift or stocking stuffer.
Get 50 Wood Carving & Painting Tips
FREE when you join our free Covered in Chips Club
Your information is 100% private and is never shared. Unsubscribe anytime. See our Privacy Policy .
Share page on:
Home | Privacy Policy | Terms of Use | Contact | Sitemap
