- Home
- Things to carve
- Oompa loompa carving
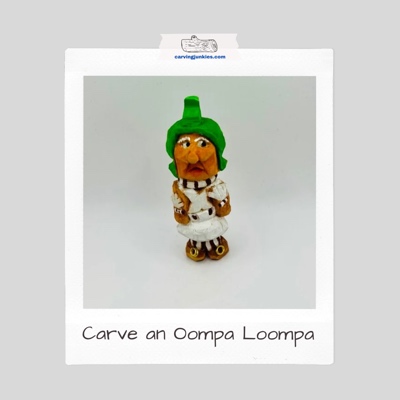
Whittle yourself an Oompa Loompa carving
Bring this beloved character to life in wood.
If you want to make an Oompa Loompa carving, you are in for a treat with this tutorial. These beloved, green-haired, candy-making helpers are the hallmark of the Willy Wonka and the Chocolate Factory movie (the original 1970 movie with Gene Wilder), and the Charlie and the Chocolate Factory remake in 2005 (with Johnny Depp).
Take a Sunday morning to watch both movies, especially if you have kids, grandkids (or an inner child!). Sing a song or two. Root for Charlie. We watched them back to back on a cold, rainy day and it brought back great memories.
Fun facts: In the original movie, there were 10 actors who played Oompa Loompas. In the remake, there was just one actor (Deep Roy). Animation technology was used to create a total of 165 adorable versions of him.
But enough about the movies. Let’s start the Oompa Loompa carving!
Oompa Loompa carving materials
For this Oompa Loompa carving tutorial, we used a 1 x 1 x 3-inch (2.5 x 2.5 x 7.6 cm) basswood block. We also use a straight knife with a 1-1/2 inch blade. You end up using most of the wood block, so there is no need to use a roughout knife.
You will carve off the corner on this little whittle, which will give you enough room to raise the arms and create the green hair that is a signature of the Oompa Loompas.
Please always use a protective glove whenever you carve. It’s downright dangerous not to.
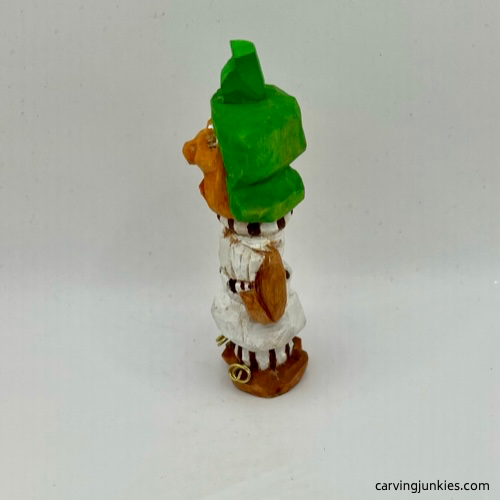
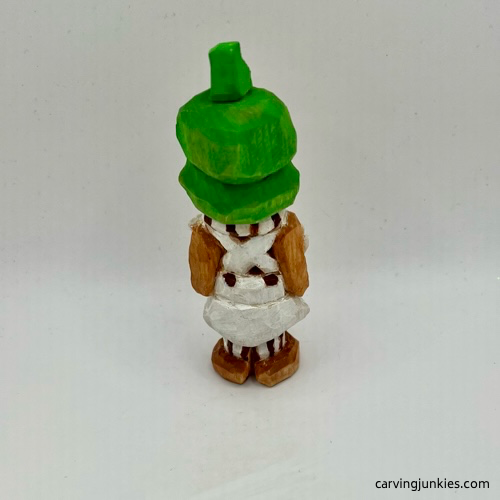
Optional: After painting, we decided our Oompa Loompa carving needed a brun (a bun for bro’s), so we carved a piece of scrap wood and glued it on with Duco cement. Then we painted it. A full painting guide is included at the end of this tutorial.
We also used some 20-gauge wire for the bows on the shoes, which were attached to the Oompa Loompa carving with Crazy Glue. We wrapped the wire around a needle-nosed plier to get a uniform shape.
Use a pencil, pen, or other writing instrument to draw on the design.
Oompa Loompa carving tutorial at-a-glance
Getting started
Round all the corners on the wood block. Draw your first guideline 1/2 inch (1.3 cm) from the bottom to mark the top of the legs.
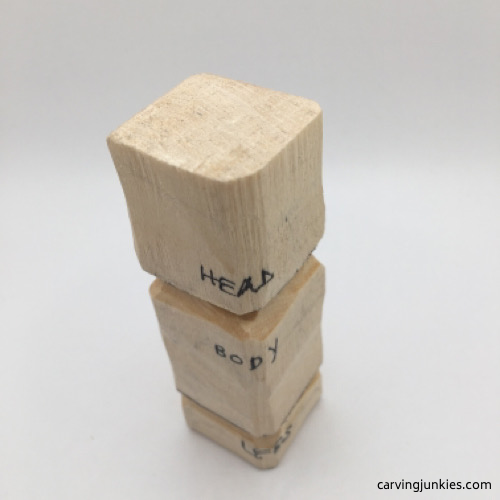
Your second guideline will be 2 inches (5 cm) from the bottom and marks the bottom of the head (photo 1).
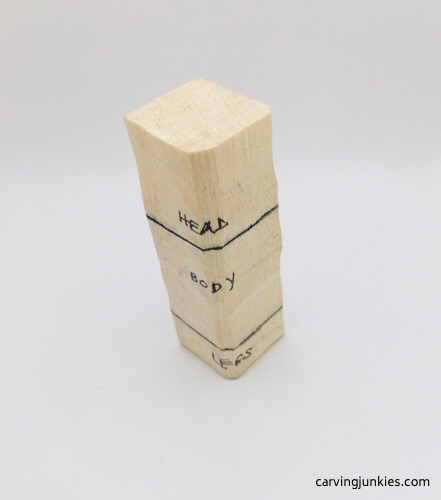 1. Corners are rounded, guidelines are drawn
Separate the head and legs
Using your knife, make a stop cut at each corner (photo 2), removing wood from underneath. Work your way completely around each guideline (photo 3).
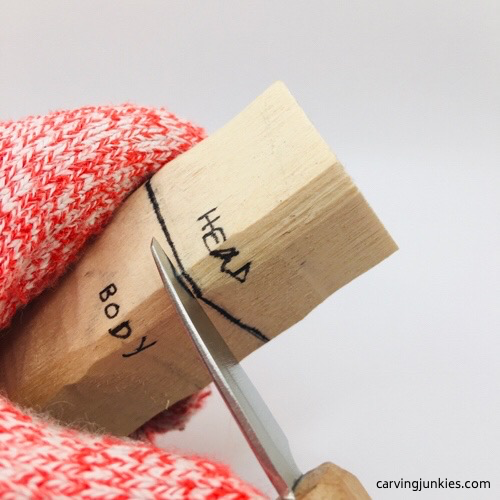 2. Stop cut to separate wood
 3. Wood is separated all around
Sketch the Oompa Loompa
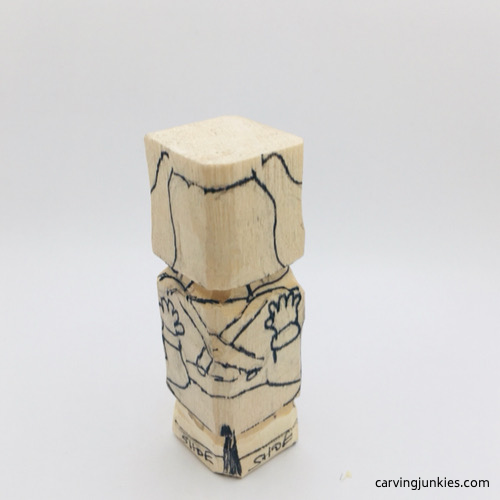
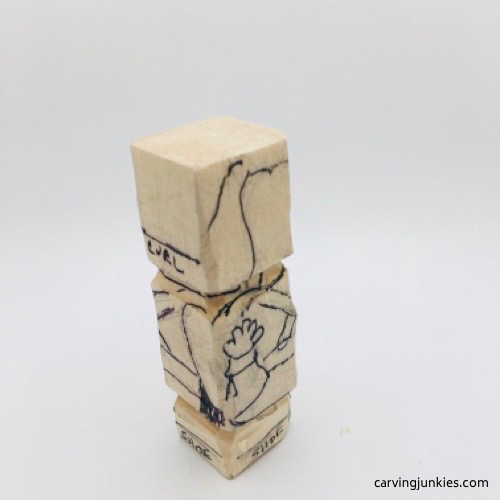
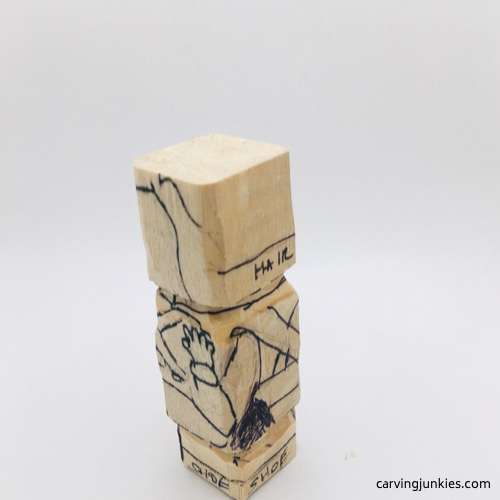
Sketch the rough design of the Oopma Loompa. This is important to help you reserve wood for the arms, legs, hair, head, and clothing (photos 4-7). It does not have to be perfect.
Since the Oompa Loompas have a curl in their hair, we’ve reserved wood for that as well (photos 5-7).
You will also color the areas that you want to remove, including where you will split the legs on the front (photo 4) and the back (photo 7).
 4. Design is drawn on front
 5. Design from right view
 6. Left view of design
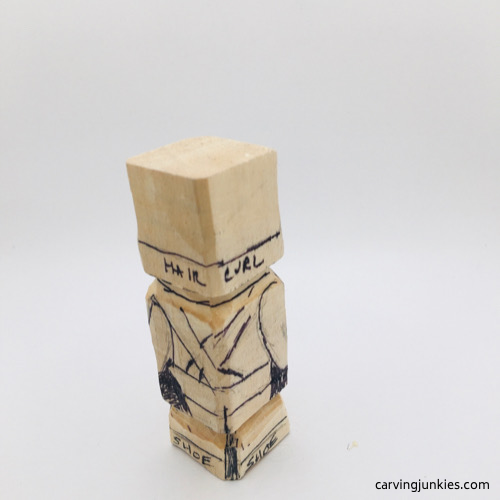 7. Back of the Oompa Loompa
Start the legs of the Oompa Loompa carving
Everyone has different preferences when it comes to carving. We like to save the head for later, in order to get a sense of the proportions of the body first.
Using your knife, make a stop cut in each corner of the guideline for the top of the shoes (photo 8), removing wood from underneath. Work your way around between the corners.
Make a V-cut to split the legs on the front and back (photo 9).
Also mark the wood that you will remove to shape and narrow the legs on the front and the back (photos 10,11).
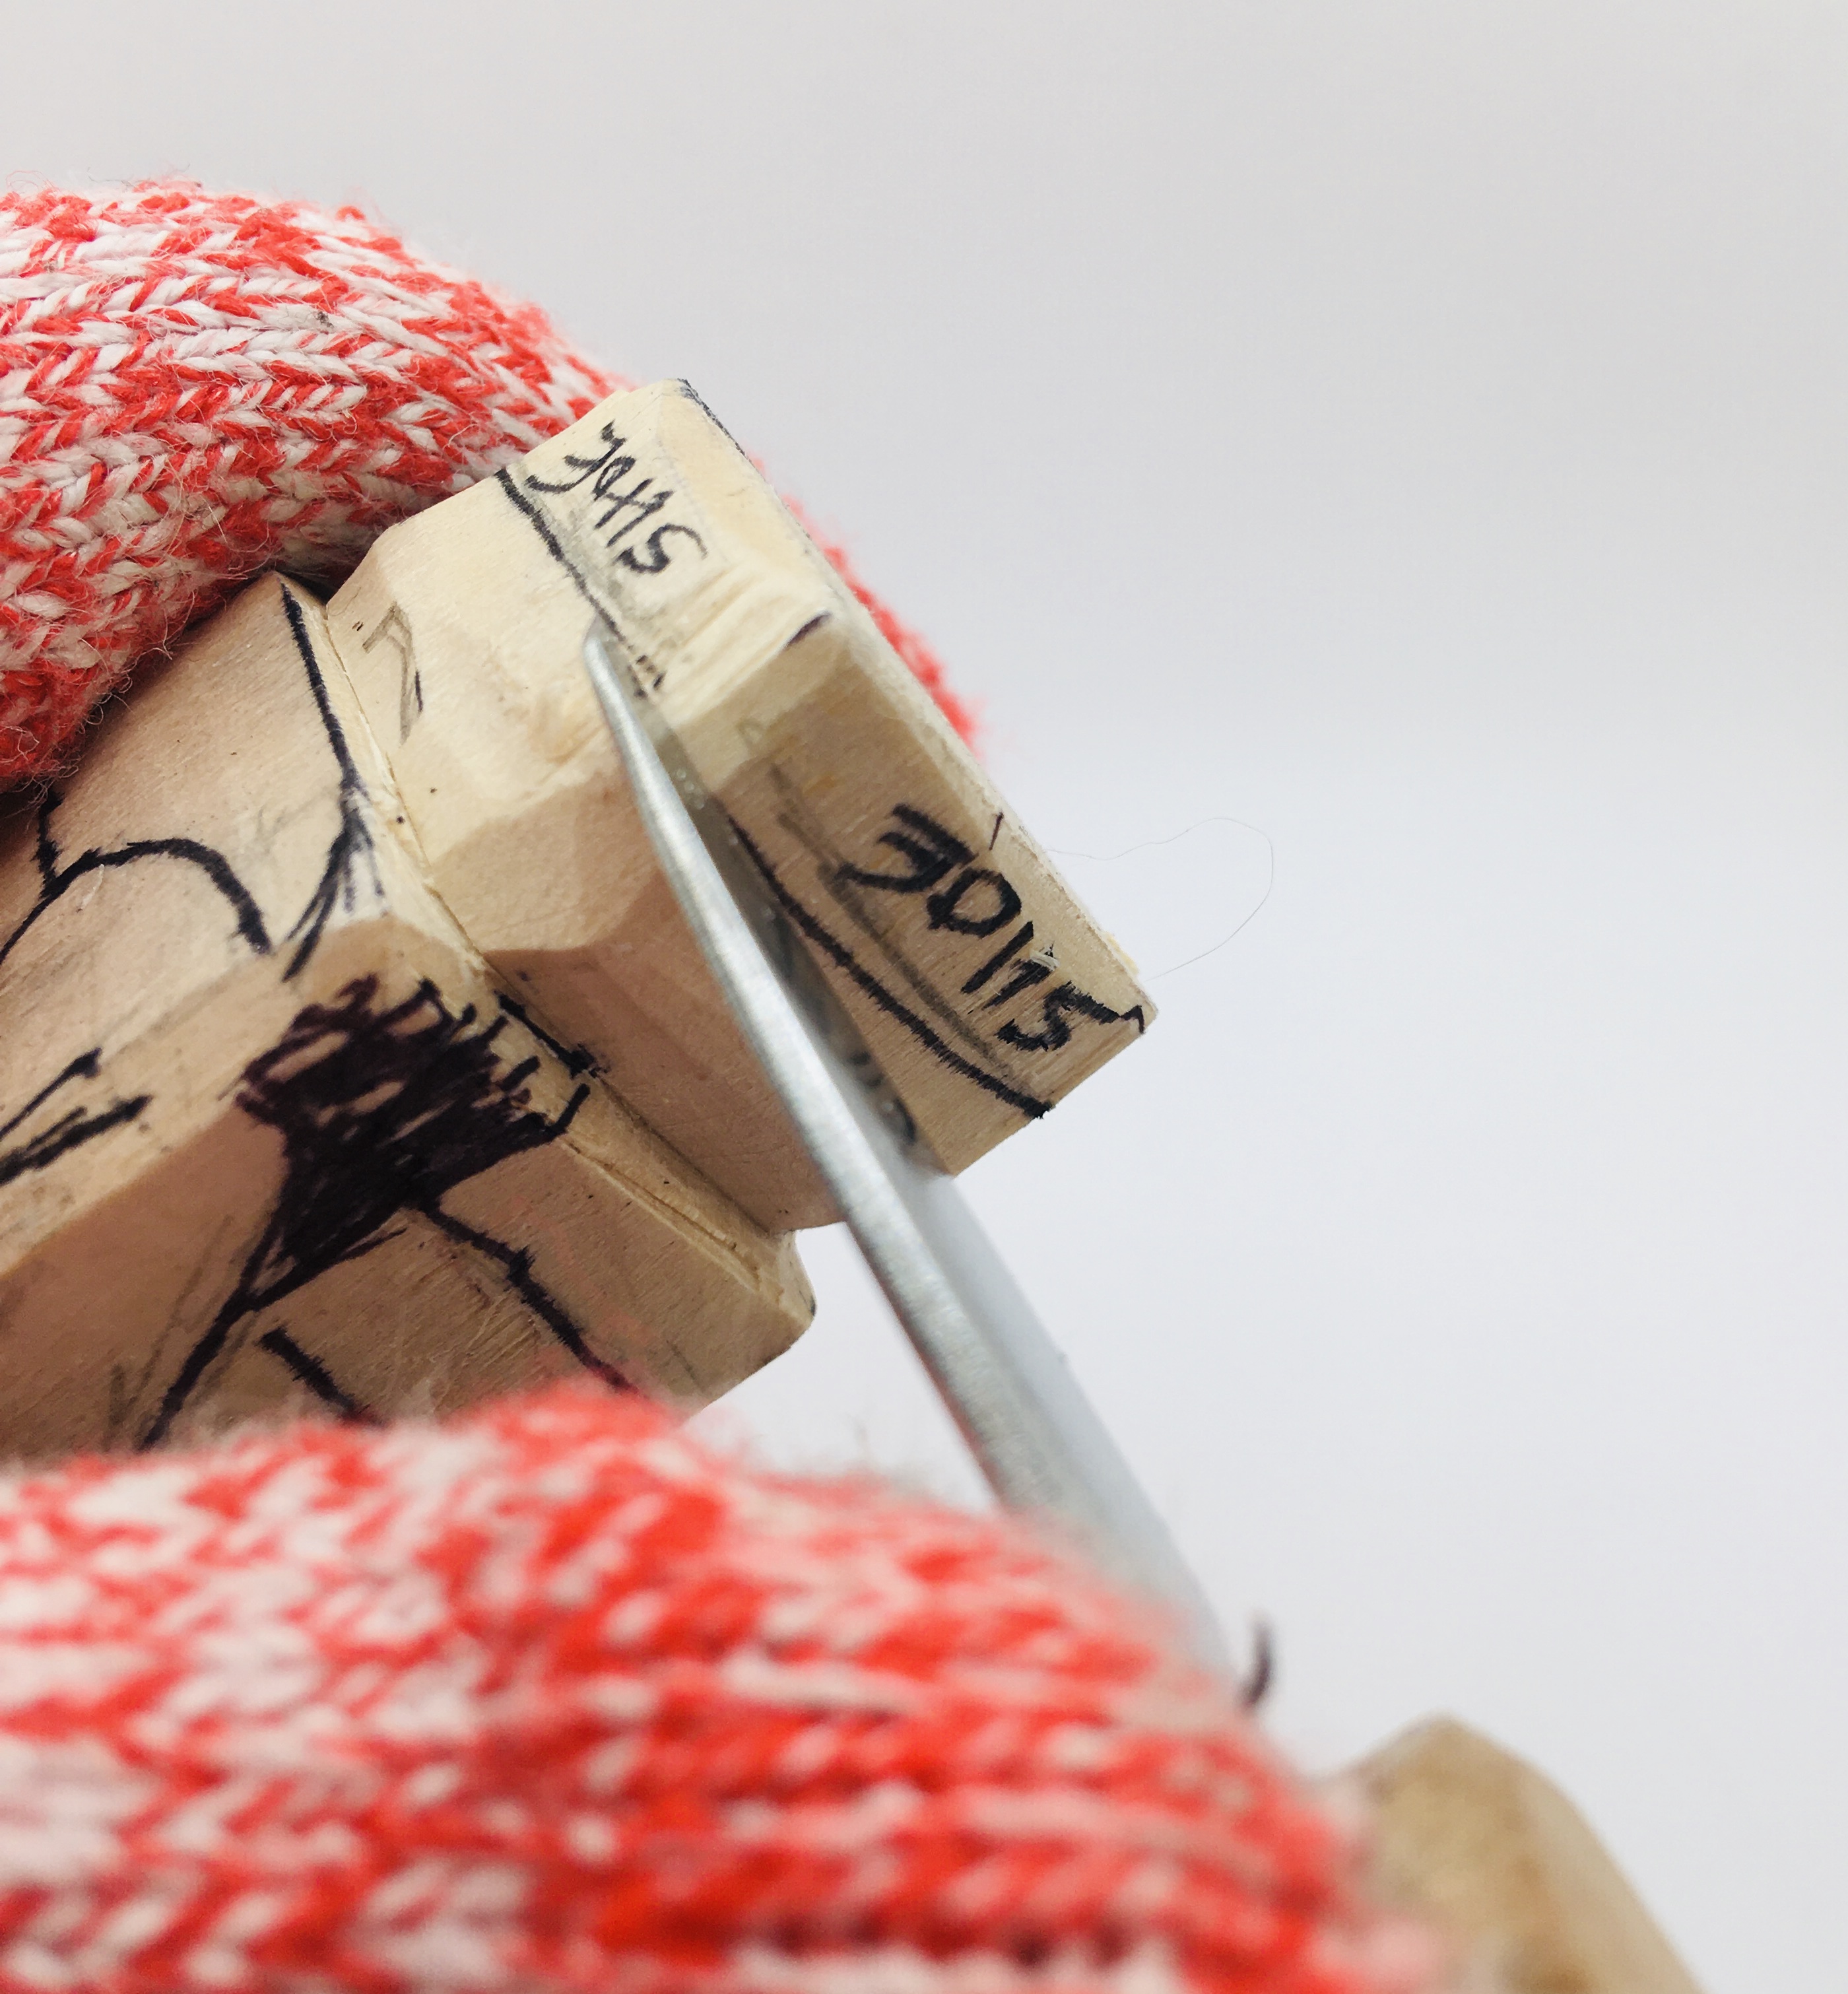 8. Making a stop cut to separate the top of the shoes
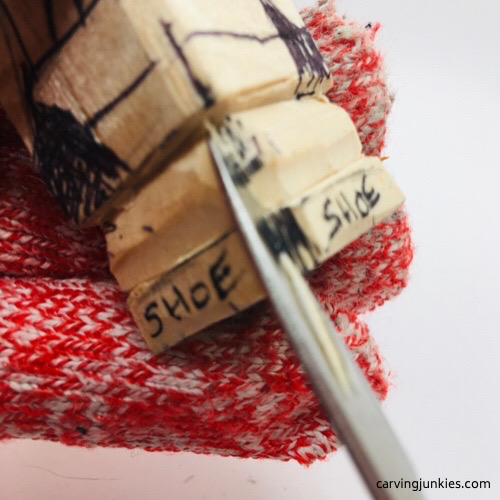 9. Making a V-cut to split the legs
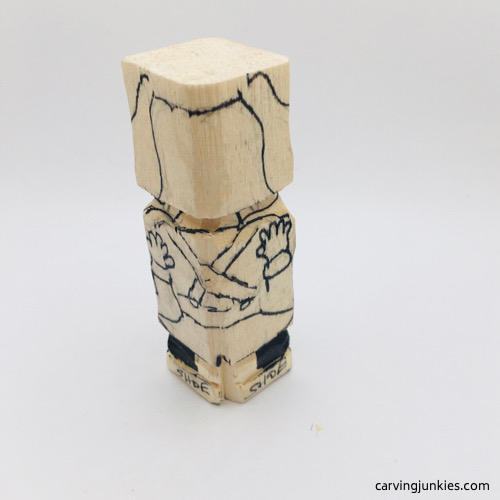 10. Wood to remove on the front
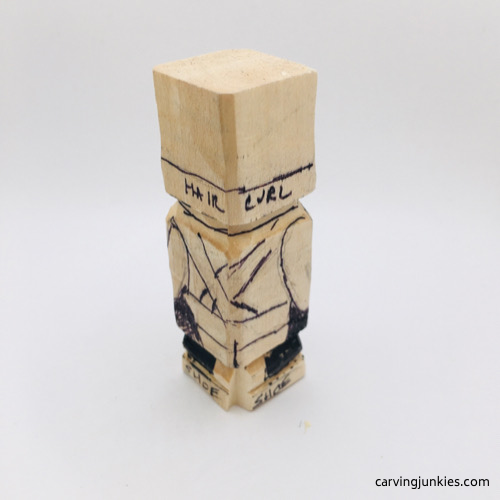 11. Wood to remove on the back
Carve the legs
The legs on the Oompa Loompa carving need to be narrowed and shaped. Using your knife, carefully remove the wood you have marked on the outer sides of the legs (photo 12). Check periodically as you carve to ensure that the legs are even.
Start to round the shoes on the front and back of the Oompa Loompa carving (photos 13,14).
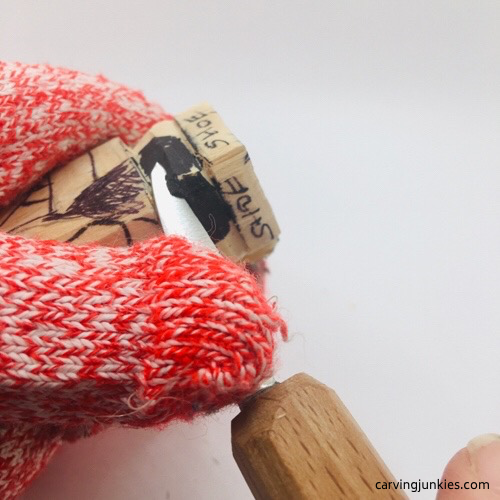 12. Removing wood to narrow the legs
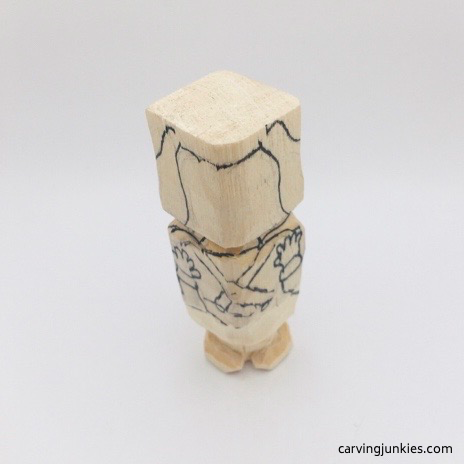 13. Shoes are rounded (front view)
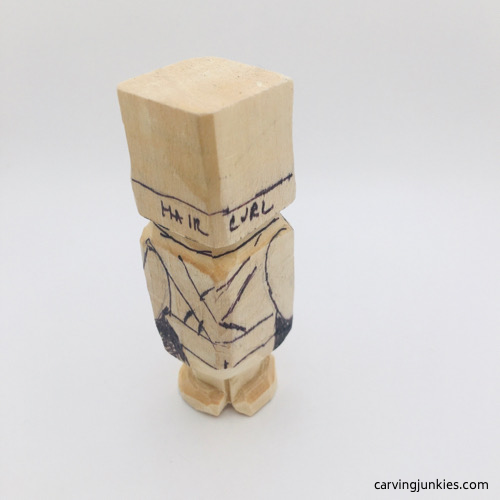 14. Back of shoes on the Oompa Loompa carving
Carve the details
Use a stop cut to separate the arms, removing wood from underneath (photo 15). Keep working your way around the arms, removing wood as you go (photo 16). You can use a stop cut, or a line cut, if you prefer.
Also begin to shape the wide waistband of the Oompa Loompa’s pants (photo 16).
Carefully make small cuts around the fingers and remove wood from around them (photo 17). Be careful here. It’s easy for the fingers to crumble. If they do, you can always slice off the entire section and start again (or just recut the errant finger).
Continue to carve the arms around the sides (photos 18, 19) and on the back of the Oompa Loompa carving (photo 20).
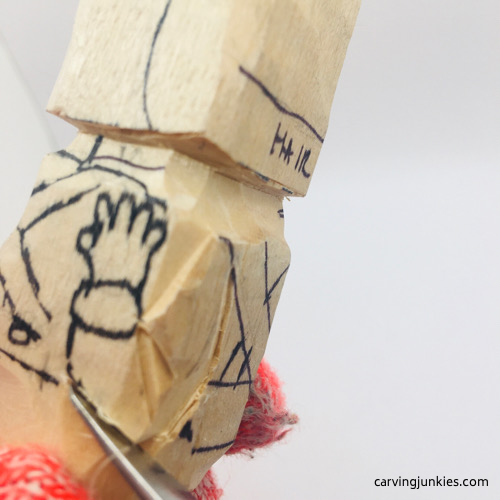 15. Separating the left arm
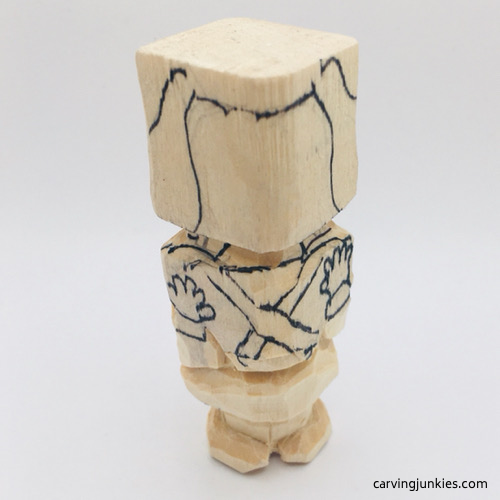 16. Starting the waistband
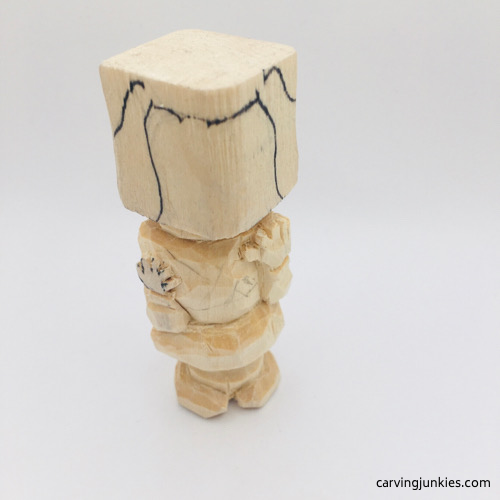 17. Separating the fingers
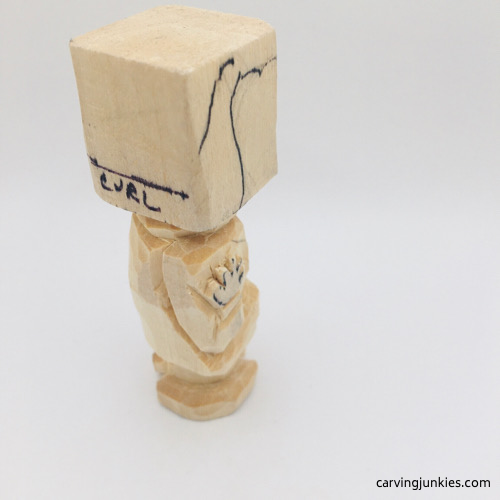 18. Right arm progress
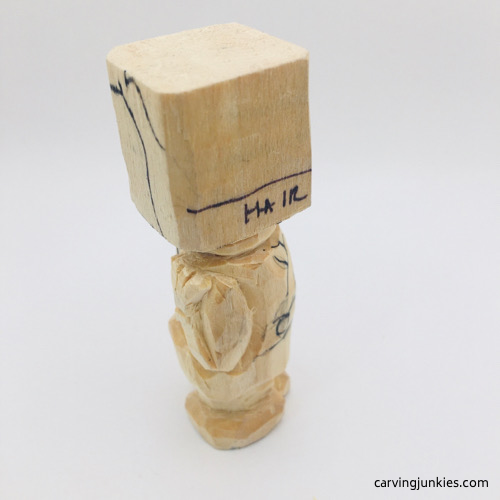 19. Left arm progress
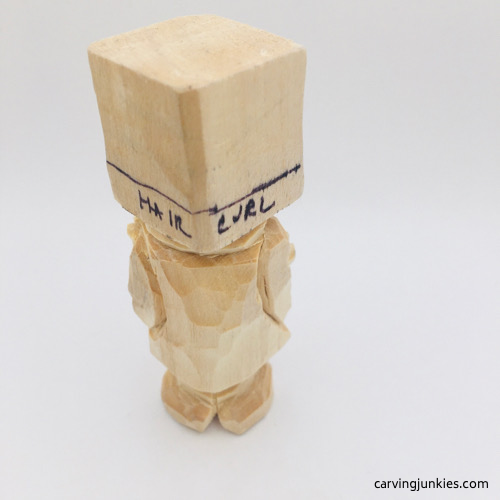 20. Arms on the back
Redraw the suspenders
While carving the hands and fingers, we carved off the previous markings for the suspenders, waistband, and buttons. Redraw them on the front and back (photos 21,22).
Now, use stop cuts to separate these details (see progress photo 23)
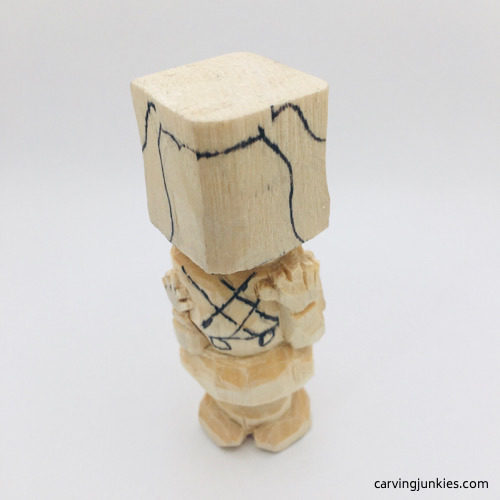 21. Front details are redrawn
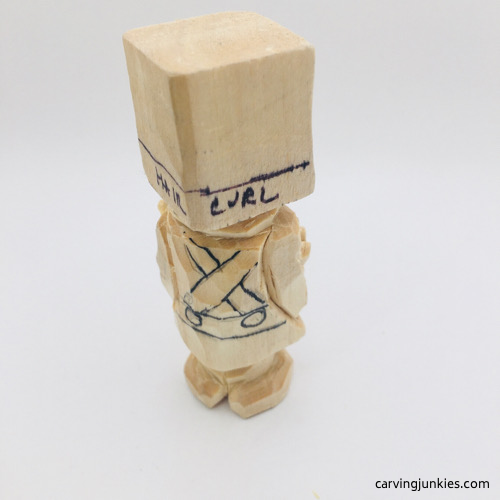 22. Back details are redrawn
Carve the head
Round the corners of the head. Start to curve the bottom of the head into the neck (photo 23).
Angle the top of the head back a little (photo 23). Also, shape off the very top of the head (the end grain) to ensure that paint will adhere properly.
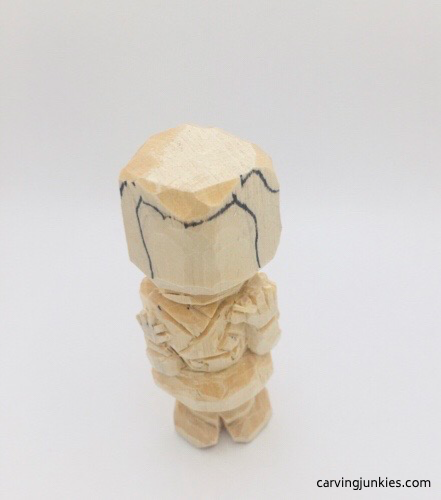 23. Head is rounded
To carve the curl of the hair, make a V-cut on one side (photo 24). Work your way around with small V-cuts to the other side of the head.
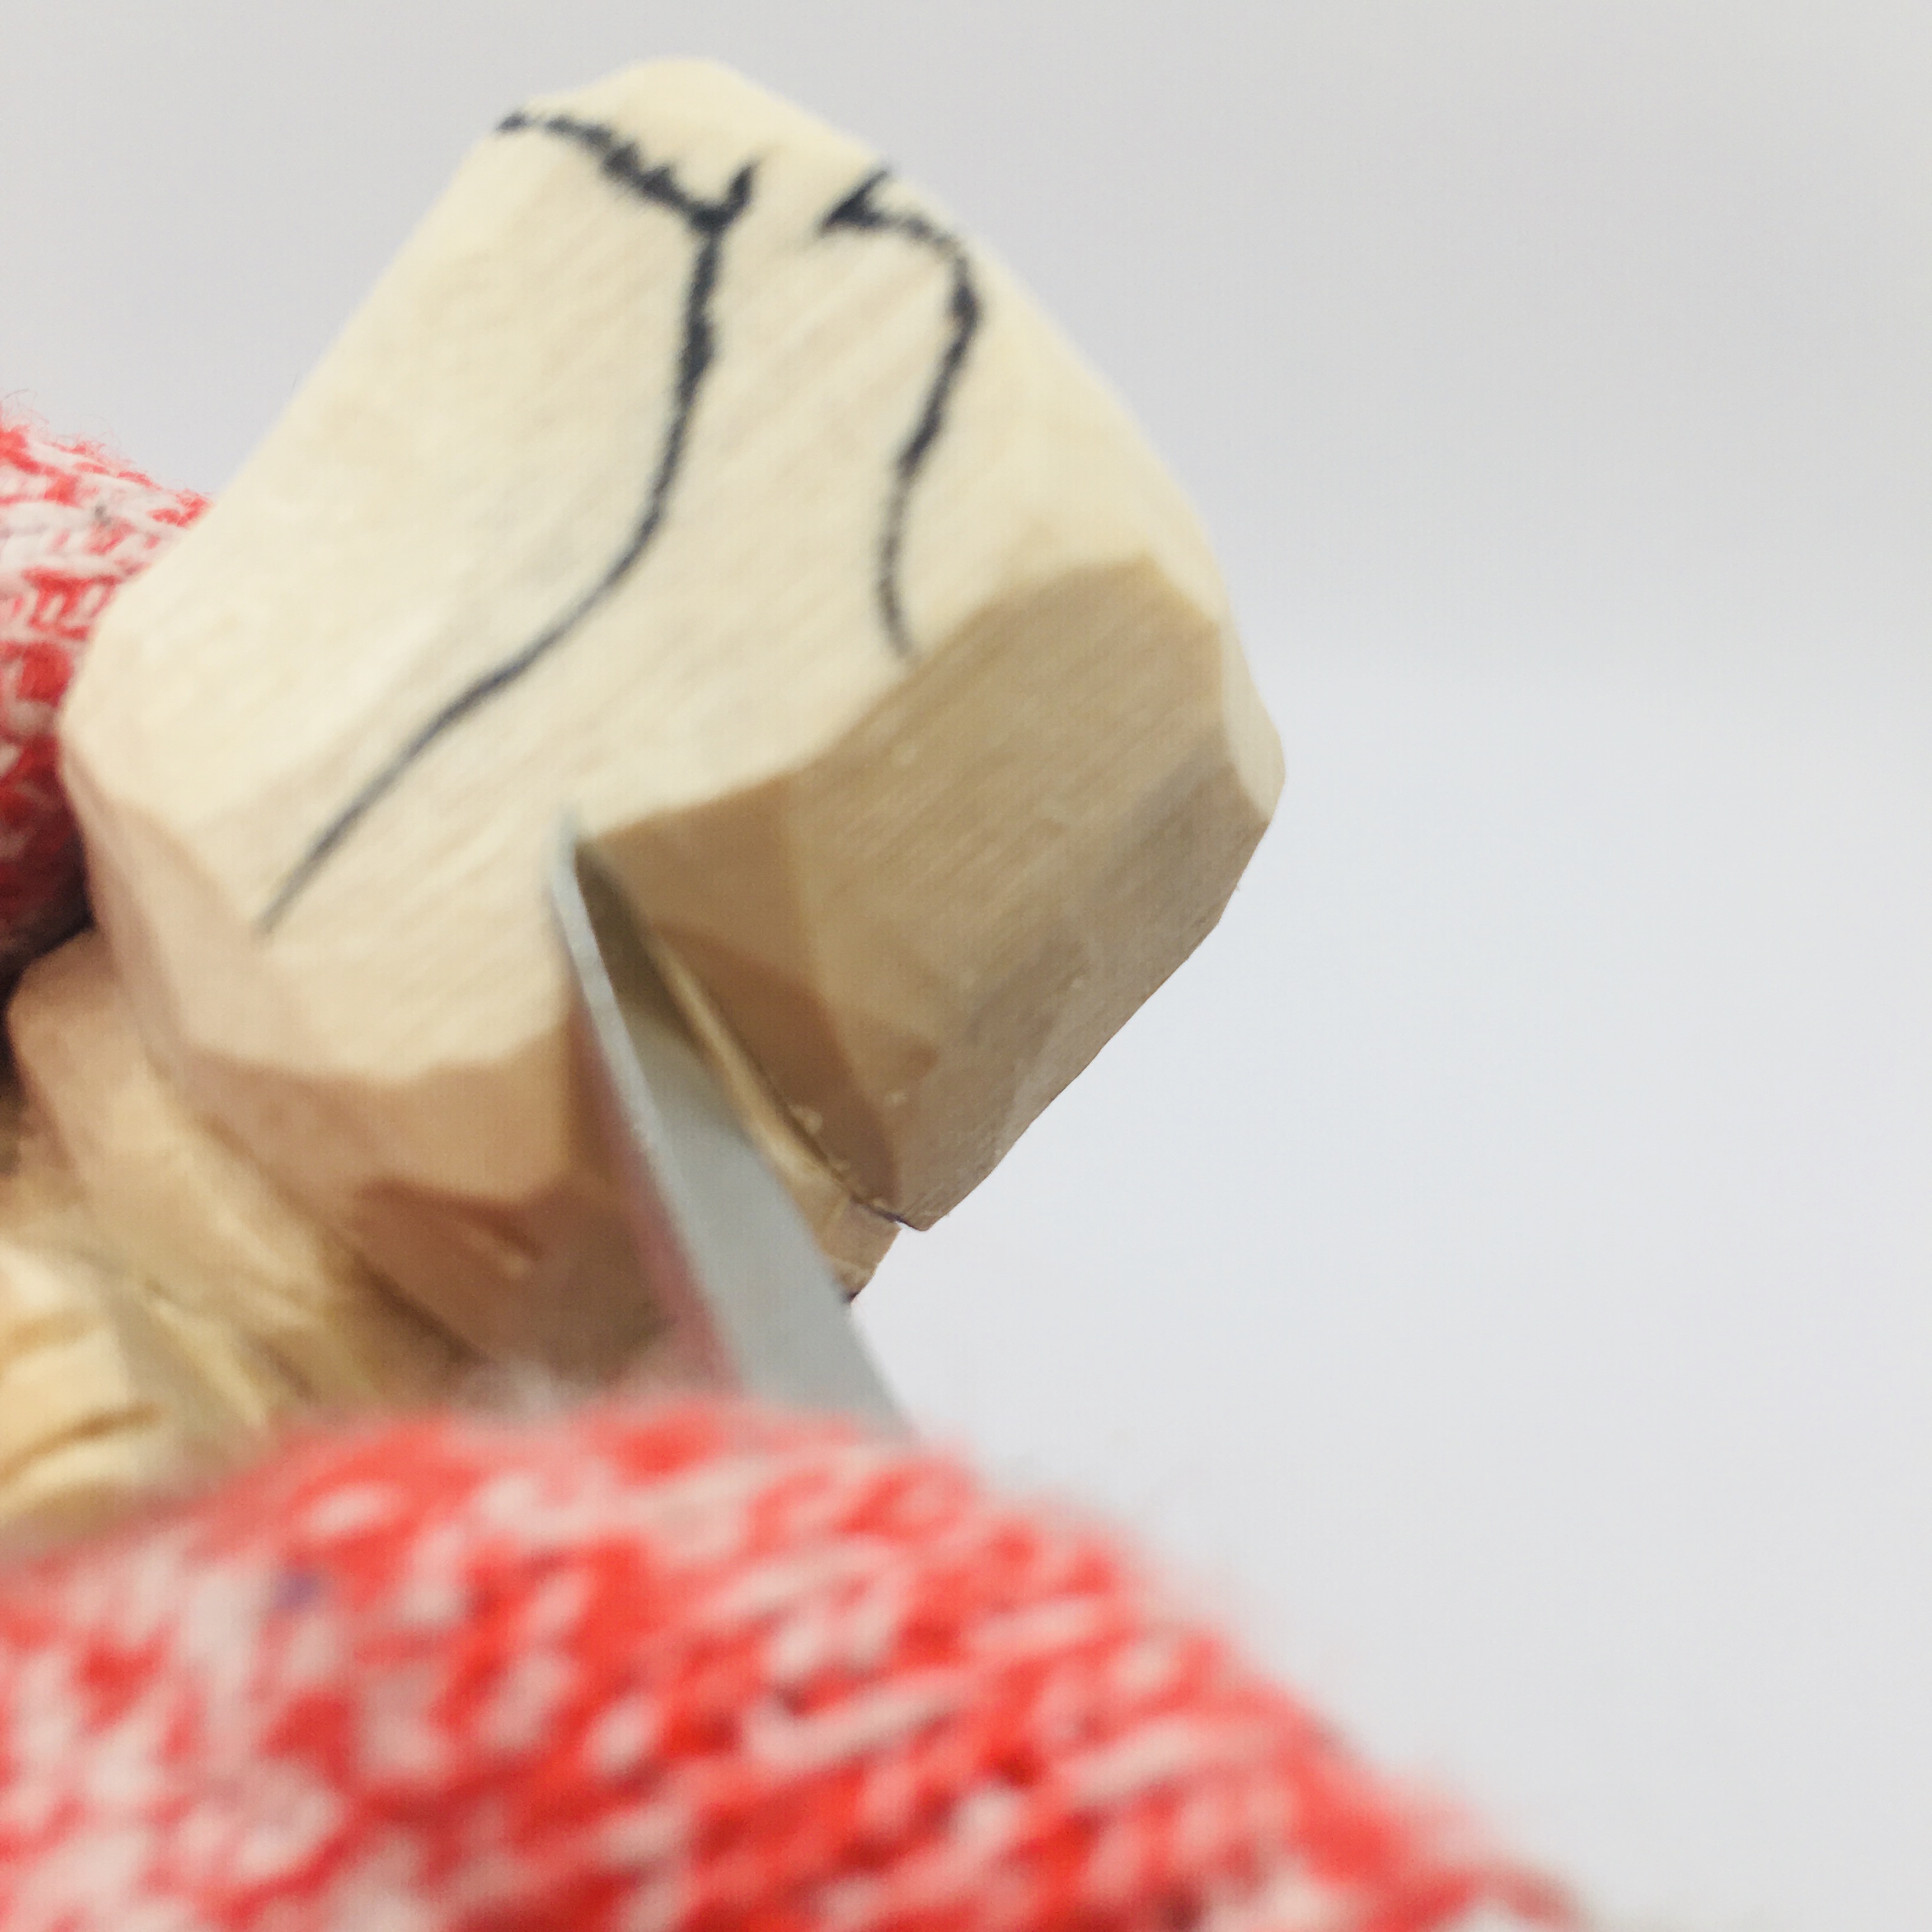 24. Making the hair curl with a V-cut
Draw and carve the facial details
Draw the eyes (photo 25).
Make a stop cut at the bottom of the nose, removing wood from underneath (photo 26).
Draw a guideline on each side of the cut you just made to guide your next cuts, which will define the nose (photo 27).
Use your knife to shape the nose, outline the eyes, and carve the lips (photo 28). We also added smile lines around the lips (photo 28). Also, separate the hair from the head. You can start with stop cuts on the top, removing wood from underneath. On the sides, it may be easier to use line cuts.
Note: Since our wood started to crumble, we decided to paint on the eyebrows rather than carve them. Wood does not always respond the way you want it to. In this case, it was not worth the risk of losing the entire carving!
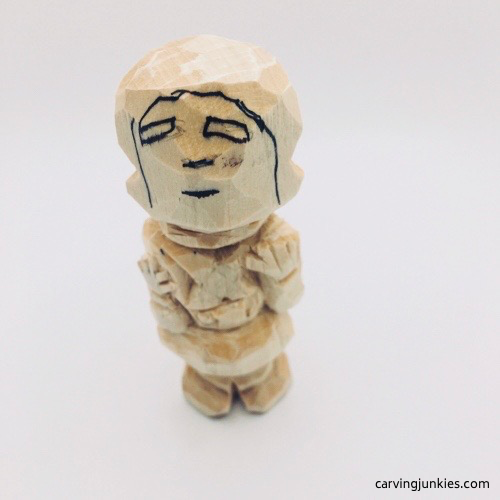 25. Details are drawn
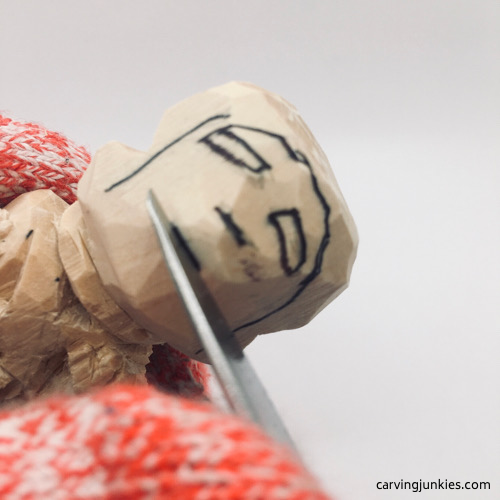 26. Making a stop cut
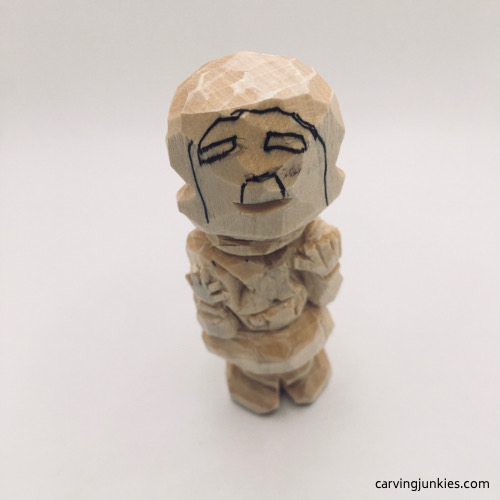 27. Guidelines are added
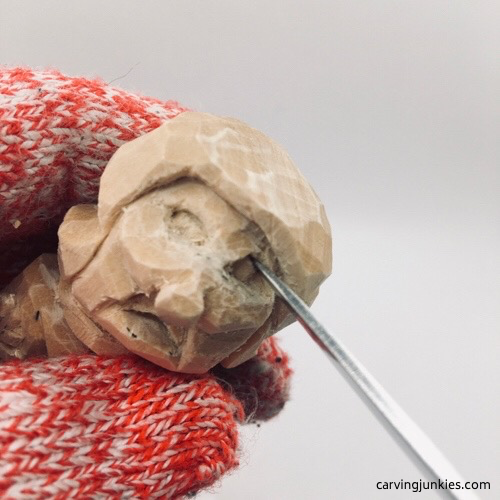 28. Carving the details
Clean up your cuts
Clean up your cuts (or deepen them as needed) prior to painting your Oompa Loompa carving. Also make sure you remove any wood fuzzies. We always take pictures at this point, which helps us see areas that need additional finessing.
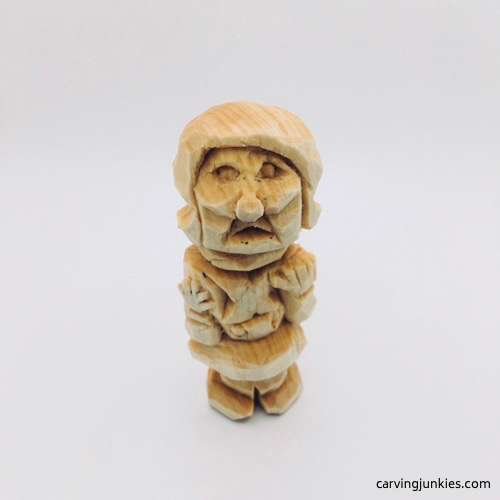 29. Front view of prepainted Oompa Loompa
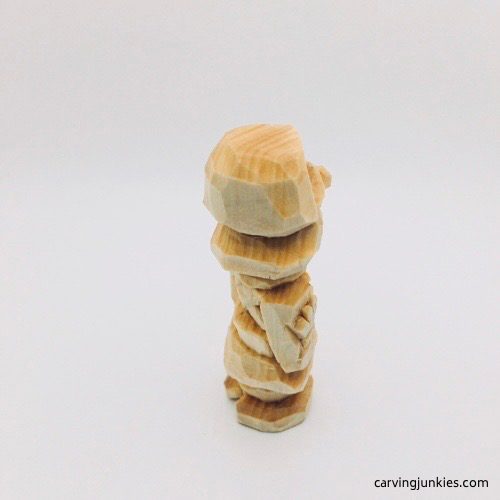 30. Right view of Oompa Loompa carving
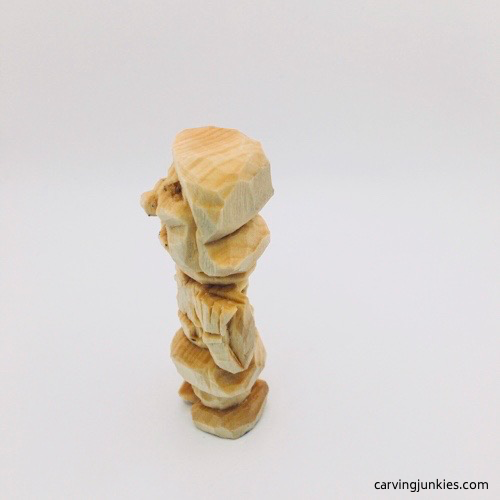 31. Left view of Oompa Loompa carving
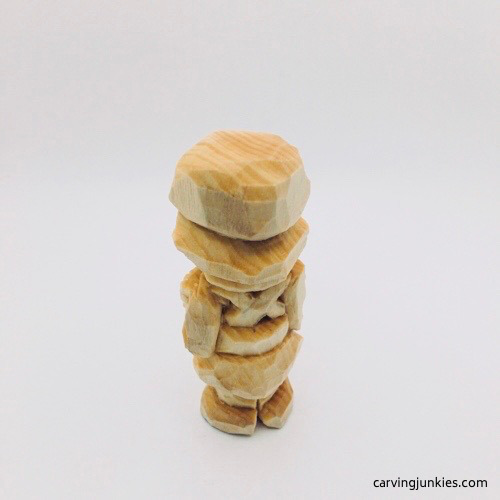 32. Back view of Loompa Oompa carving
Painting the Oompa Loompa carving
We create washes with our acrylic paints by adding water. We squeeze one drop of paint into a paint well. We then swirl our paint brush into a container of water, pull up a little paint, and swirl it around in a clean paint well. We continue adding water, as needed, until the paint looks kind of milky.
Paint washes allow you to see some of the grain on the wood. You can adjust the amount of water you use, until you get a wash that you like. Sometimes we also use 100% of the paint, such as for eye whites.
You can use acrylic paints of your choice, as well as whatever paint brushes you have. Like carving knives, you may develop a preference for certain shaped paint brushes (we like flat and circular brushes).
Keep a knife you do not use for carving on hand to clean up mistakes as you paint. Start with the lightest color first on your Oompa Loompa carving.
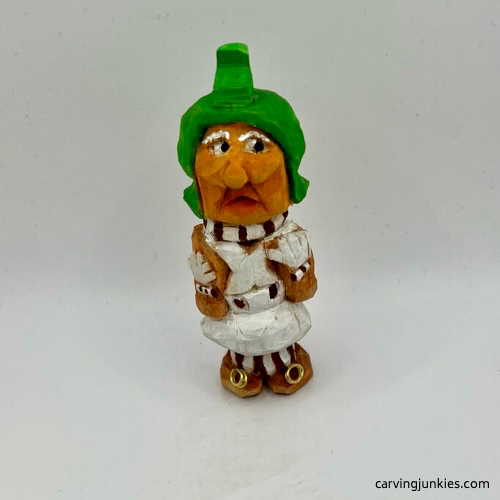
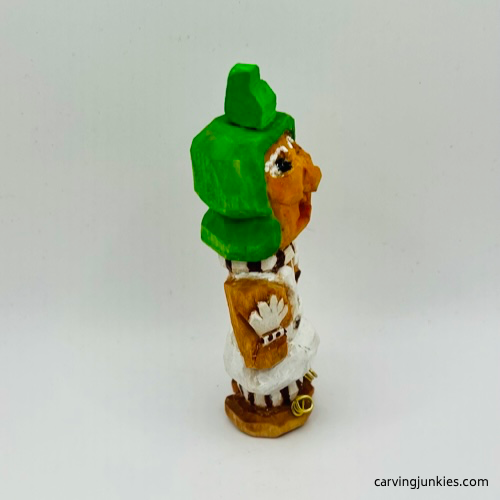
- Eye whites, gloves, pants, stripes: 100% Artist’s Loft titanium white.
- Clothing stripes and buttons: 100% Academy burnt sienna paint, applied with a toothpick.
- Shirt and shoes: Burnt sienna wash. Optional: we curved some wire around a needle-nosed plier to create the little ribbons on top of the shoes. We attached them with Crazy Glue.
- Hair and brun: FolkArt bright green.
Oompa Loompa carving tutorial summary
- Oompa Loompas are beloved little green men that are fun to carve from wood.
- Our tutorial has a few options (wire bow on shoes and brun from scrap wood) that can add some pizzaz.
- Use a toothpick when you paint the stripes (for greater control) and start with the white stripe first.
Get 50 Wood Carving & Painting Tips
FREE when you join our free Covered in Chips Club
Your information is 100% private and is never shared. Unsubscribe anytime. See our Privacy Policy .
Share page on:
Home | Privacy Policy | Terms of Use | Contact | Sitemap
