- Home
- Wood carving gnomes
- Nisse wood carving
Itty bitty nisse wood carving tutorial
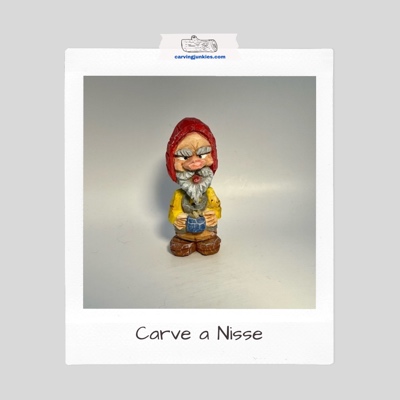
Carve a wide-nosed character holding his porridge bowl.
This miniature nisse wood carving tutorial is a fun carve with cute details, including a porridge bowl.
Nisses (also sometimes called brownies) are part of Scandinavian folklore. They are small—like children—and live in barns, stables, and sometimes churches. Their caps are red and they often wear gray work aprons.
Their favorite food is rice porridge. Treat them well and they will reward you by helping out around your home.
What you will need for your nisse wood carving
For this tutorial you will need a block of wood that is 1 x 1 x 3 inches (2.5 x 2.5 x 6.6 cm). As always, feel free to use a bigger block and simply increase the provided dimensions.
A pencil will be needed to sketch your guidelines. Grab a knife (or two) suitable for roughing out wood and for carving fine details.
Remember to always use safety gloves and to protect your lap from knife slips that can be dangerous.
Keep a leather or cardboard strop handy for sharpening your knife every 30 minutes or so.
Nisse wood carving tutorial at-a-glance
Watch this progression video to see the key steps included in this nisse wood carving tutorial.
Setting up your nisse wood carving
Round all the corners on the block. Draw a guideline 1.5 inches (3.8 cm) from the top of the block (all around) to mark the bottom of the head (photos 1,2). On the front only, you will extend a triangle down about 3/4 of an inch (1.9 cm) to reserve wood for the beard (photo 1).
Draw another line 2.75 inches (6.9 cm) from the top to mark the top of the shoes (photos 1,2).
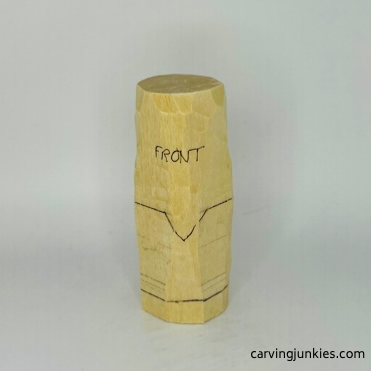 1. Front guidelines with wood reserved for beard
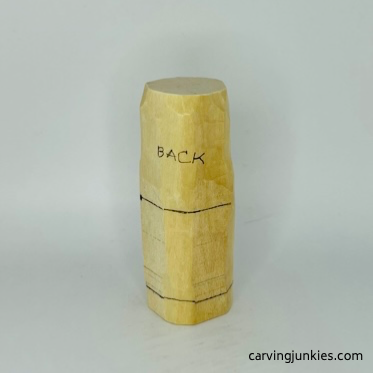 2. Back guidelines
Nisse wood carving: Separate the shoes and head
Using stop cuts, separate the shoes (photo 3) and the bottom of the head (photo 4). When you are done, the nisse wood carving should look like photo 5.
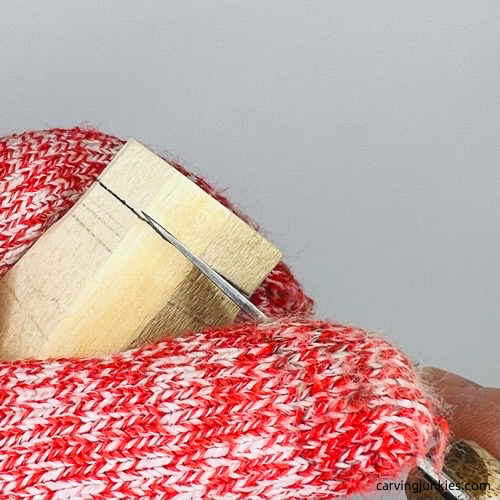 3. Making stop cut for shoes
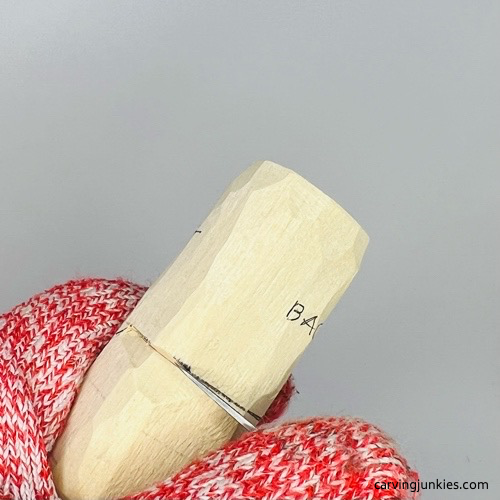 4. Making stop cut to separate the head
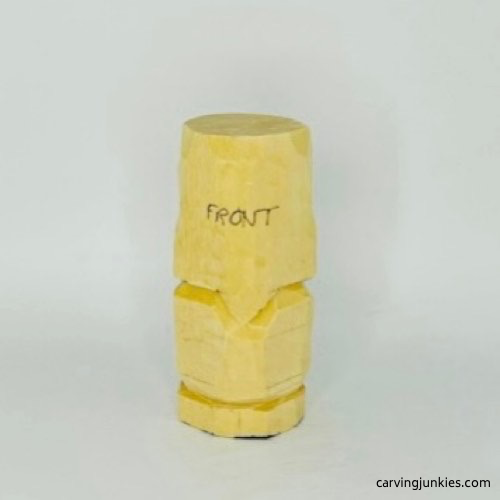 5. Head and shoes are separated
Nisse wood carving: Round the head back
Use push cuts (photo 6) to round back the head (photo 7).
Turn the nisse wood carving upside down and mark the areas of wood to remove to shape the shoes (photo 8).
Use a V-cut to split the shoes (photo 8) on the front. To prevent breaking your knife, start with a small V-cut, and make additional V-cuts, until you can easily slide the wood off from each side. Tip: You may want to use a sturdy roughout knife here.
Split the shoes on the back in the same way.
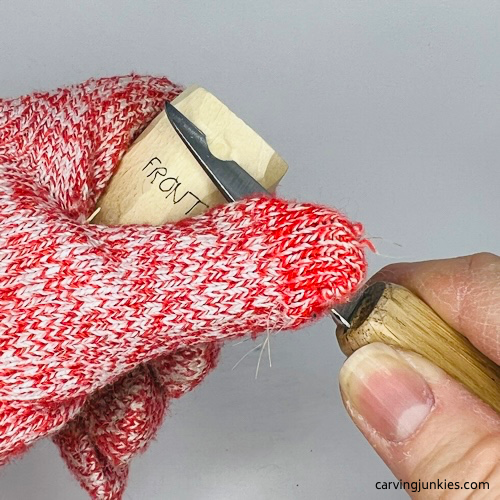 6. Rounding back the head
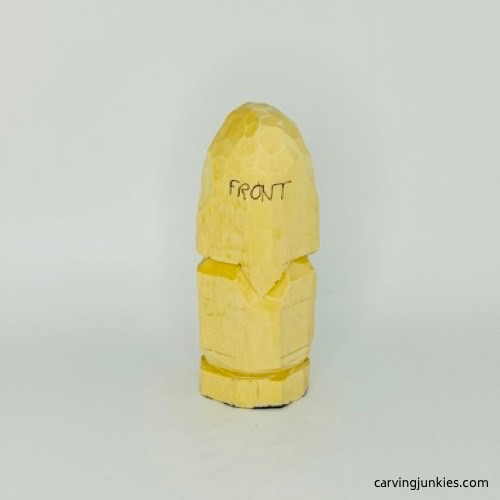 7. Head is rounded back
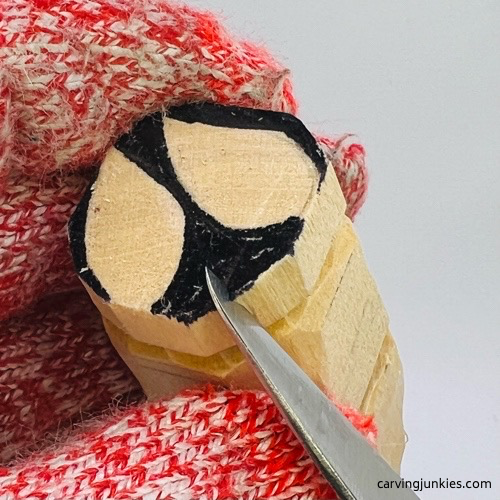 8. Making a V-cut to split the shoes
Add some details to your nisse wood carving
Use your knife to remove wood from the sides and to round the shoes (photos 9-12). You will refine the shoes later. Also, narrow the body a little all around and draw on the details, including the porridge bowl (photo 9), hands (photos 9-11), and arms (photos 9-12).
The bowl is about 1/4-inch (0.6 cm) square. The arms are roughly 1/4-inch (0.6 cm) wide. The hands are a tad more than 1/4-inch (0.6 cm) wide.
Draw the set up for the nose on the front using our triangle-by-triangle nose carving system, and draw the hat line on the face (photo 9). The finished nose is about 1/2-inch (1.3 cm) wide and 1/4-inch (0.6 cm) tall. Make your nose box slightly larger than these dimensions.
Roughly sketch the apron on the front and back (photos 9 and 12). Draw a line all around to mark the top of the pants (photos 9-12).
Also, mark a little Y on the backside that you will carve on the tush (photo 12).
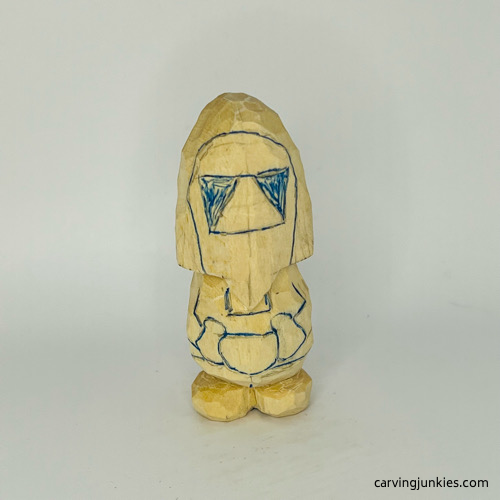 9. Front view of drawn details 9. Front view of drawn details |
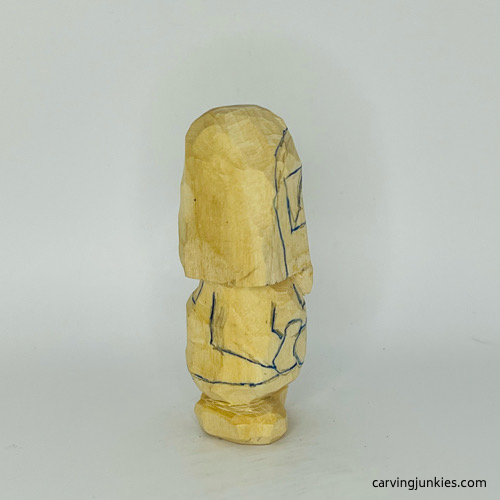 10. Right view of drawn details 10. Right view of drawn details |
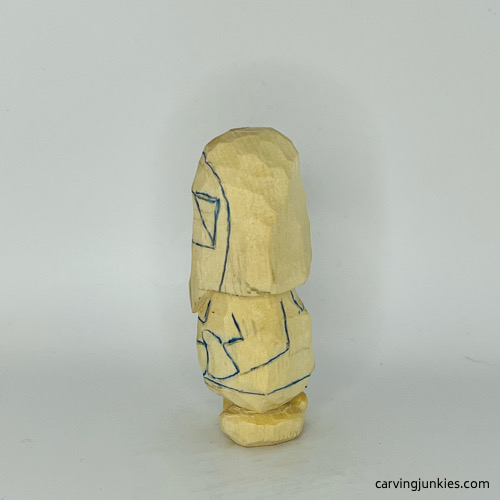 11. Left view of drawn details 11. Left view of drawn details |
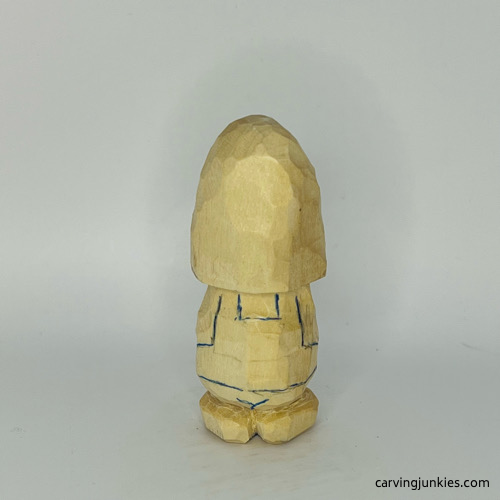 12. Back view of drawn details 12. Back view of drawn details |
Carve the face of the nisse wood carving
Make a stop cut under the nose (photo 13) and remove wood from underneath. Now, make a pyramid cut on each side where you have marked the wood for removal (photos 14,15).
Draw the second set of triangles on the nose that you will remove (photo 15). Cut into the bridge of the nose at a downward angle (photo 16). Then, cut the bottom of the nose at an angle so the nose will turn up slightly (photo 17).
Tip: You can noodle the nose further on the sides to get the shape you want after you carve the beard, mustache, and mouth.
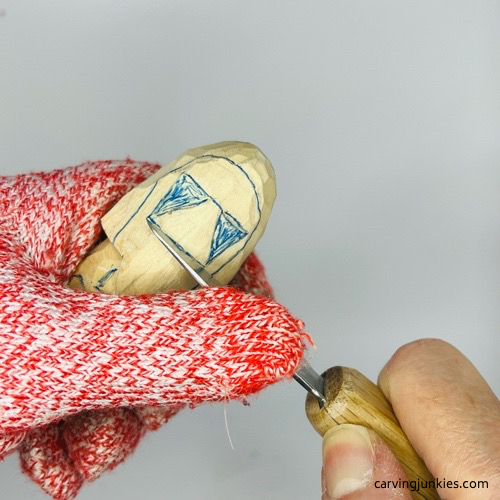 13. Making a stop cut
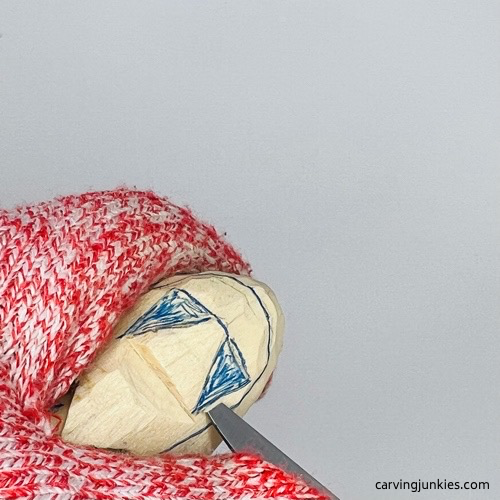 14. Starting the pyramid cut
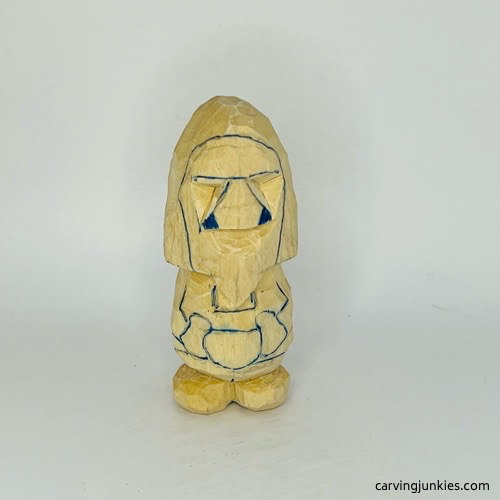 15. Marking new triangles after pyramid cuts
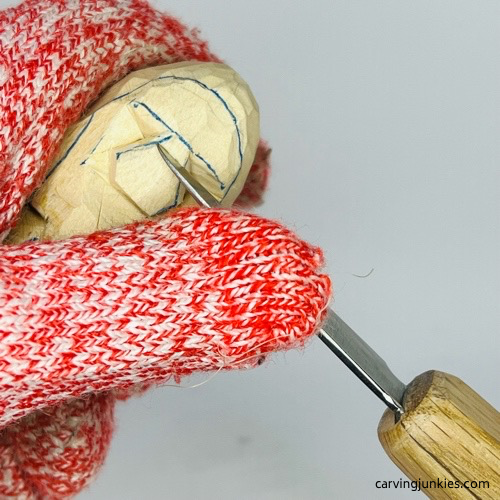 16. Cutting bridge of the nose
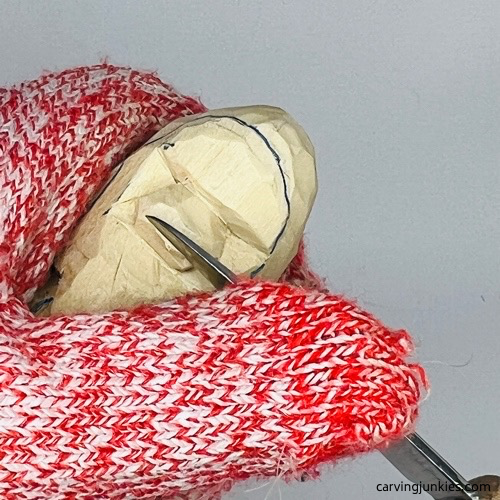 17. Cutting bottom of the nose at an angle
Continue to shape the head of the nisse wood carving
Draw the eyebrows on the nisse wood carving (photo 18). Using your knife, follow the eyebrow guideline (you can make a controlled pull cut). Then, remove wood from above the brow (visible in photo 19).
Draw on the mustache, mouth, and tongue (photo 19).
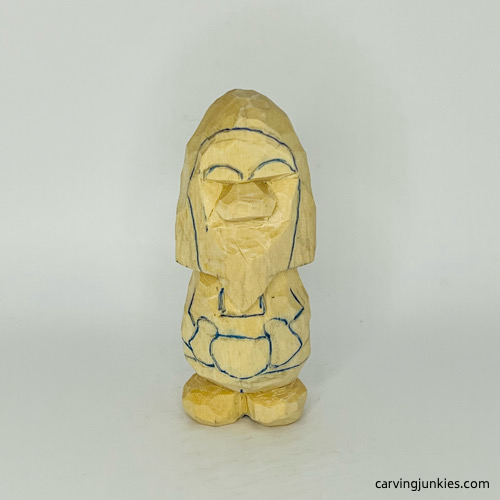 18. Eyebrows are drawn
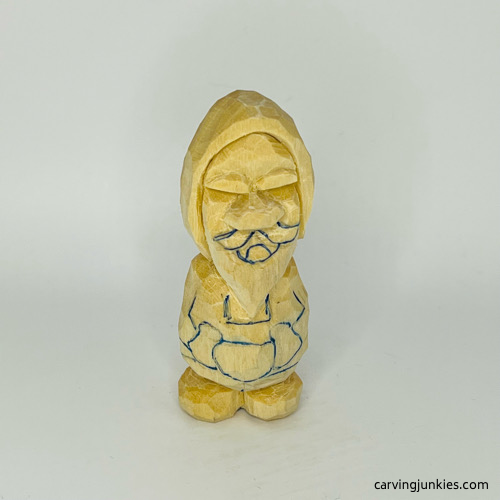 19. Eyebrows are cut
Carve more details on your nisse wood carving
Carve the outline of the mustache and mouth, carefully removing wood around your cuts as you go (photo 20). Shape the tongue (visible in photo 28).
Draw the tassel on the back of the nisse wood carving (photo 21). It should be about 3/4 of an inch (1.9 cm) long and a 1/4-inch (0.6 cm) wide.
Make a stop cut under the tassel and remove wood from underneath (photo 22). This will allow you to make a sweep cut under the tassel (photo 22) to curve the hat. Use V-cuts to separate each side of the tassel. Then, make a pyramid cut on each side to notch the tassel (photo 23).
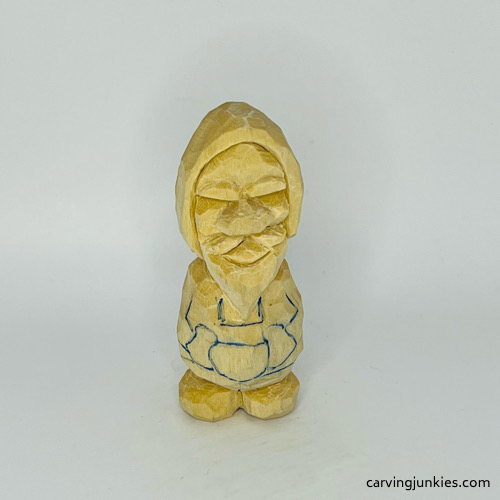 20. Face is carved
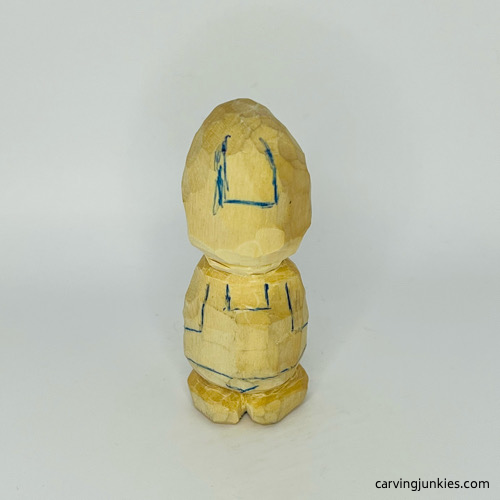 21. Tassel is drawn
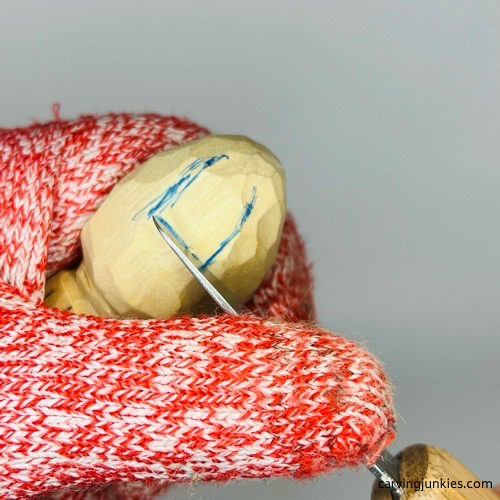 22. Starting the tassel
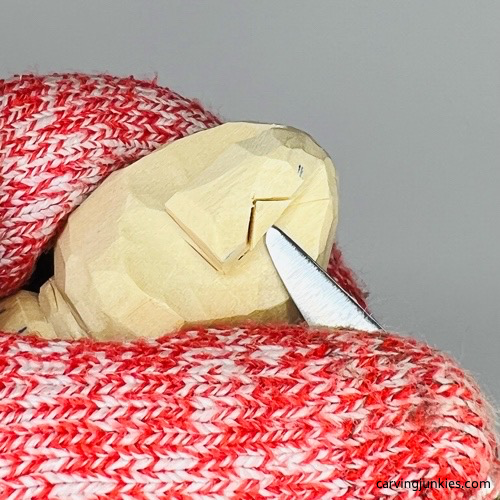 23. Notching the tassel
Carve the body of your nisse wood carving
Use stop cuts to separate the arms of the nisse wood carving, removing wood from underneath (photo 24).
Use your knife to separate the pants, the bottom of the apron, and the bottom of the bowl on the front (photo 25). Continue until all the details are separated all around.
Use a V-cut to carve the back of the arms (photo 26). You can use a stop cut or V-cut to separate the apron on the back (photo 27).
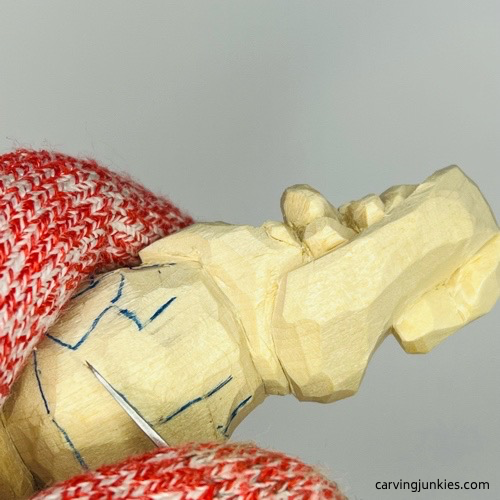 24. Separating the arm
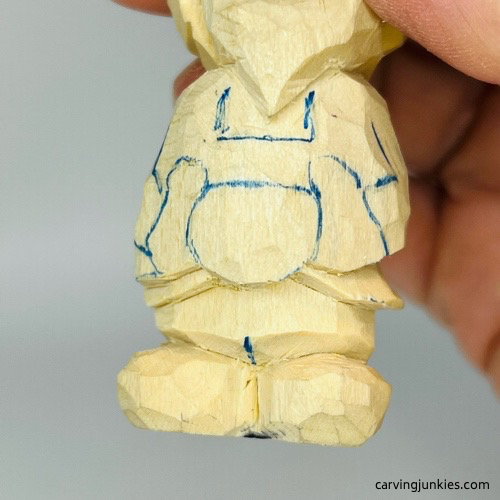 25. Separating the front details
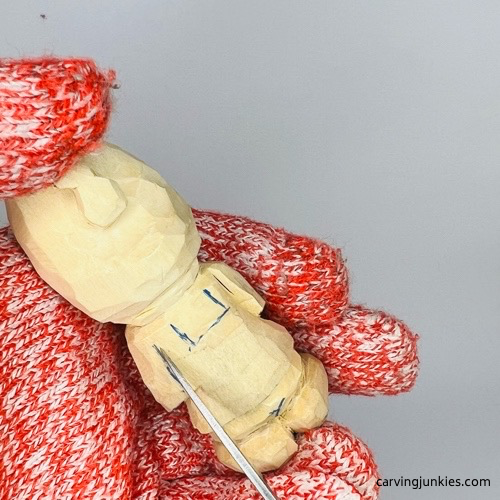 26. Making a V-cut
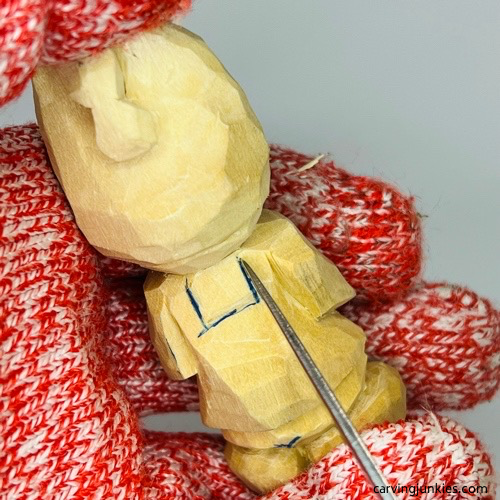 27. Separating the apron.
Carve more details on your nisse wood carving
Narrow the neck and cut back the shoulders on the front of the nisse wood carving (photo 28). You can use a push or pull cut here. Note: You may have to redraw the apron top.
Use a pyramid cut to carve the crook of the front of the arm on each side (photo 29). You can further noodle the shape.
Sketch on the fingers and the rim of the shoes (photo 30).
Very carefully, separate the fingers using small V-cuts (this is a good time to stop and strop your knife before you make these cuts). Remember, the pinkie fingers will be a little shorter than the others. I angled the bottom half of the fingers downward (photo 31) and had to re-separate the fingers. It may be easier to cut your angle before you separate the fingers to prevent the wood from crumbling.
Tip: If the fingers don’t pan out for you, simply slice them off, and you can give your nisse mittens when you paint him. Problem solved!
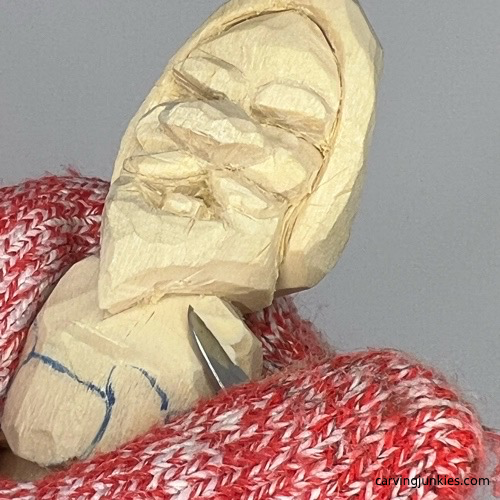 28. Narrowing the neckline and front shoulders
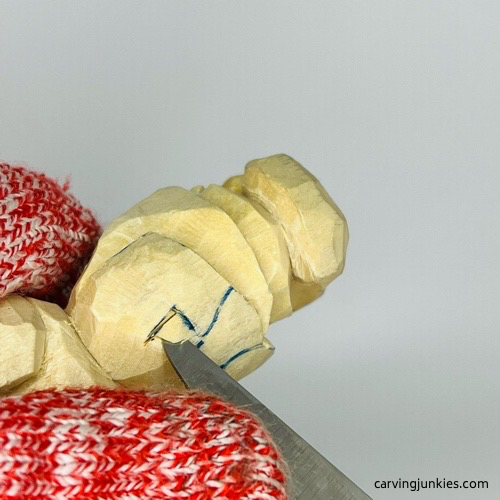 29. Completing pyramid cut in arm crook
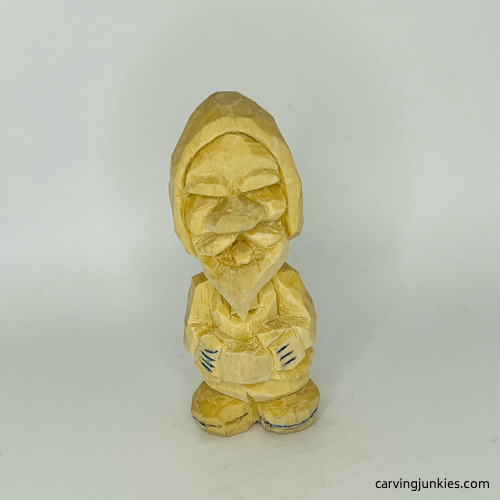 30. More details are drawn
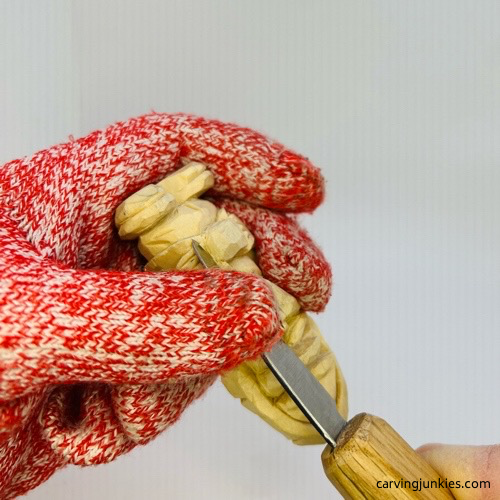 31. Cutting fingers at an angle
Refine your nisse wood carving details
Add some wrinkles to the nisse wood carving on the hat, arms, and pants (photos 32, 36-39).
Draw a few guidelines on the beard where you will (carefully) use V-cuts to notch out sections on your nisse wood carving (photos 32,33). Continue to carefully make V-cuts along the mustache and the hair on the back of the head (photos 34, 36-39).
Use stop cuts to carve a rim around the shoes of the nisse wood carving. Then, use a V-cut to carve the heel on each shoe (photo 35). Tip: mark the wood to remove on each side to ensure that the heels are symmetrical.
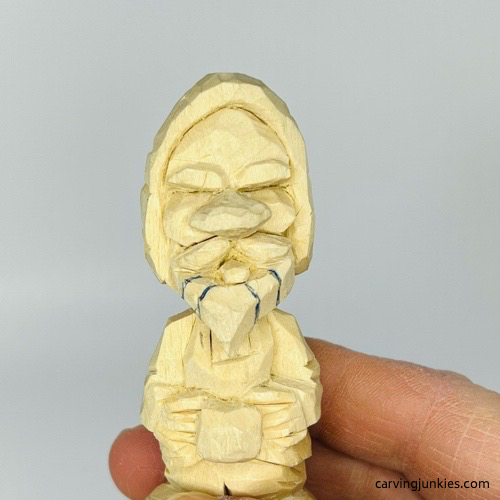 32. Beard lines are drawn
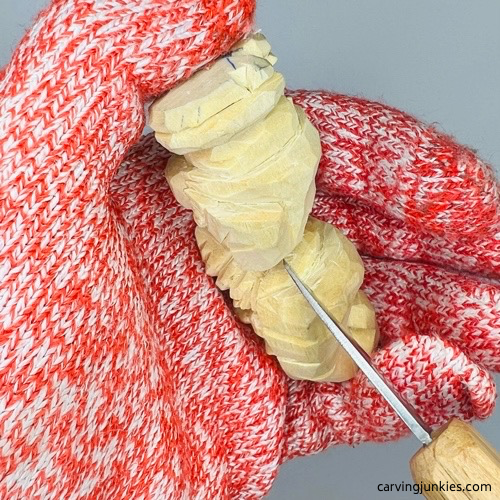 34. Making V-cuts on hair under the hat
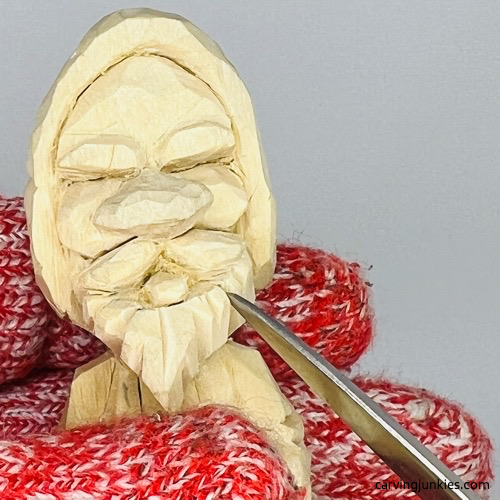 33. Carving the beard sections
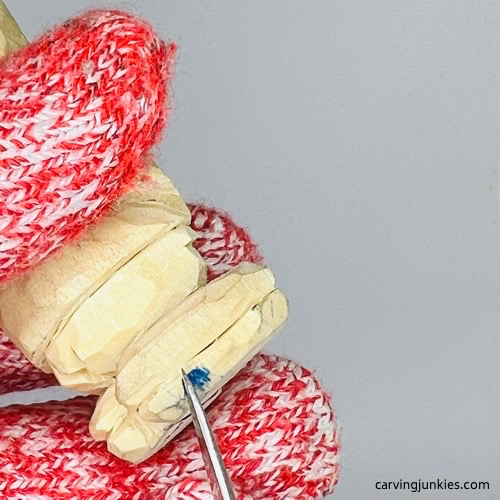 35. Cutting a heel
Get ready to paint your nisse wood carving
Use your knife to clean up cuts, or to deepen them, to prevent paint from bleeding (photos 36-39).
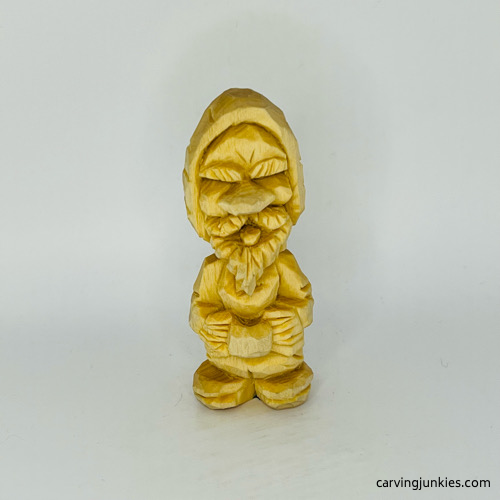 36. Front view of nisse wood carving
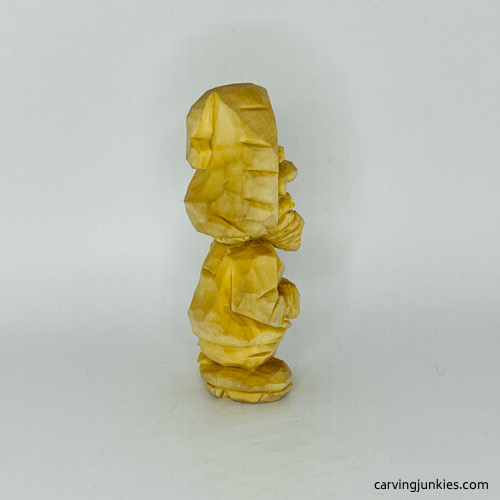 37. Right view of nisse wood carving
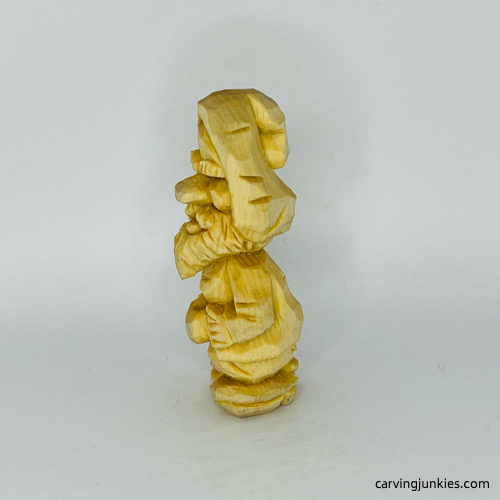 38. Left view of nisse wood carving
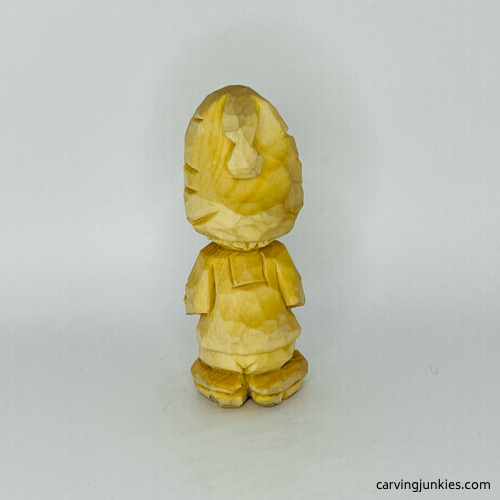 39. Back view of nisse wood carving
Paint your nisse wood carving
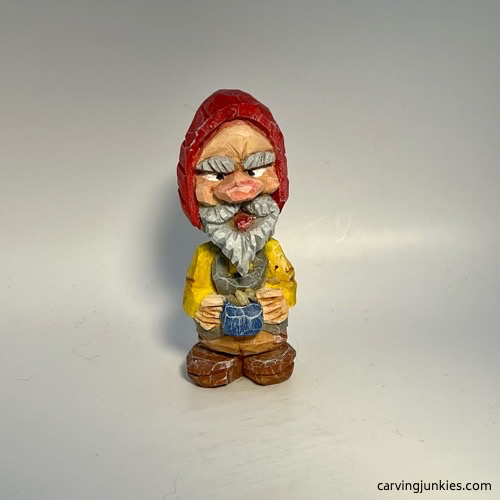 40. Painted nisse wood carving
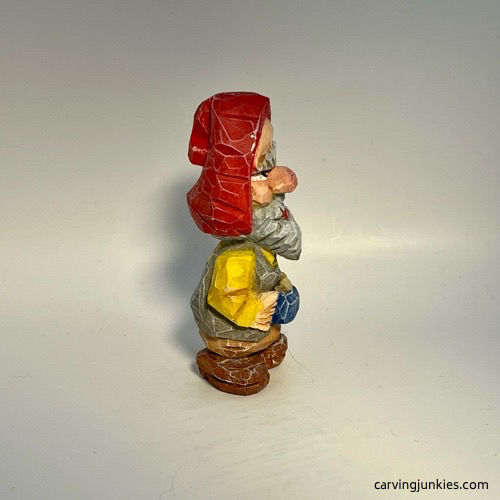 41. Right view of painted nisse wood carving
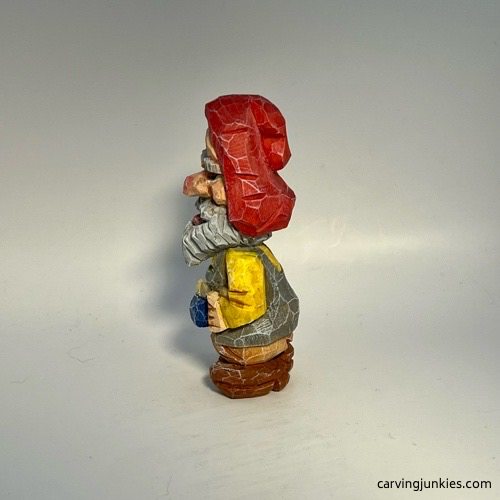 42. Left view of painted nisse wood carving
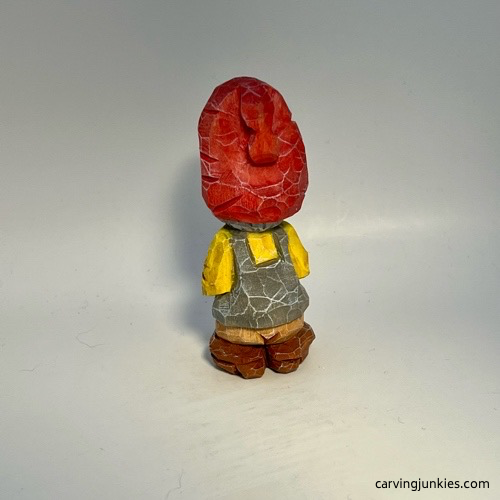 43. Back view of painted nisse wood carving
All paints listed below are acrylic and watered down (unless marked as 100%), which is referred to as a wash.
Use whatever brushes you prefer. Tip: A shading brush comes in handy for tight corners.
- Skin: 100% Ceramacoat tawny light with a tiny drop of academy burnt sienna (on toothpick).
- Beard and eyebrows: 100% dolphin gray. When dry, use 100% Artist’s Loft titanium white applied with dry brushing.
- Hat: FolkArt lipstick red wash. Reserve and water down further to accent the nose, cheeks, and tongue.
- Shirt: 100% Ceramcoat bright yellow.
- Apron: FolkArt medium gray wash.
- Bowl: 100% FolkArt true blue.
- Pants: Apple Barrel classic caramel wash.
- Shoes: Academy burnt sienna wash.
- Eye whites: 100% Artist’s Loft titanium white.
- Pupils: Black Tombow water based N15 marker.
- Porridge (optional): Glue a few grains of uncooked brown rice (cut in half) into the bowl.
- Finish: Howard’s Feed-N-Wax.
Want some awesome painting tips? Click here.
Nisse wood carving tutorial summary
- The nisse is a beloved character from Scandinavian folklore.
- You can change up the colors of your nisse wood carving clothes and hat (but red and gray are traditional).
- Take your time carving the fine details, like the beard and eyebrows.
- Use our triangle-by-triangle nose carving system to easily carve a big, humorous nose.
- To learn more about nisses, click here.
Get 50 Wood Carving & Painting Tips when you join our FREE Covered in Chips club.
Share this page
carvingjunkies.com never sells your personal information.
This site uses cookies for its operation and to enhance your experience. As an Amazon Associate and Focuser Carving affiliate we earn from qualifying purchases.
Home | About Us | Privacy Policy | Terms of Use | Contact | Sitemap
