- Home
- Wood carving caricatures
- How to carve a nose
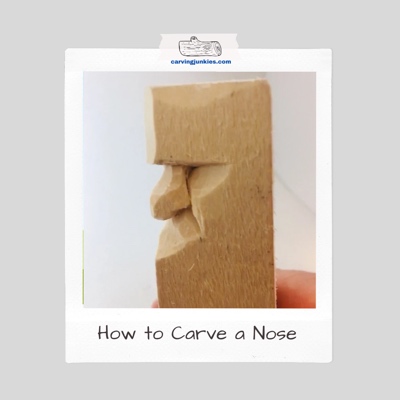
How to carve a nose successfully
Here’s our easy technique for wood carving a perfect nose.
Wondering how to carve a nose effortlessly? Some carvers can carve a nose without any fuzzies or wood splitting. They make it look so easy.
This page provides helpful tips and a tutorial for our triangle-by-triangle nose carving technique.
Our technique is designed to help you achieve the right proportions for creating a perfect nose with a knife (plus an optional gouge for the nostrils) without too much fussing or cussing.
With a little practice, you will be carving a nose with ease, time after time.
How to carve a nose: What are you aiming for?
The first step to learning how to carve a nose is to decide what type of nose you want.
For example, do you want to realistic nose or a caricature nose?
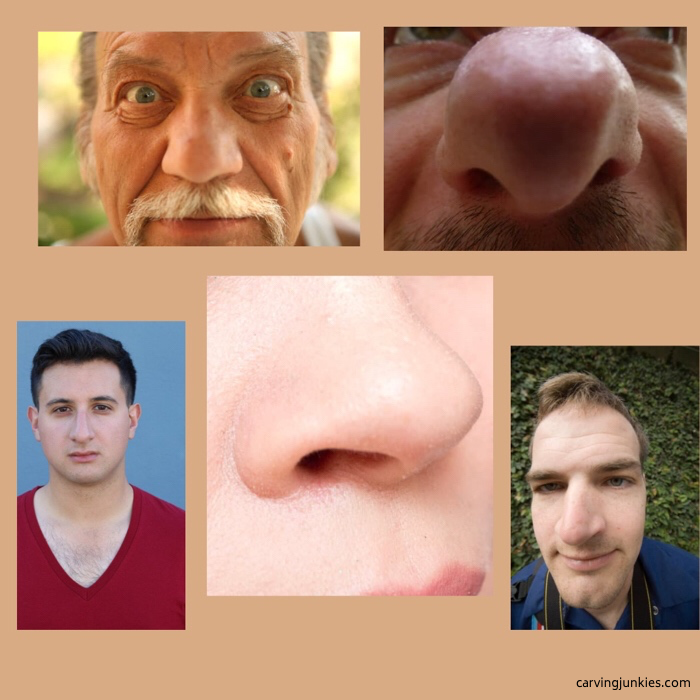 Noses vary widely
Before you pick up your knife, look at photos of different noses (online photo stock companies are a great resource for them) or take a selfie of yourself.
As you study the lines and angles of different noses you may notice that:
- Men's noses are different from women's noses (female noses tend to be narrower).
- A bulbous nose or one that is upturned (concave nose) can look cute or goofy.
- A big, wide "hook" nose (convex nose) can look humorous.
When you are wood carving, something as simple as changing the nose length will create a very different carving. Or making eyebrows a little higher than normal can add length to a nose.
How to carve a nose: Step-by-step
Here is what you will need for our how to carve a nose tutorial:
- A basswood block (ours is 1 x 1 x 4 inches or 2.54 x. 2.54 x 10.16 cm).
- Knife of choice (we used a straight edged 1 1/2 inch knife).
- Optional: U gouge for curving the nostrils.
- Pencil with eraser.
You will work off the corner, which gives you a ready-made facial plane to achieve the desired depth for carving your nose.
How to carve a nose tutorial at a glance
How to carve a nose: First triangle
- Start by drawing a triangle on the corner to mark the nose. Go bigger than you intend so you have extra wood to play around with. Also draw a line across the top of the triangle to mark the eyeline (photo 1).
- Tip: We prefer a straight eyeline so you can easily clean up wood around the nose. You can always reshape the eye socket with a curve later.
- Erase the top part of your triangle so the bridge of your nose will be wide enough, and to avoid your nose having a narrow point (photo 2).
Tip: Make your first triangle wider than you want your nose to be.
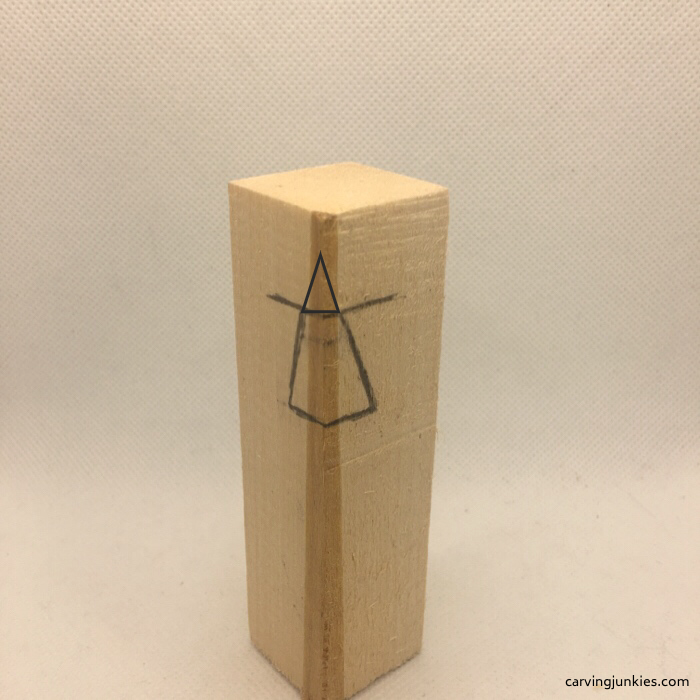 1. Triangle and eyeline are drawn
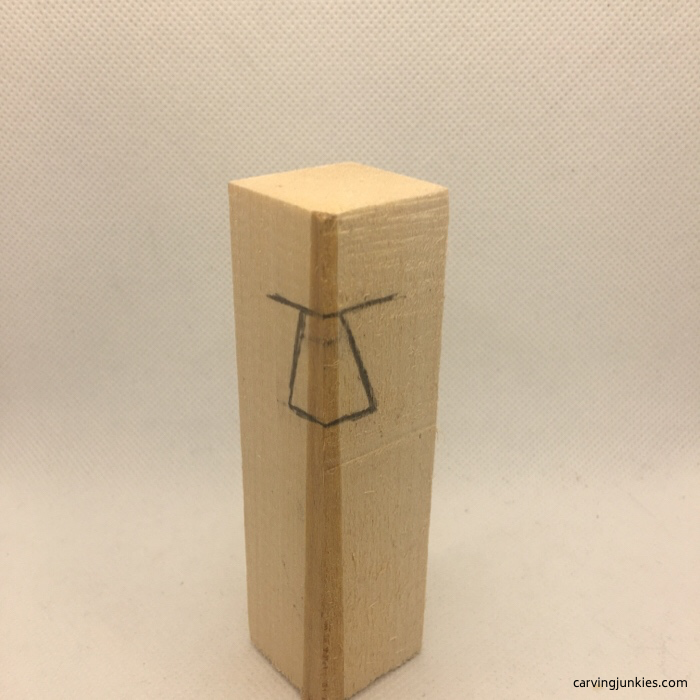 2. Triangle top is erased
How to carve a nose: Next triangles
- Add an upside-down, colored triangle to each side of your first triangle to guide where you will remove wood (photo 3).
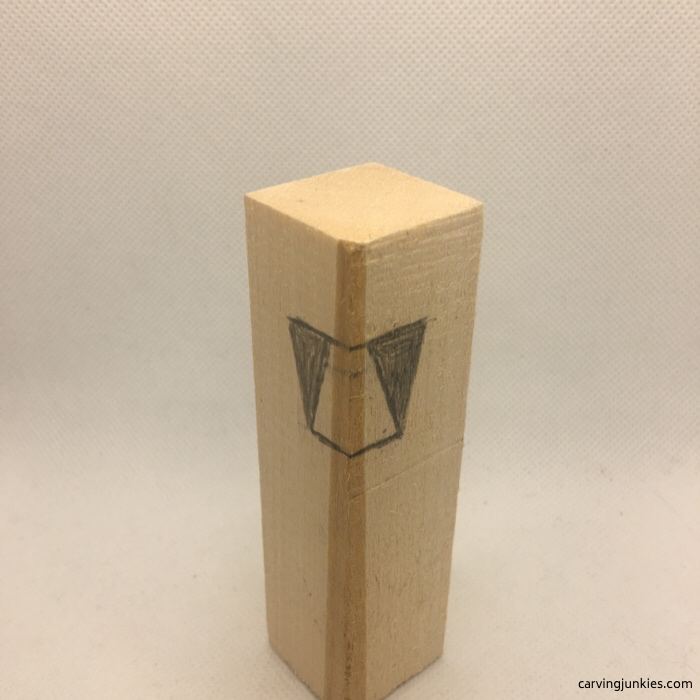 3. Colored triangles are drawn
How to carve a nose: First cuts
- Make a stop cut along the line under the nose (photo 4) and remove wood from underneath (photo 5). Note: We removed the side triangles in these photos for illustrative purposes.
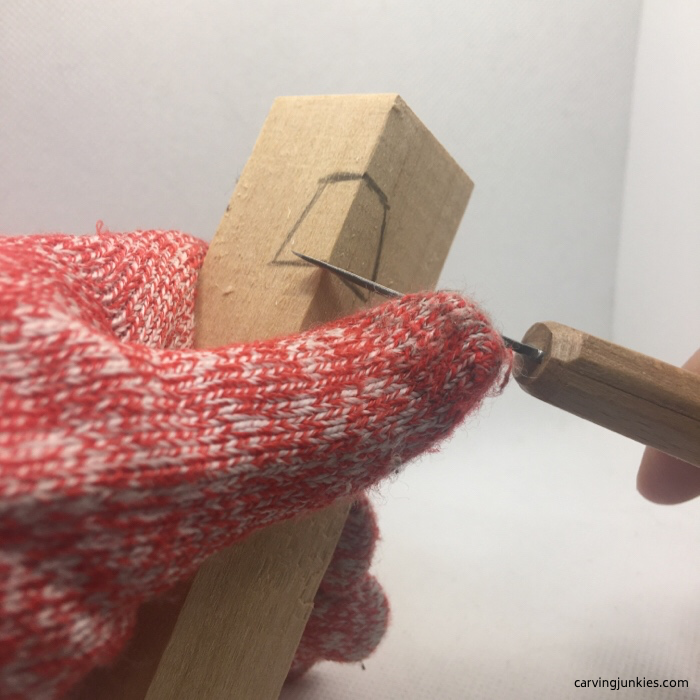 4. Stop cut below the nose
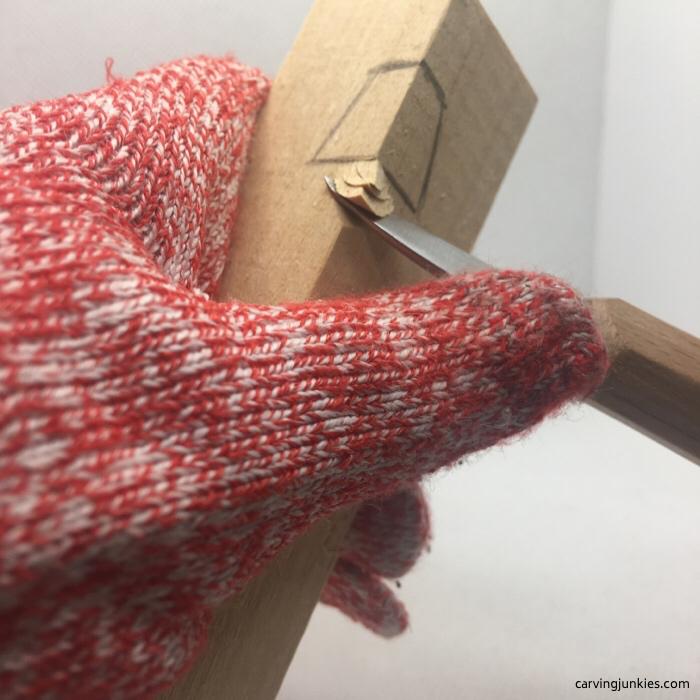 5. Removing wood underneath
How to carve a nose: Cut the triangles
- Use a big pyramid cut to remove the triangles on each side of the nose (photo 6). Make your cuts in order (as labeled in photo 6).
- Tip: Make deep cuts at an angle so they meet in the middle, which will make it easy to cleanly remove wood (photo 6). If you cannot make one long angled cut, insert the knife deeply and drag it along the guideline (at an inward angle).
- Once each pyramid wood chip is removed, you will have open access for your knife up to the eyeline to remove any fuzzies (photo 7) . This is why we love this technique for how to carve a nose!
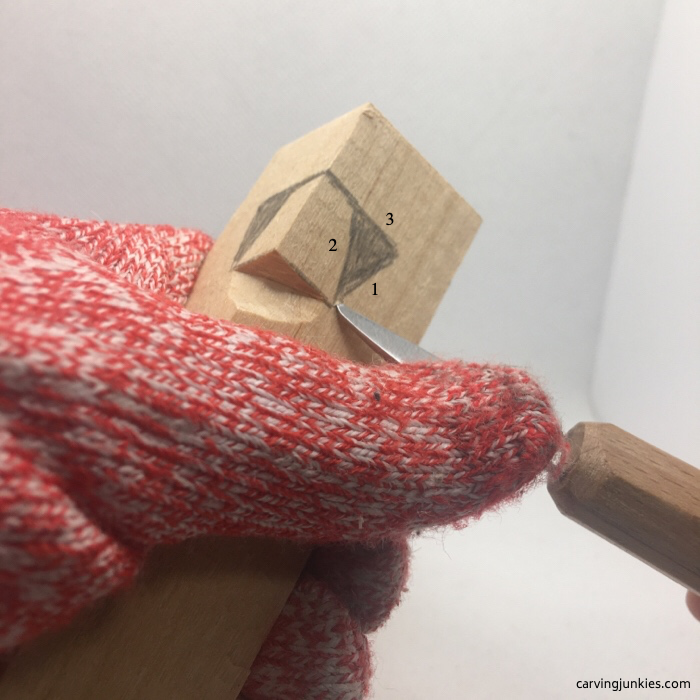 6. Make deep cuts at an angle
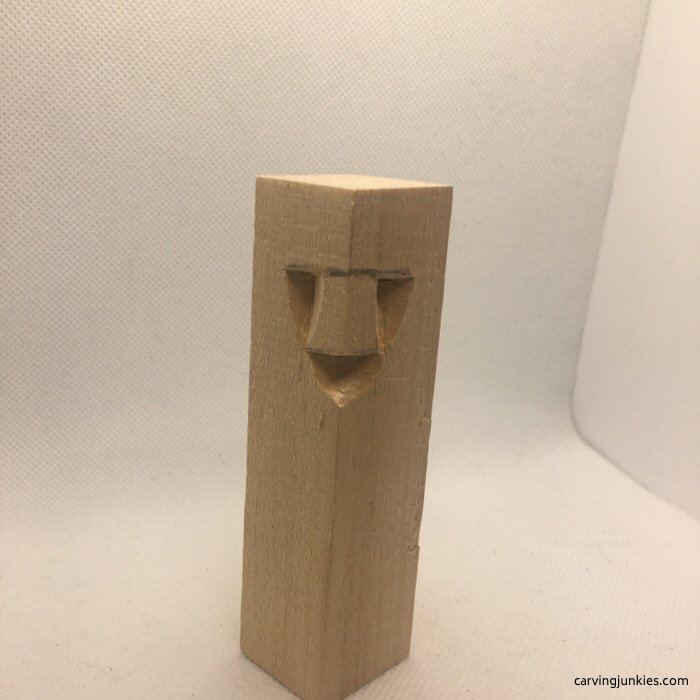 7. Triangles are cleanly removed
How to carve a nose: Next triangles
- Draw another colored triangle on each wing of the nose to mark the wood you will remove (photo 8).
- Carefully cut the side closest to the nose (#1 in photo 8) at a slight angle. Go slow to avoid cracking the nose (photos 8,9). Slice any remaining wood off from underneath (photo 10).
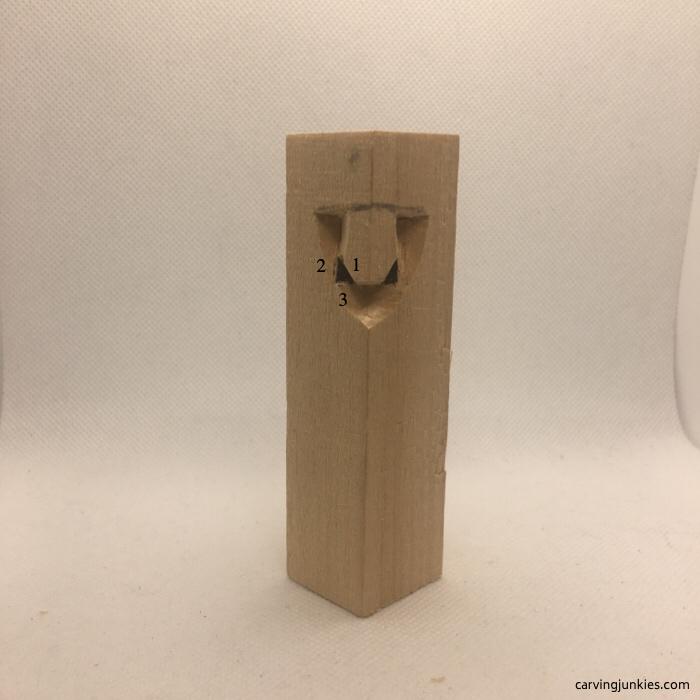 8. Wood to remove is marked
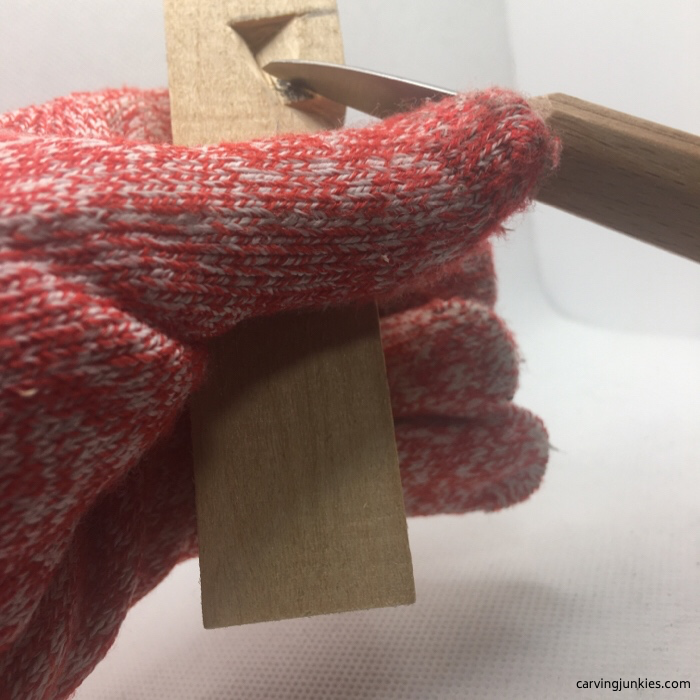 9. Cutting the nose wing at an angle
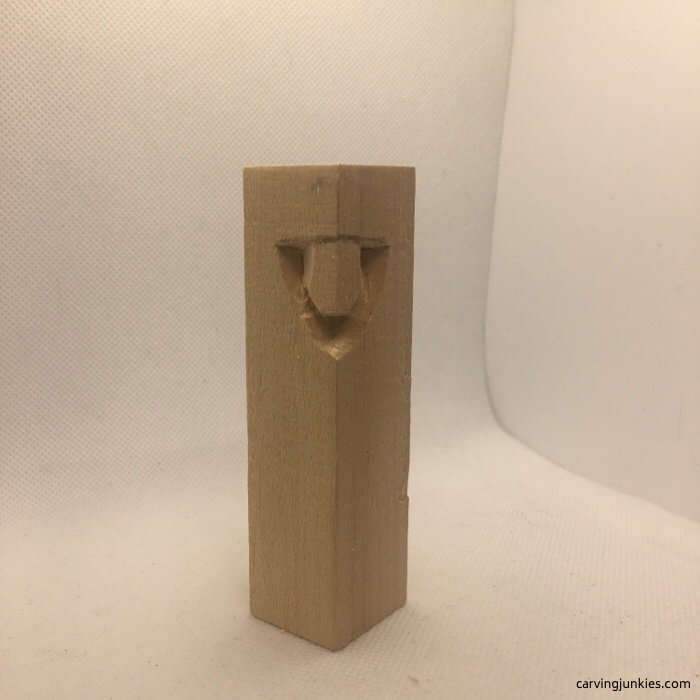 10. Both nose wings are cut
How to carve a nose: Smile line triangles
- To create your smile lines, add another set of colored triangles under the nose (photo 11).
- Using a pyramid cut, remove these triangles (make your cuts in the order that is labeled in photo 11).
- The end result should look similar to a letter M that is wider across the middle (photos 12,13), which is the way caricaturist Marv Kaisersatt teaches carvers how to carve a nose.
 11. Draw another set of triangles under the nose
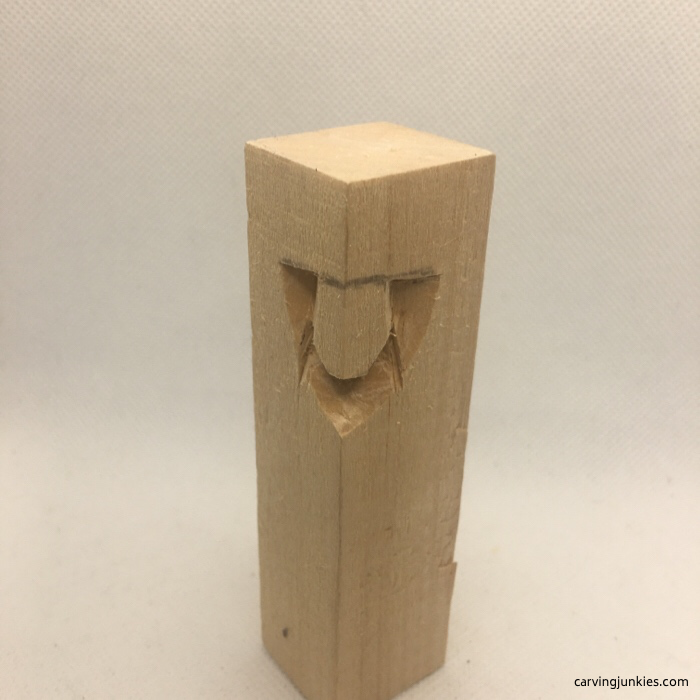 12. Smile lines are cut
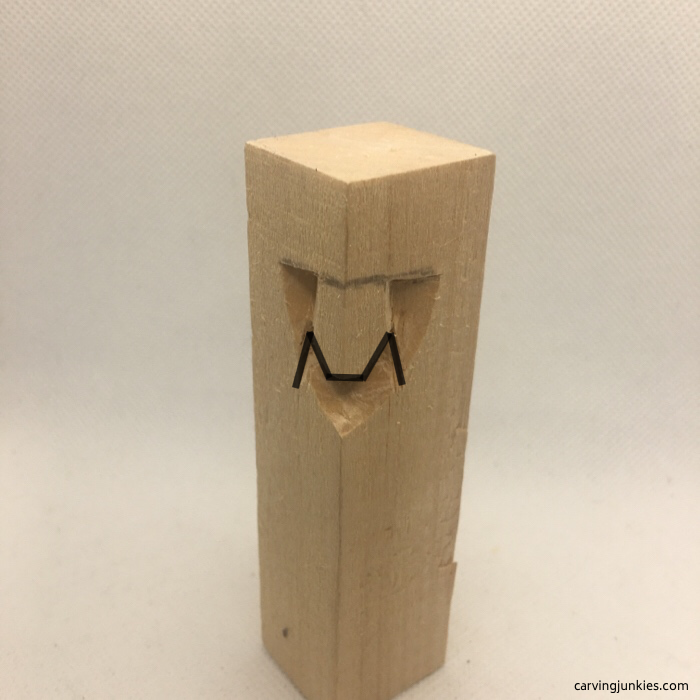 13. Think of a wide letter M (Kaisersatt)
How to carve a nose: Add details
- If there is one tool for wood carving worth buying, it is a laminated U gouge for shaping the nostrils. Gently twirl the gouge in a half circle to cut each nostril (photo 14), using your knife to carefully remove the wood from underneath. If you do not have a U gouge, carefully cut the nostril with a sharp detail knife to make the same curves (this may take some practice and go slow so you do not to crack the nose).
- Tip: Turn the piece upside down to see if the nostrils are symmetric.
- After the nostrils are completed, shape the nose by sweeping your knife upward (while turning your wrist) to create a slight curve at the bridge (photos 15,16). Keep going up to create the dent on the forehead between the eyes (photo 16).
- Tip: Make sure you are carving with the grain or the wood will split!
- Make a few angled cuts to further define the bridge and front of the nose (photo 17).
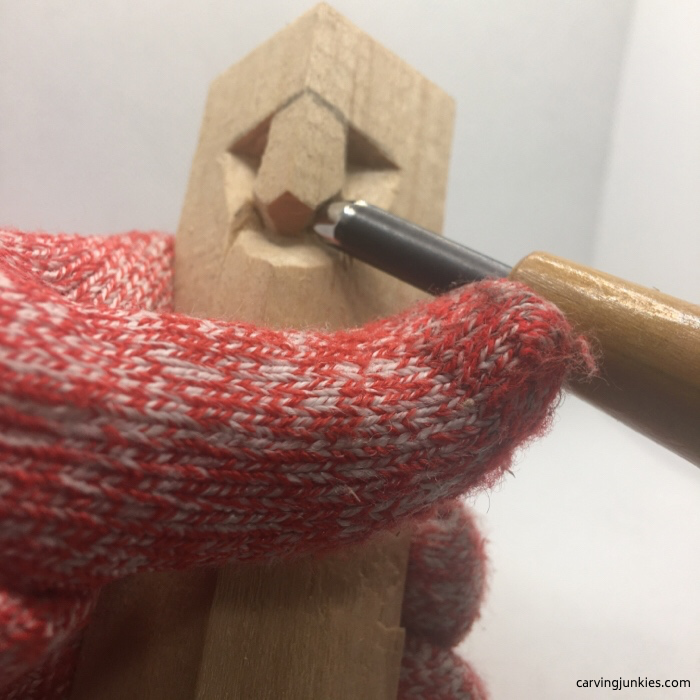 14. Cutting the nostril
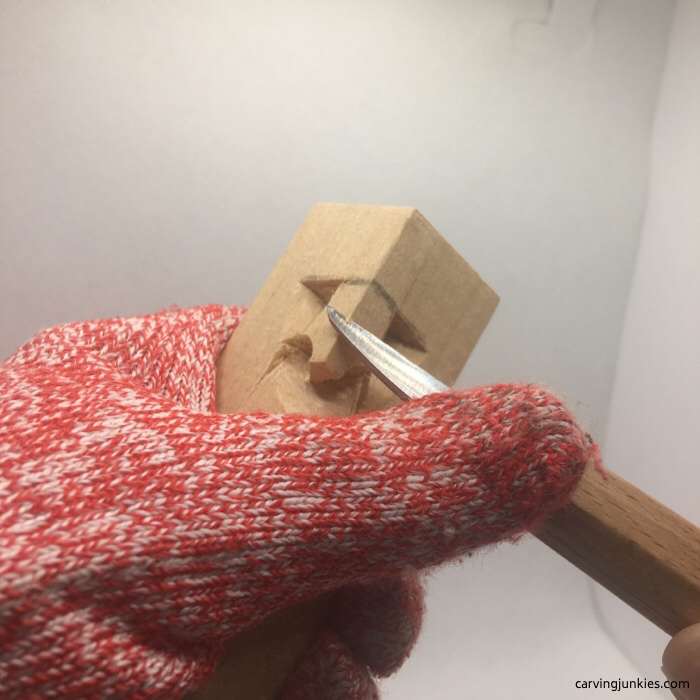 15. Sweep the knife up to remove wood
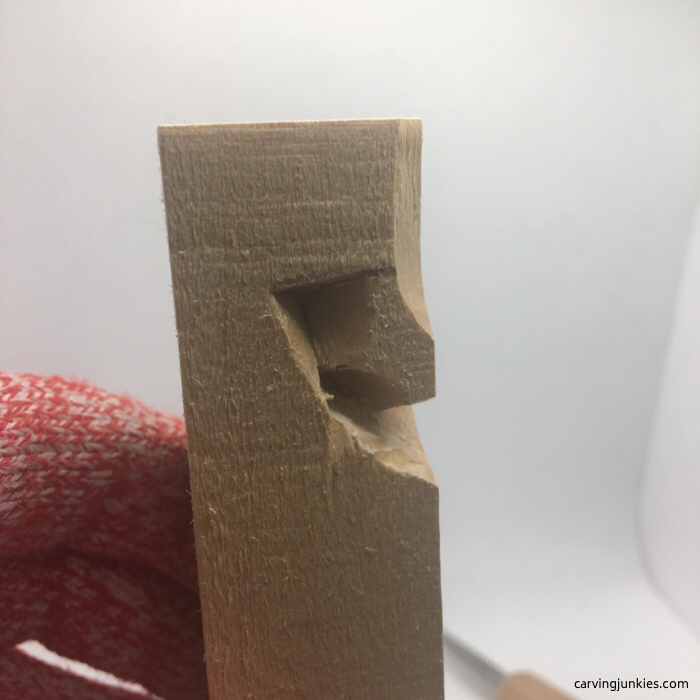 16. Progress from the side
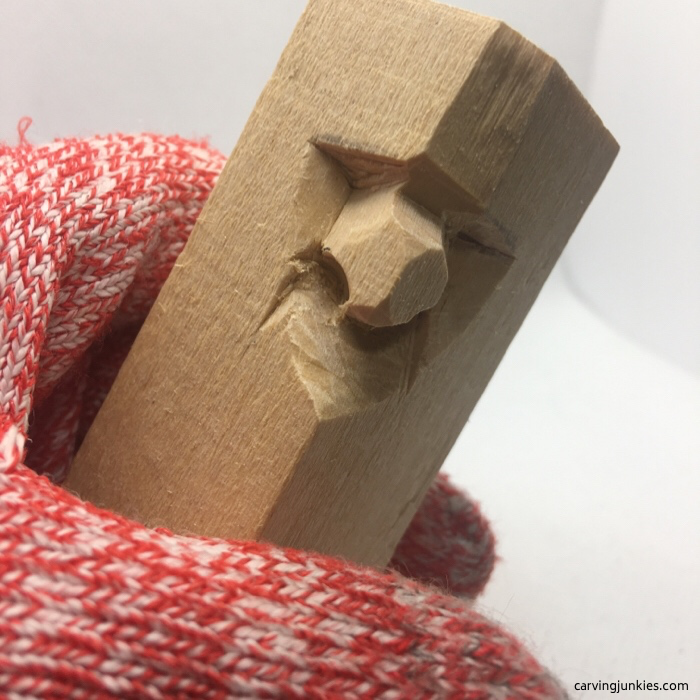 17. Nostrils and nose take shape
How to carve a nose: Shape & refine
Use your knife to shape the nose to your desired shape. Our first nose is rounded (photo 18). We kept reshaping the same nose to illustrate that you can:
- Narrow a nose by making sweeping cuts on the sides (photo 19).
- Add a few angled cuts on the front and top to create a cute, upturned nose (photo 20).
- Keep removing more wood to create a goofy nose (photo 21).
No matter what type of nose you carve, make a final tiny pyramid cut in each corner of the nostrils to create some shadow (photo 22).
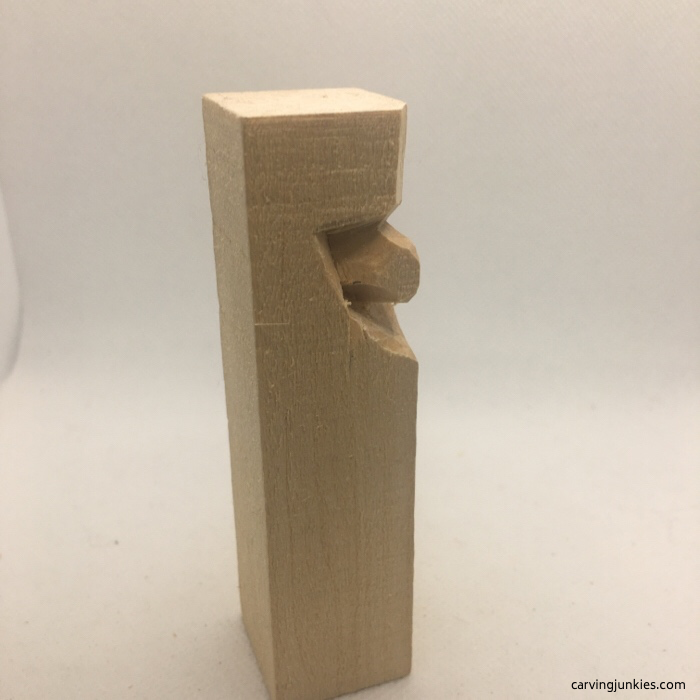 18. Rounded nose
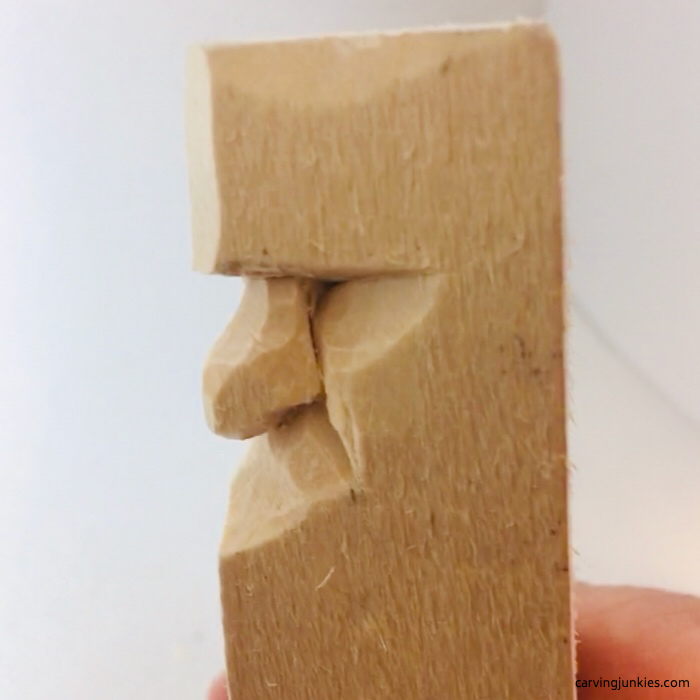 19. Narrowed nose
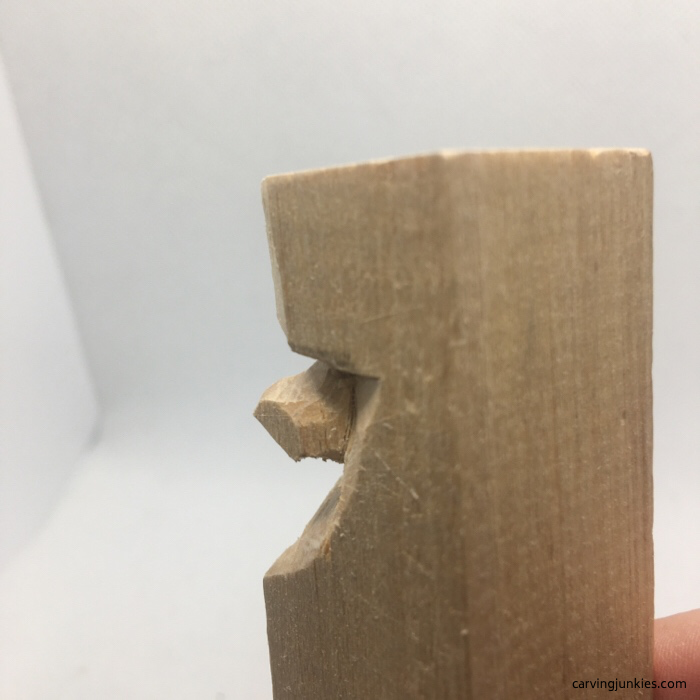 20. Cute upturned nose
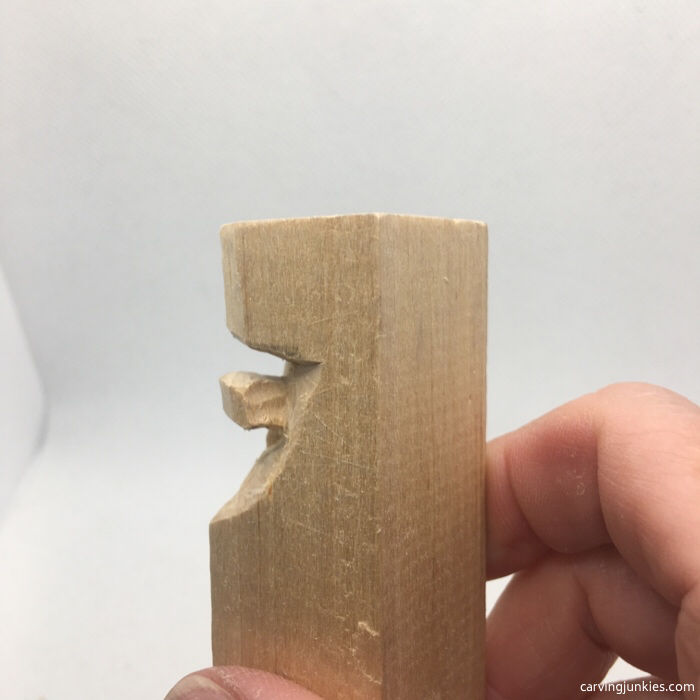 21. Keep shaping to create a goofy nose
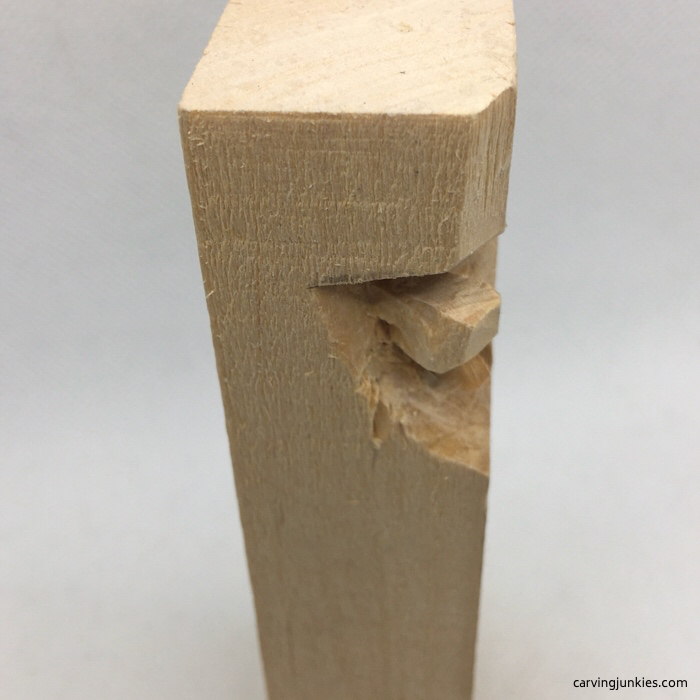 22. Add a small pyramid cut to each corner for shadow
How to carve a nose: Make a study stick
Now that you have the steps for how to carve a nose, you can make a study stick that you can refer to each time you carve (photo 23).
Start with step one on a corner; steps 2 and 3 on the next corner; steps 2,3, and 4 on the next, and so on. Number each step on the first row. Then create steps 5 to 8 a little further down on your block (photo 23).
Study sticks are great to have on hand, especially when you are learning a new carving style or technique for how to carve a nose.
As you create different types of noses, you can easily make additional study sticks to make it easy to recreate the steps.
Our study block is 1 x 1 x 4 inches (2.54 x 2.54 x 10.16 cm) but you can make it any size.
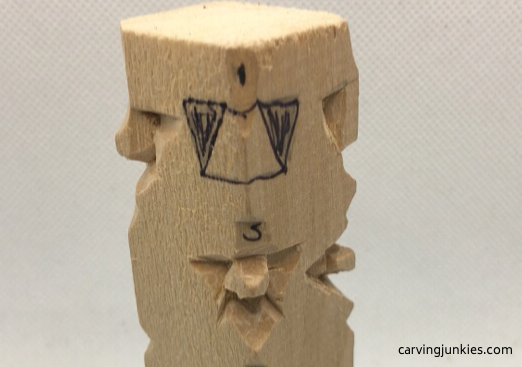 23. Homemade study stick
How to carve a nose: Sources/resources
One of the best books we know for learning how to carve a nose (and caricature heads in general) is Caricature Heads by Marc Kaisersatt.
This wonderful caricaturist provides excellent examples of different noses and a Pic-Yer-Nose profile tool. It is full of wonderful tips, techniques, and illustrations. We really wish we had this book when we first started carving and we continue to refer to it today. It is hard to come by and may be a little costly.
Carving Woodspirits: Beyond the Basics by Susan L. Hendrix and Paul "PJ" Peery is also a helpful resource.
Read our woodcarving book review page for more information and other great resources.
How to carve a nose summary
- Carving noses does not come naturally to all wood carvers.
- Study different noses before you start to carve.
- Use our triangle-by-triangle technique to help get the right proportions.
- Create a study stick for an handy reminder of the steps from our how to carve a nose tutorial.
- Practice, practice, and keep practicing until perfect carving noses comes easily.
Get 50 Wood Carving & Painting Tips
FREE when you join our free Covered in Chips Club
Your information is 100% private and is never shared. Unsubscribe anytime. See our Privacy Policy .
Share page on:
Home | Privacy Policy | Terms of Use | Contact | Sitemap
