- Home
- Things to carve
- How to carve a leprechaun
How to carve a leprechaun
We help you create a caricature that loves to dance.
LEVEL: SOME CHALLENGES
How to carve a leprechaun, you wonder? For that matter, what exactly is a leprechaun?
According to Irish folklore, leprechauns are similar to fairies, and they can be quite mischievous.
Leprechauns are creatures that tend to keep to themselves and enjoy playing practical jokes. They are also often associated with pots of gold and rainbows.
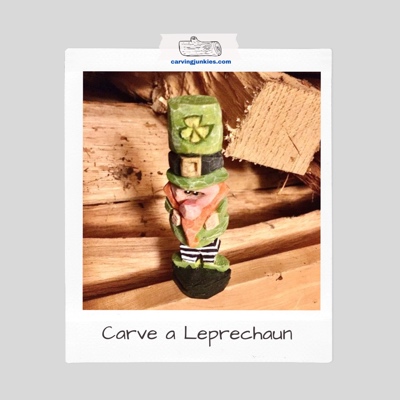
Our modern leprechaun has a round body and legs that are poised to do a jig. He’s had a few too many dark ales, which is why his nose is red. His hat features a belt, buckle, and four-leaf clover.
We hope you have as much fun carving him as we did!
What you will need for this tutorial
We use a basswood block that is 1 x 1 x 4 inches (2.5 x 2.5 x 10 cm). We often work with blocks that are only 3 inches tall and the extra inch allowed us to add more details that bring a wood carving to life.
We use a flat-edged knife (with a 1 1/2-inch blade) that we prefer to use on small blocks. A V-tool to outline the four-leaf clover, and U-gouge to carve the nostrils, are helpful (but you should be able to achieve similar results with a detail knife).
We can never stress this enough: Always wear a safety glove when you carve. We also wear a thumb guard on our carving hand.
Tutorial at a glance
Watch this short progression video to see the key steps for our how to carve a leprechaun tutorial.
How to carve a leprechaun: Getting started
Draw your guidelines as follows (see photo below):
- Make your first guideline 1.5 inches (3.8 cm) from the top to mark the bottom of the hat.
- Your second guideline should be 2.5 inches (3.8 cm) from the top to mark the bottom of the body.
- A third guideline that is 3.5 inches (8.9 cm) from the top marks the bottom of the legs/shoes.
- Draw a fourth guideline that is about 3.75 inches (9.5 cm) from the top, which marks the double-tier base that you will carve for decoration and added stability.
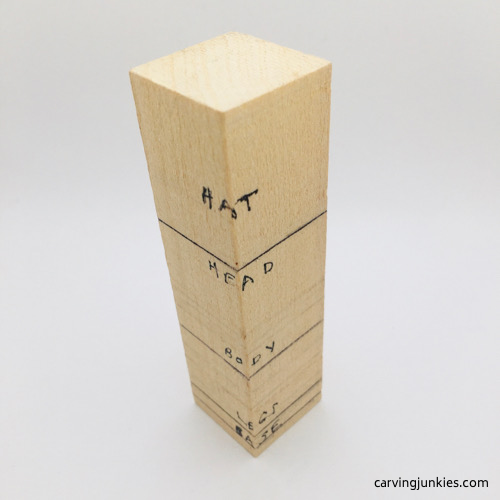 Start with your guidelines
How to carve a leprechaun: Separate the base
Using your knife, make a stop cut at each corner of the base, and remove wood from underneath (photo 1). Continue between the corners (all around the wood block) until the base is separated (photo 2).
Continue this process on the next several guidelines, until the legs, body, and hat are separated all around (photo 3). Note: At this point, the back looks exactly like the front.
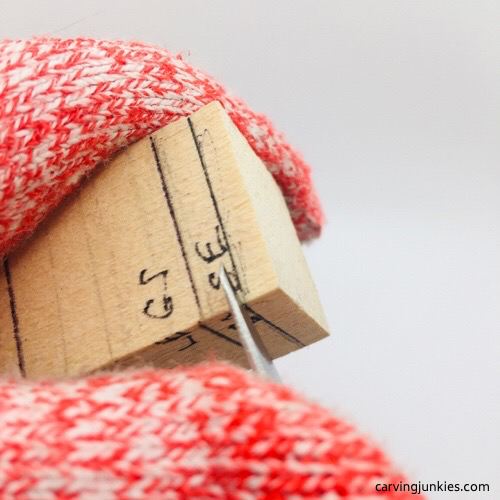 1. Making a stop cut
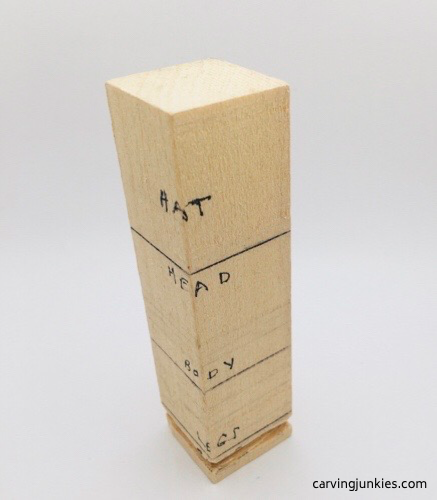 2. Base is separated all around
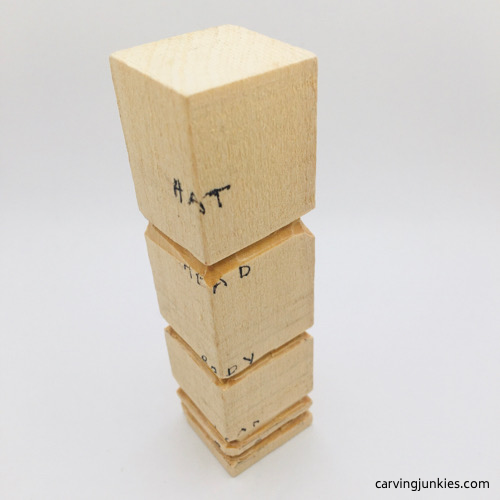 3. All separations are made
How to carve a leprechaun: Start the hat
Round all of the corners, midway on the top section of your block, to create a cylinder shape for the hat (photos 4-6). Tip: Switch to a sturdier roughout knife for faster, easier wood removal.
Sketch the hat, the hat belt, and the hat belt buckle. Color the areas on each side of the hat that you will remove (photos 5-8).
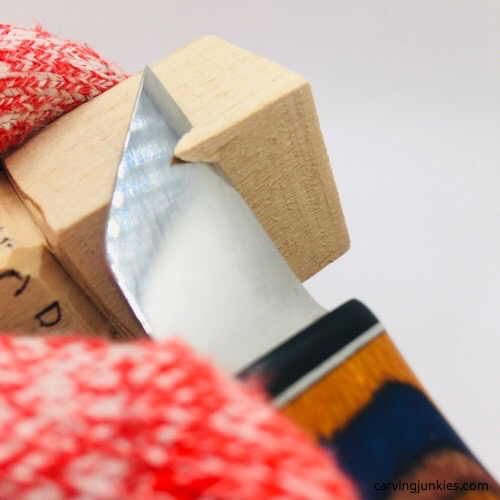 4. Removing wood to shape the hat
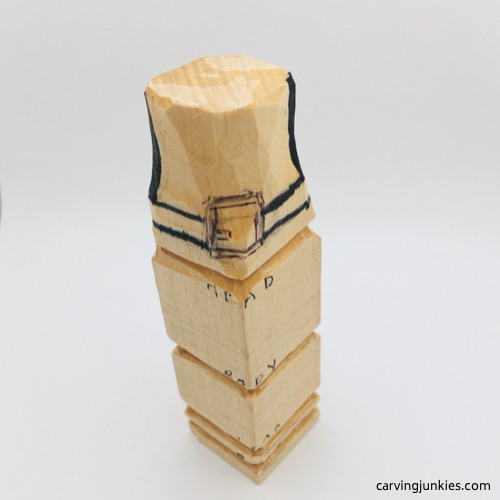 5. Cylinder shape of hat with details drawn
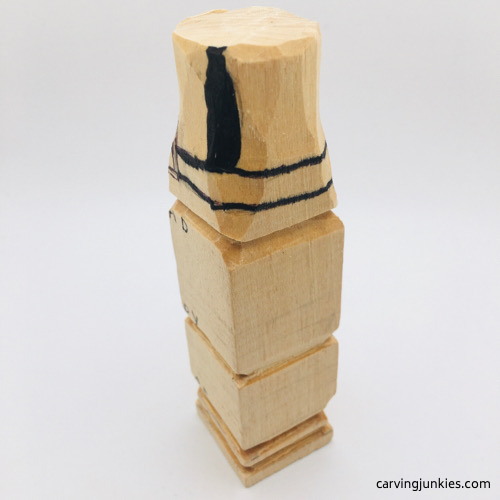 7. Wood to remove on left side
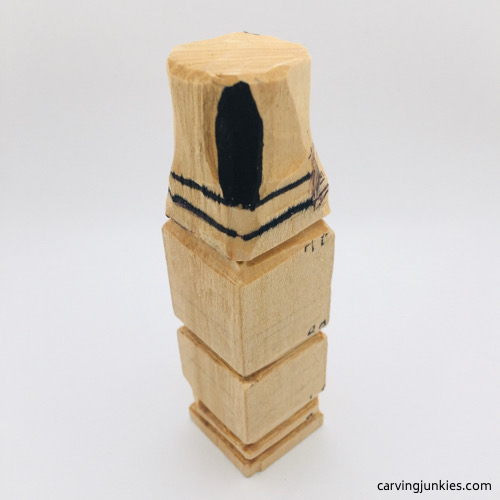 6. Wood to remove on right side
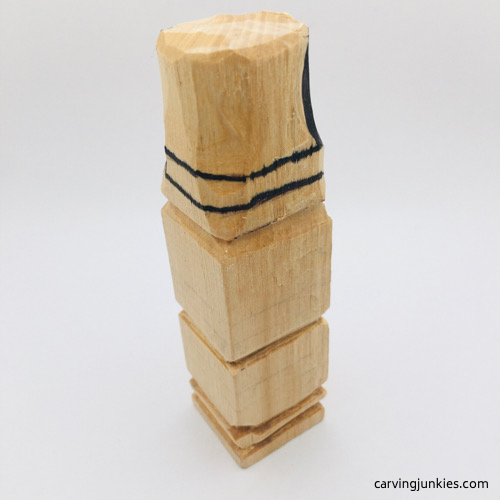 8. Back view of the hat belt
How to carve a leprechaun: Refine the hat
Using your knife, make stop cuts to separate the bottom of the hat belt, removing wood from underneath (photo 9).
Now, separate the top of the hat belt all around (photo 10).
Carve off the marked wood on the sides to narrow the hat (photo 11).
Using small stop cuts, separate the hat belt buckle and further refine the shape of the hat (photo 12).
Carefully narrow the brim of the hat by shaving off wood. Go slowly (and do not remove too much wood) to avoid weakening, or cracking, the brim (see progress photo 12).
Draw on the arms and hands, and a square box to reserve wood for the nose. Draw circular lines around the nose, which will define the face of the leprechaun (photo 12).
Also draw the beard. At this point, your leprechaun wood carving should look like photo 12.
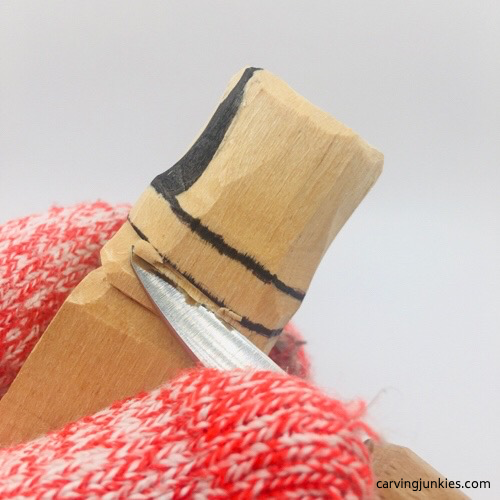 9. Making a stop cut and removing wood under it
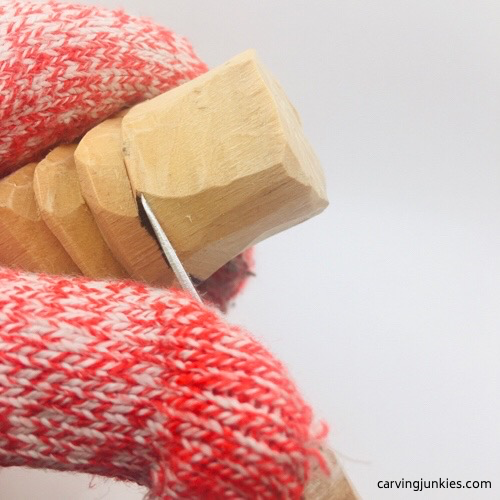 10. Separate the top of the hat belt all around
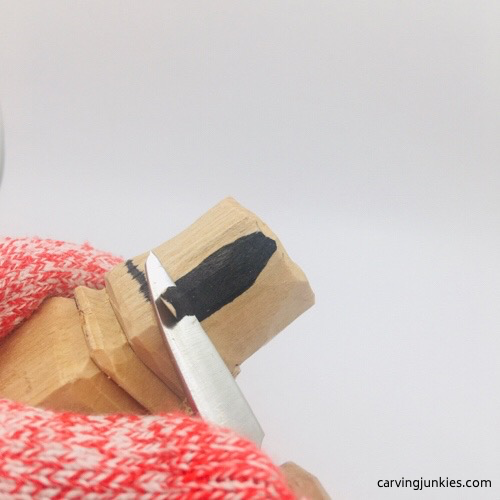 11. Narrow the sides of the hat
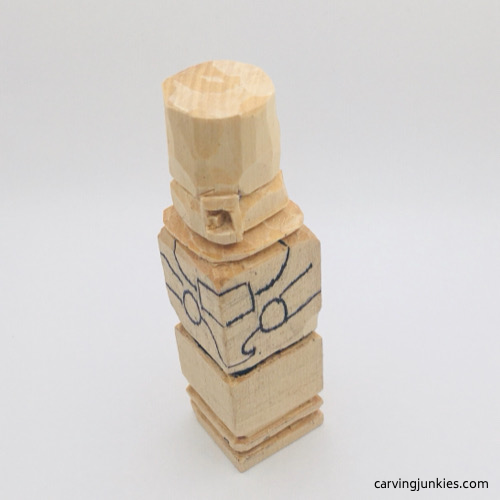 12. Hat is carved and details are added
How to carve a leprechaun: Separate the body
The leprechaun will have a short, round body.
Using your knife, round the corners all around the wood block (photo 13).
Use a stop cut to separate the bottom of the nose (photo 14) and remove wood from underneath.
Continue to use stop cuts to remove wood around the square nose box (photo 15).
Separate the cheek lines around the nose (photo 16). We dig our knife in and gently push it with our thumb. You can also work in the opposite direction using a variation of a pull cut.
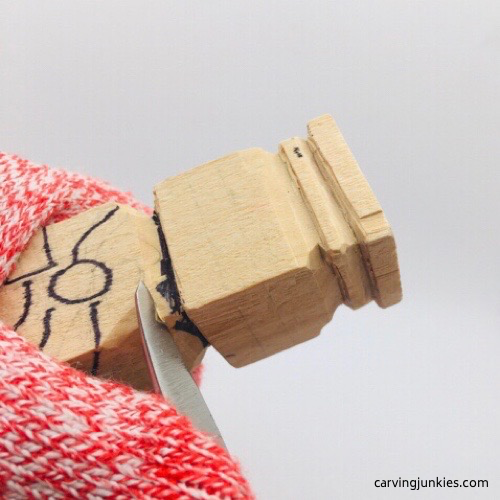 13. Rounding the lower body
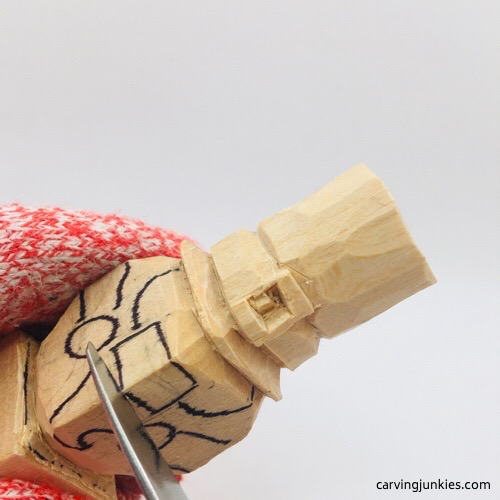 14. Making a stop cut under the nose
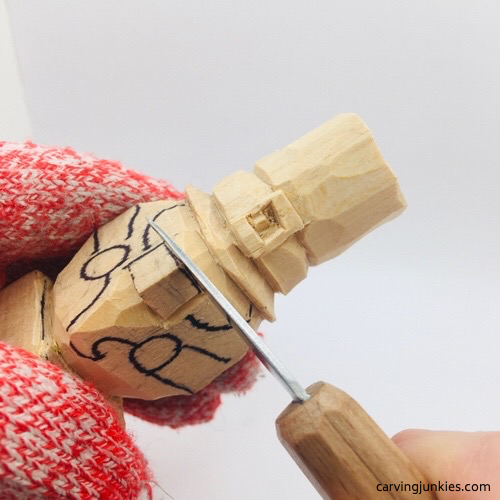 15. Separating the nose all around
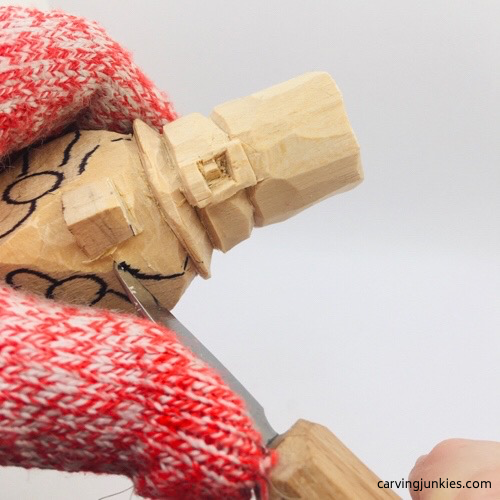 16. Cutting cheek lines
How to carve a leprechaun: Refine the nose
Mark wood to remove on the corners of the nose (photo 17). Carefully slice the wood off and round the nose (photo 18). Also, make a tiny pyramid cut at each corner of the nose to create shadow.
Evenly shave wood off above the nose to flatten the surface for the eyes (visible in photos 17-18).
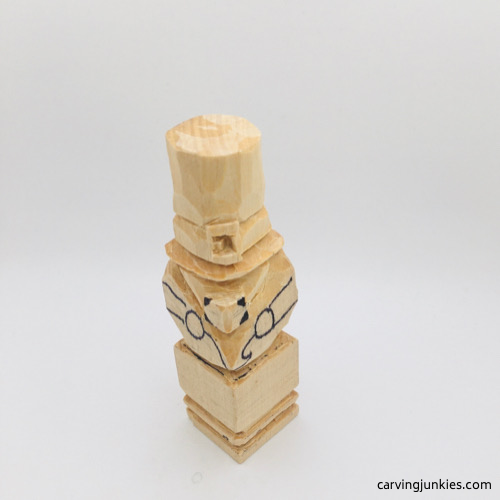 17. Wood is marked for removal
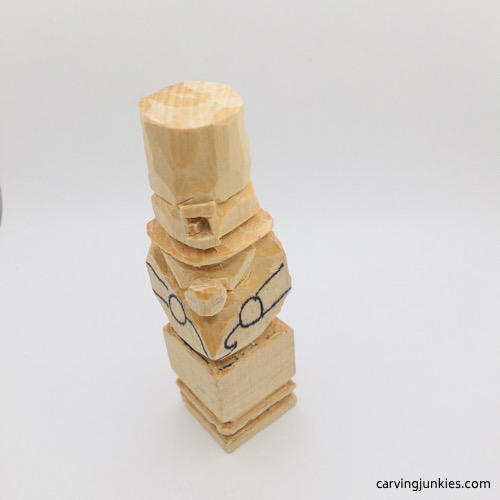 18. Nose is rounded
How to carve a leprechaun: Carve some details
Make a stop cut under the arm and remove wood from underneath (photo 19). Continue until the entire arm is separated (photos 20, 21). Repeat this process on the other arm.
Use stop cuts to separate the beard (photo 22). We use a tiny V-cut to create the curve at the bottom of the beard (most visible in photo 38).
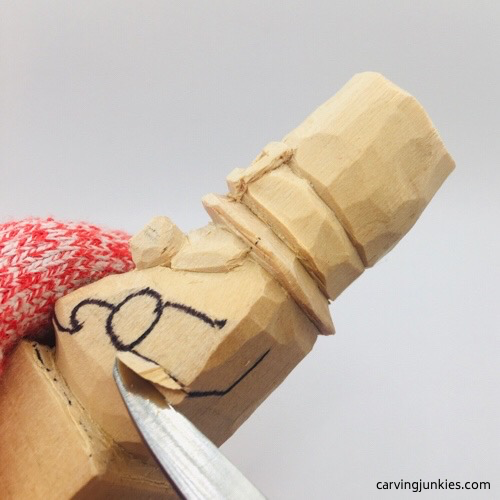 19. Using a stop cut to separate the arm
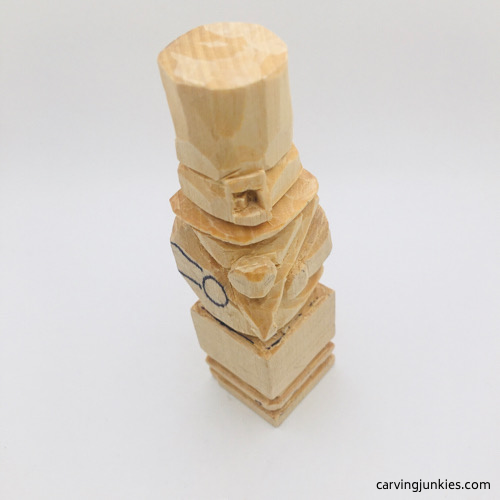 20. Arm is separated
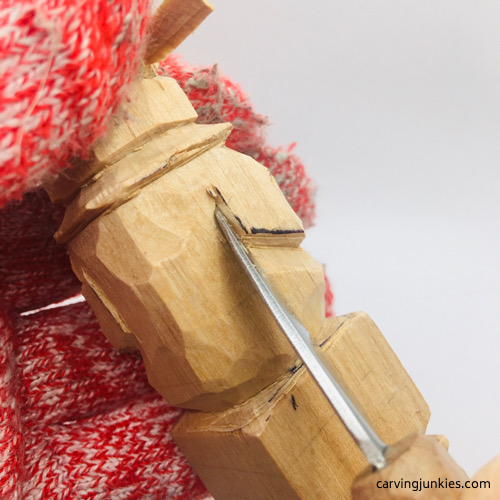 21. Separating the arm on the back
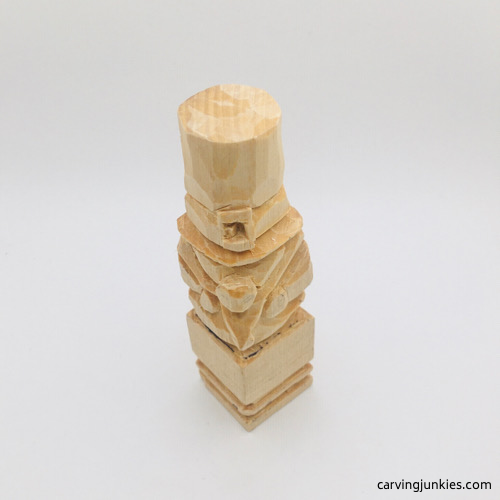 22. Details are cut
How to carve a leprechaun: Start the legs
Round down the front and back corners (photo 23) on the lower part of the carving. This will create a flatter and narrower surface for the legs.
Draw the outline of the legs and shoes on the front and back (photos 24,27). Color the wood that you will remove (photos 24-27).
Draw the four-leaf clover on the hat (photo 24). You can carve it later.
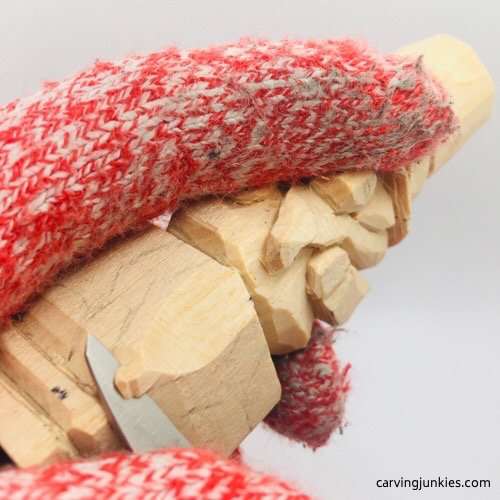 23. Narrowing surface for legs
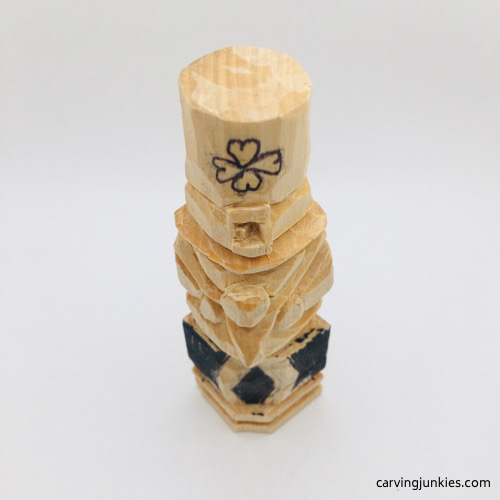 24. Legs are drawn
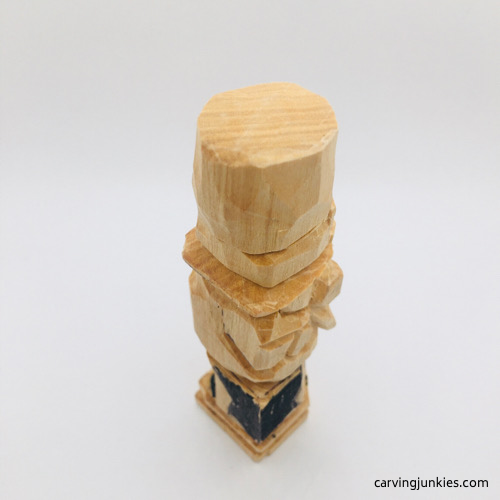 25. Right view of wood to remove
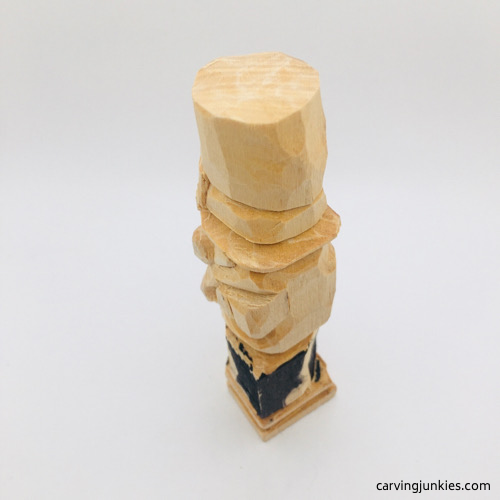 26. Left view of wood to remove
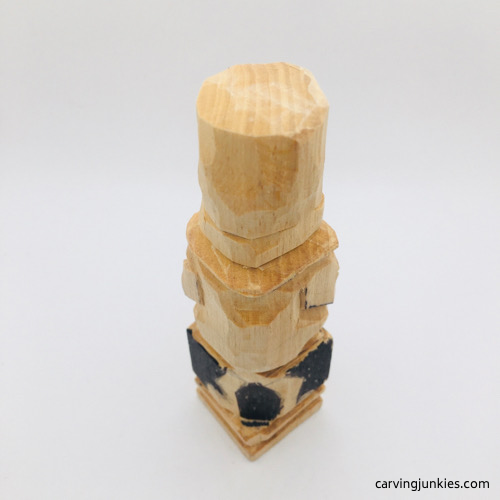 27. Back view of legs
How to carve a leprechaun: Refine the legs
Remove the wood you colored around the legs (photo 28).
To split the legs with just a knife (feel free to use a fishtail gouge instead), make a large pyramid cut on the top half of the wood between the legs on the back (visible in photo 29) and the front. Make a second pyramid cut on the bottom half (photo 30).
Tip: If your cuts are uneven, you may need to make a second pyramid cut in the same place to remove the wood without too much splintering.
Make a stop cut to define each shoe, and remove wood from above (see progress photo 31).
Once the legs are split, you can remove more wood from the front and back (photo 31) to narrow the thickness of the legs.
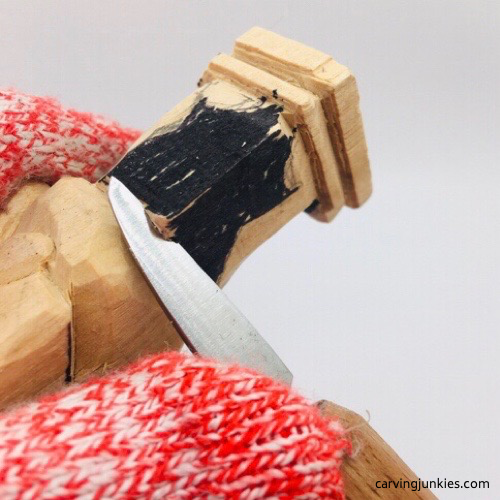 28. Removing wood around the legs
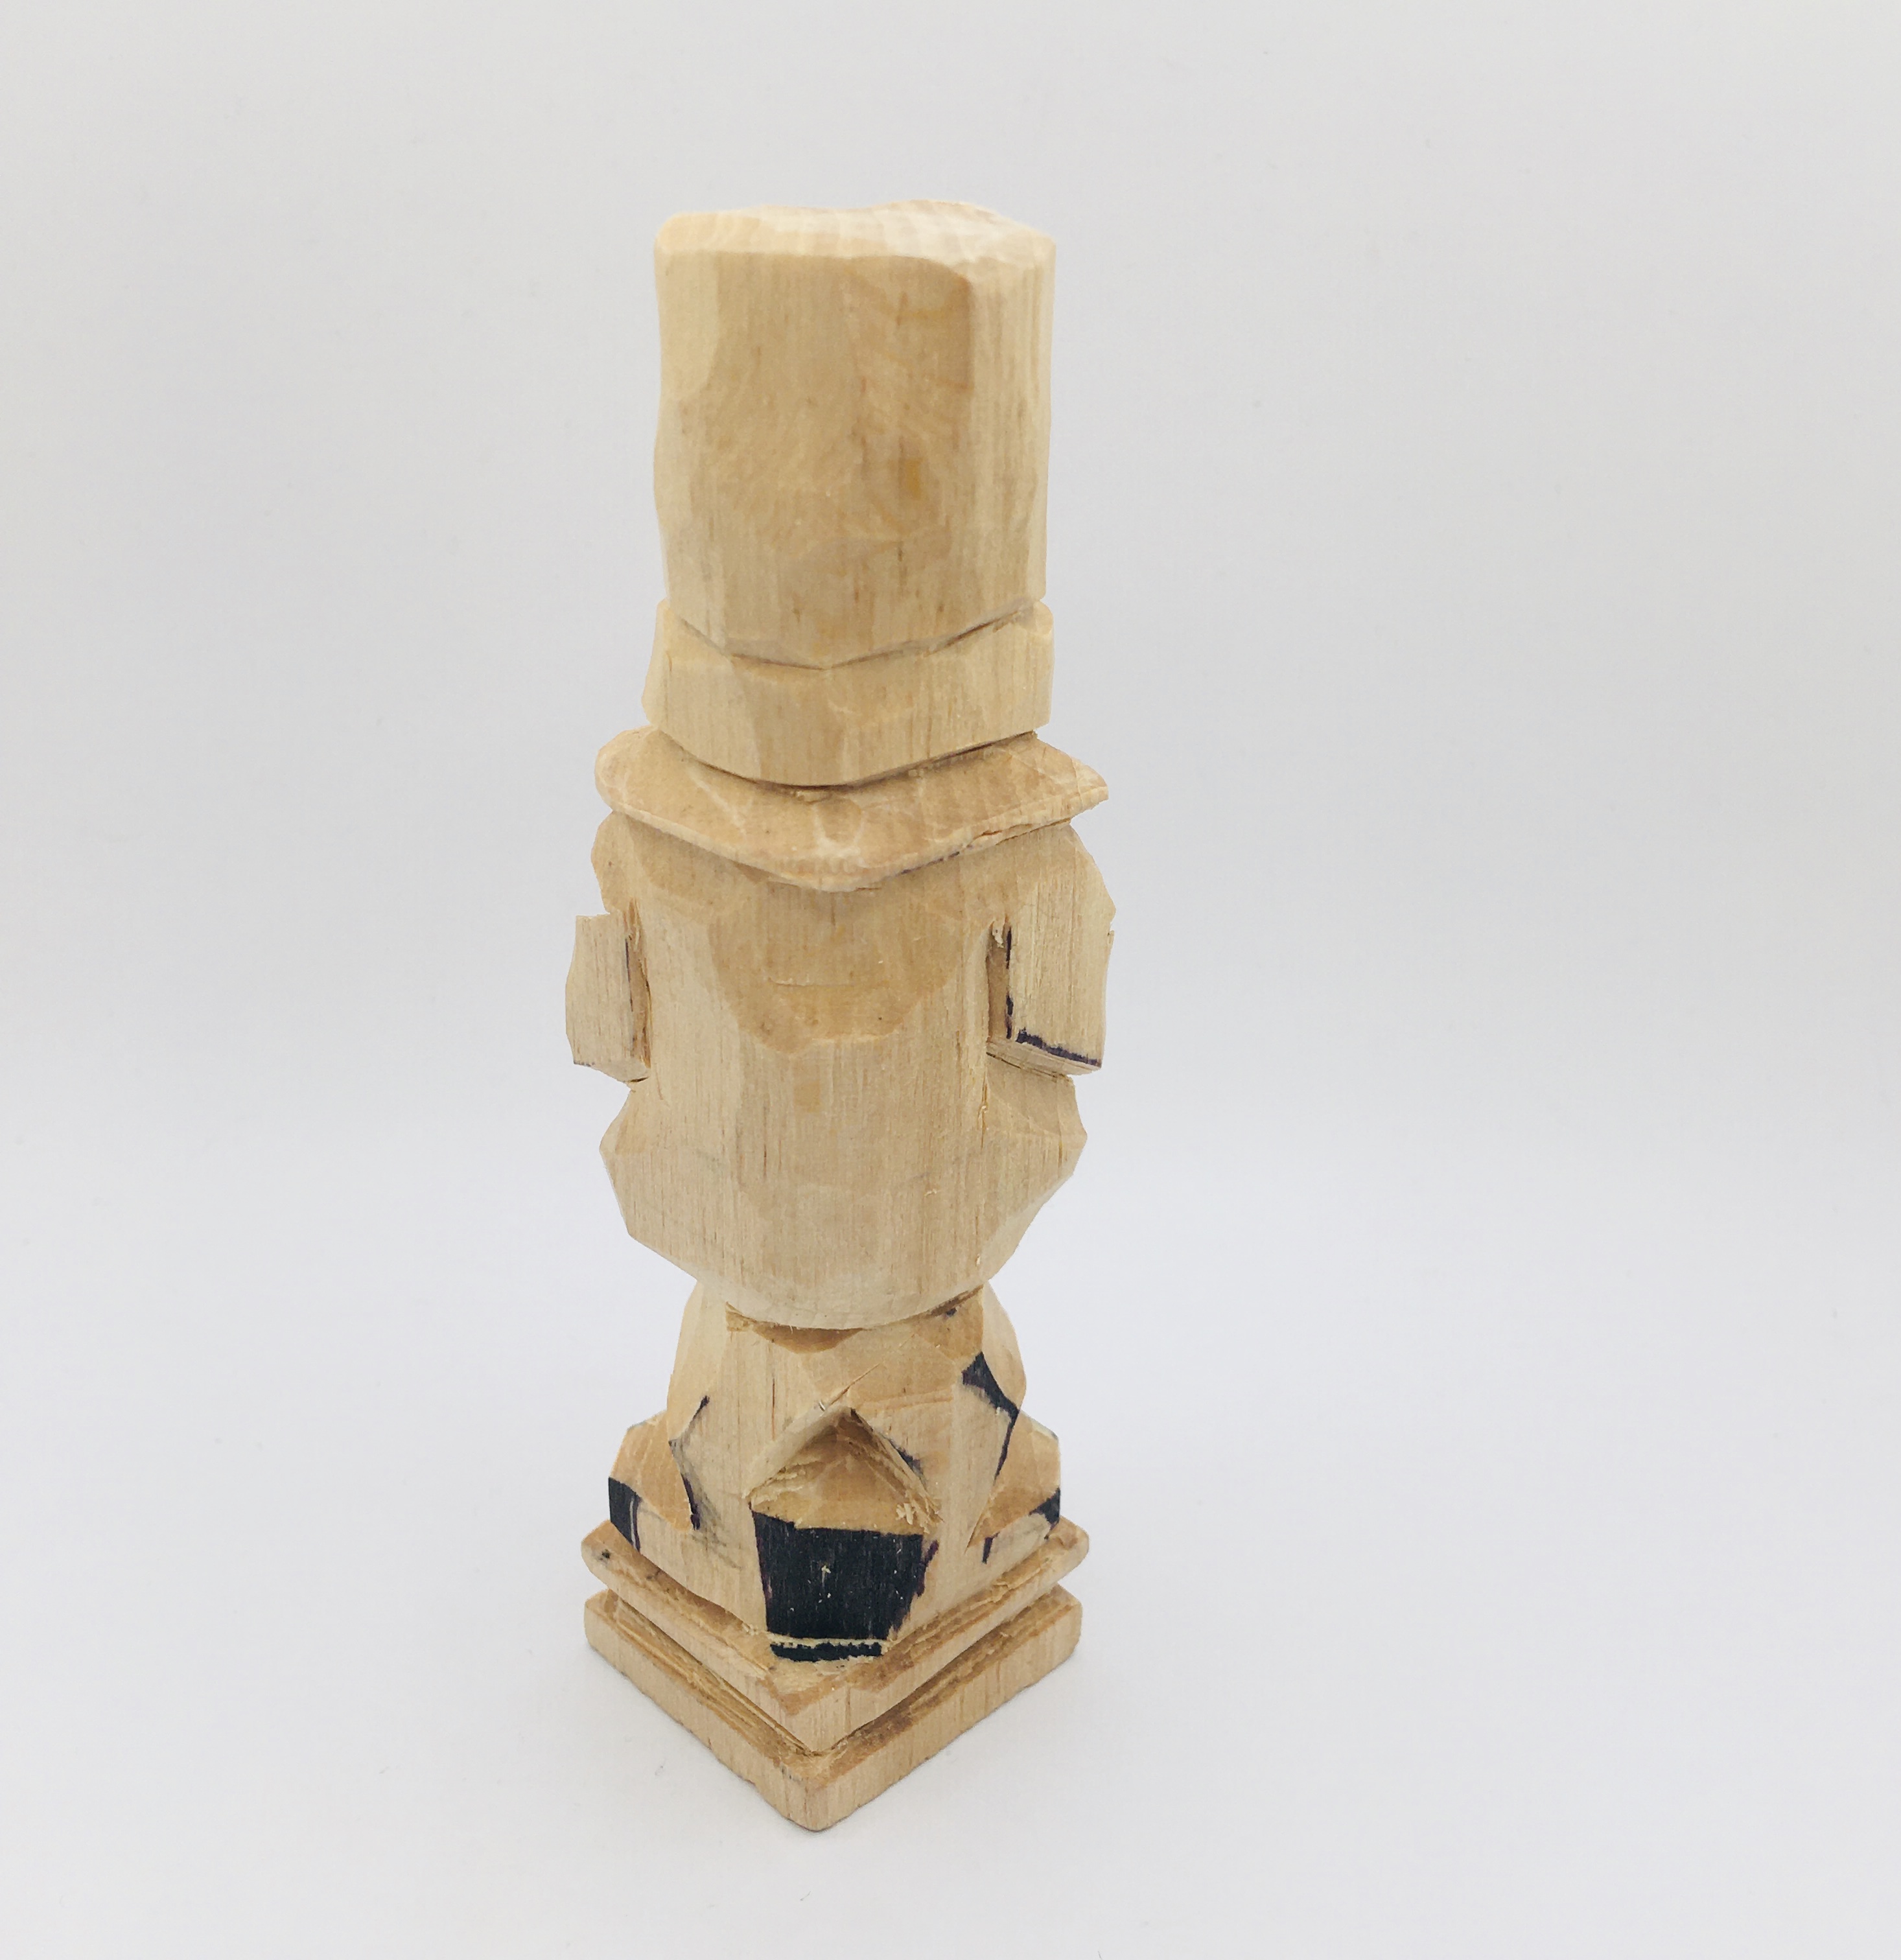 29. First pyramid cut is made
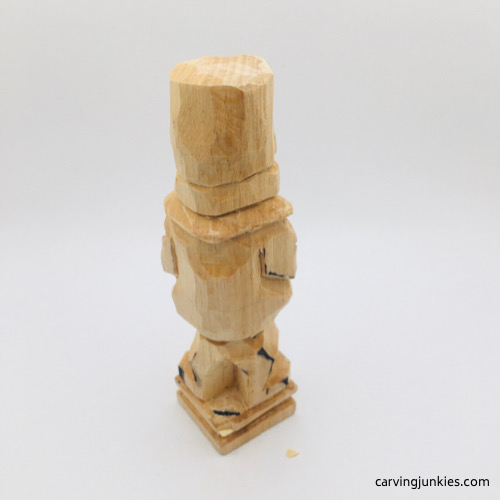 30. Second pyramid cut
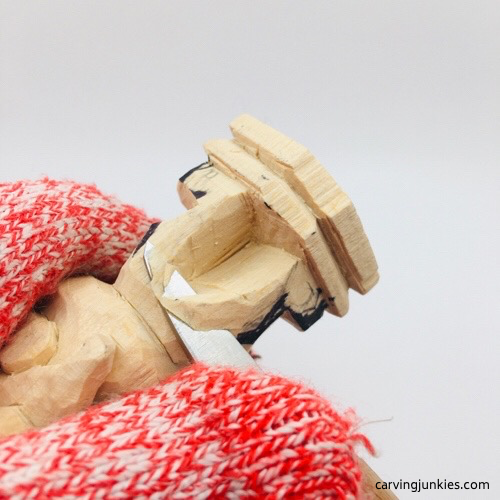 31. Shaping the legs further
How to carve a leprechaun: Carve more details
Once the legs are shaped, mark where you will make a small pyramid cut (photos 32,33) to carve the shoe heels on the front and back (photo 34).
Create a curve from the middle of the back, up to the hat (visible in photo 33), by turning your wrist as you sweep your knife upwards.
Use a V-tool to outline the four-leaf clover on the hat. Then use your knife to clean and deepen your cuts (visible in photo 34). Tip: If you don’t have a V-tool, stab your knife along the guideline (or use short stop cuts).
Draw the eyes and fingers on the hands (photo 34). Outline the eye with your knife (photo 35). Carve the small, beady eyes by making small pyramid cuts in the inner and outer corner of the eyes. Tip: If you mess up, carve everything off (i.e., flatten the eye surface) and start over.
Make small V-cuts to separate the fingers on each hand (visible in photo 35). Be careful here to avoid wood from crumbling.
We use a laminated U- gouge to slightly curve the nostrils under the nose (visible in photos 36,37). Tip: If you do not have a U-gouge, carefully use your knife under the nose to slice wood off and shape your curved nostrils.
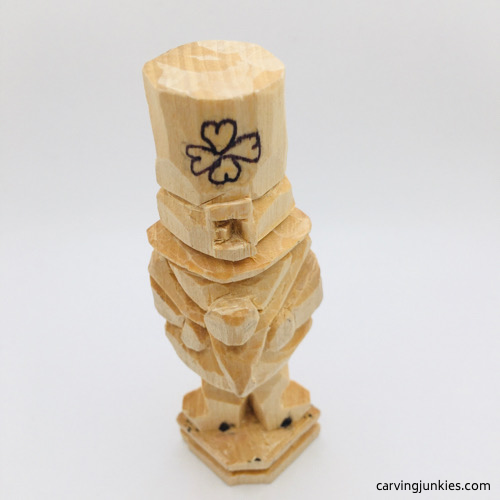 32. Front heels are marked
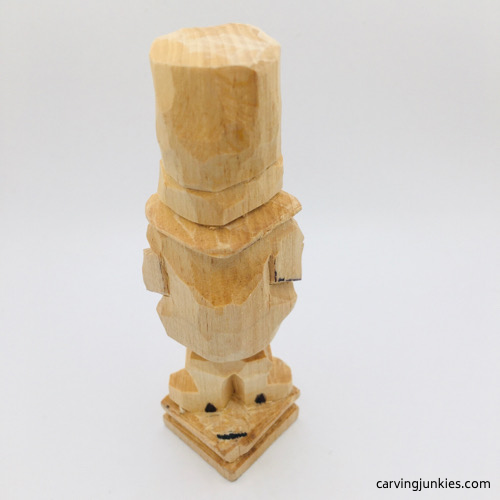 33. Back heels are marked
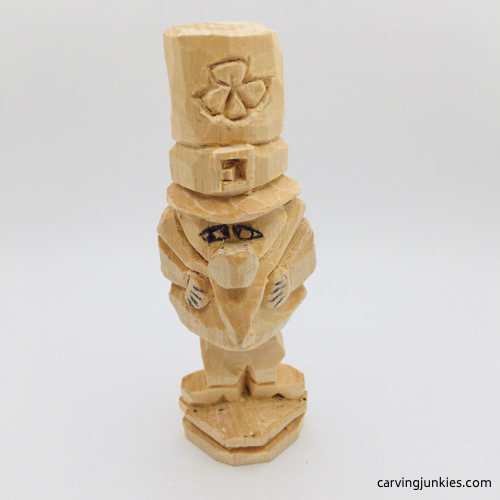 34. Details are added
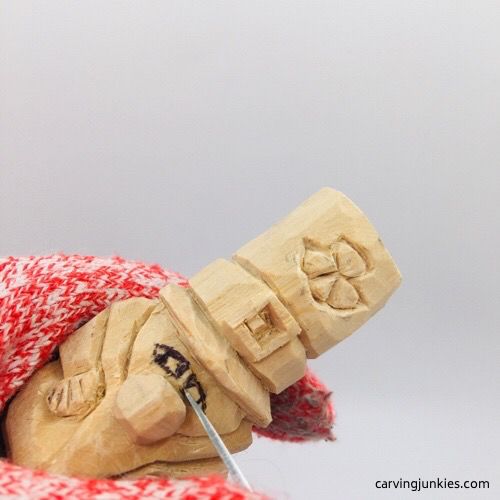 35. Carving the eyes
How to carve a leprechaun: Clean up your cuts
Prior to painting, clean up any wood fuzzies, or deepen your cuts. This will help your paint adhere well and avoid colors from bleeding into each other.
Check your leprechaun carving to be sure the arms are symmetrical on the front and back (we did a little noodling to even ours out).
You may also want to add more of a curve on the back and round the body further (see photo 37).
Tip: We scrub our carvings with a little dish soap to clean them before painting.
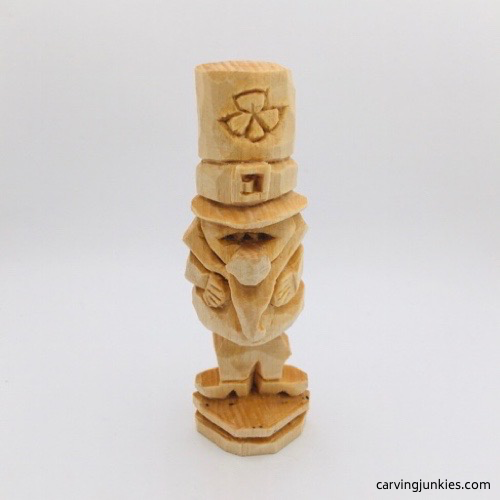 36. Front view of carved details
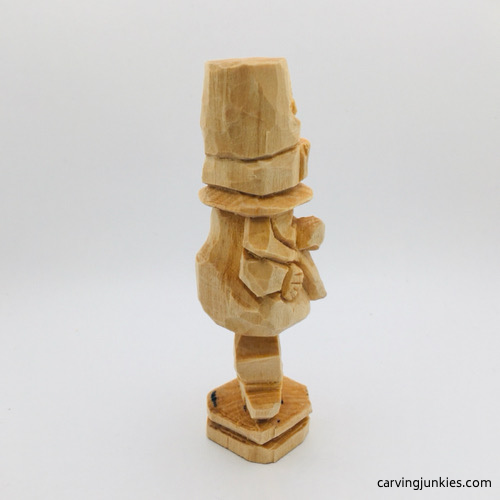 37. Details from the right view
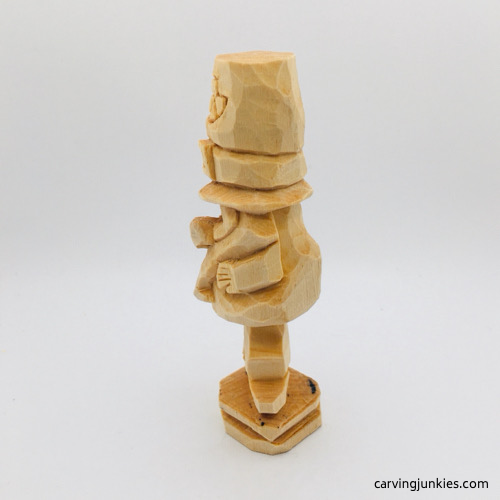 38. Details from the left view
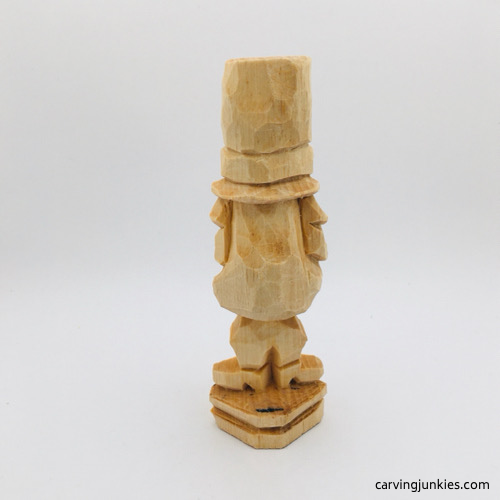 39. Details from the back
Break out your paint
We create paint washes with acrylic paints. We dip the brush in water, and pull a little paint into a separate paint well. While we favor flat and round brushes, you may prefer to use other types of paint brushes.
Prior to painting, we brush boiled linseed oil over the entire carving. We start painting right away (some carvers like to let the oil dry overnight). If any of the oil spills onto paper towels, throw them away in an outside garbage bin (they are highly combustible).
We keep an old knife handy to clean up mistakes as we go. You want to avoid painting over other paint (the color will bleed through).
All paints are Delta Ceramcoat unless otherwise noted. It is recommended that you start with the lightest colors first.
- Legging base: 100% Artist’s Loft titanium white paint. Allow to dry completely. The stripes are made with 100% black paint.
- Face: Tawny light.
- Beard: Tangerine.
- Clover on hat: Apple orchard.
- Hat, jacket, shoes: Leaf green.
- Eyes: Black. After completely dry, titanium white applied with toothpick.
- Nose and cheeks: Apple Barrel cameo pink with lipstick red highlights.
- Base: Liquitex deep green permanent paint.
- Belt buckle: Dry brush with FolkArt steel gray.
- Entire carving: Dry brush with titanium white.
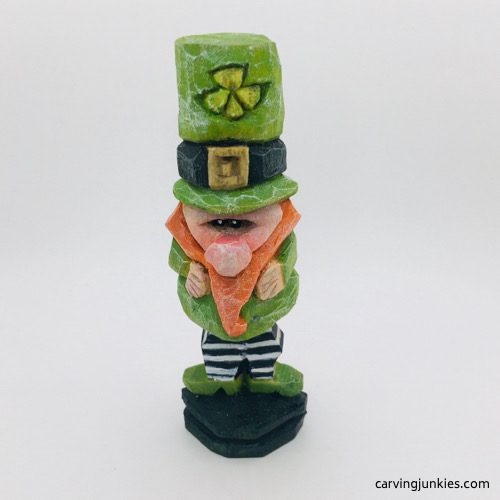
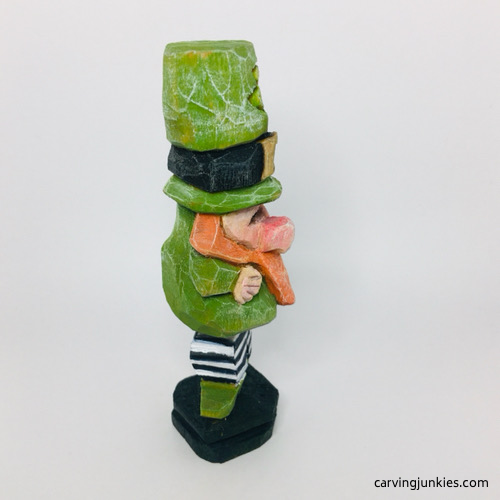
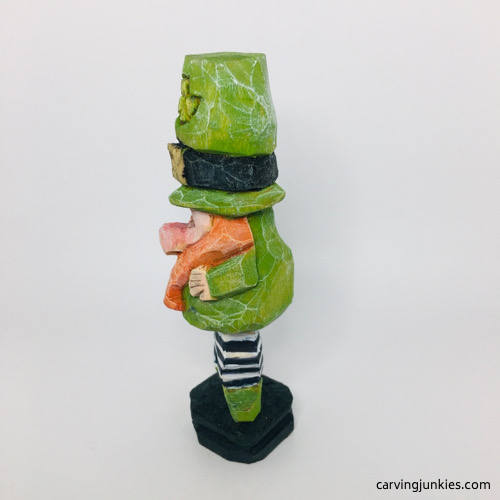
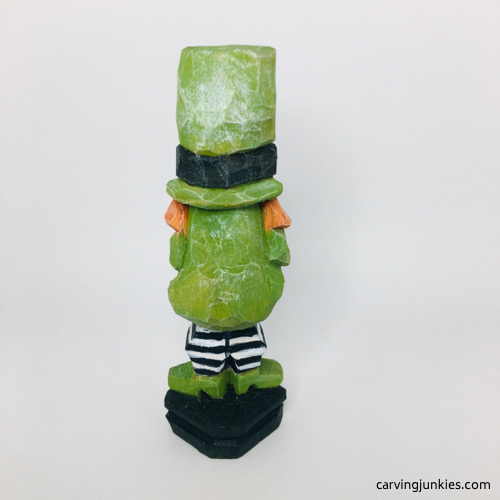
Free leprechaun wood carving pattern
If you prefer to carve your leprechaun with a pattern, photocopy this to size to fit your wood block.
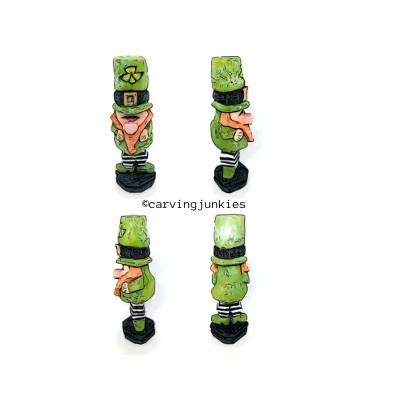
How to carve a leprechaun tutorial summary
- Our how to carve a leprechaun tutorial provides everything you need to create this quirky Irish caricature.
- It is a simple pattern that is not too difficult, but has some details that may be challenging for some.
- You can forgo the four-leave clover on the hat, and skip carving the fingers, if you are brand new to carving.
- Carving the base provides extra stability. If you do not want a base, make the legs and shoes a little wider.
Get 50 Wood Carving & Painting Tips when you join our FREE Covered in Chips club.
Share this page
carvingjunkies.com never sells your personal information.
This site uses cookies for its operation and to enhance your experience. As an Amazon Associate and Focuser Carving affiliate we earn from qualifying purchases.
Home | About Us | Privacy Policy | Terms of Use | Contact | Sitemap
