- Home
- Easy wood carving ideas
- Hedgehog wood carving
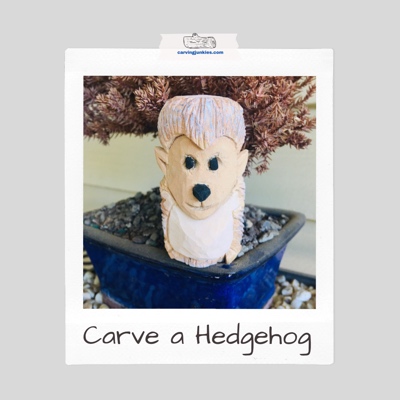
Hedgehog wood carving tutorial
You can easily carve this little guy with our step-by-step instructions.
LEVEL: EASY
Looking to make a hedgehog wood carving for yourself or as a gift?
This easy-to-follow tutorial includes a free pattern, instructions, and a painting guide to help you succeed.
And the quills from this hedgehog wood carving aren’t painful to touch! Note: I carved this piece when I was first learning how to carve. It is a great practice piece for beginners!
What you need for this hedgehog wood carving
- 1 1/4 x 1 1/4 x 3 inch (3.175 x 3.175 x 7.62 cm) basswood block.
- Pencil.
- Magic marker (optional) to go over your pencil marks.
- Knife of choice (we use a roughout knife and a detail knife).
- Paint brushes and acrylic paints.
- Water to thin the paint.
- Gloves for safety while making this hedgehog wood carving.
You will carve off the corner of this hedgehog wood carving
The nice thing about carving off a corner is that it gives you depth for the face and nose. It also provides a wider wood "canvas" for creating your hedgehog wood carving.
1: Trace the hedgehog wood carving pattern onto the wood
You can cut out the pattern (bottom of page) and simply tape it to the block to trace the design or even glue it on.
Don't worry about getting a perfect design.
As you work you can adjust and shape the hedgehog wood carving to get the desired result. Add eyebrows if you want (we decided not to carve them).
- Draw a dot on top of the block as shown below. You will be cutting inward for the head and twills.
- Reserve space for the ears that will stick out on both sides.
- Draw a line where you will separate the head from the body of the hedgehog wood carving.
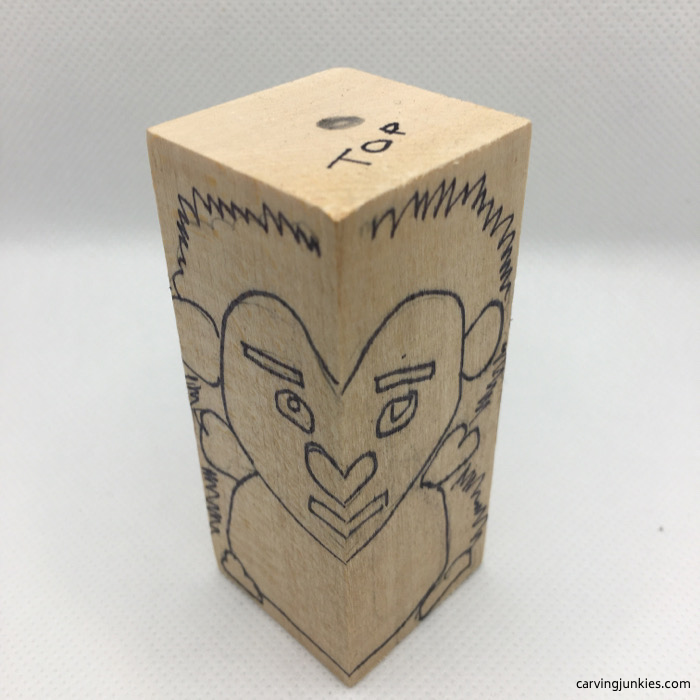 Pattern is traced across the corner onto both sides
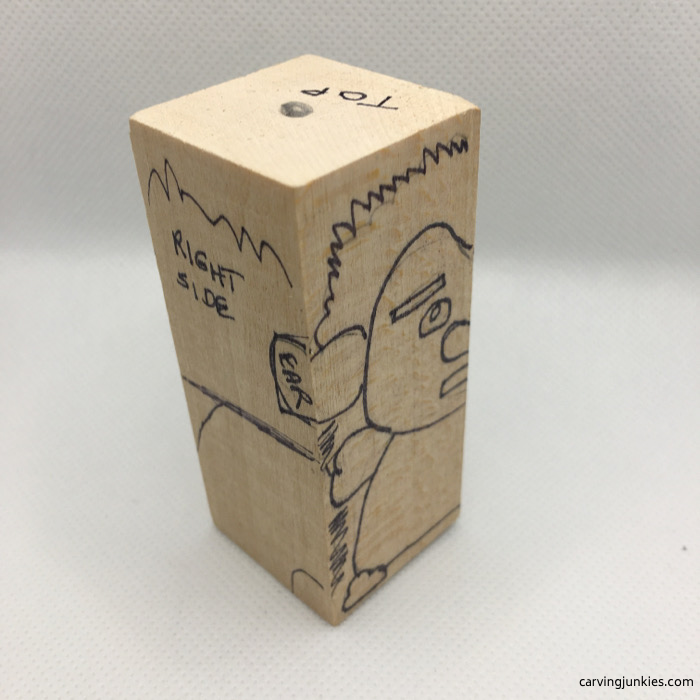 Ear box extends from the front to the side
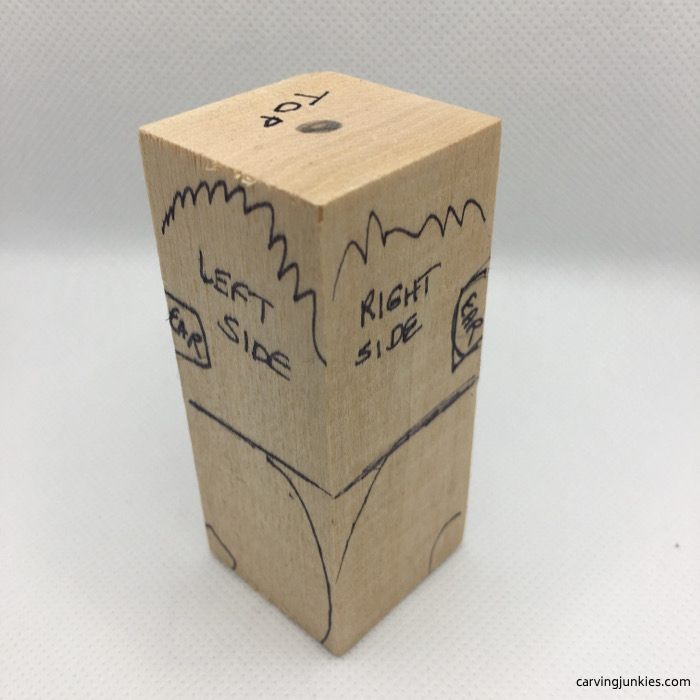 Left and right views with ear boxes and lines
2. Round the corners of your hedgehog wood carving
- Round the front and back corner and start to define the overall shape of the hedgehog wood carving.
- Use stop cuts and remove wood around the boxes marked for the ears.
- Be careful not to cut into the boxes or slice them off (glue them back on if you do).
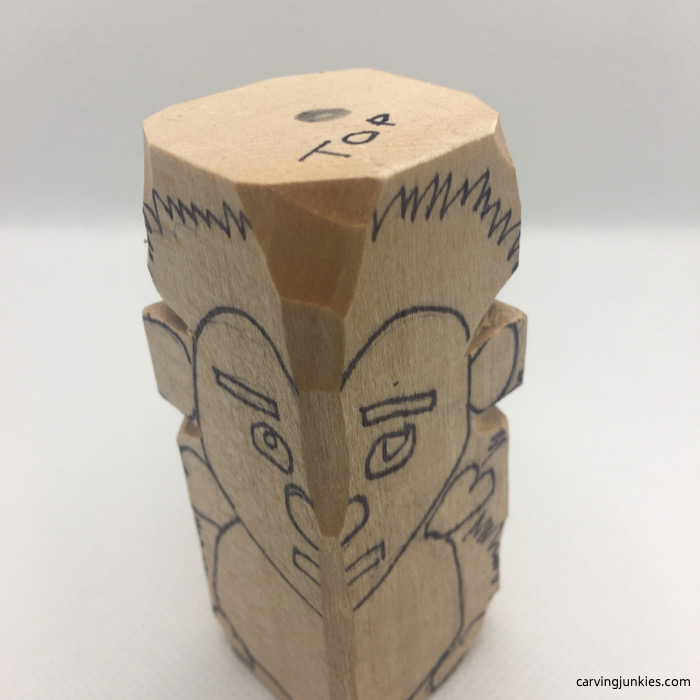 Rounded front corner and separated ears
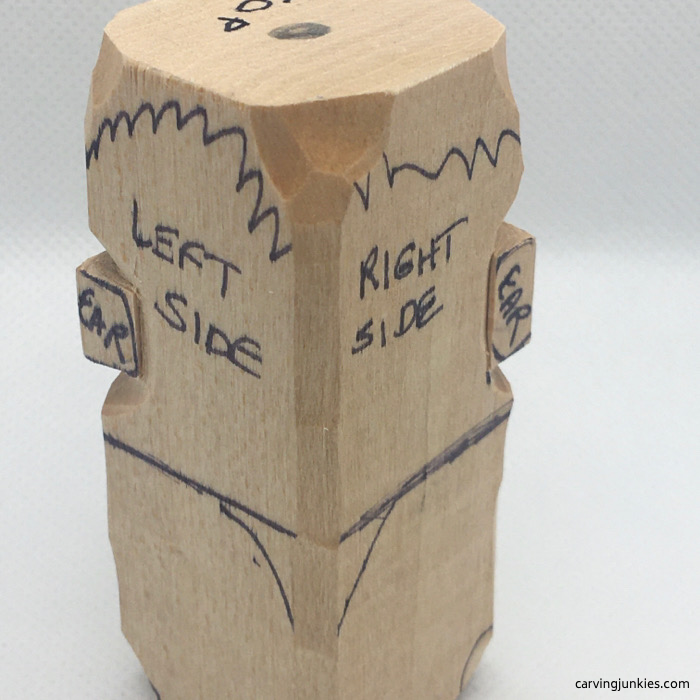 Rounded back corner and separated ears
3. Carve inward on the head of the hedgehog wood carving
- You want to have a full head of quills (the cuts for quills are made later).
- Shave a thin layer of wood off the top or your paint will not take well.
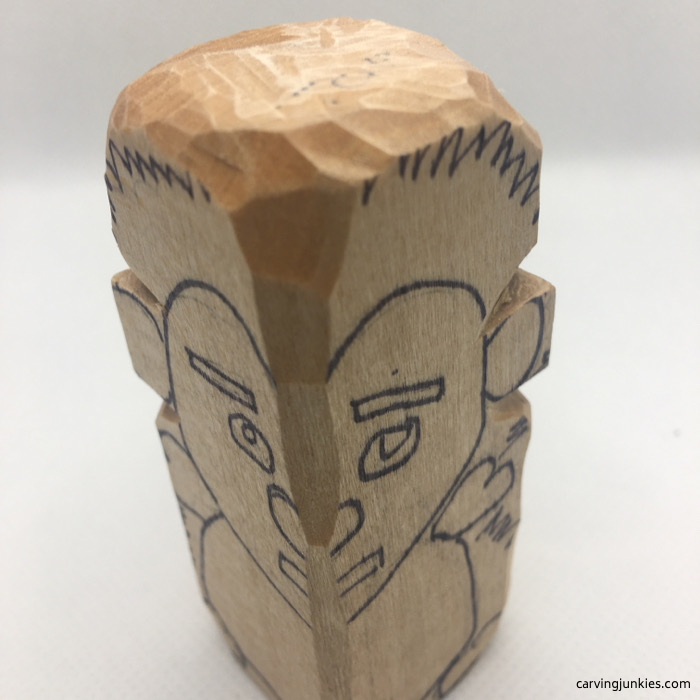 Top carved off (front)
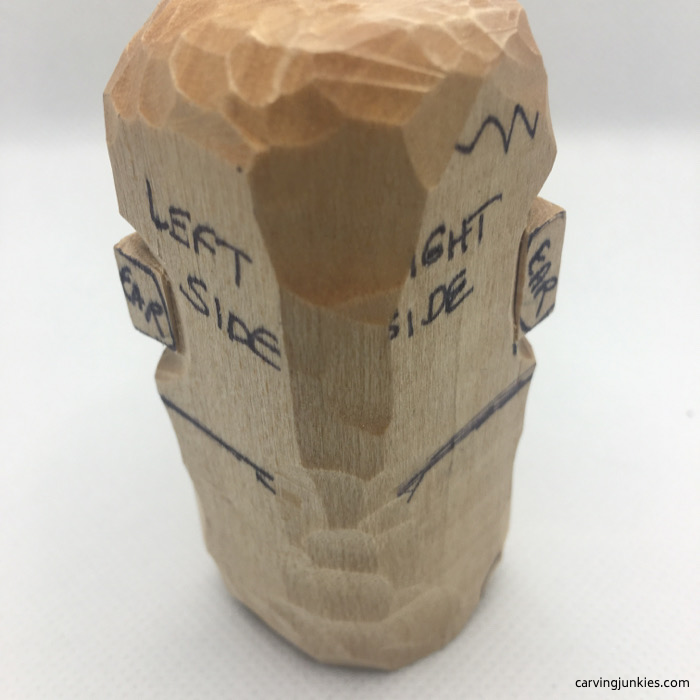 Top carved off (back)
4. Separate the head from the body of the hedgehog wood carving
- Separate the head and from the lower body (we use deep line cuts).
- Separate the hands and feet, but keep some wood around them to add quills.
- Leave a little lip on the bottom that will be used to create quills under the feet.
- Start the nose by making a stop cut along the bottom of the nose.
- Cut a line around each side of the nose and create a flat surface for the eyes (you will shave off your lines).
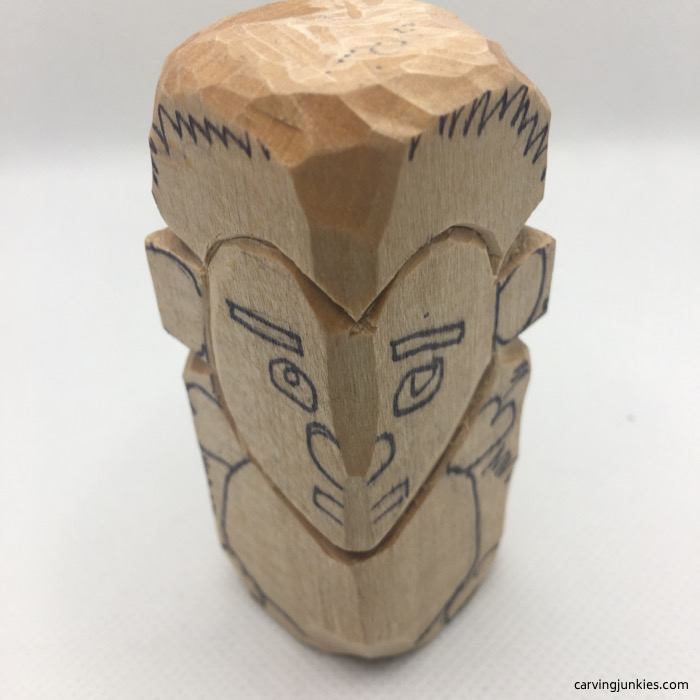 Head is separated
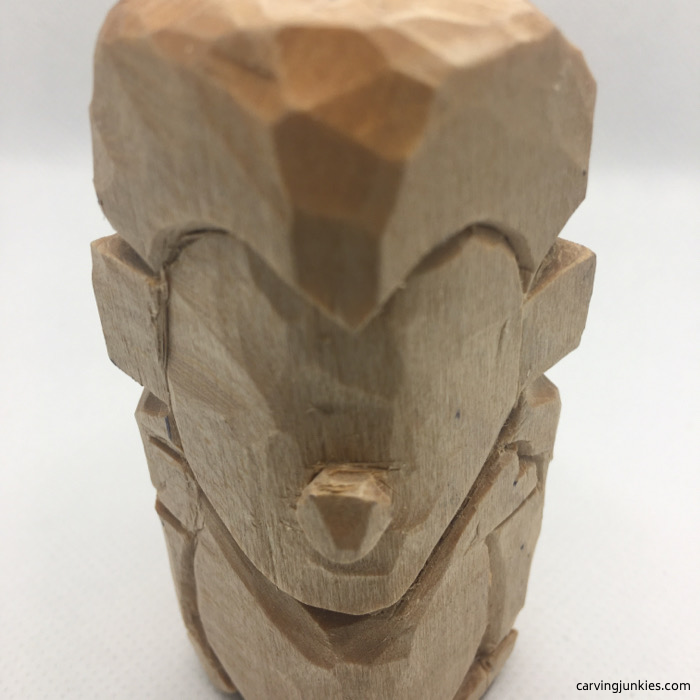 Lower body is separated, nose and feet are carved
5. Add the details to this hedgehog wood carving
- Draw lines for the quills on the body and head in pencil to guide you (sorry, we forgot to take a picture of this step!).
- Make series of V cuts for the quills around the head and back of the hedgehog wood carving.
- Create quills at an angle on the back that meet in the center.
- Some quills can be short and others long (mix them up).
- Quills should continue around under the legs (trim and round the belly if more space is needed).
- Draw on the eyes, mouth, and ears, and then define them.
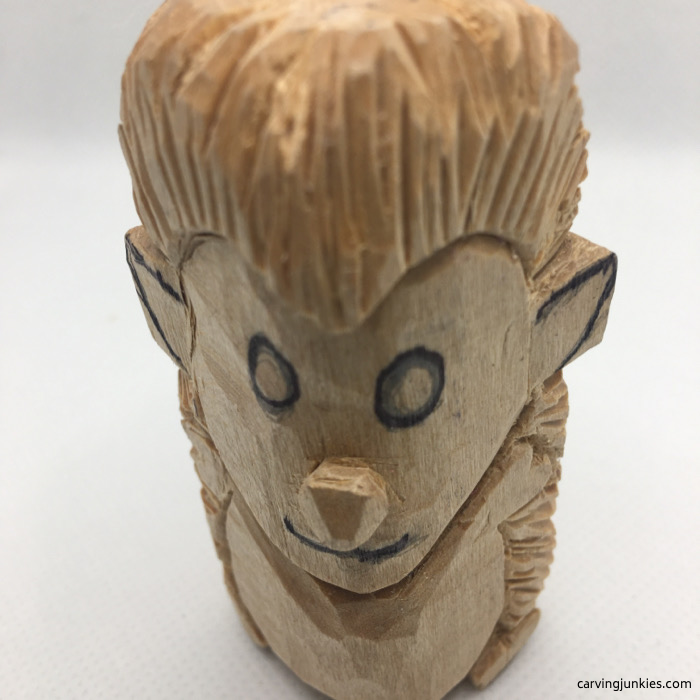 Front view of quills and face details
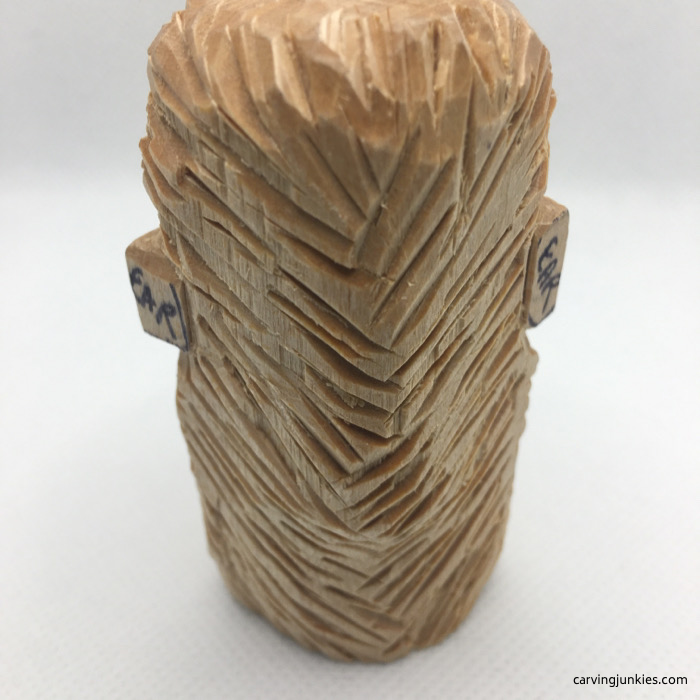 Angle cut quills to meet in the center
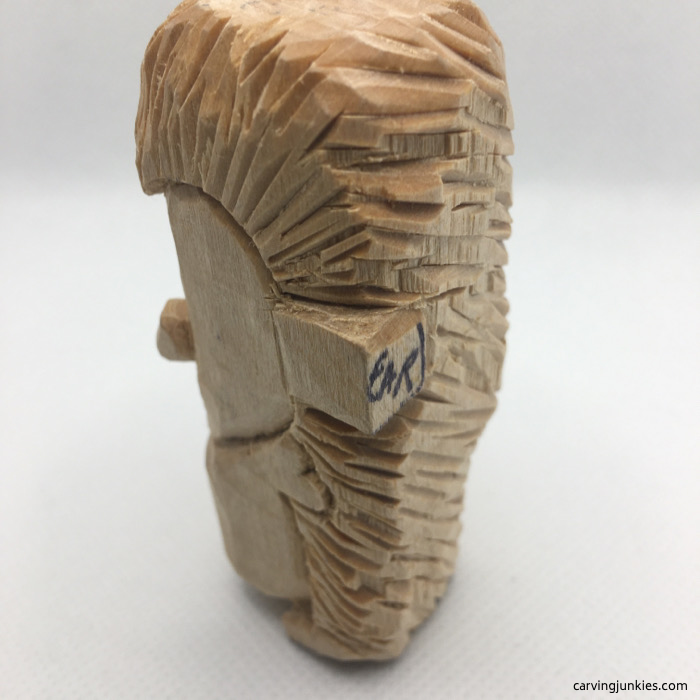 Left side view
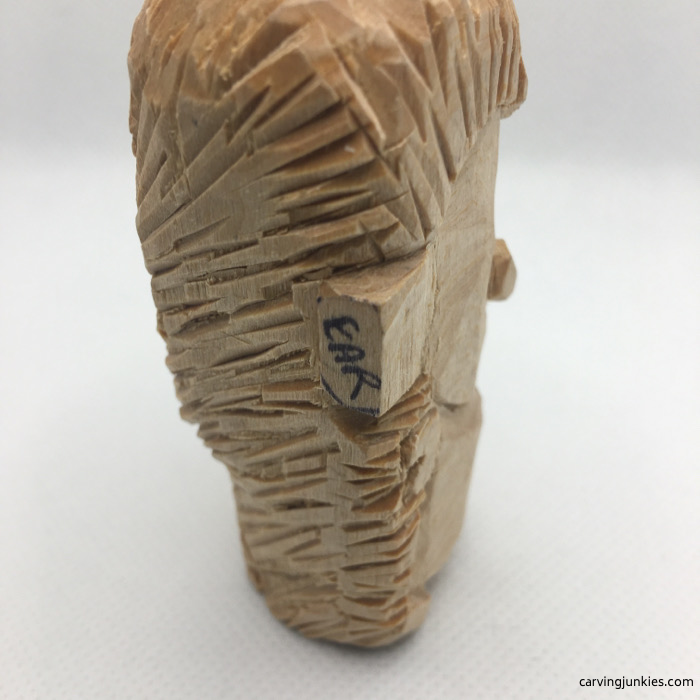 Right side view
6. Finish the face and ears of the hedgehog wood carving
- Shape the ears until they are pointy.
- Remove the inner part of the ear (we used a stop cut on each side and removed wood from the middle out).
- We decided to give this little guy a pot belly using sweep cuts from the top of the belly up to the neck.
- Clean up any visible fuzzies with a detail knife before painting your hedgehog wood carving.
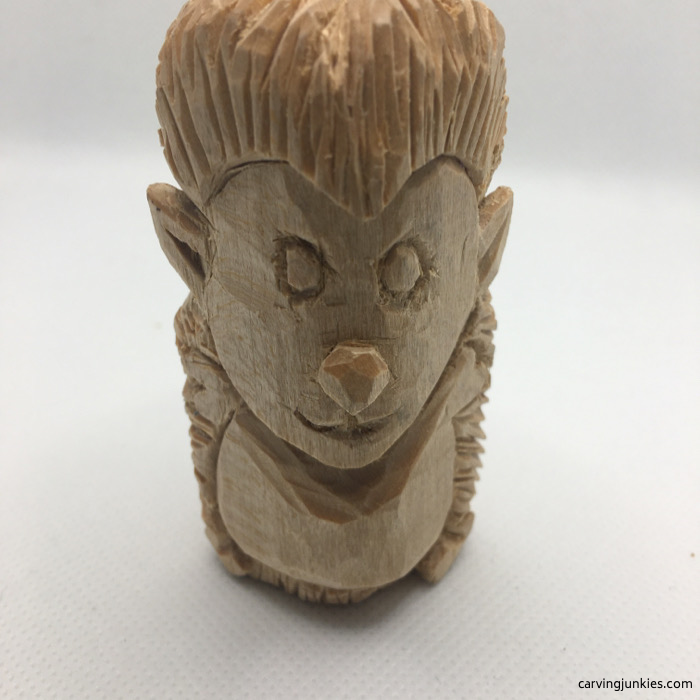 Hedgehog wood carving is ready for paint
7. Paint your hedgehog wood carving
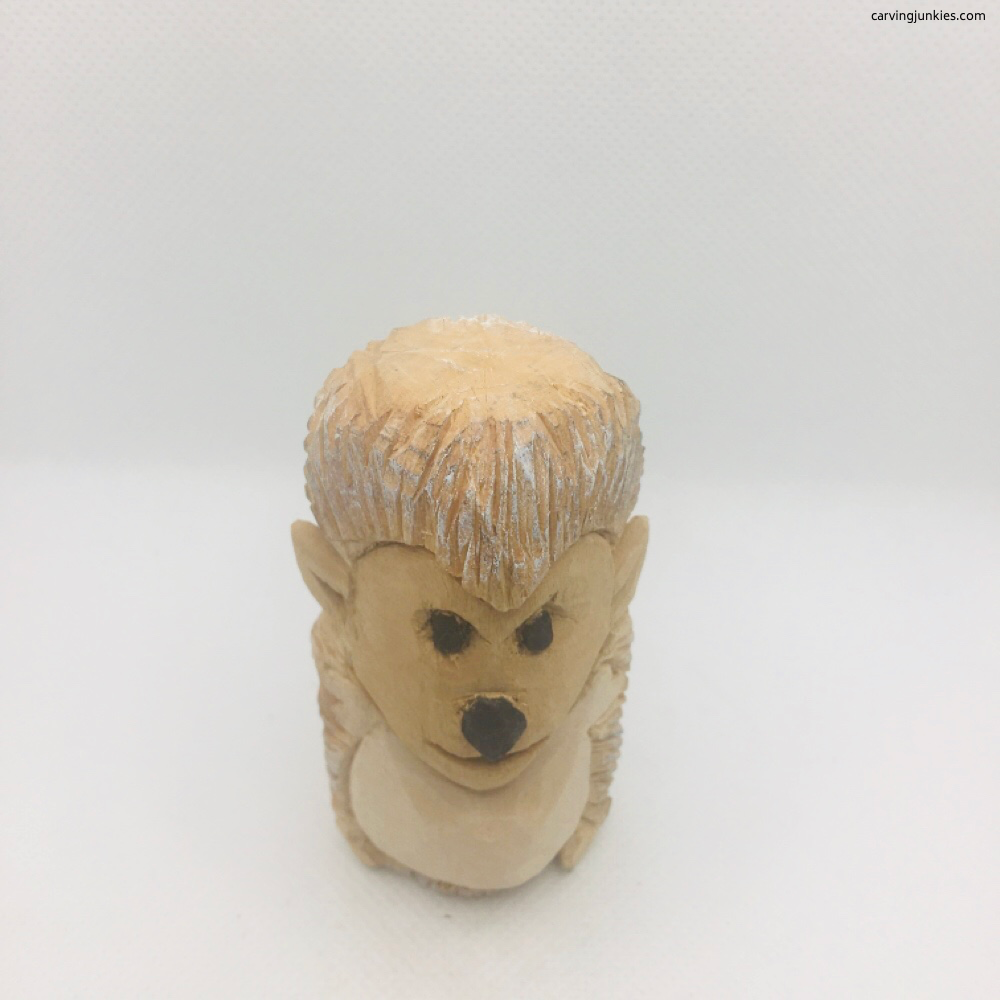
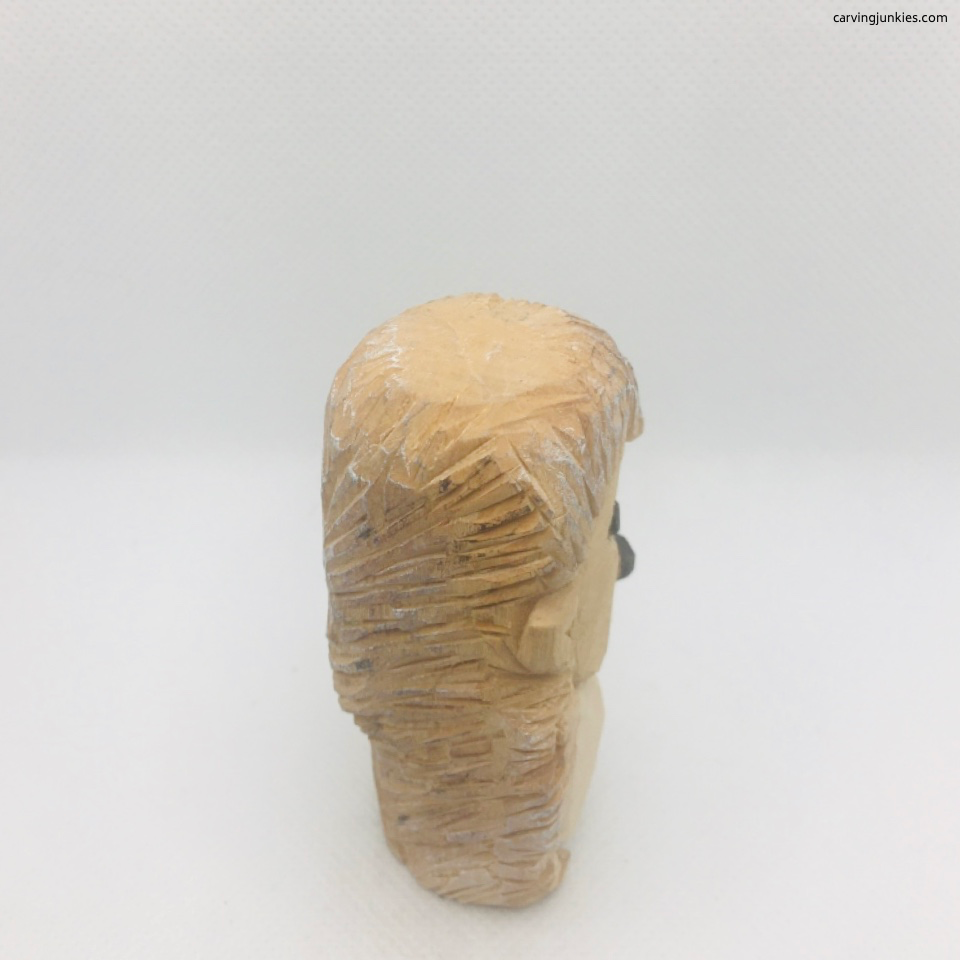
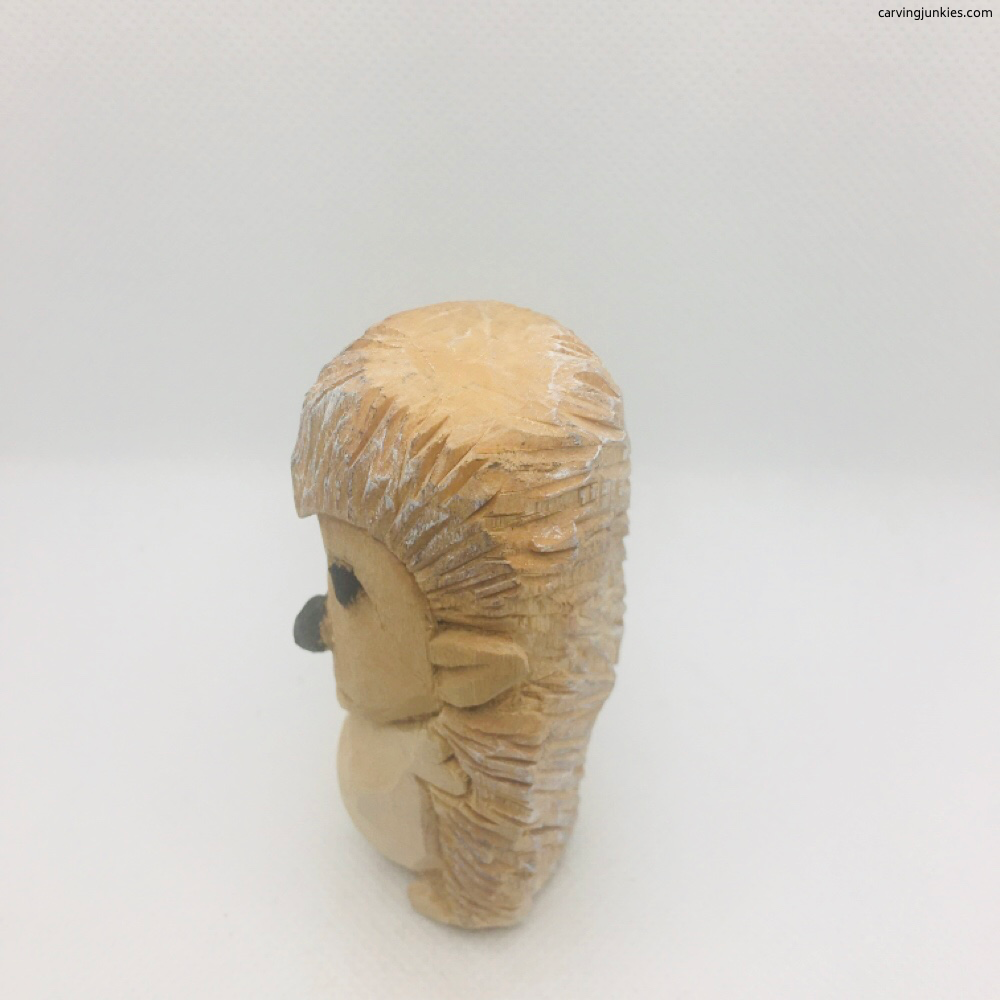
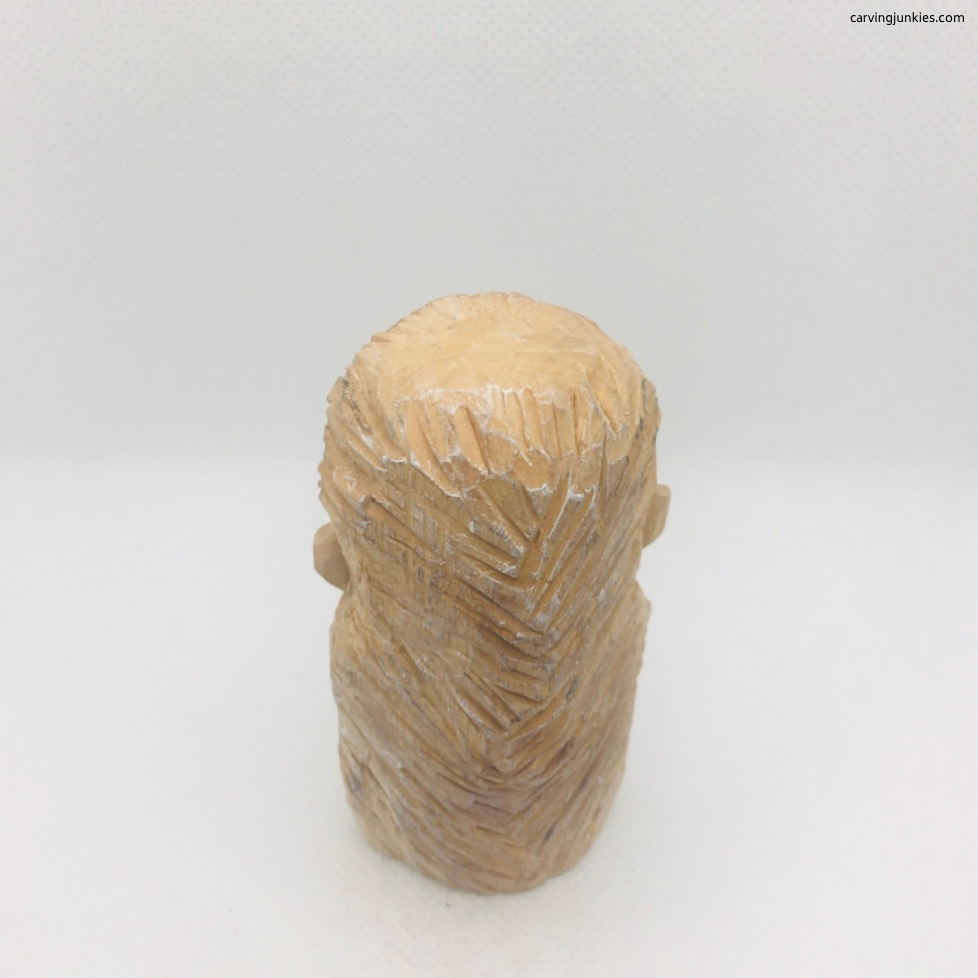
This hedgehog wood carving is fairly easy to paint and adds another level of cuteness.
Remember to let paint dry thoroughly after each color is added. When the weather is warm, painting outside helps with drying time.
This is the order we painted the hedgehog wood carving and the water-to-paint ratios we used:
- Preliminary wash for snout, face, and quills: golden brown 1 drop of paint and 10 drops of water (Craftsmart).
- Quills: dry brush with 100% brown (Craftsmart).
- Belly: 3 drops of white mixed with 1 drop of golden brown and 15 drops of water. Also used to feather the quills (Craftsmart).
- Nose and eyes: 100% black (Craftsmart).
- Dry brush with 100% white on twills to add texture (Craftsmart).
Want to vary the color on your hedgehog wood carving?
Check out some realistic images of hedgehogs here.
Free hedgehog wood carving pattern
If you prefer to carve your hedgehog with a pattern, photocopy this to size to fit your wood block.
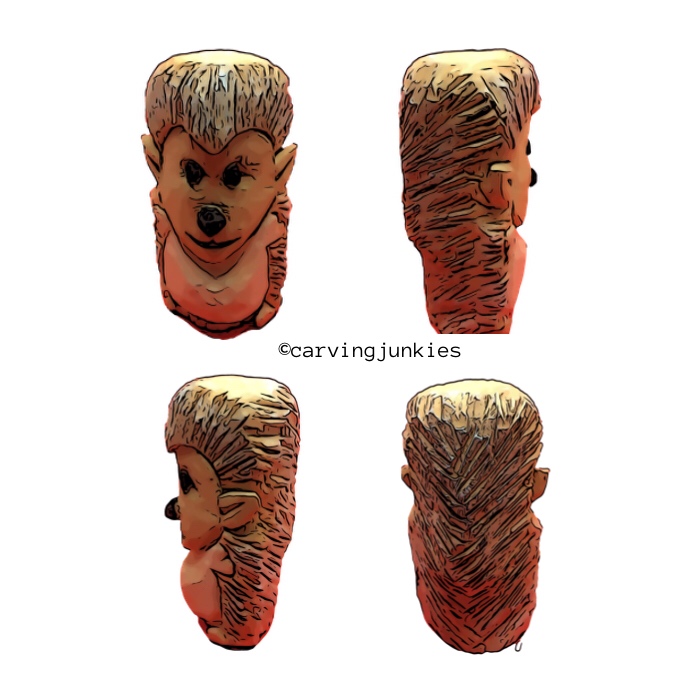
Hedgehog wood carving summary
- This adorable wood carving makes a great gift for hedgehog lovers. Find more hedgehog gifts here.
- It is relatively easy to carve and goes pretty quickly.
- The painting is also fairly simple.
Get 50 Wood Carving & Painting Tips
FREE when you join our free Covered in Chips Club
Your information is 100% private and is never shared. Unsubscribe anytime. See our Privacy Policy .
Share page on:
Home | Privacy Policy | Terms of Use | Contact | Sitemap
