- Home
- Christmas wood carving ideas
- Elf wood carving
Christmas elf wood carving tutorial
Perfect to carve as a holiday gift, ornament, or decoration.
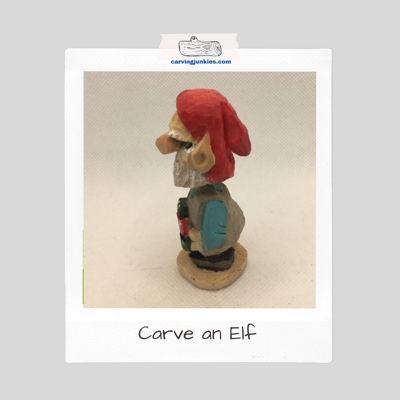
This elf wood carving tutorial is super easy to follow and you will end up with an adorable little character that is holding colorful Christmas packages. He looks a little grumpy, but it is his busy season.
You will carve this little guy on the corner, plus create his own little base for extra stability. Stand him up or add a hook to hang him from a tree.
Happy holiday carving!
Elf wood carving tutorial supplies
You will need:
- A basswood blank. Ours is 1-inch x 1-inch by 3-inches (2.54 x 2.54 by 7.62 cm), and you can easily use a larger size and increase your measurements.
- Wood carving knife of choice (we prefer a straight edge knife on little blanks).
- Optional U gouge (for the nostrils).
- Optional soft V-tool (for the beard).
- Acrylic paints and paint brushes of choice (painting guide at the end).
- Pencil.
- Good carving gloves (safety, safety, safety!).
Elf wood carving tutorial at a glance
Prepare the basswood blank
- Draw a line all around that is about 1 3/4 inches (4.5 cm) down from the top to mark the bottom of the head of the elf wood carving. We added a little "H" to mark the front of the head (photos 1,2).
- Round 3 of the corners from the line up. Keep the corner on the front, which provides a ready-made facial plane (photo 1).
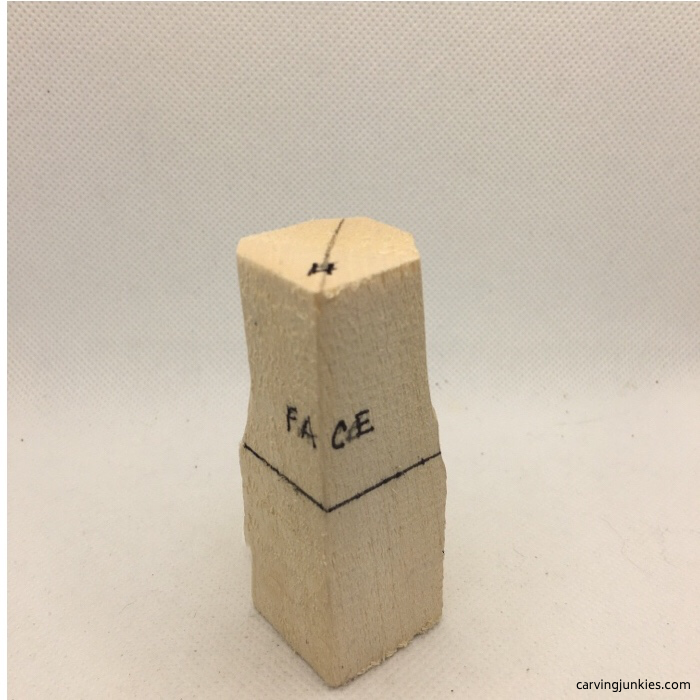 1.Keep the corner on the front
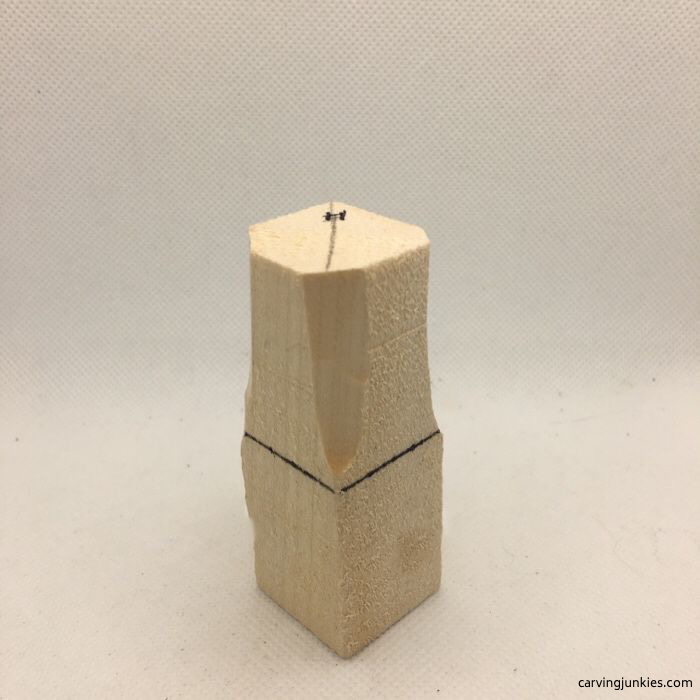 2. Other corners are rounded
Separate the head of the elf wood carving
- Using stop cuts, separate the head all around the elf wood carving (photo 3).
- Draw a line 1/4 inch from the bottom all around to mark the base (photo 3).
- Also add lines to indicate the bottom and top of the nose (photo 3).
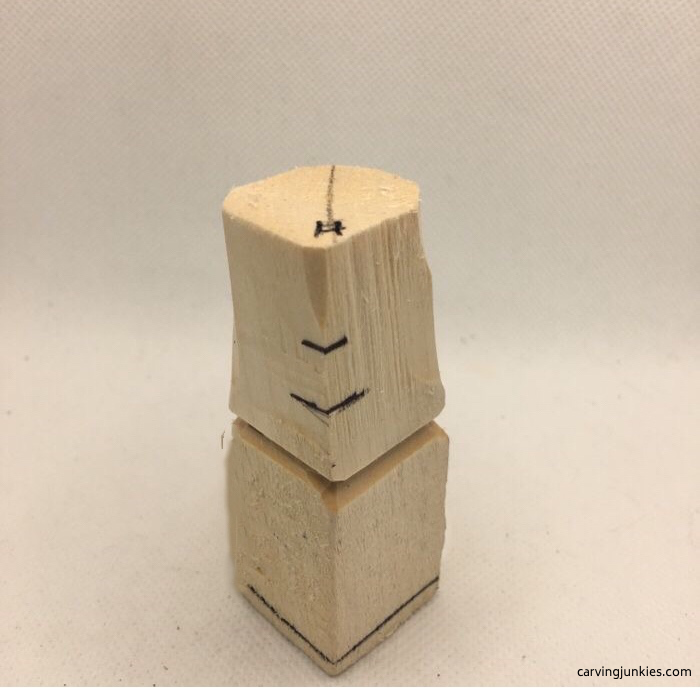 3. Head is separated and lines are added
Start the nose of the elf wood carving
- Make a stop cut under the nose and remove wood from underneath (photo 4).
- Add a colored triangle on each side of the nose (photo 4). This is the first step of our triangle-by-triangle nose carving technique.
- Draw squares to reserve wood for the ears and the tassel of the elf's hat (photos 5-7).
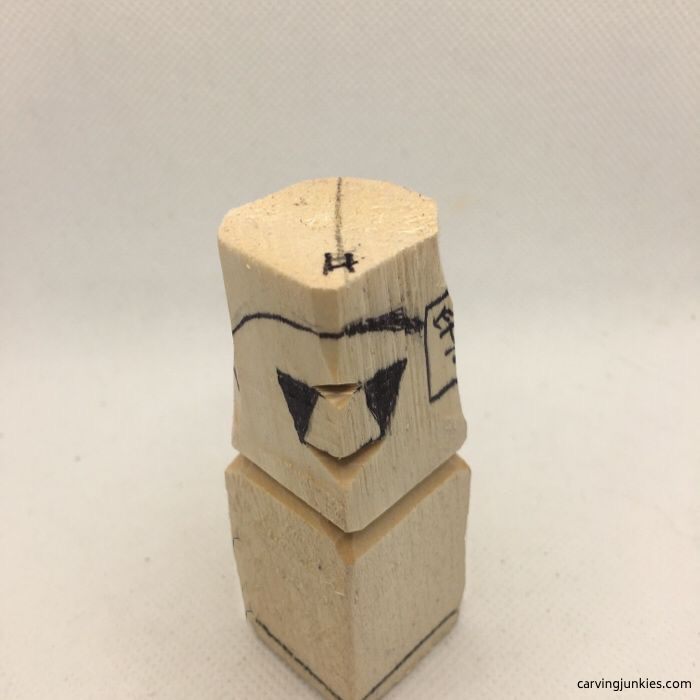 4. Stop cut is made below the nose
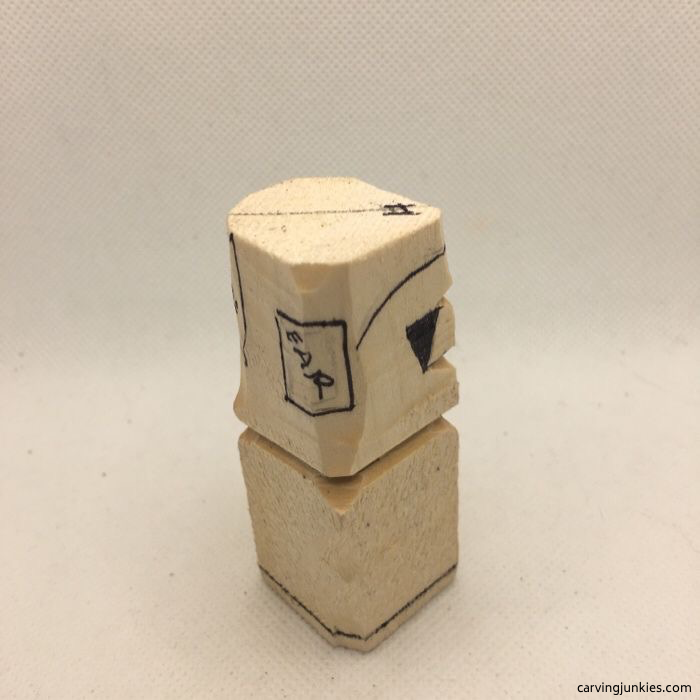 5. Box for the right ear
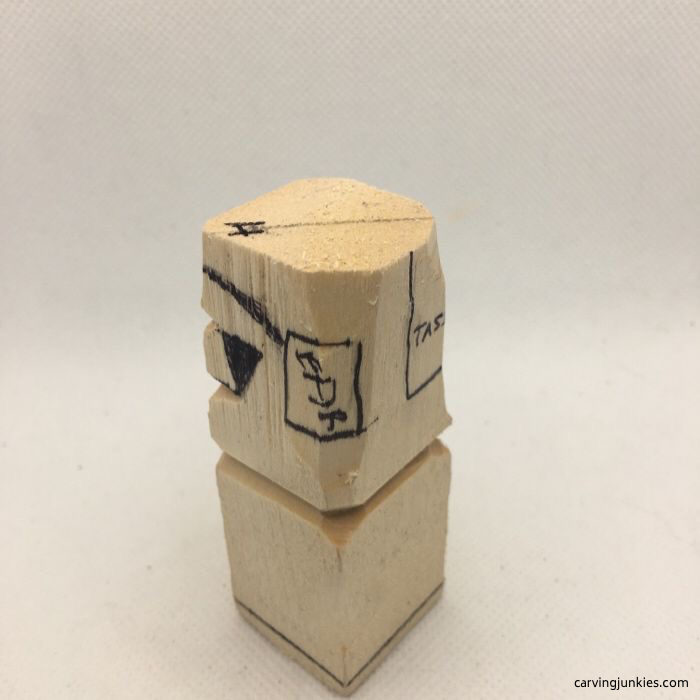 6. Left ear box
 7. Hat tassel box
Continue the nose of the elf wood carving
- Use a pyramid cut to remove the colored triangles around the nose. Tip: make deep cuts that angle toward the middle to make it easy to cleanly remove wood. See our page on carving a nose for additional guidance.
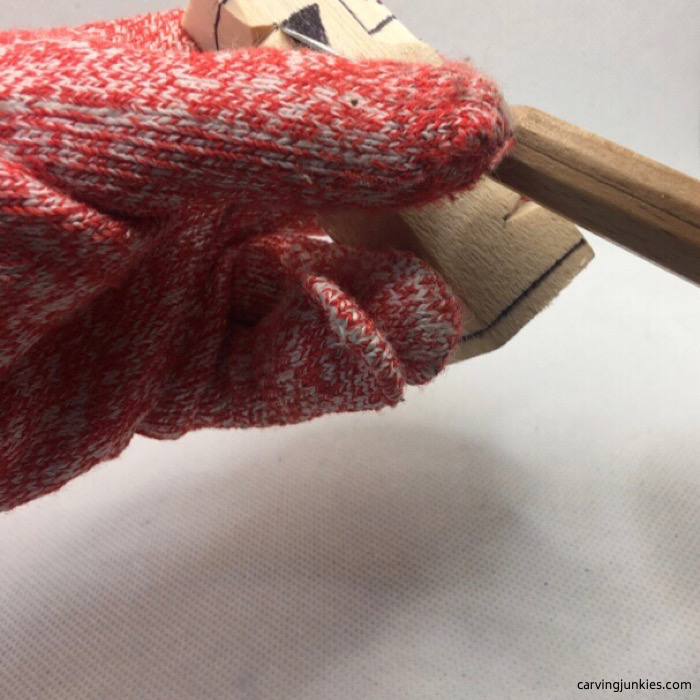 8. Making a pyramid cut
Carve the head of the elf wood carving
- Separate the ears and the tassel on the back of the hat. We start with deep cuts along the guidelines (photos 9-11). Tip: make your cuts a little longer so they cross across at each corner. This makes it easier to slice wood from the bottom up (photo 9).
- Round the head and hat (photos 9-11).
- Use deep V cuts to narrow and shape the neck all around (photo 10).
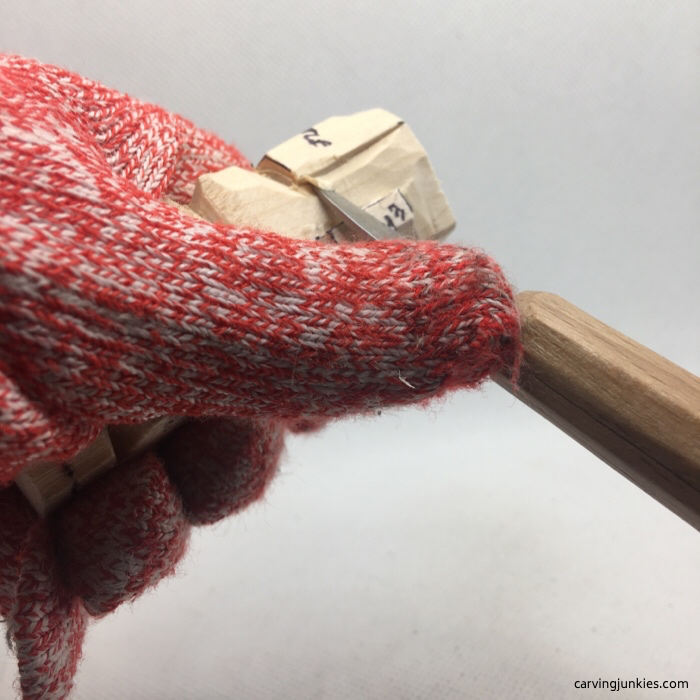 9. Slice wood off from the bottom up
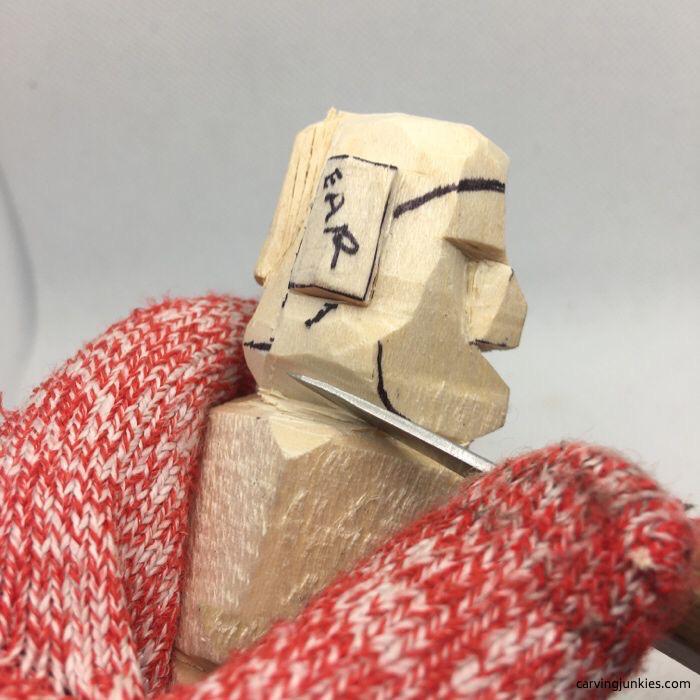 10. Carve the neck all around
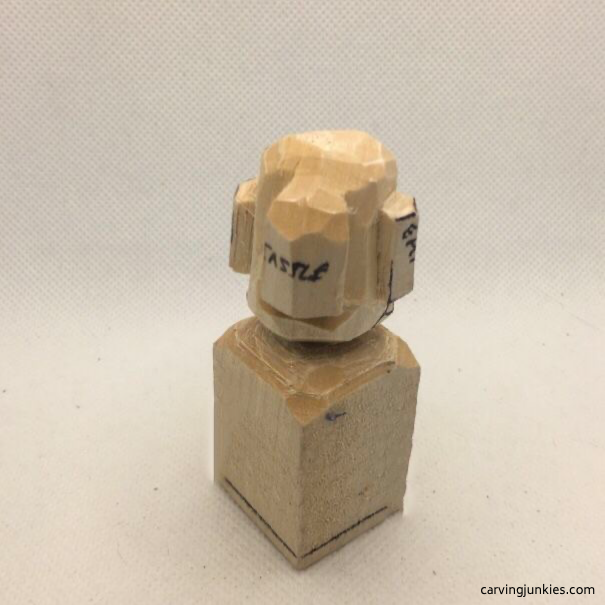 11. Tassel on hat is separated
Draw details on the elf wood carving
- Draw the hat and hair on the elf wood carving (photos 12-14).
- Add a small colored triangle on each nostril to mark additional wood to remove to shape the nose (photo 12).
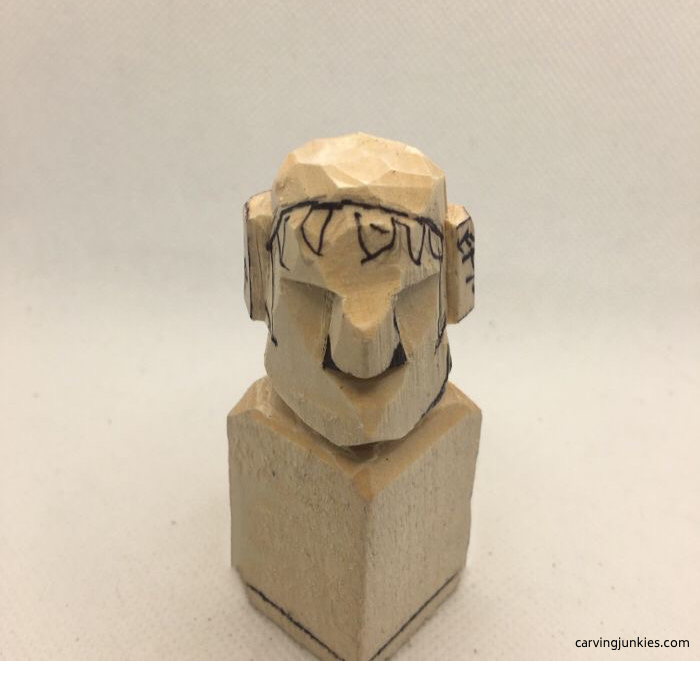 12. Details are drawn
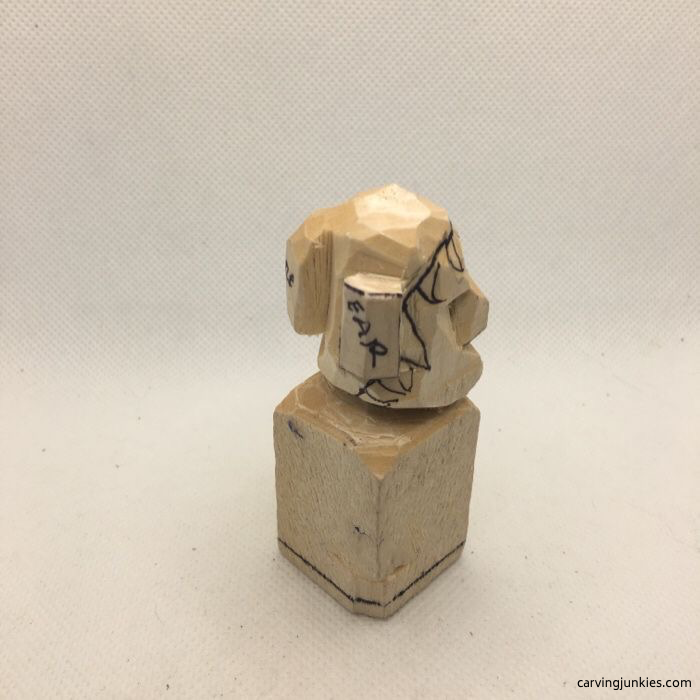 13. Right view
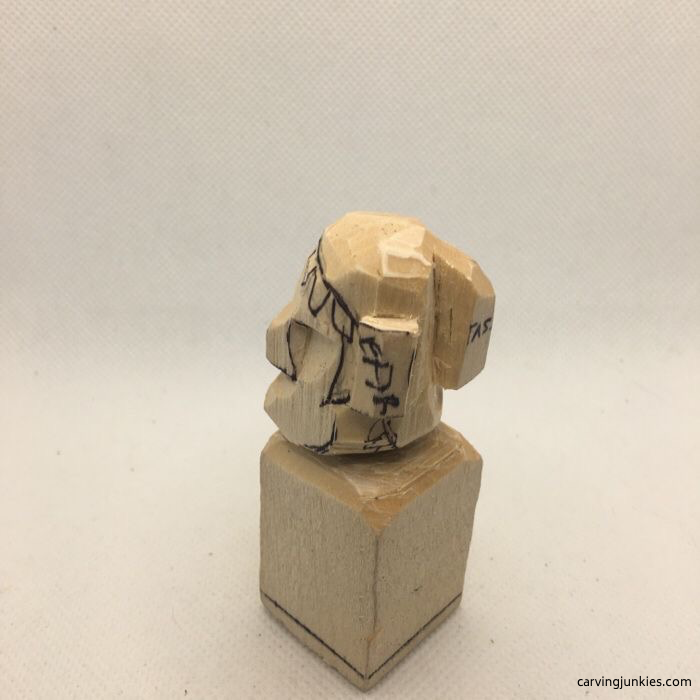 14. Left view
Shape the nose of the elf wood carving
- After cutting off the second set of nose triangles, draw a final set of triangles and remove them using small pyramid cuts to create shadow (photo 15).
- Make an angled cut downward at the end of the nose so it looks upturned (photos 16, 19).
- Use a U gouge to twirl under the nose (only halfway) to create curved nostrils (photo 17). Use a knife to remove the wood from underneath. Tip: You can use a detail knife to carve the nostrils, but carefully shave wood off (cutting it can crack the nose).
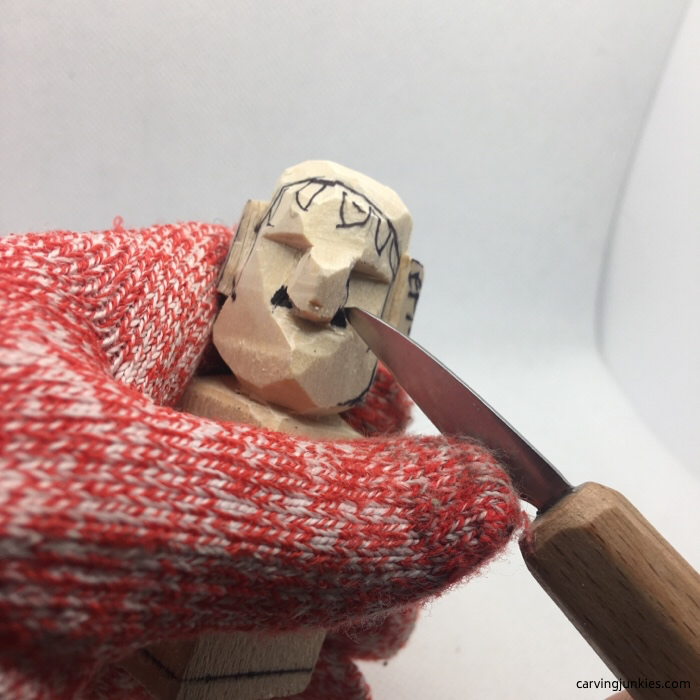 15. Making pyramid cut for shadow
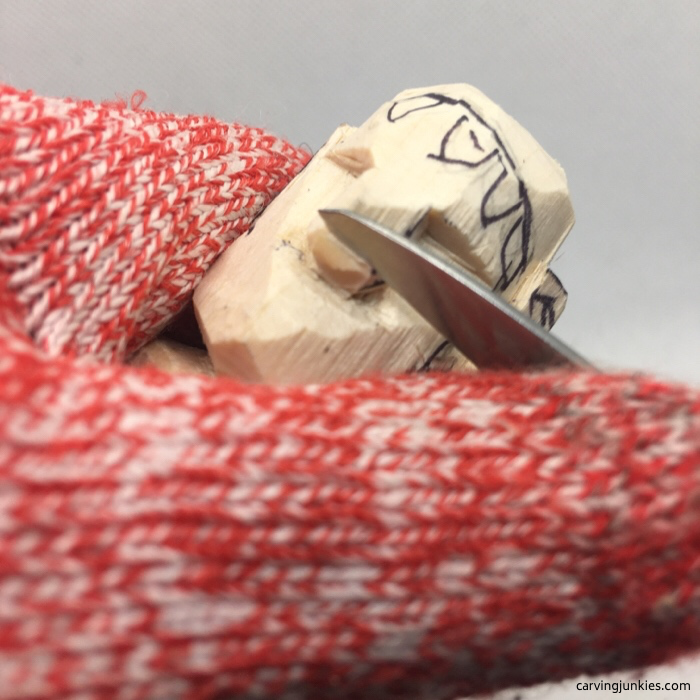 16. Angled cut for upturned nose
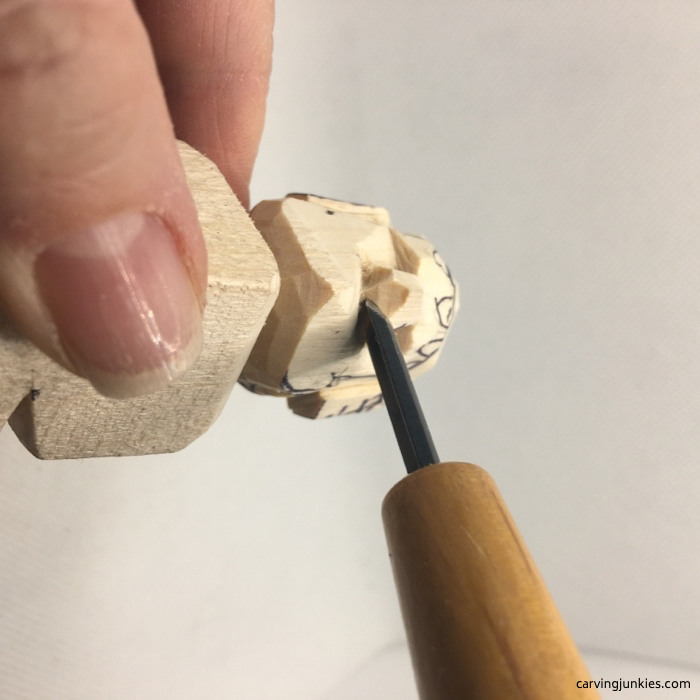 17. Twirl U gouge to carve nostrils
Carve the face of the elf wood carving
- Draw the smile lines on the elf wood carving and cut them. We use a stop cut and remove wood from each side (photos 18, 19).
- Start to narrow the chin, carve a thin mouth, and make an angled cut under each eye to create a cheekbone (photo 19).
- Use your knife to separate the head from the hat (photo 18) with V cuts.
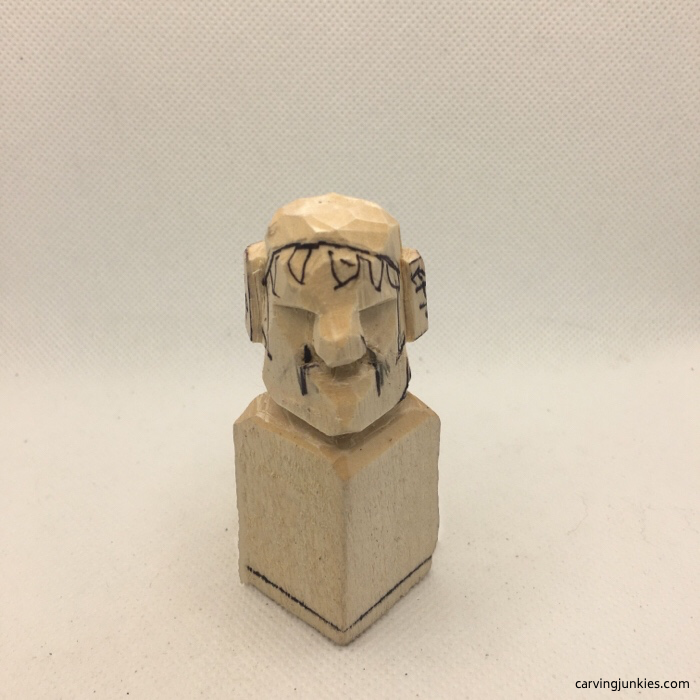 18. Draw smile lines
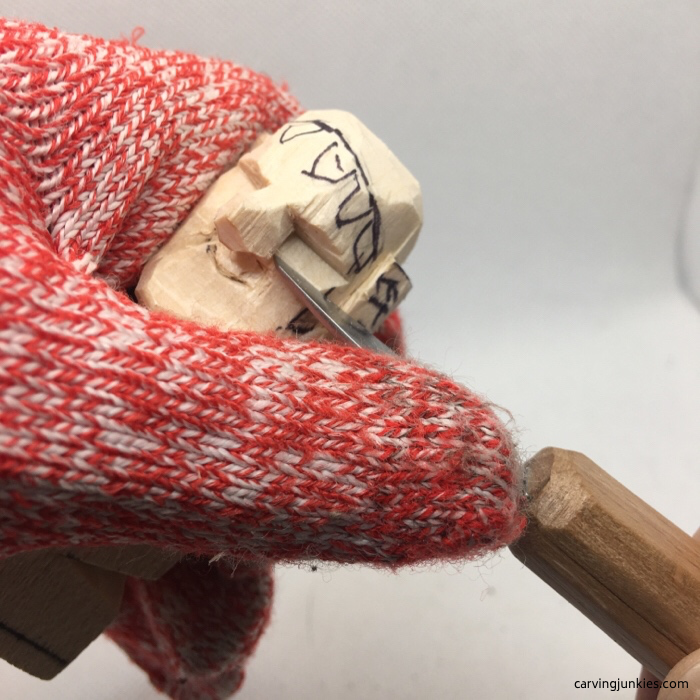 19. Creating cheekbone with angled cut
Shape the ears of the elf wood carving
- Carefully carve the ears to a point (photos 21,22). Tip: Keep the ears as thick as possible and shave wood off versus making cuts that can cause the ears to crack.
- Use a U gouge to gently scoop out the ears (photos 21,22). Tip: Go slow.
- Round all the corners on the lower body (photos 20-23).
- Use your knife to separate the thin base from the body all around (photos 20-23). We use V cuts.
- Draw the arms, the overalls, and the outline of the gift boxes (photos 20-23).
- Draw a little Y on the back to mark where you will carve the tush (photo 23).
- Shape the bottom of the hat tassel and make angled cuts to separate it from the head (photos 21-23)
- You can also noodle and narrow the chin (photos 21, 22).
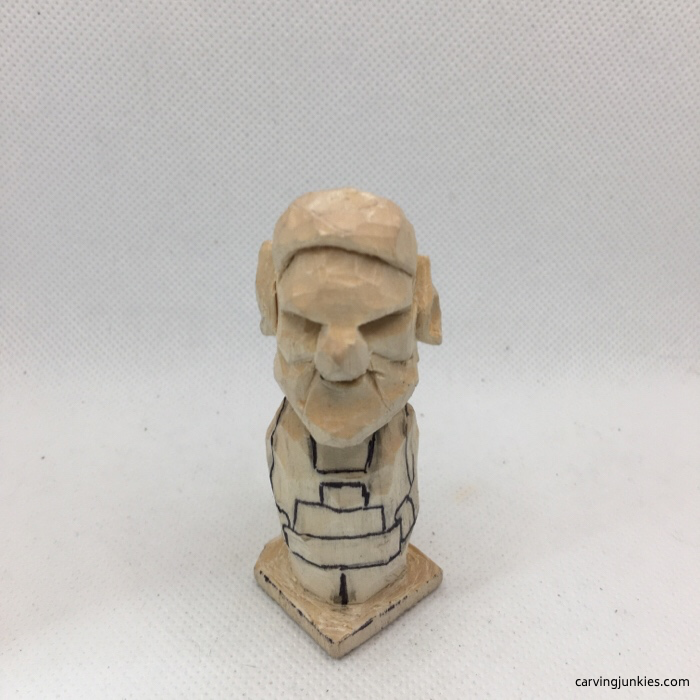 20. Front view of details
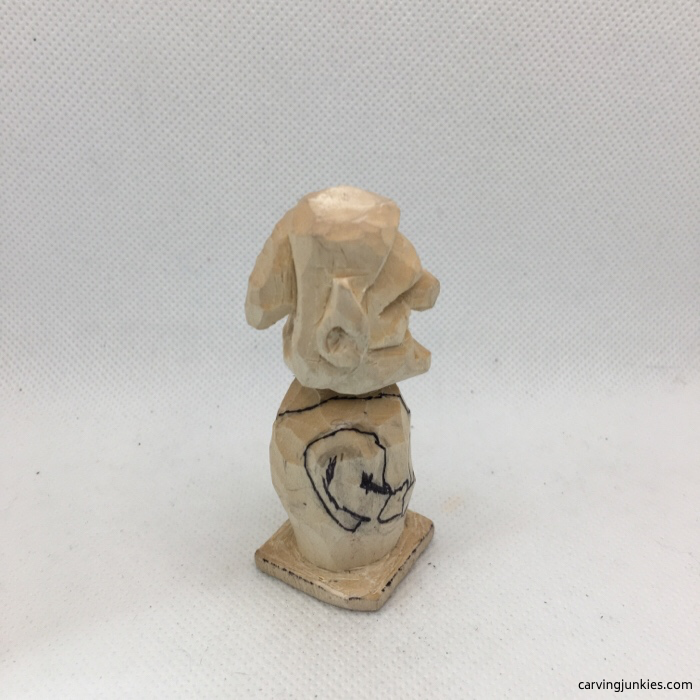 21. Right view
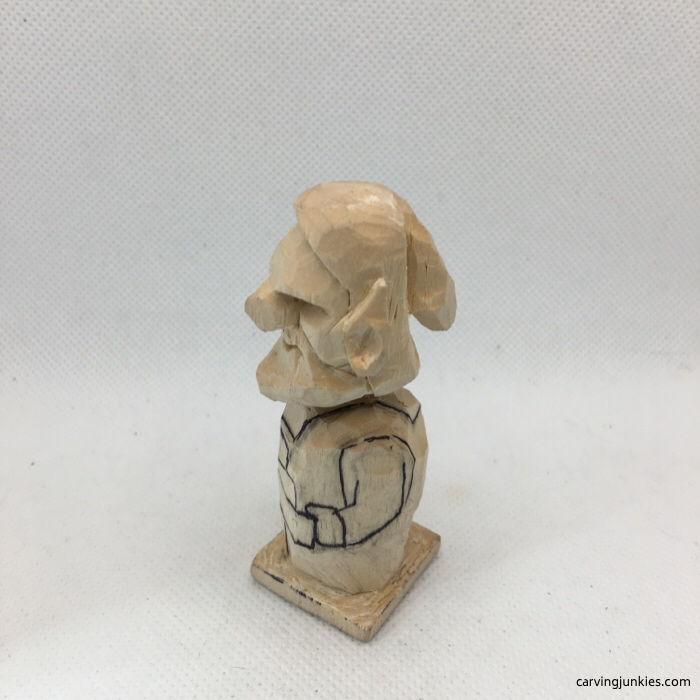 22. Left view
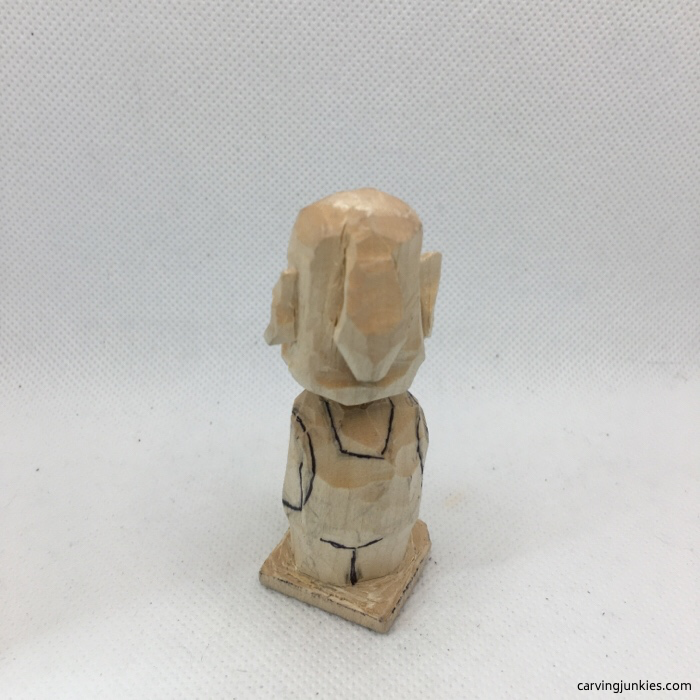 23. Back view
Define the gift boxes and the arms
- Use your knife to define the gift boxes and arms. You can use V cuts or stop cuts (photos 24,25).
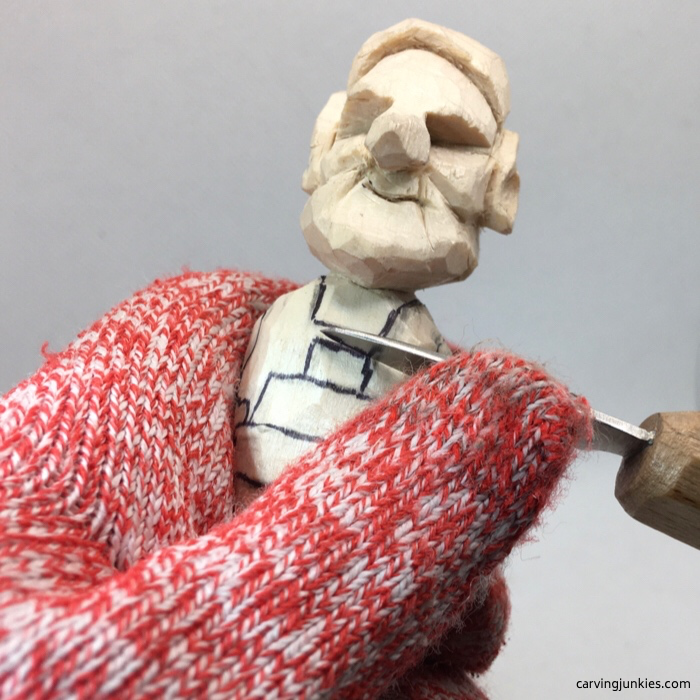 24. Defining gift boxes
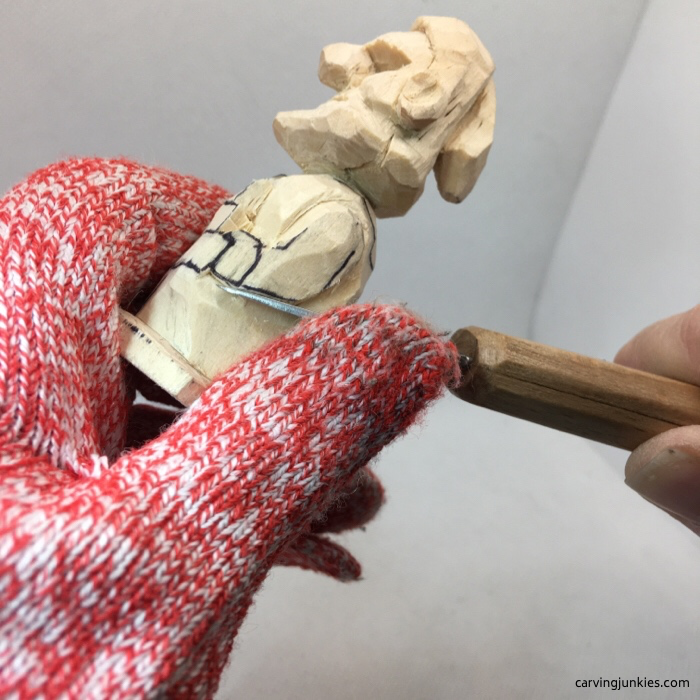 25. Defining arms
Split the legs of the elf wood carving
- Use V cuts to split the legs of the elf wood carving on the front and back.
- Mark the back where you will add V-cuts to define the knees.
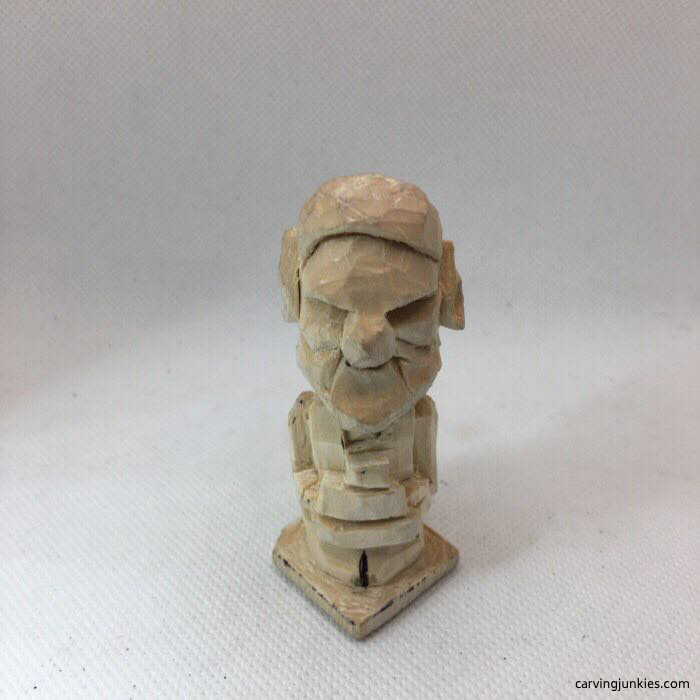 26. Legs are split
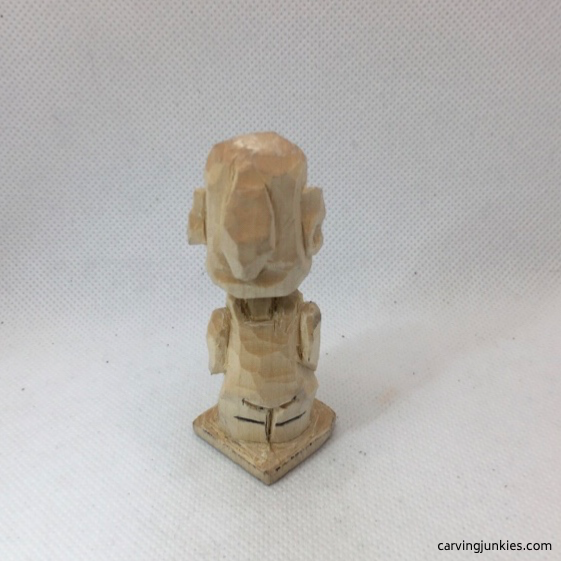 27. Knee cuts are drawn
Refine the elf wood carving
- Carve the shoes and round the pedestal of the elf wood carving (photos 28-31).
- Narrow the pants and the chin (photo 28).
- We use a soft V tool (from Drake) to carve the beard and hair. You can also use a detail knife. Tip: Make small V cuts to create texture (photo 28).
- Very gently narrow the bridge of the nose with the soft V tool (photo 28).
- Use your knife to carefully slice the eyebrows (with V cuts) to add texture.
- Use V cuts to add wrinkles on the shirt sleeves and pants (photos 28-31).
 28. Front view of elf before painting
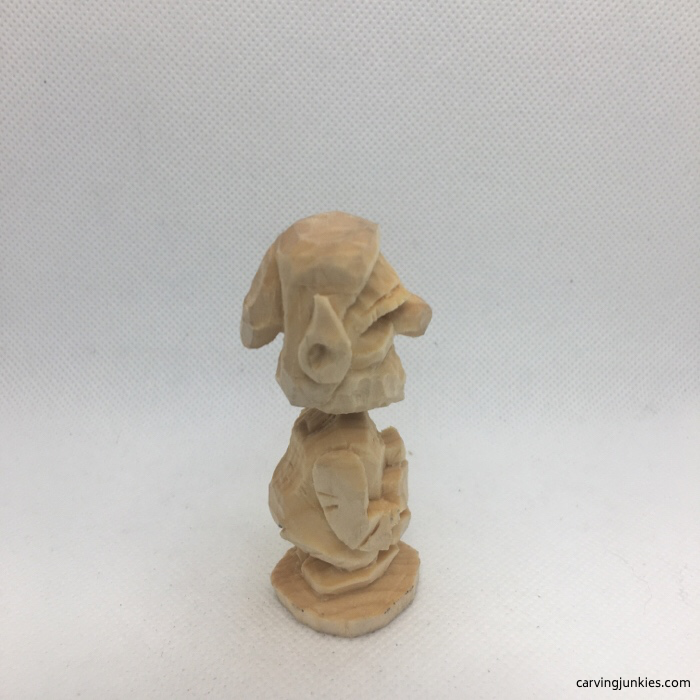 29. Right view
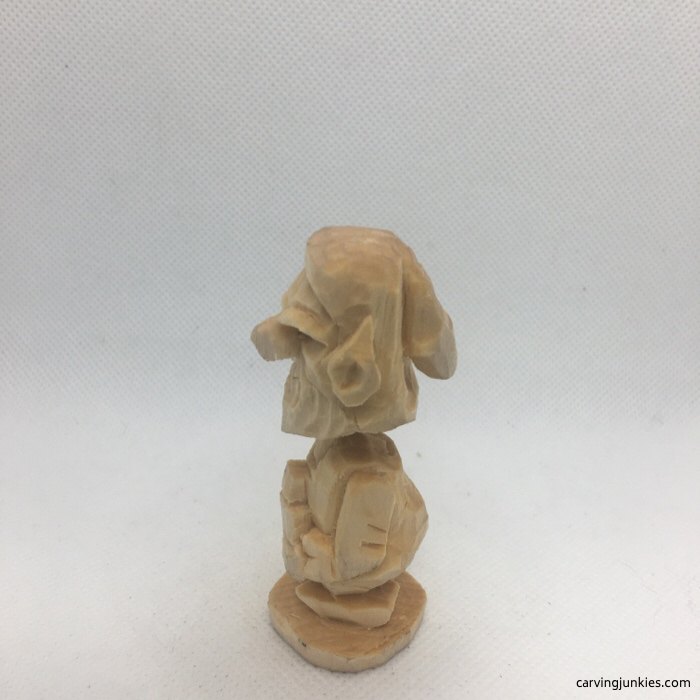 30. Left view
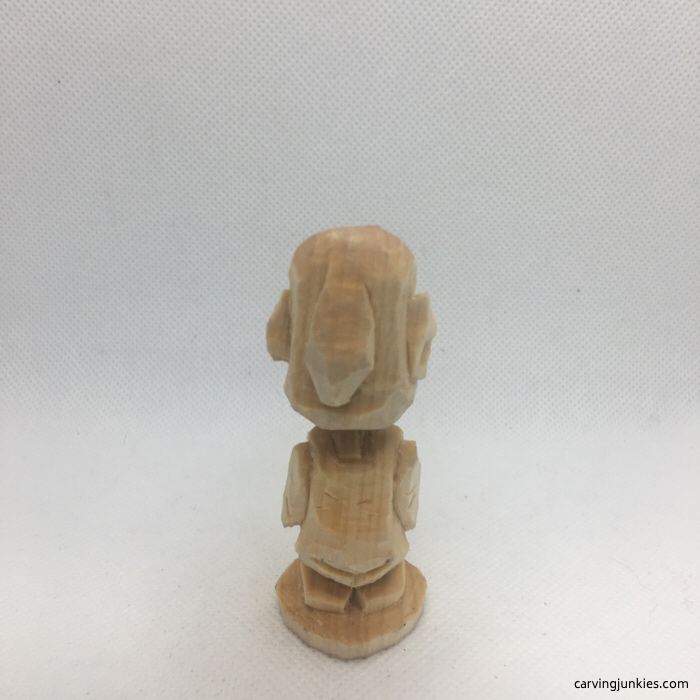 31. Back view
Paint the elf wood carving
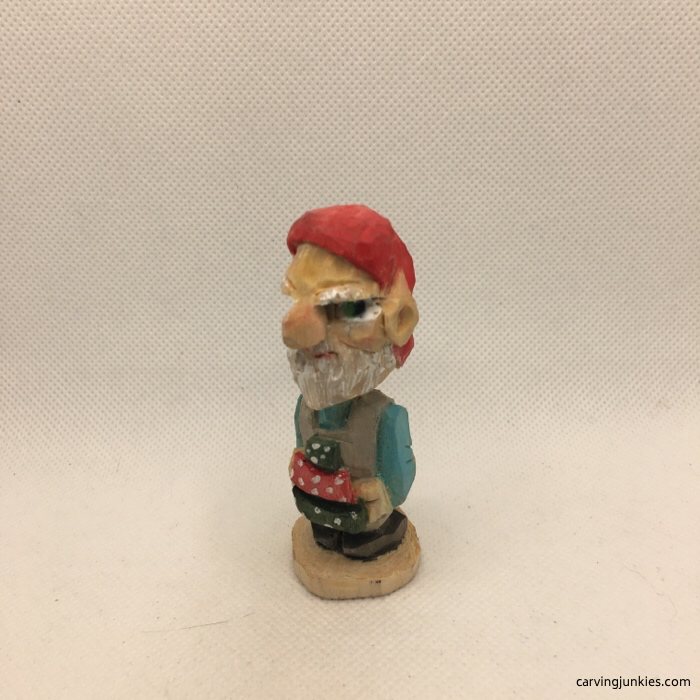 Front view of painted elf
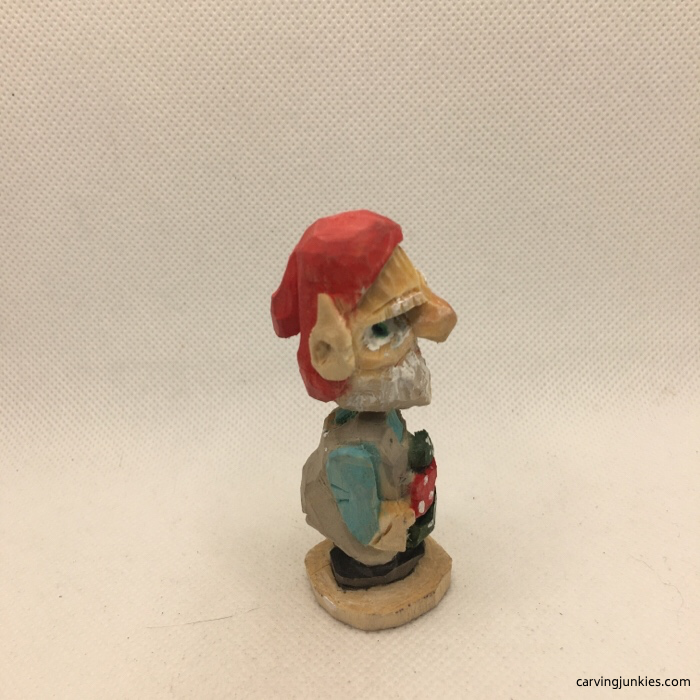 Right view
 Left view
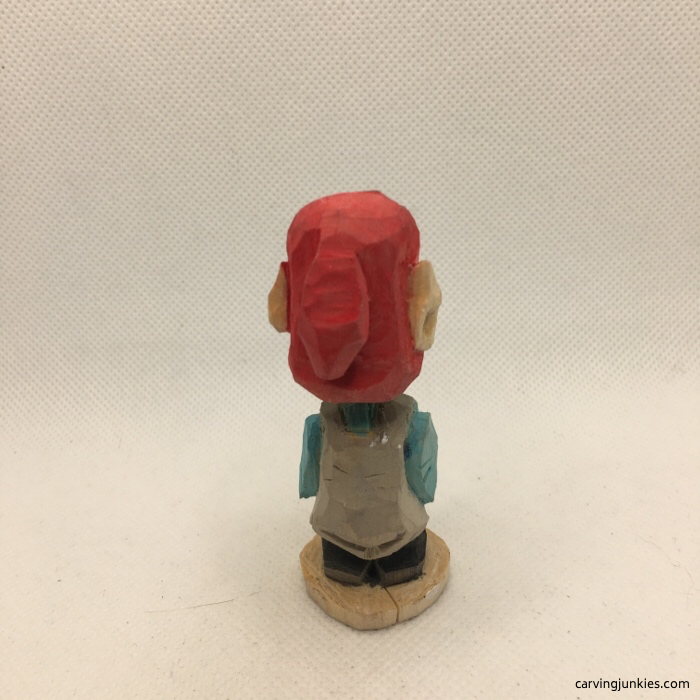 Back view
Use our painting guide below to get a similar look. You can even add a little gold glitter to the gift boxes.
All the acrylic paints we used are from FolkArt, except where noted:
- Eyebrows, beard, and whites of eyes: 100% winter white (dry brush beard and eyebrows).
- Eyebrows and beard shading: dry brush 100% steel gray.
- Hat: 5 drops of lipstick red paint mixed with 5 drops of water.
- Shirt: 5 drops of calypso sky paint mixed with 5 drops of water.
- Overalls: 5 drops of steel gray mixed with 5 drops of water.
- Eyes: 5 drops of blueberry frost paint mixed with 5 drops of water.
- Gifts: 5 drops of lipstick red paint mixed with 5 drops of water, 5 drops of Artists deep green permanent paint mixed with 5 drops of water; polka dots: 100% winter white applied with a toothpick.
- Shoes: 5 drops of black mixed with 5 drops of water.
- Eyes: light green and black magic marker.
Free elf wood carving pattern
If you prefer to carve your elf with a pattern, photocopy this to size to fit your wood block.
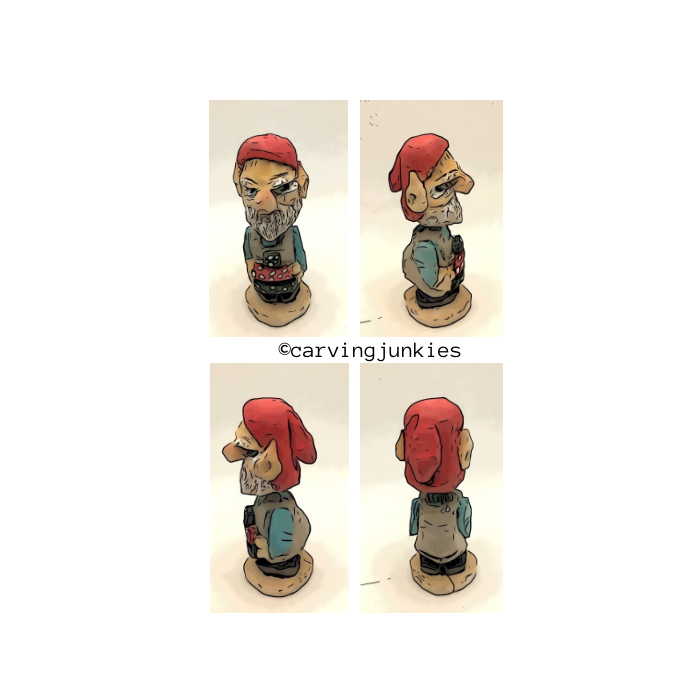
Elf wood carving tutorial summary
- This elf wood carving will brighten up your holiday season.
- While it seems like there are a lot of steps, the carving actually goes pretty quickly.
- A laminated U gouge (from Warren Cutlery) and a soft V tool (from Drake) are great to have for fine details like the nostrils and beard.
- Add a little hook and you can make this elf into an adorable ornament.
Get 50 Wood Carving & Painting Tips
FREE when you join our free Covered in Chips Club
Your information is 100% private and is never shared. Unsubscribe anytime. See our Privacy Policy .
Share page on:
Home | Privacy Policy | Terms of Use | Contact | Sitemap
