- Home
- Christmas wood carving ideas
- Christmas tree carving
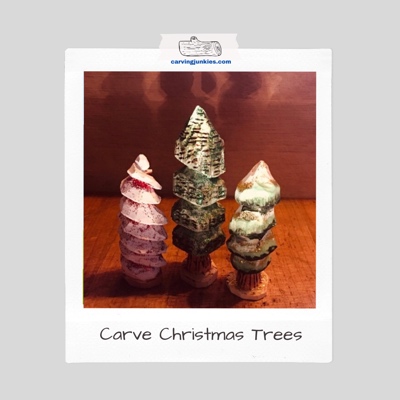
Christmas tree carving trio
You can carve these beautiful trees quickly and easily.
Here are three different Christmas tree carving tutorials to help get you into the holiday spirit.
You can carve these trees on small basswood blocks with built-in bases that provide extra stability for use as table decorations.
Or… you can forgo the base and make the trees hanging ornaments (we suggest you add an eye hook to the top center of the basswood block before you start your carving).
You can also double (or triple) the size of your block to create taller decorations. We’re all about carving fun and flexibility, so pick what’s best for you.
A painting guide for each tree is provided at the end. Adding a little glitter glue after painting makes them sparkle as they reflect the light. Consider carving our Christmas elf and Santa caricature, too, and add them to complete your holiday scene.
As always, we recommend good carving gloves for safety. We never carve without ours.
Christmas tree carving #1: The spiral tree
- For the first Christmas tree carving, we use a 1 x 1 x 3-inch (2.54 x 2.54 x 7.62 cm) basswood block.
- With a roughout knife, carve the top to a point (photo 1). It’s kind of like shaving the point of a pencil.
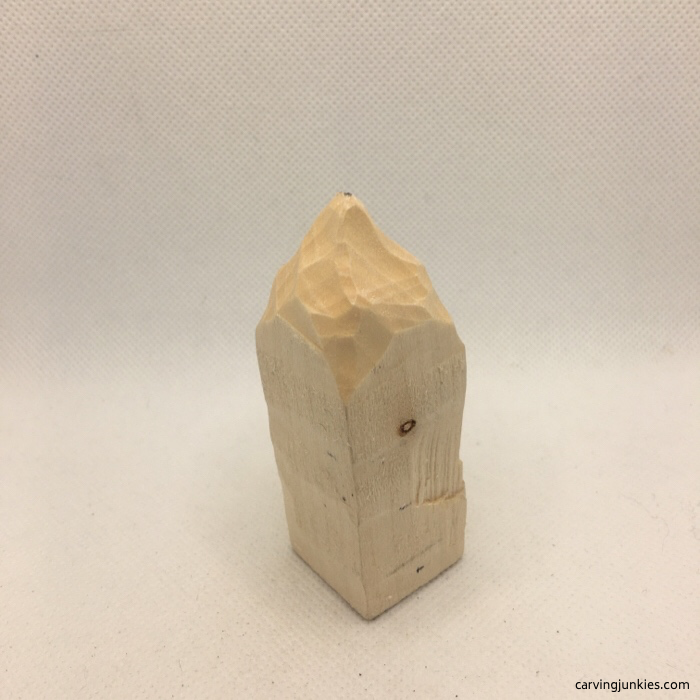 1. The point is carved
- Next, round the bottom corners and draw a spiral guideline all around the block (photos 2,3).
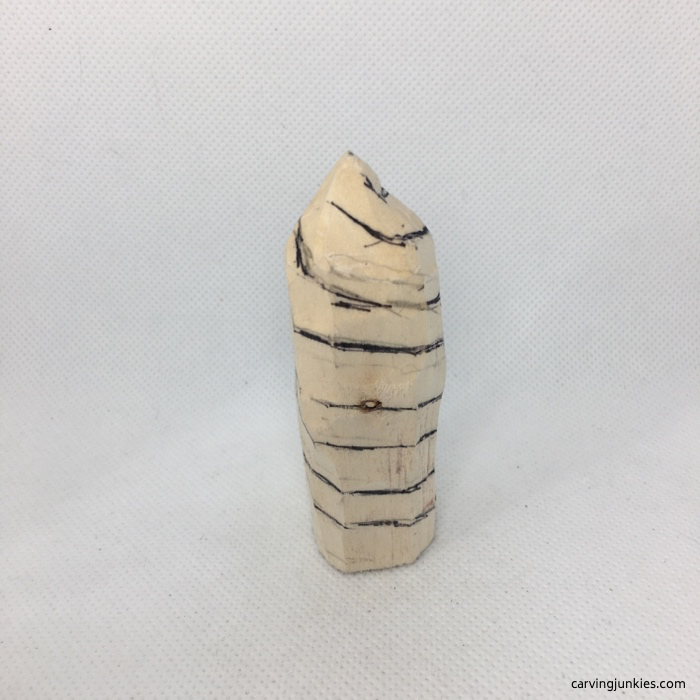 2. Front view of spiral
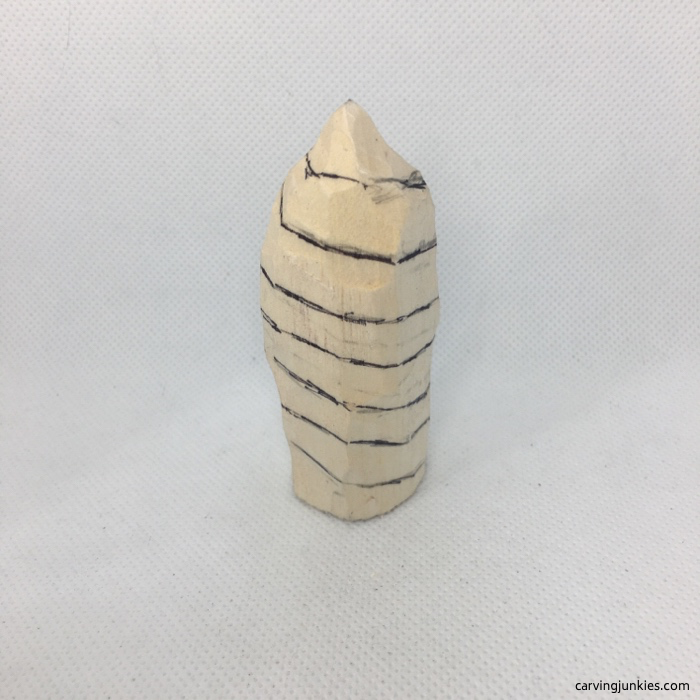 3. Back view
- Using a roughout knife, make a stop cut along the spiral guideline and remove wood from underneath (photo 4).
- Continue carving the spiral all around (photo 5) as evenly as possible.
- The spiral provides a natural base at the bottom (photo 5).
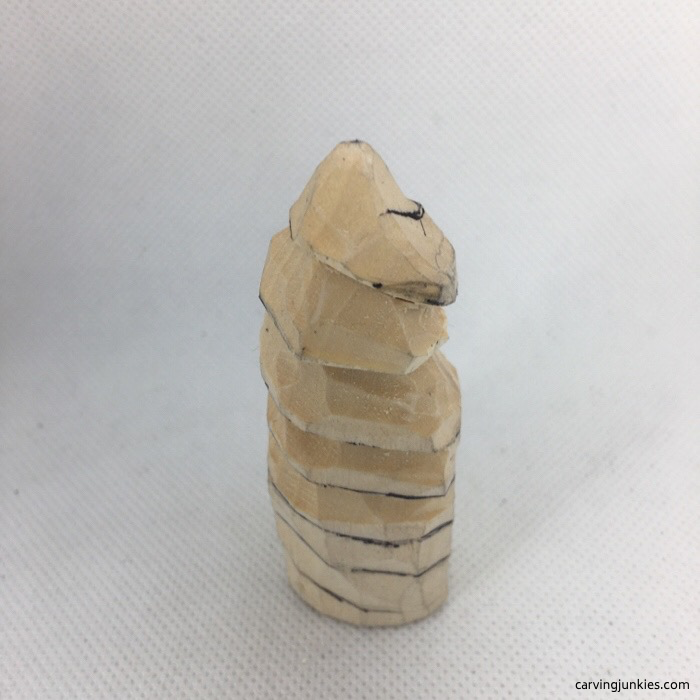 4. Starting to cut the spiral
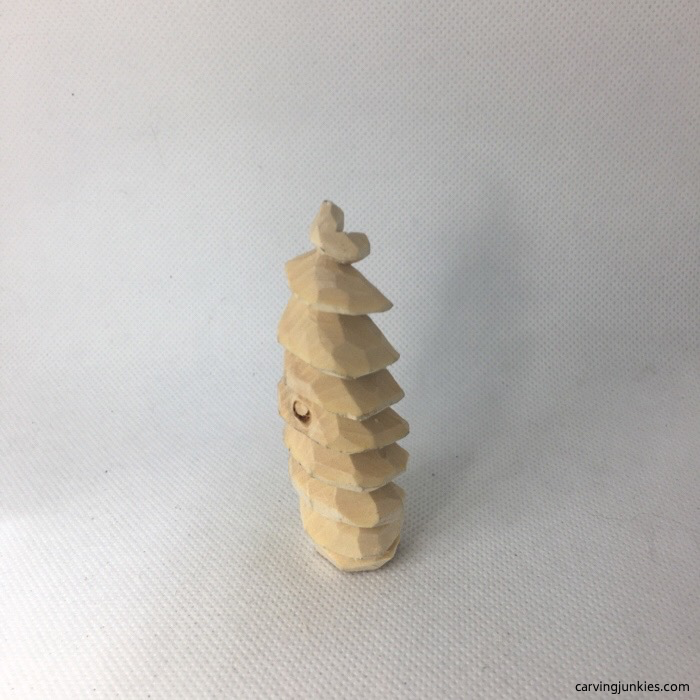 5. Spiral is cut all around
Christmas tree carving #2: The textured tree
 The textured tree is in the middle
- For this Christmas tree carving, we use a 1 x 1 x 4-inch (2.54 x 2.54 x 10.16 cm) block of basswood.
- Start the tree by shaving the top to a point and rounding all the corners. Then draw 4 guidelines around the block (they do not have to be evenly spaced). Add a 5th line close to the bottom that will mark the base (photo 6).
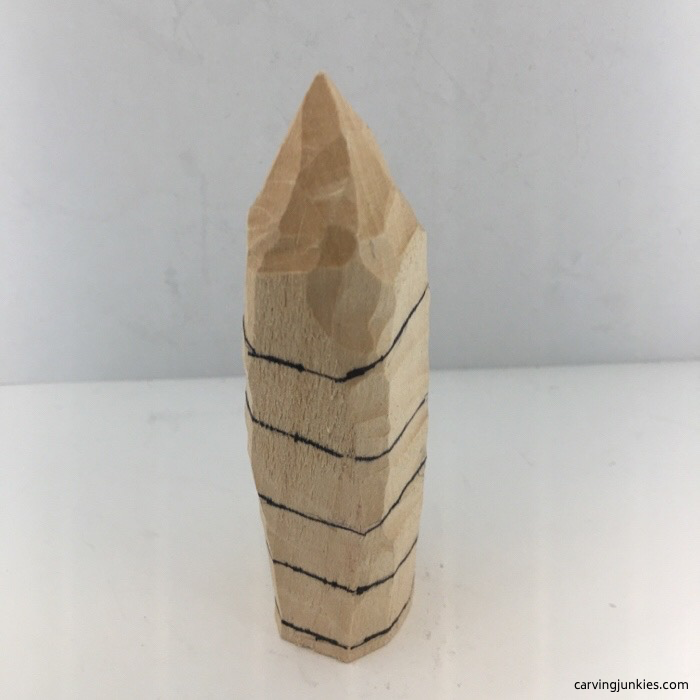 6. Top is carved and guidelines are drawn
- Create a textured pattern on the entire Christmas tree carving before separating the tree sections. Use a #11 (U) gouge to cut along the guidelines (photo 7). If you don’t have a gouge, you can make V-cuts with a knife.
- Tip: See photo 7 for how we hold the gouge, which allows more control (we use a backward scooping motion) and prevents slipping.
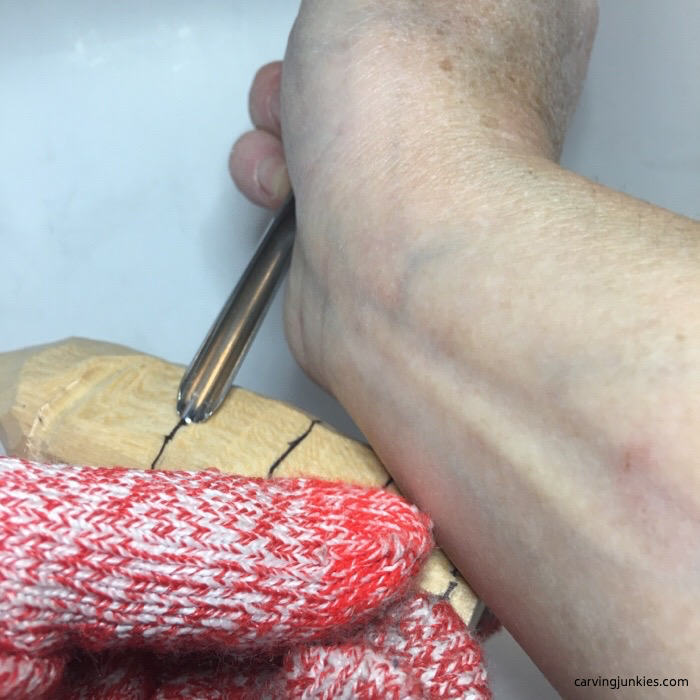 7. Making cuts with the gouge
- Continue using the gouge to create indentations that run vertically (photo 8) on the Christmas tree carving. Or make V-cuts with a knife if you don’t have a gouge.
- Use a micro V-tool to make horizontal cross cuts (photo 9). You can also use a detail knife and make small V-cuts.
- To carve the base, use a roughout knife to make stop cuts and remove wood from above (photo 9).
- Also remove wood to create the tree trunk (photo 9), which you can narrow later.
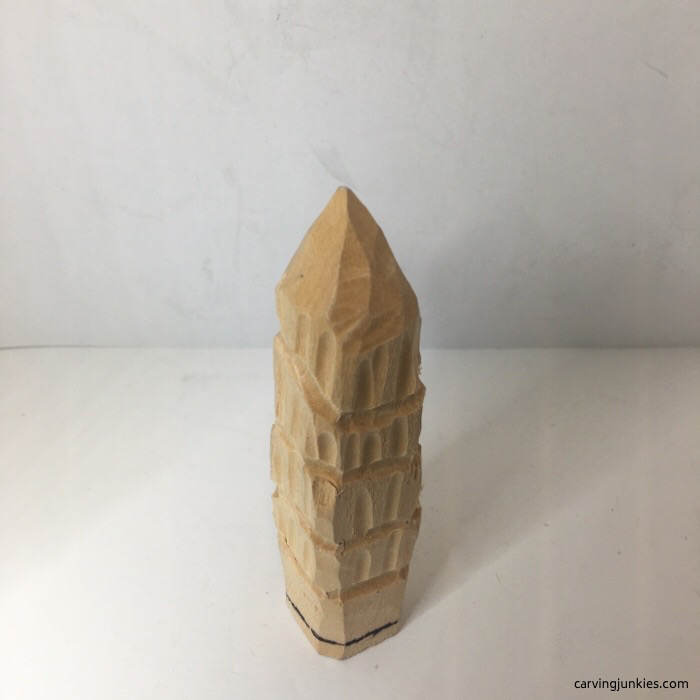 8. Vertical indentations are cut
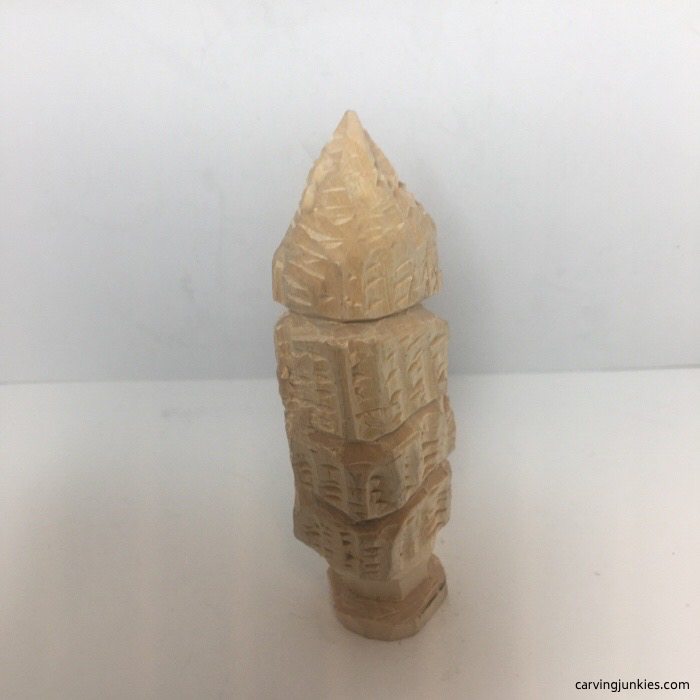 9. Texture is added
- Using a roughout knife, make a series of angled V-cuts to further separate and shape each of the tree sections (photo 10).
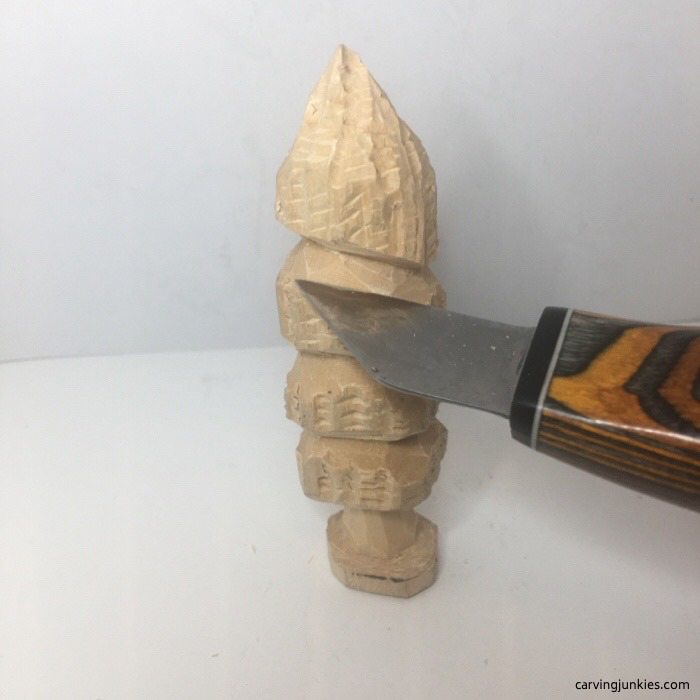 10. Carving the tree sections
Christmas tree carving #3: The mushroom tree
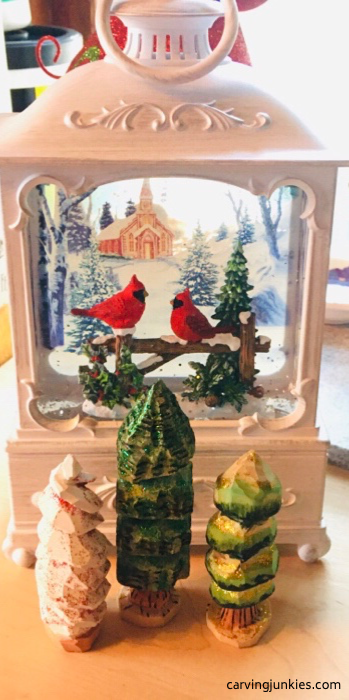 The mushroom tree is on the right
- For the third Christmas tree carving, we use a 1 x 1 x 3-inch (2.54 x 2.54 x 7.62 cm) basswood block.
- Like the other trees, carve the top to a point and draw your first guideline around the block (photo 11).
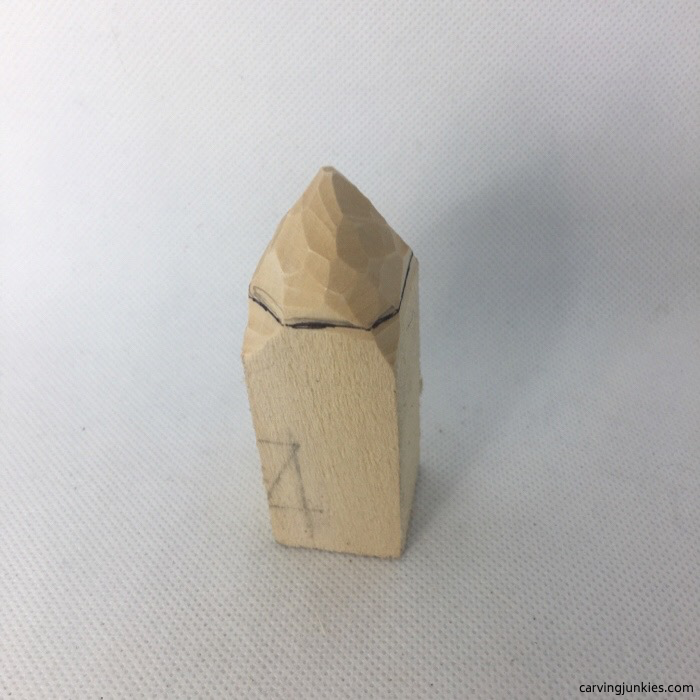 11. The point is carved
- Using a stop cut, separate the first section all around and remove wood from underneath (photo 12). It will look like a mushroom.
- Draw the second guideline at an angle all around (to vary the sections) to mark the next section of the Christmas tree carving (photo 12).
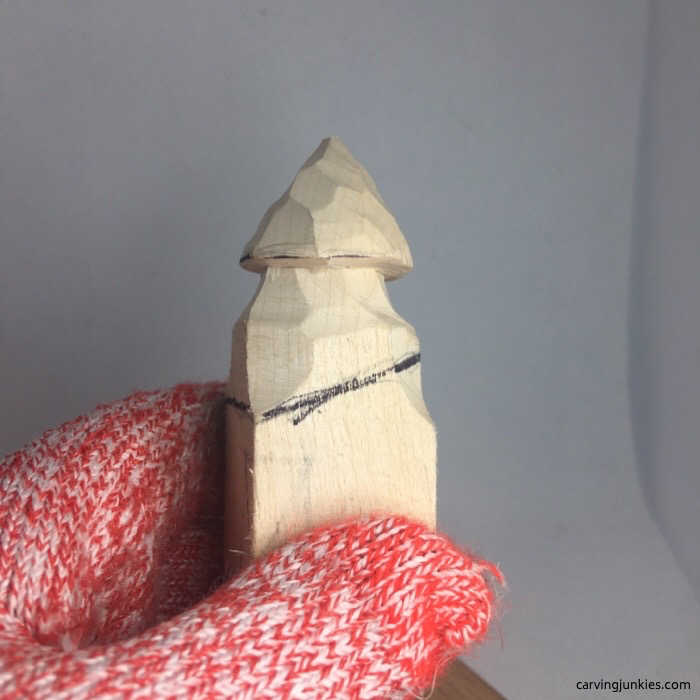 12. The first tree section is separated
- Separate the second section of the Christmas tree carving all around (photo 13) and draw on the third guideline (photo 14), which can be straight all around.
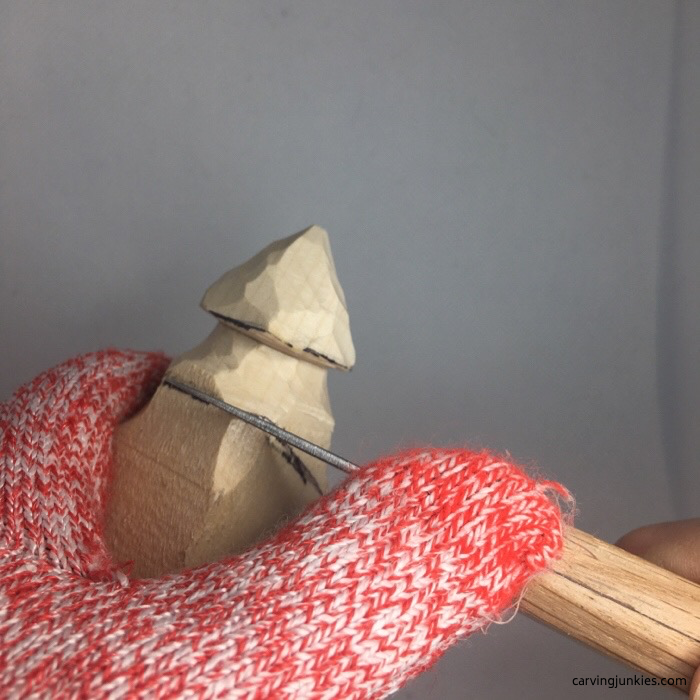 13. Separating the next tree section
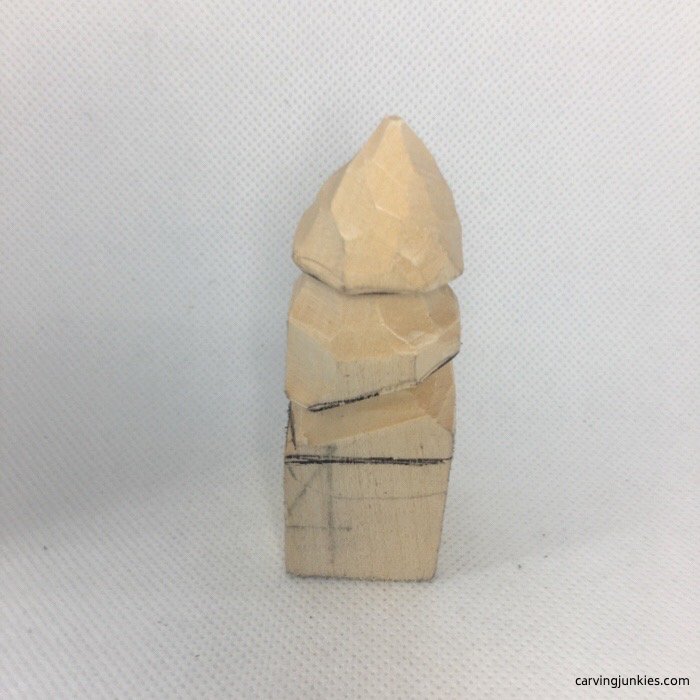 14. Continuing to separate the tree sections
- Add another guideline and separate the final section of the Christmas tree carving (photo 15).
- Draw a guideline for the base and roughly draw the trunk (photo 15).
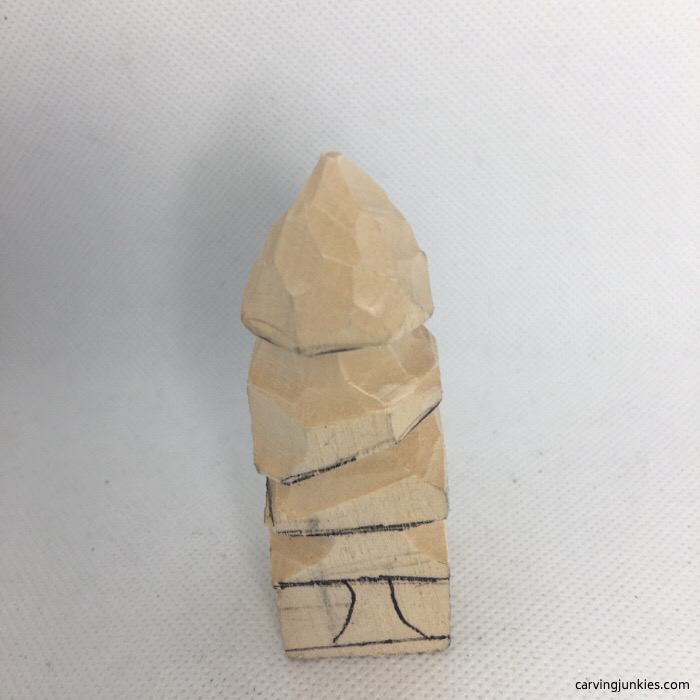 15. The last guidelines are added
- To carve the base, use a roughout knife to make stop cuts and remove wood from above (photo 16).
- Also remove wood to create the tree trunk (photo 16).
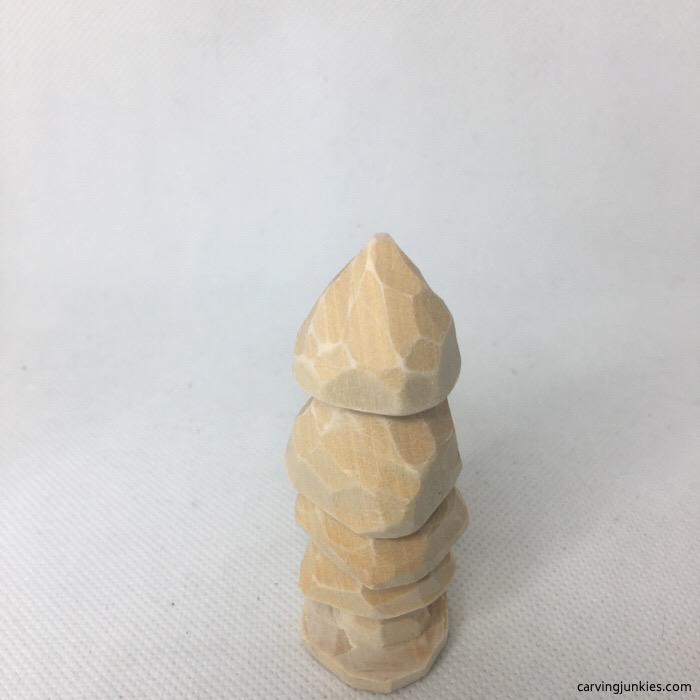 16. The tree is carved
Painting each Christmas tree carving
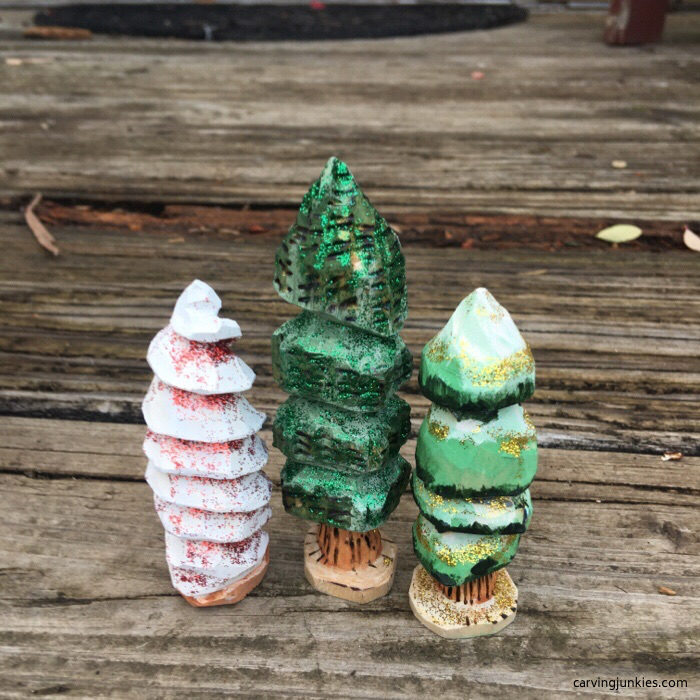
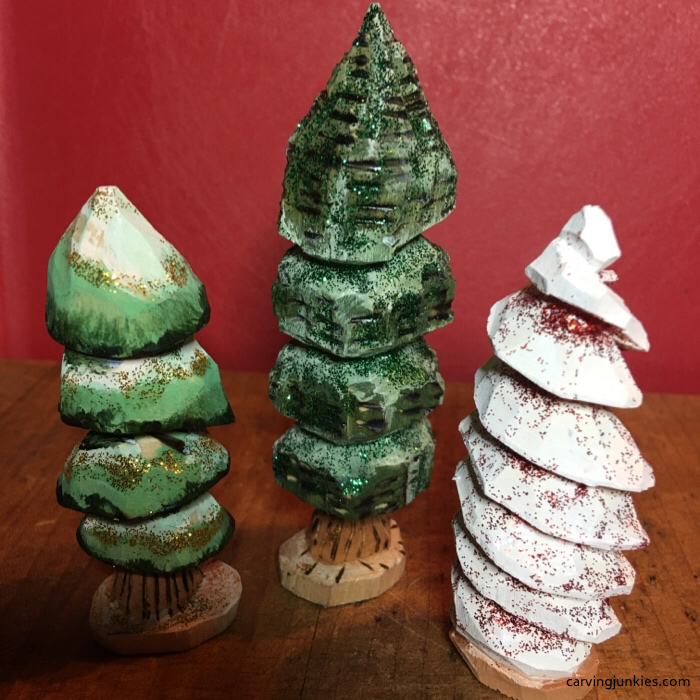 17. Painted mushroom tree, textured tree, and spiral tree
Before painting each Christmas tree carving, you can use a wood burner (optional) to enhance the textured Christmas tree carving and add lines to the tree stumps (photo 17).
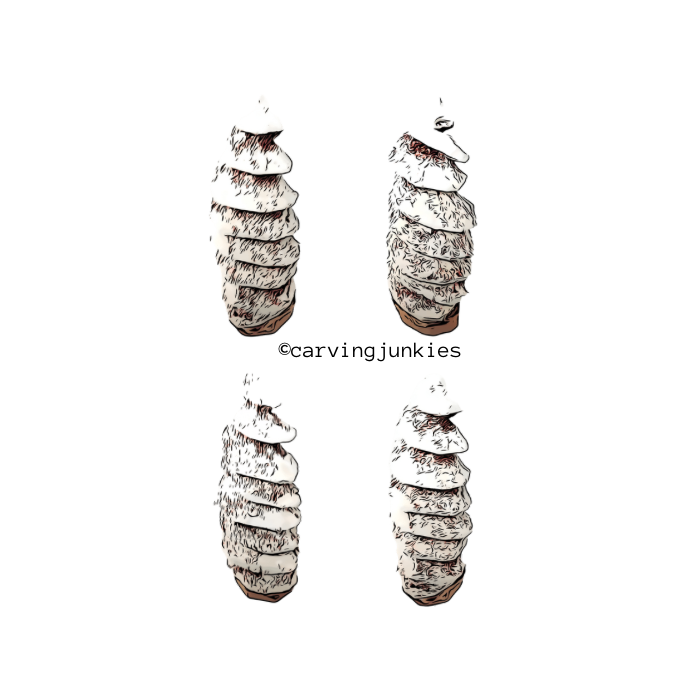
Spiral Christmas tree carving (photo 17, right): 5 drops of Artist’s Loft titanium white mixed with 3 drops of water; Bazio red glitter glue; 1 drop of Academy burnt sienna mixed with 5 drops of water for base.
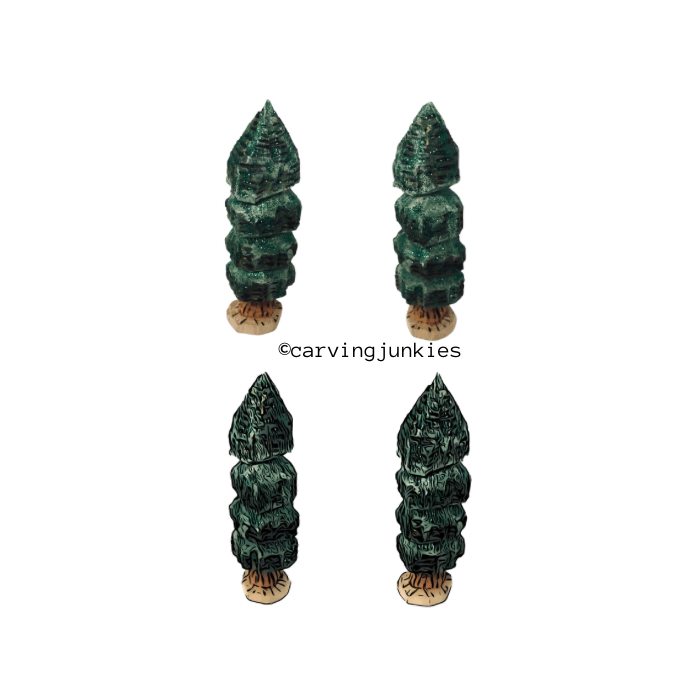
Textured Christmas tree carving (photo 17, middle): 3 drops of Artists Acrylic green permanent mixed with 9 drops of water; Bazio green glitter glue; 1 drop of Academy burnt sienna mixed with 5 drops of water for tree trunk.
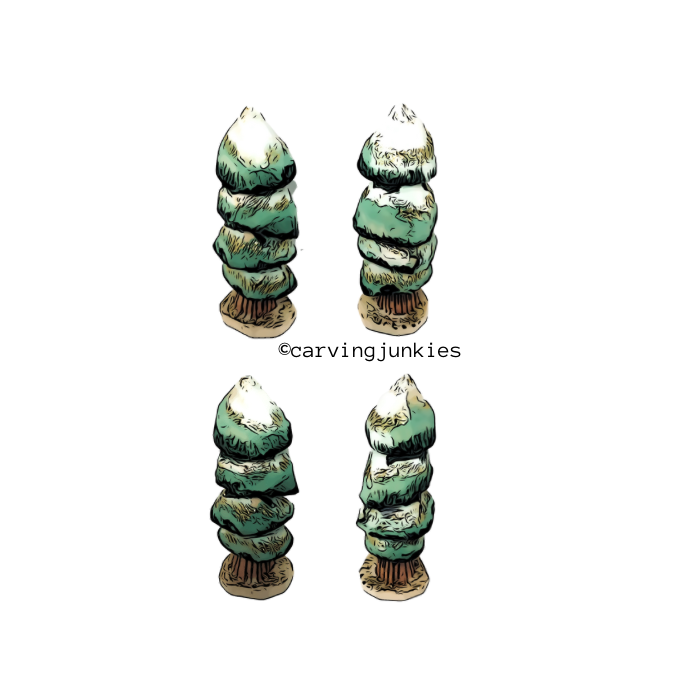
Mushroom Christmas tree carving (photo 17, left): 3 drops of Craft Smart grass green mixed with 15 drops of water; 1 drop of titanium white mixed with 3 drops of water for snow; Bazio gold glitter glue; dry brush Artists Acrylic green permanent on the edges for shadow; 1 drop of Academy burnt sienna mixed with 5 drops of water for tree trunk.
Christmas tree carving trio summary
- These patterns make it easy to create three different versions of a Christmas tree carving.
- They are quick to carve and you don’t have to worry about them being perfect.
- You can easily add more trees in different shapes and colors.
- These trees make great ornaments or table decorations, when paired with other holiday decor.
- Add our Christmas elf and Santa caricature carvings to complete your holiday scene.
Christmas tree carving patterns
Get 50 Wood Carving & Painting Tips
FREE when you join our free Covered in Chips Club
Your information is 100% private and is never shared. Unsubscribe anytime. See our Privacy Policy .
Share page on:
Home | Privacy Policy | Terms of Use | Contact | Sitemap
