- Home
- Wood carving caricatures
- Carve a little man
Cute carve a little man tutorial
Use flat-plane carving skills to create a fun caricature.
LEVEL: SOME CHALLENGES
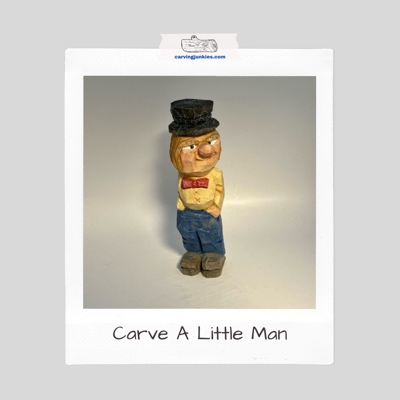
Ready to carve a little man with a porkpie hat? This tutorial was inspired by a beautiful video about Harley Refsal, who is often credited with coming up with the term flat-plane carving.
Unlike traditional wood carving, you will not round the edges of your carving (unless you prefer to). Leaving the flat edges helps accentuate the facets in your carving. When you paint the little man (see our painting guide at the end) and dry brush him with a little white paint, the facets are wonderfully accentuated (see hat and pants in the photo below).
This little guy’s head will be tilted to the left, which is easy to do, and creates a sense of movement.
Carve a little man tutorial at-a-glance
Watch this progression video to see the key steps to carve a little man before you start your carving.
What you will need to carve a little man
To carve a little man, use a block that is 1 x 1 x 3 inches (2.5 x 2.5 x 7.6 cm) . As always, you can easily make your little man carving bigger.
Grab a pencil or pen to trace the template (provided at the end of this page). You may have to photocopy the template to size to fit your wood block.
You will need a knife to remove wood and perhaps a smaller, detail knife for the face and hands.
A painting guide is provided at the end.
Always wear carving gloves for safety and remember to protect your lap as well.
Preparing to carve a little man
Use the provided template (at the end of this page) and trace your little man on each side of the wood block (photos 1,2). You really only need to use one of the provided templates (simply turn it over), but we’ve provided both sides for you.
Make sure the head and body are pointed in the same direction on each side (photos 1,2). Add guidelines to mark the middle of each cut that you will make on the right and left sides (photos 1,2). You can also extend your guidelines on the front and back to guide your cuts (photos 3,4).
For those who prefer to measure and cut, the bottom of the hat is 1/2-inch (1.3 cm) from the top. The bottom of the head is 1.5 inches (3.8 cm) from the top. The top of the pants are about 2.5 inches (6.4 cm) from the top. The top of the shoes are 3 inches (7.6 cm) from the top.
 1. Right side of template is drawn
 2. Left side of template is drawn
 3. Front side with guidlines
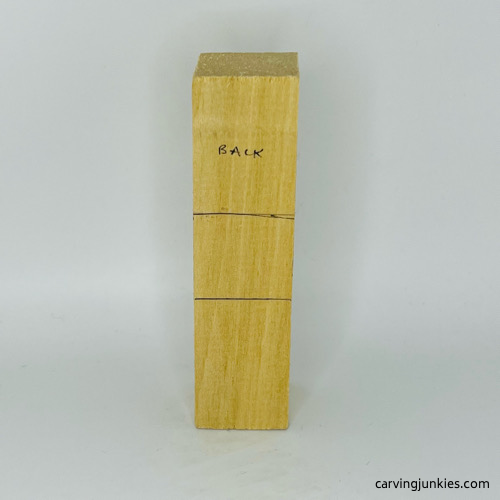 4. Back side of guidelines
Making your first cuts to carve a little man
Use a combination of V-cuts (photo 5) and stop cuts to create notches at each corner of the guidelines on the block (photo 6).
Continue by removing wood in between the notches to separate the head, body, legs, and shoes (feet) all around, refining and shaping the body of the little man (photos 7,8).
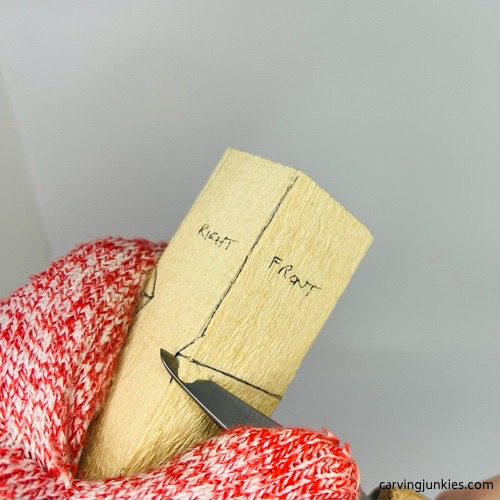 5. Starting a V-cut to make a notch
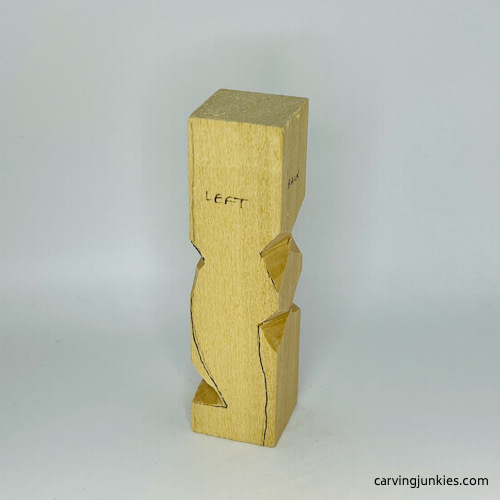 6. Left view of cut notches
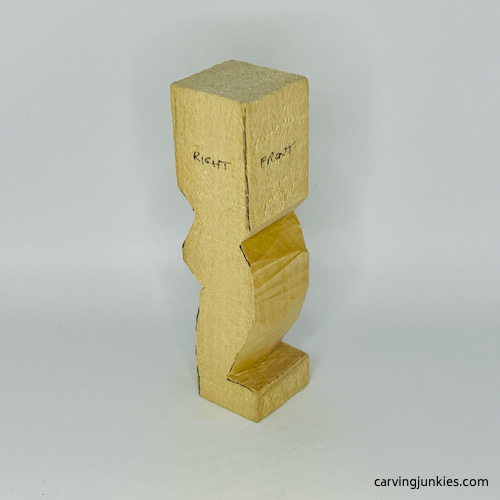 7. View from front and right
 8. View from back and left
Carve a little man: Set up the head
The head of the little man will be looking to the left. Mark the top of the head where you will remove three of the corners (photo 9). Slice wood off starting about half-way down the body, moving upward (photo 10).
Tip: You will now have a new “front” of the head that you may want to mark for guidance (photo 9). Using this corner makes it possible to create a long, protruding nose with ease.
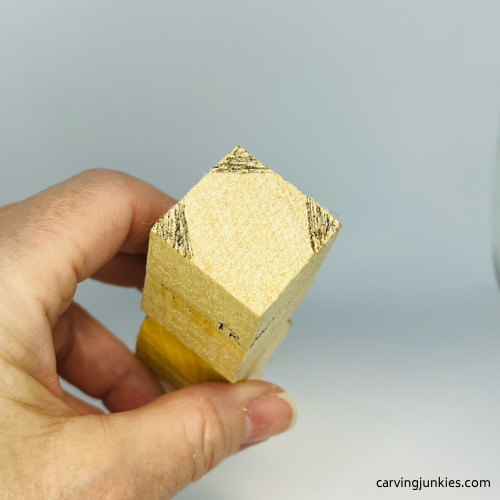 9. Corners to remove are marked
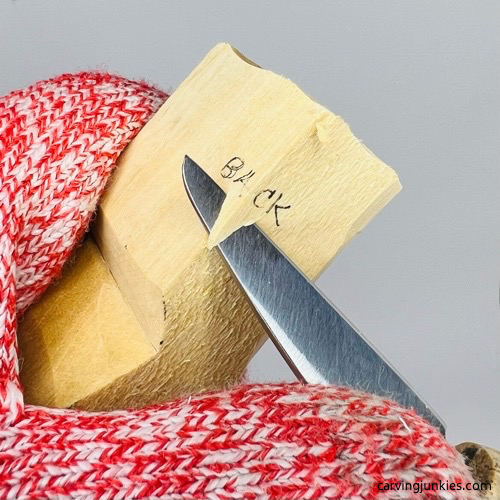 10. Rounding three corners to shape the head
Carve a little man: Add some details
After the head is shaped, separate the neck all around with stop cuts (visible in photos 11-14).
Also, draw some details, including a line for the bottom of the hat (photos 11-14).
On the front, draw a bow tie, buttons, and the waistband (photo 11).
On the sides, add the arms (photos 12,13) and the bottom of the pants (they are longer in the back, as in photos 12,13). The arms are about 1/4-inch (0.09 cm) wide. Note: You can add cuffs if you want. I ended up turning the cuff into a hand that is visible in the left pocket, while the other hand is hidden inside the pocket (see photos 36-38, 41, 42).
On the front and back, add a line (about an inch or 2.5 cm long) to separate the the legs (photos 11,14). Also, add a little Y on the back of the tush (photo 14).
Set up the nose box, which extends from the front to the left side (photos 11, 13). It is about one inch (2.5 cm) wide. Note: You can easily carve the nose using our triangle-by-triangle nose carving system, or use your own method.
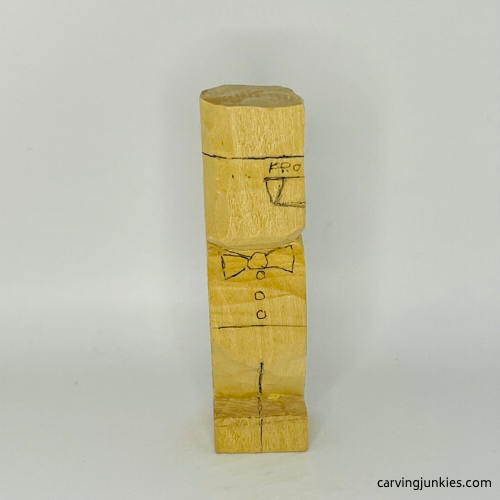 11. Drawn details on the front
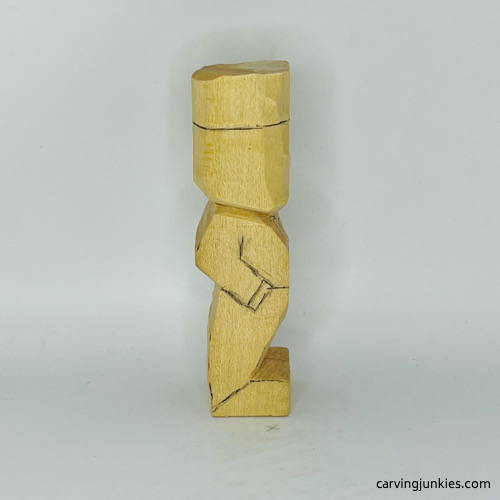 12. Details drawn on the right
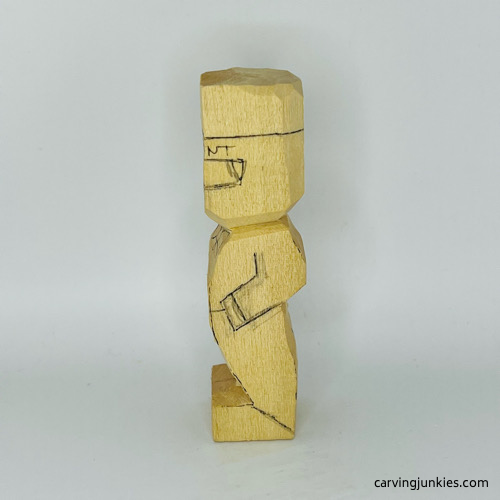 13. Details drawn on the left side
 14. Details on the back side
Carve a little man: Separate the arms
Make a stop cut under each arm and remove wood from underneath (photo 15). This will give you access to taper the back of the legs (photo 16).
Separate the end of the arm and the inside of the arm (photo 17). You can use a stop cut and remove wood from the side. Also, taper the right arm so it looks like the hand is in his pocket. You can slice the wood at an angle across the bottom of the arm (photo 18).
Repeat on the left arm (note: you can carve a hand here or have this hand hiddden in this pocket as well).
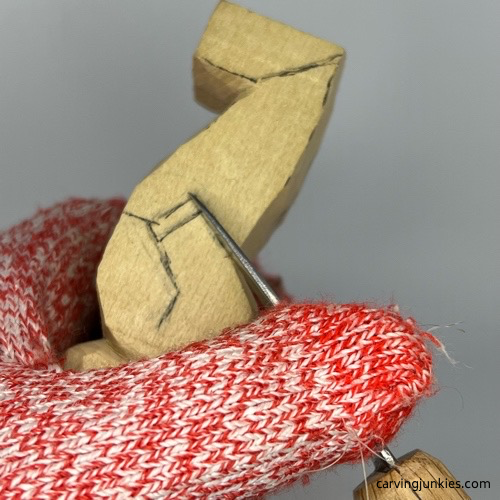 15. Making a stop cut under the right arm
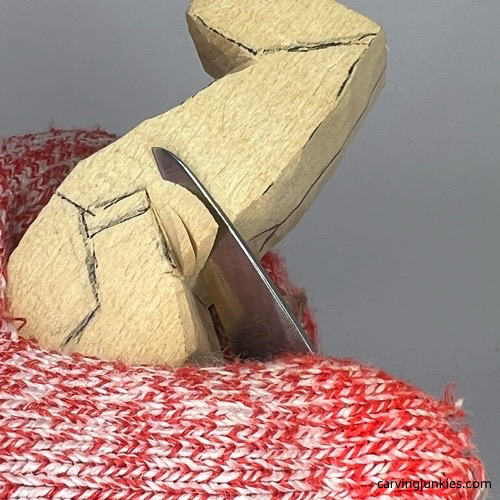 16. Removing wood to taper the legs
 17. Separating the inside of the arm
 18. Tapering the end of the arm
Carve a little man: Keep cutting
The chest of the man needs to be cut back. Remove wood by making one long push or pull cut in the middle, and another long cut on each side. The chest will then have 3 flat planes (photo 22).
Use stop cuts to separate the back of the arms (photo 23). Tip: you can draw a guideline about 1/4-inch (or 0.9 cm) long on each side.
Use stop cuts to separate the bottom of the hat from the head (photo 20). Draw a line (less than a quarter inch or 0.09 cm wide) to mark the brim of the hat (photo 20) and use stop cuts to separate it. Cut from the top of the hat down to the stop cuts you made (photo 21), carefully removing wood in small sections. Check the shape often to maintain symmetry around the hat.
Once the hat is finished, carve the head into an oval shape (see progress photos 22,23). Since the body is now carved, you can easily shape the head in proportion to the rest of the body.
Redraw the bow tie (if needed) and separate it (photo 22) with small stop cuts. You will add the buttons later.
Split the legs on both sides and separate the back of the arms (photo 23). You can use a wide V-cut or a slicing cut.
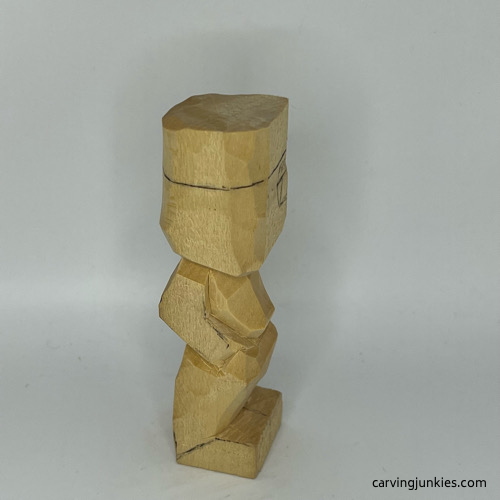 19. Chest is cut
 20. Head is separated
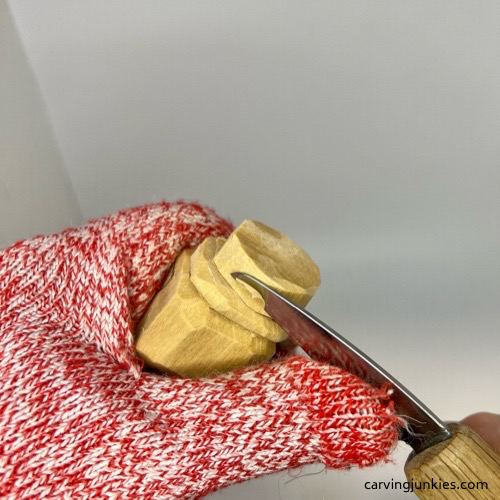 21. Shaping the top hat
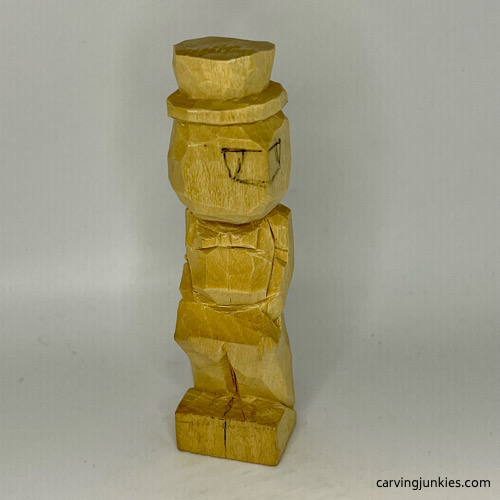 22. Front legs are split
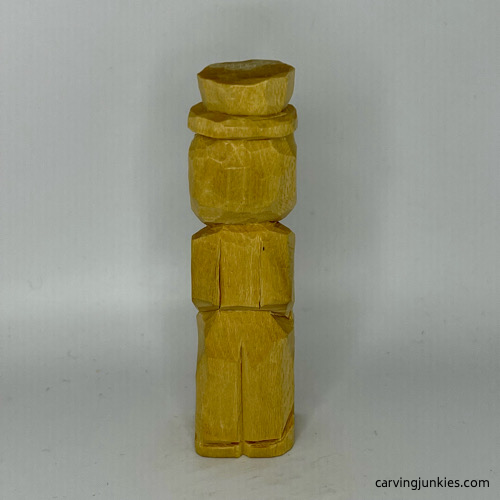 23. Back legs and arms are split
Carve a little man: Cut the nose
You will carve a long nose for your little man. Make a stop cut under the nose and remove wood from underneath (photo 24). Make a pyramid cut on each side, following the guideline of each triangle. (photo 25).
Once the triangles are removed, cut the bridge of the nose at a downward angle (visible in photo 26). Also cut under the nose at an angle to create an upturned nose (visible in photo 26). Save noodling the shape of the nose further until the mouth is carved.
Draw on the smile lines and make one cut along the guideline (photo 27). Make a second slicing cut at a slight angle to remove the wood in one piece. Also, remove wood from inside each smile line to create three facets (visible in photos 28,29).
Draw on the mouth and carve it the same way that you carved the smile lines (photo 28).
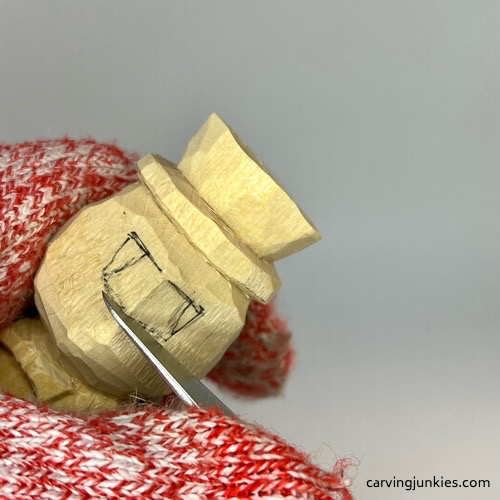 24. Making a stop cut
 25. Making first pyramid cut
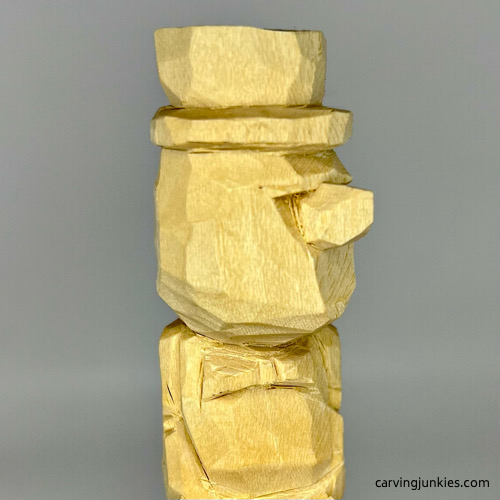 26. Nose is cut
 27. Adding smile lines
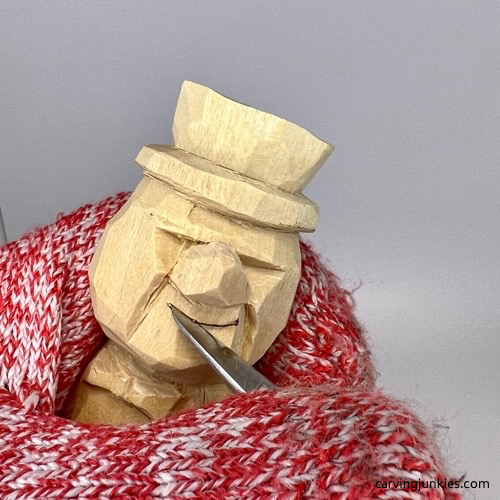 28. Carving the mouth
Carve a little man: Add some details
Draw the hairline all around (photo 29). Carefully make stop cuts along the hairline to separate the hair from the head (photo 30).
One the hairline is cut you can carve the eyebrows. Carve one long shape before splitting the eyebrows (to avoid the wood from crumbling). Once you have the desired shape, make a V-cut to separate the eyebrows in the middle (visible in photo 31).
Shape the shoes and draw a rim line all around each shoe (photo 32).
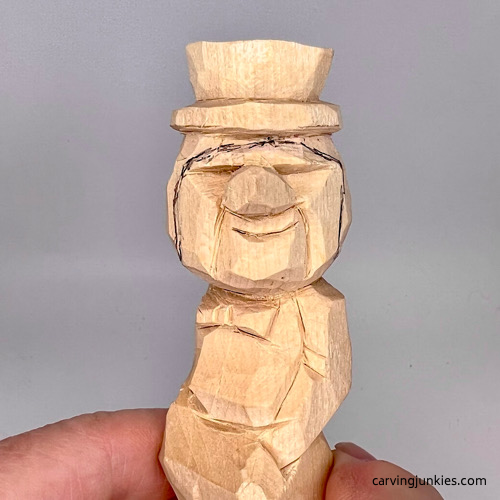 29. Hairline is drawn
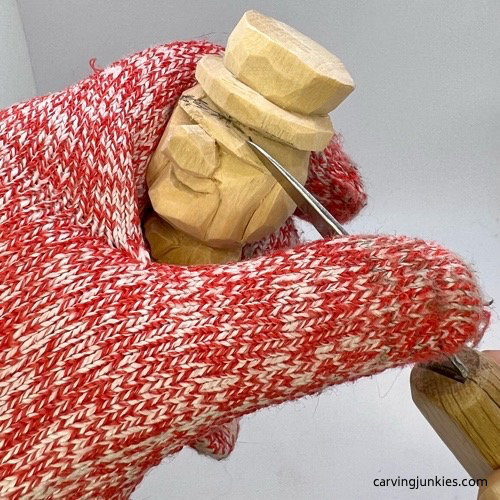 30. Cutting the hairline
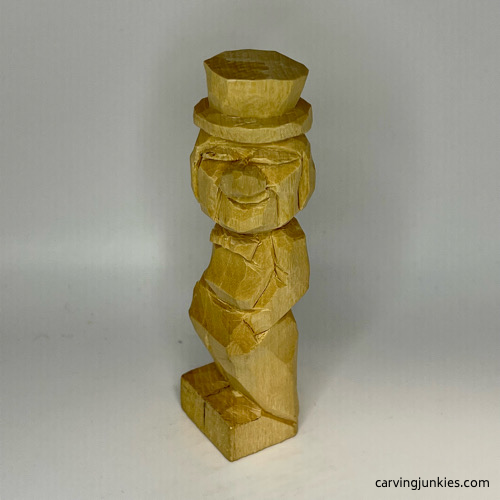 31. Eyebrows are cut
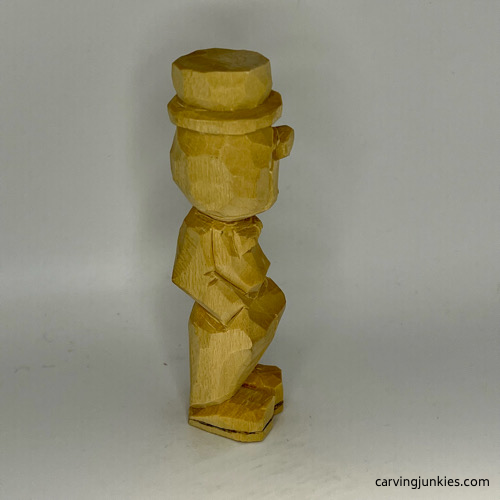 32. Shoes are shaped and rim is drawn
Carve a little man: Refine the details
Use your knife to carve the hair (photo 33) with short and long V-cuts (you can also use a V-tool). Start your cuts from the bottom up and then work from the top down. Finish with cuts in the middle. Make some of your cuts intersect with others (visible in photo 37).
Draw the X buttons in the middle of the shirt (photos 34,36). Make little V-cuts to carve the buttons (visible in photo 36).
Slice a little wood off at an angle below the cheeks to make them stand out more (photo 35).
Also, add a few wrinkles on the shirt and pants with V-cuts (visible in photos 35, 36-39).
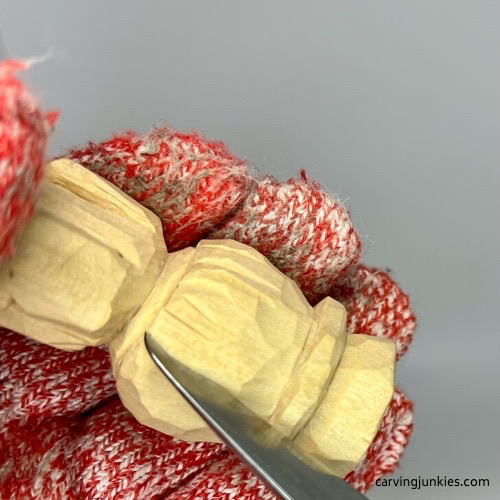 33. Carving the hair
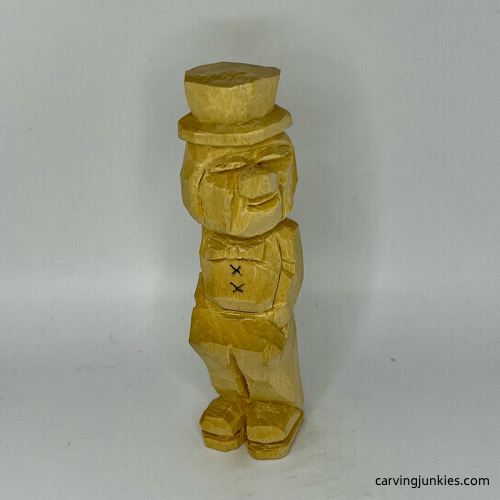 34. Adding the buttons
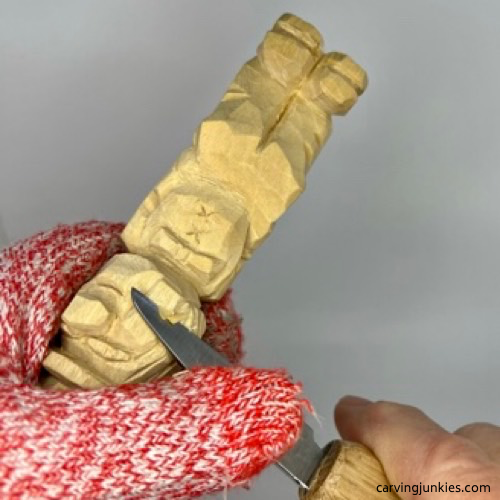 35. Narrowing the cheeks
Carve a little man: Finishing touches
Optional: you can draw a line (about 1/4 of an inch or 0.6 cm wide) around the brim of the hat to make a traditional porkpie hat. Add a little square label on the back (photos 36-39).
Make a tiny pyramid cut on each side of the nose for shadow (photos 36, 38).
Very carefully, make little V-cuts to add texture to the eyebrows (photos 36-39). Also, refine the chin and mouth by carving from under the mouth down toward the neck (visible in photos 36, 38).
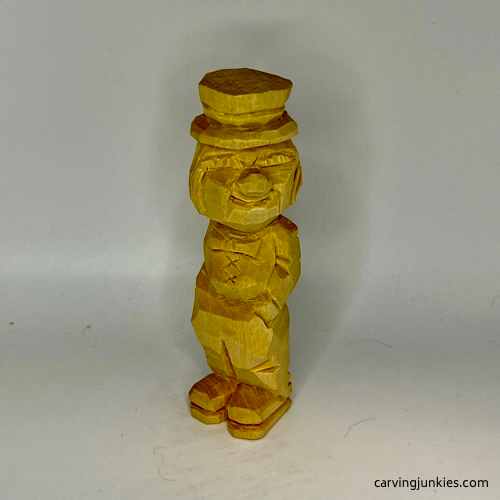 36. Front view prior to painting
 37. Right view prior to painting
 38. Left view prior to painting
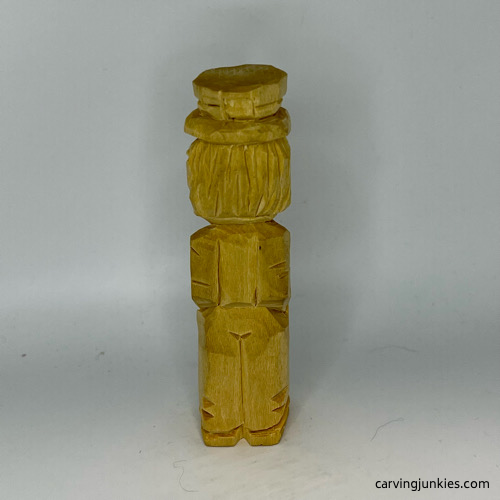 39. Back view prior to painting
Carve a little man: Time to paint
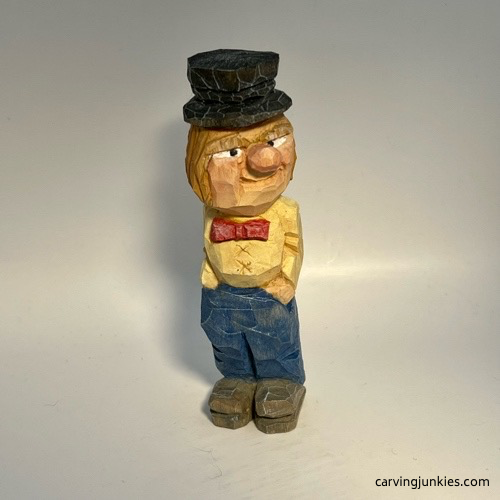 40. Front view of painted little man carving
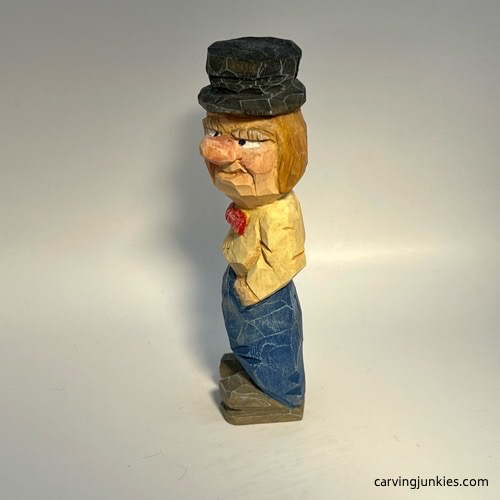 41. Left view of painted carving
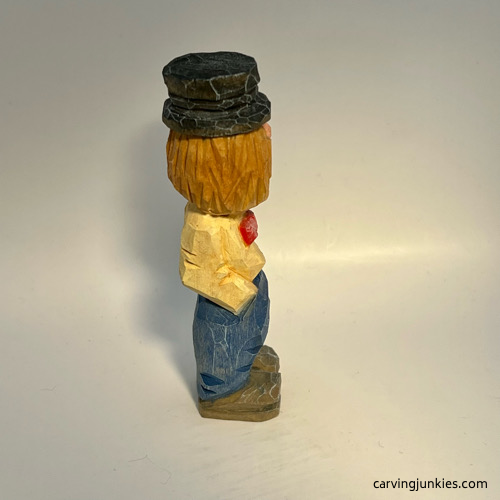 42. Right view of painted carving
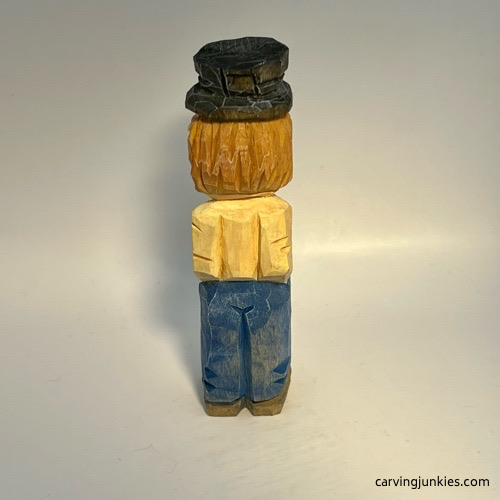 43. Back view of painted carving
Unless noted as 100%, all acrylic paints are watered down. An easy way to do this is to pull a little paint from one paint well into another. Then, dip your brush into water and mix it with the pulled paint.
Here are the colors that were used for this carve a little man tutorial:
- Skin: 100% Ceramcoat tawny light with a tiny bit of of academy burnt sienna mixed in (use a toothpick tip).
- Shirt: 100% CraftSmart ivory.
- Hair: Apple Barrel classic caramel wash.
- Hair highlights: Dry brush with academy burnt sienna.
- Pants: FolkArt true blue wash.
- Bow tie: Apple Barrel bright red wash. Reserve some (and water it down further) for highlighting the nose and cheeks.
- Shoes: FolkArt: medium gray wash.
- Hat: Ceramcoat black wash.
- Eye whites: 100% Artist’s Loft titanium white.
- Pupils: Drawn with black Tombow water-based, dual brush N15 marker (can also use paint).
Once the carving is dry, dry brush hat, hair, pants, shoes, and pants with Artist’s Loft titanium white. Finish with Howard’s Feed-N-Wax.
Want some great painting tips? Click here.
Little man carving: Free template
Photocopy this template to size to fit your wood block. Trace on a piece of thin cardboard and cut out. Use the cardboard cutout to trace the pattern on the wood block. Save and reuse as often as you want!
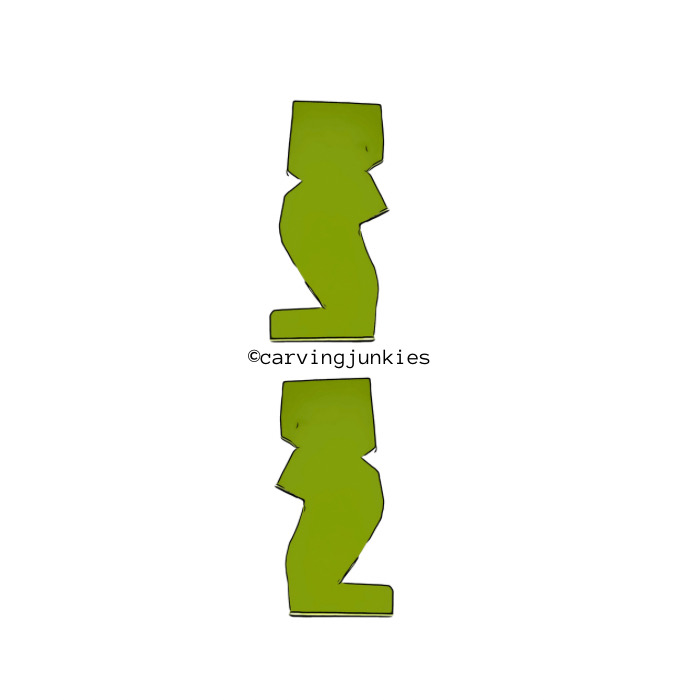
Little man wood carving pattern
Photocopy this pattern to size to fit your wood block if you prefer to carve your little man with a pattern.

Little man wood carving tutorial summary
- Flat plane carving is a fun way to work on your carving skills (the goal is to make as few cuts as possible).
- This how to carve a little man tutorial is inspired by the work of flat-plane carver Harley Refsal.
- Our free template makes it easy to get the right shape for the body.
- Add the porkpie hat for a traditional look and feel (or a baseball hat to update the look).
- Check out our ultimate flat-plane guide to learn more about this unique carving style.
Get 50 Wood Carving & Painting Tips
FREE when you join our free Covered in Chips Club
Your information is 100% private and is never shared. Unsubscribe anytime. See our Privacy Policy .
Share page on:
carvingjunkies.com does not sell any personal information.
This site uses cookies for its operation and to enhance your experience. Privacy Policy
Home | Privacy Policy | Terms of Use | Contact | Sitemap
