- Home
- Wood carving caricatures
- Fun caricature carving
Super fun caricature carving
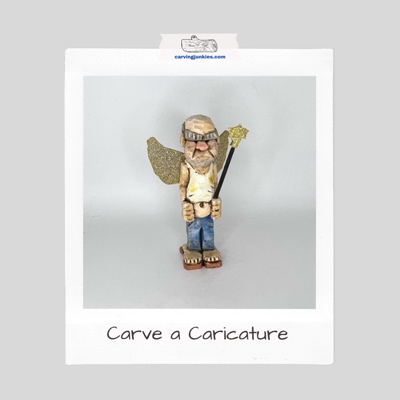
Carve a hilarious screw-up fairy as a gift or keep him for youself.
LEVEL: SOME CHALLENGES
Our screw-up fairy caricature carving tutorial will keep you busy with cool details and challenges, including carving hands. He’s a lot of fun to carve and is sure to garner a lot of laughs.
Sometimes our tutorial ideas come from pictures. This caricature was inspired by a gift plaque about a screw-up fairy. That got us thinking… what would a screw-up fairy look like? Scroll down to see!
What you need for this caricature carving tutorial
You will need a block of wood to carve your screw-up fairy caricature carving. Ours is 1 x 1 x 4 inches (2.5 x. 2.5 x 10 cm).
You can use your knife of choice (remember to strop it every 30 minutes or so to ensure your cuts are as clean as possible). We use an OCC Tools straight knife (1 7/8-inch inch blade).
Keep a pencil or pen handy to sketch guidelines and the design. We use black magic marker to make our drawing more visible. For the wings (optional and we provide the pattern at the end) and wand, you will need some gold glitter cardstock, glue, and a toothpick.
A pin vise or hand drill is needed if you want to carve a hole in the hand to hold the wand.
If you’ve carved with us for a while, you know we always recommend wearing carving gloves. Protect your lap too. One easy way is to use a plastic cutting board from a dollar store.
Caricature carving tutorial at-a-glance
Planning your caricature carving
First, slightly round all the corners on the wood block with your knife (photo 1). This will also help you determine which way the wood grain is running. If the wood splinters, you will know to turn the piece around and carve from the other direction. Tip: Draw a little arrow so you will remember which direction to carve in.
Draw your first guideline 1.25 inches (3.5 cm) from the top of the block to mark the bottom of the head (photo 1). You will only draw this on the front. On the back, draw your guideline about an inch (2.5 cm) from the top (as in photo 4). Draw a guideline on the left and right side at a slight angle (photos 2,3) so the chin of the screw-up fairy caricature carving will be lower on the body than the back of the head.
Draw your second guideline 2.5 inches (6.4 cm) from the top to mark to mark the bottom of the pants (photos 1-4).
Draw a third guideline 3.75 inches (9.5 cm) from the top of the block to mark the top of the feet (photo 4).
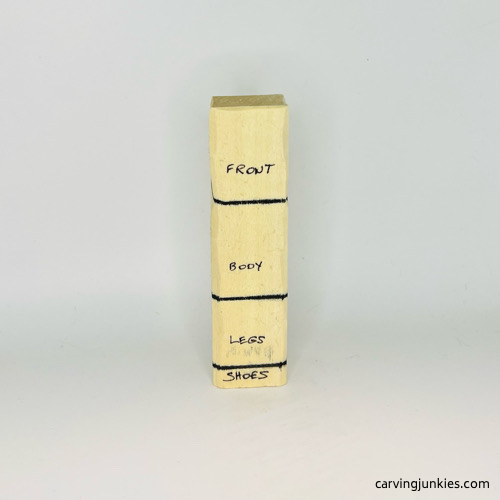 1. Front guidelines are drawn on wood screw-up fairy caricature
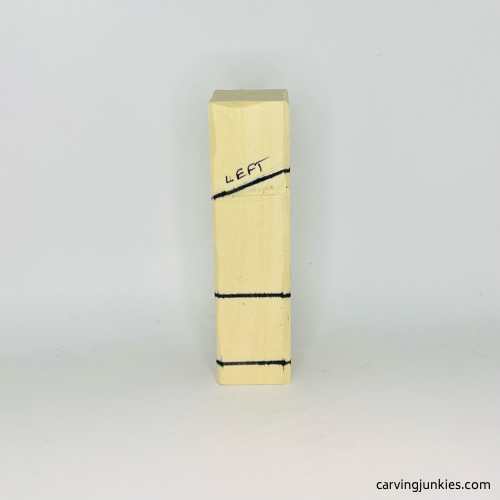 3. Left guidelines are drawn
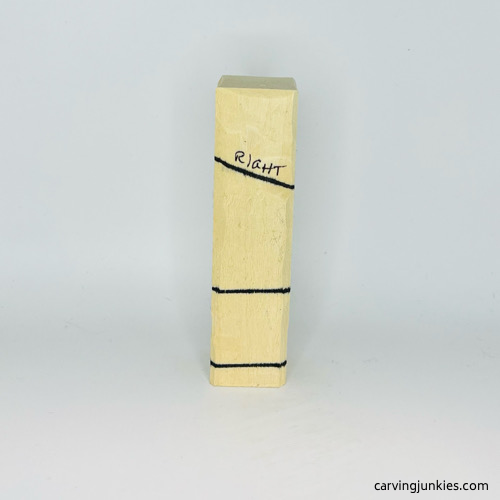 2. Right guidelines are drawn
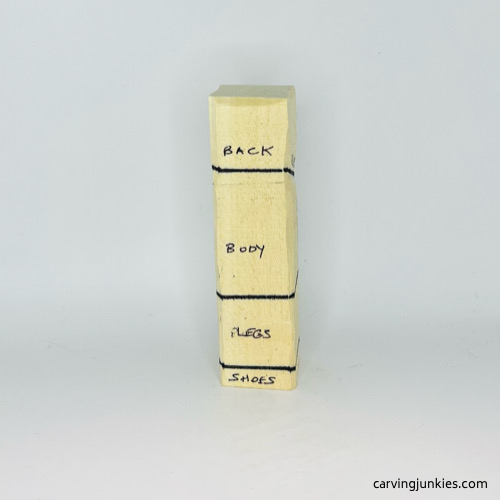 4. Back guidelines are drawn
Starting your caricature carving
Using your knife, separate the guidelines all around. This helps you to know what wood you are reserving for the head, body, legs, and shoes of the fairy caricature carving. Your cuts do not have to be very deep.
Start by making a stop cut in each corner, removing wood from underneath (photo 5). Then, continue to make stop cuts between the corners all around the wood block (photo 6).
Now, make angled cuts toward the neck to start the shoulders (photo 7). Work your way around until the neck is separated. Also,sketch on the hands, arms, and legs (photos 8-11). Mark the wood that you will remove next (photos 8,11).
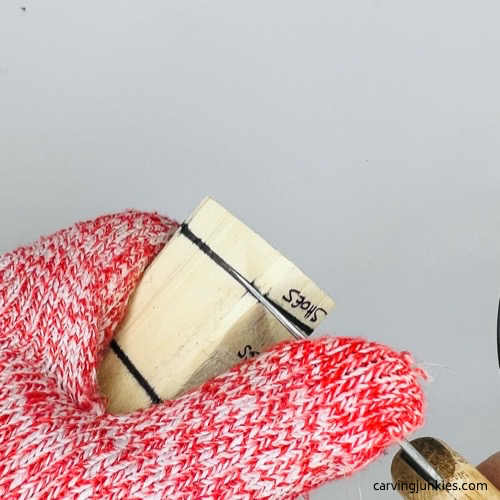 5. Making a stop cut
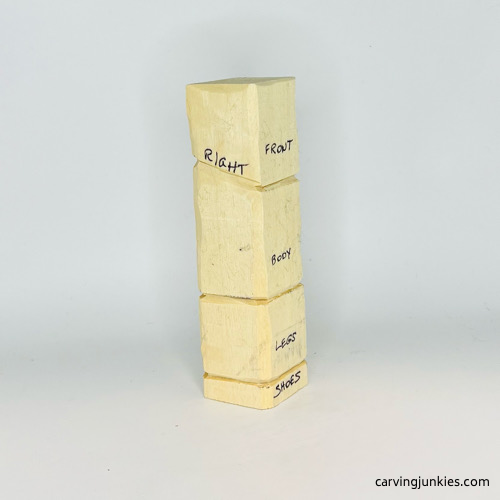 6. Sections are separated
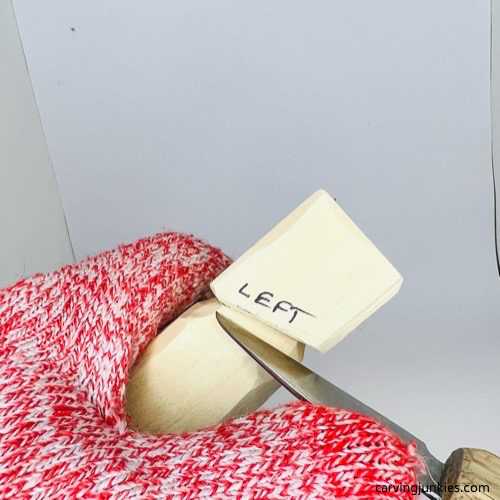 7. Starting to cut the shoulders
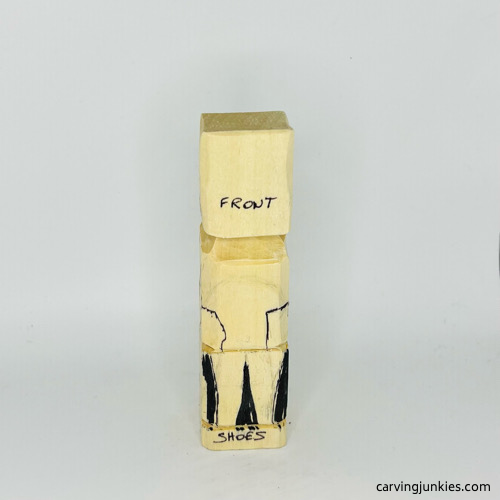 8. Front wood is marked for removal
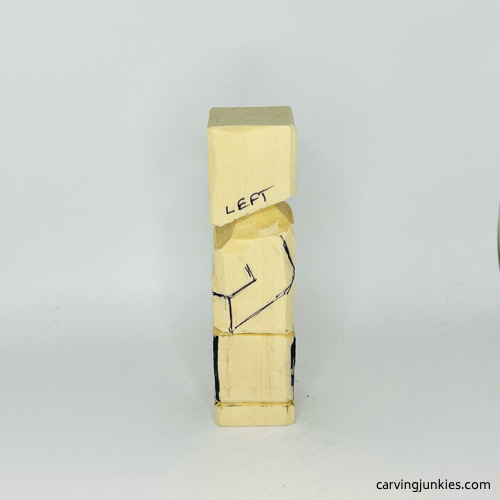 9.Left view of progress
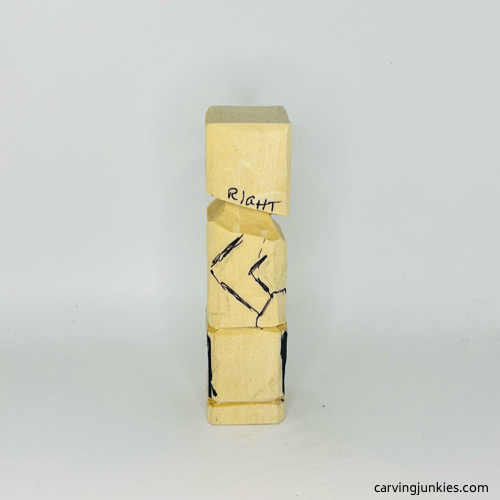 10. Right view of progress
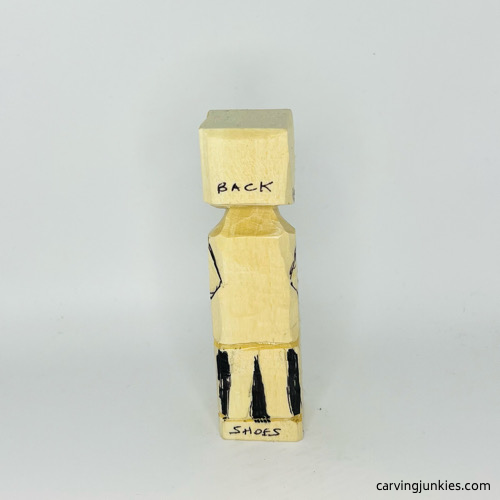 11. Wood marked for removal on back
Start the legs of the caricature carving
Remove wood around the legs (photo 12), narrowing the legs into a cylinder shape. When you get to the desired thickness, flatten each side. Also, redraw your center line (photo 14).
Make a slicing cut on each side of your center line at an angle and across the bottom (essentially making a wide pyramid cut) and remove the chip of wood (photo 14).
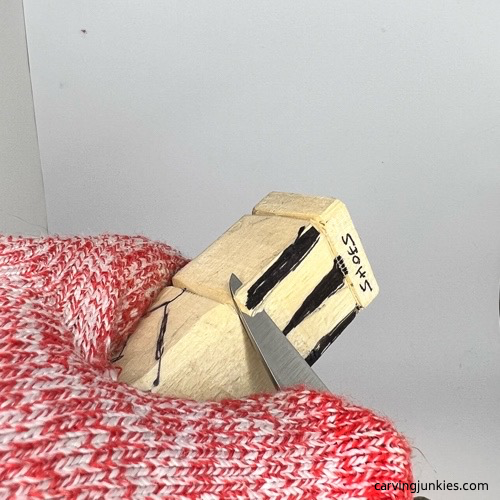 12. Narrowing the legs
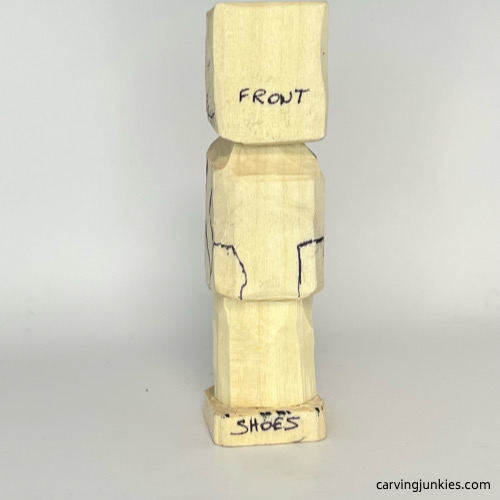 13. Cylinder shape of legs
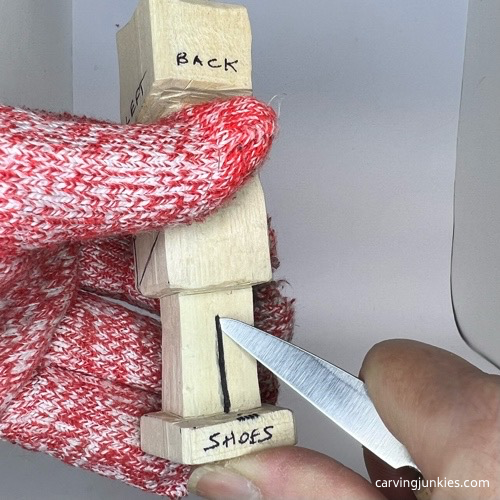 14. Splitting the legs with splicing cut
Carve the knees of the caricature carving
To create bended knees, color in areas of wood to remove on the sides of the screw-up fairy caricature carving (photos 15,16).
You can use a wide V-cut for the larger triangle (you may have to make several passes to remove all the wood). You can also use a smaller V-cut for the smaller triangles. Once again, it may take several passes. Take your time here. Be careful that you do not break your knife (see progress photos 19,20).
You will also carve a thin base for your screw-up fairy caricature carving for added stability.
Draw a line in the middle of the section you reserved for the shoes. Use stop cuts in the corners and remove wood from underneath. Carefully work your away around the block. Don’t make your cuts too deep.
Note: You will shape the feet later, adding more space between the feet and the base.
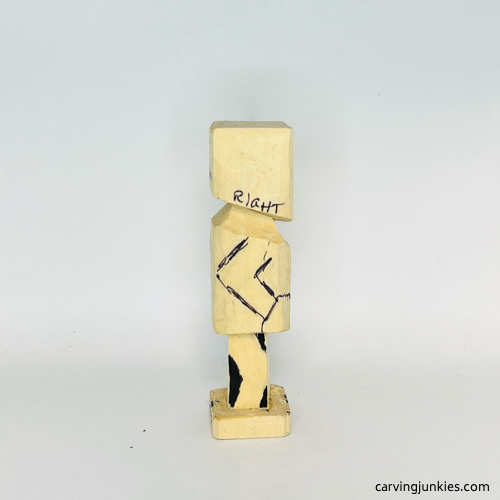 15. Right view of marked wood to remove
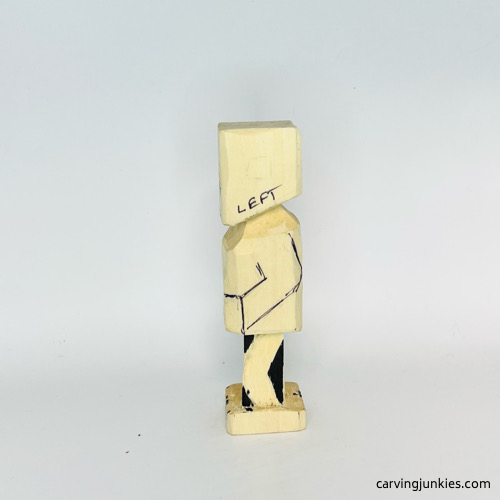 16. Left view of marked wood to remove
Separate the arms and hands on the front
Separate the hands and arms on the front of the screw-up fairy caricature and shape the shoulders (photo 17). Keep the hand box thick so you can carve the fingers without breaking them. We use a stop cut and remove wood from around the cuts.
Also, start to shape the screw-up fairy’s pot belly (photos 18-20).
Draw on some details, including the fingers, undershirt, belly button, and feet (photos 18-21). Also, reserve a box for each ear and set up the nose box on the front (photos 18-20).
Tip: Read about our triangle-by-triangle nose carving system, which makes it easy to carve a proportional nose time after time. We made our nose wider than we usually do so we’d have more wood to work with.
Of course, you can always carve the nose with another technique, if you prefer.
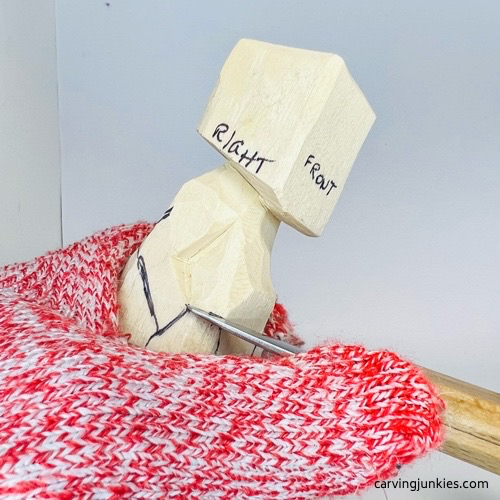 17. Separating the front arms
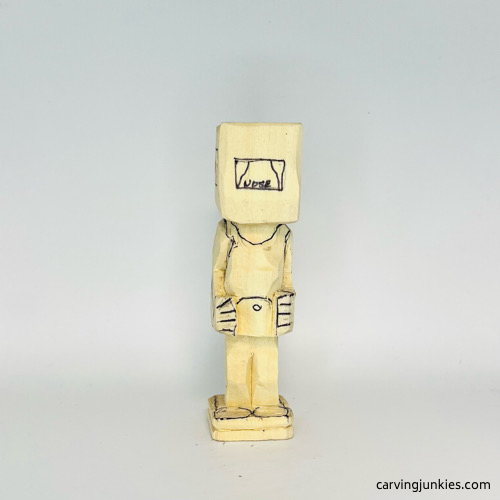 18. Front details are added
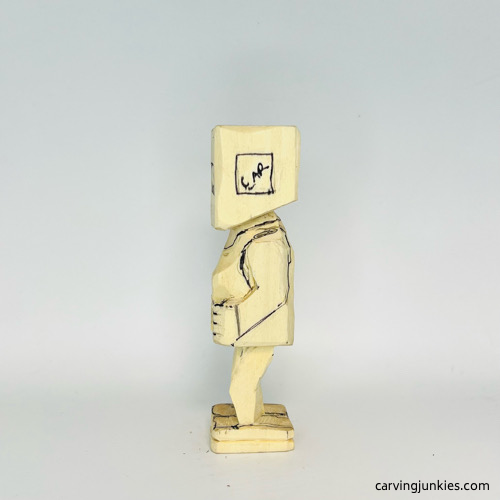 20. Left side details are added
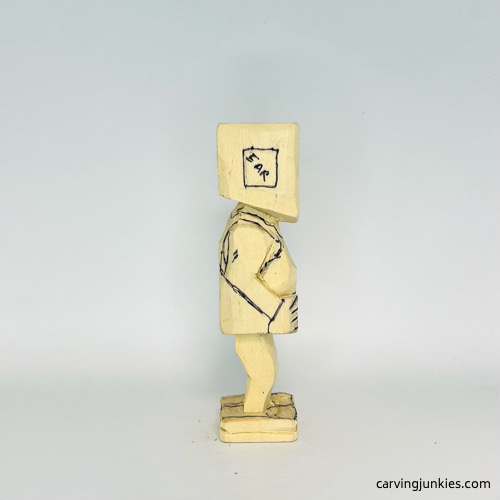 19. Ride side details are added
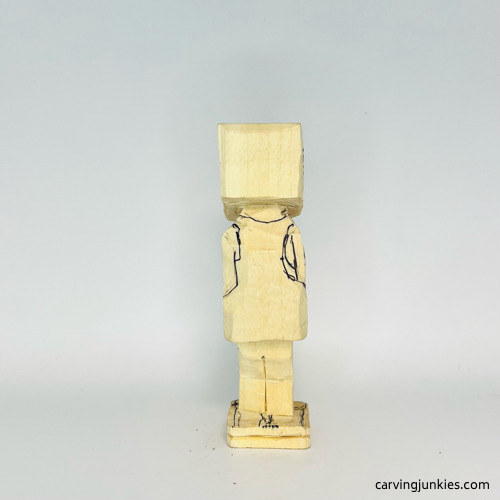 21. Back details are added
Carve some details on the caricature carving
Separate the arms on the sides (photo 22) of the screw-up fairy caricature and the shoulders on the back. Also separate the undershirt from the belly (photo 24) and from the back of the arms (photo 23). You want a little skin peeking out from the undershirt on the sides under the arms.
You can use stop cuts (or small V-cuts) and work your way along the guidelines. However, if you have a V-tool, it may make your cuts a little easier. We use a #47 from Stubai USA (1/8 inch). Also , add a small pyramid cut in the crook of each arm to add shadow.
Tip: On the undershirt neckline, carve from the bottom middle up on one side, and then on the other side, to avoid splitting the wood.
To separate the fingers, carefully make small V-cuts with your knife (photo 24). We find a straight-edge knife works better on small carvings to avoid crumbling.
Shape the belly and undershirt on the front (see progress photos 24,27). The ideal tool to create the belly button is a tiny U-gouge, which makes a perfect circle if you twirl it. Otherwise, use a very sharp detail knife and outline the circle. Then outline a slightly smaller circle inside the outer circle. You want the screw-up fairy caricature carving to have a visible belly button (photo 24).
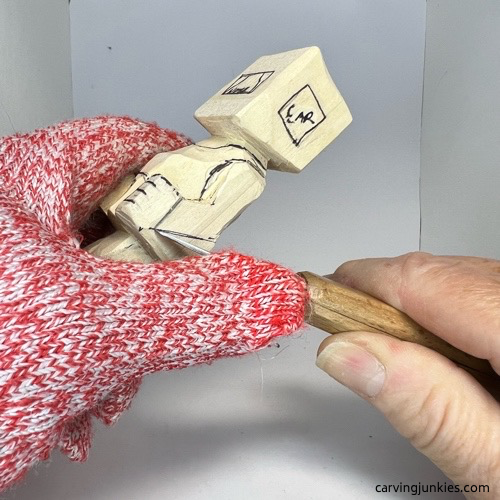 22. Separating the arms
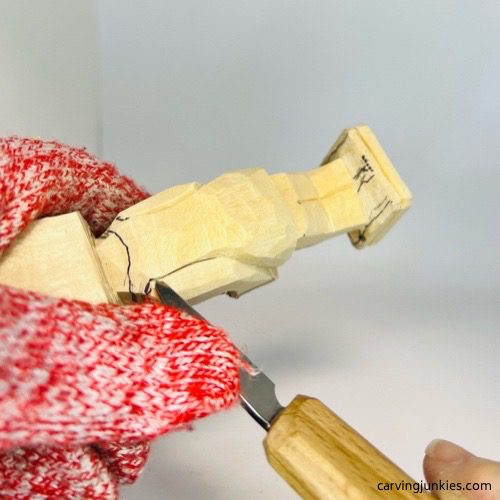 23. Separating the undershirt on the back
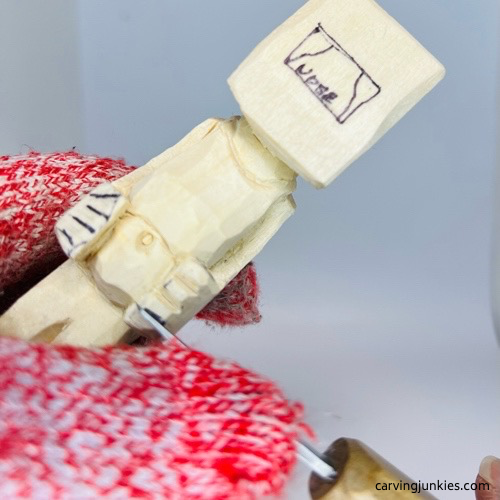 24. Separating the fingers
Narrow the feet on the sides and shape them on the front and back (photo 25). Once the feet are shaped, sketch on the toes and carve them very carefully with small V-cuts (see progress photo 27).
The undershirt needs to be thinned. Shave wood off very carefully (take your time here). Also, refine the sides and back of the undershirt. Add short and longer wrinkles by making very narrow V-cuts (see progress photos 27-30).
Finally, carve a little Y into the tush of the screw-up fairy caricature using small V-cuts (photo 30) and add some wrinkles on the front and back of the pants (photos 27,30), which are visible from the sides (photos 28,29).
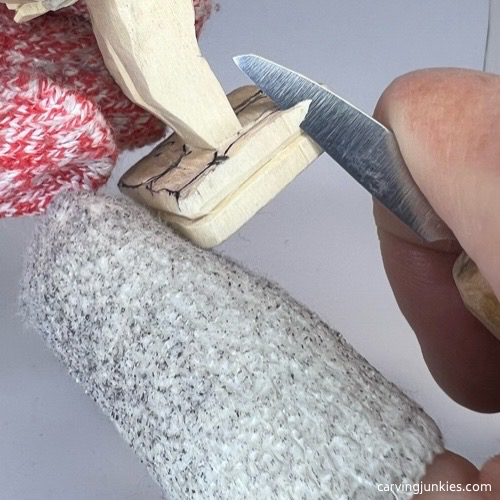 25. Narrowing the feet
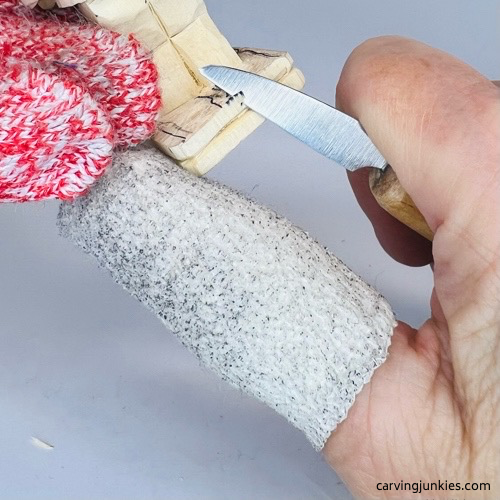 26. Splitting the feet
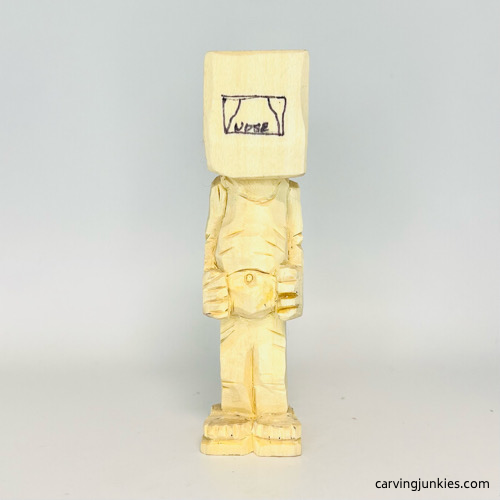 27. Front progress
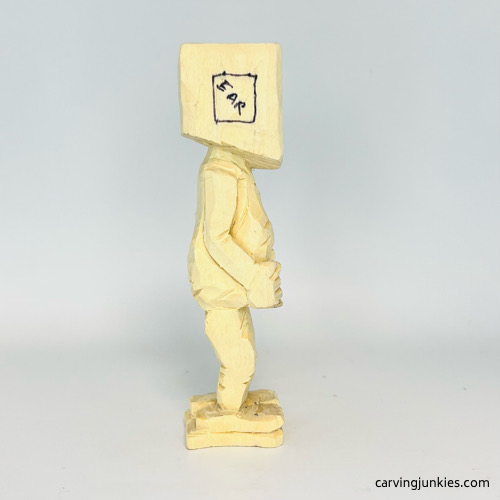 28. Right side progress
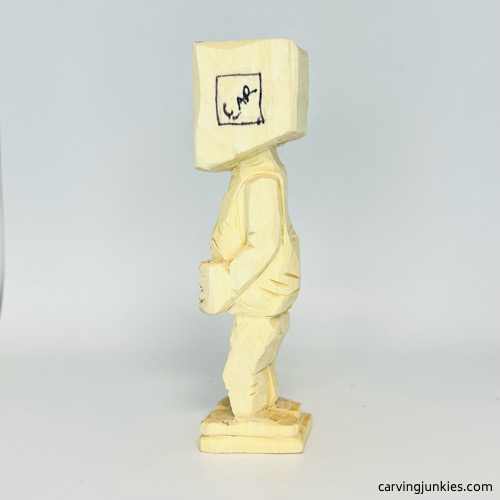 29. Left side progress
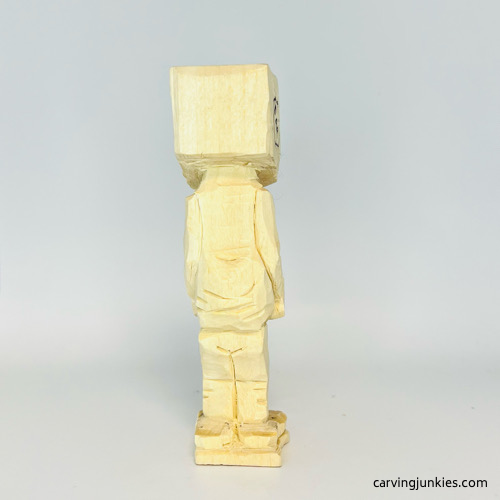 30. Back progress
Carve the head of the caricature carving
Separate the ear boxes (photos 31, 32). You can make stop cuts along the guideline and remove wood as you go.
Now, start to shape the head into an oval shape. We use our triangle-by-triangle nose carving system to easily carve a nose (we’ve repeated the image for you in photo 33). Make a stop cut underneath the nose (photo 34). Then, make a pyramid cut on each side of the nose (photos 35,36).
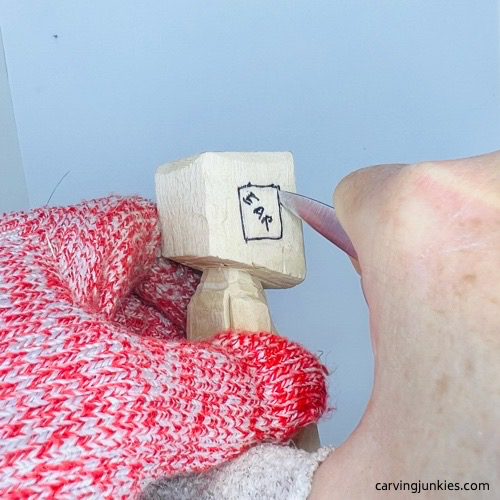 31. Separating ear box
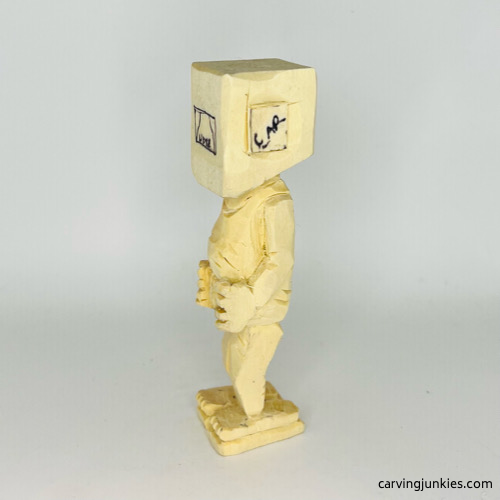 32. Ear box is separated
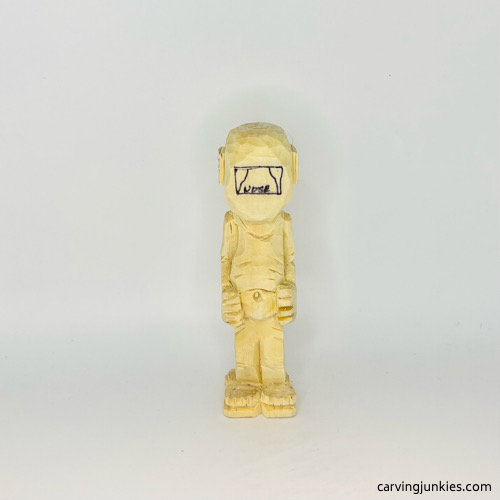 33. Nose is already set up
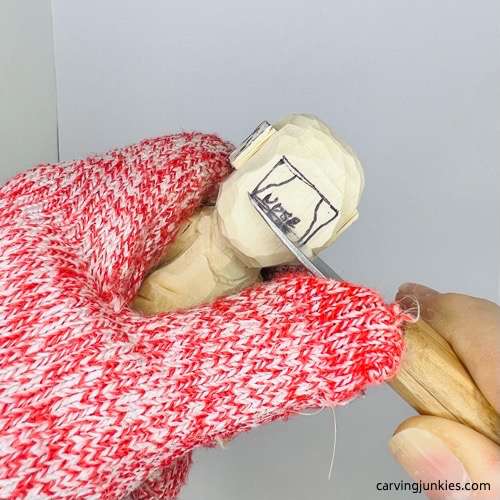 34. Making a stop cut
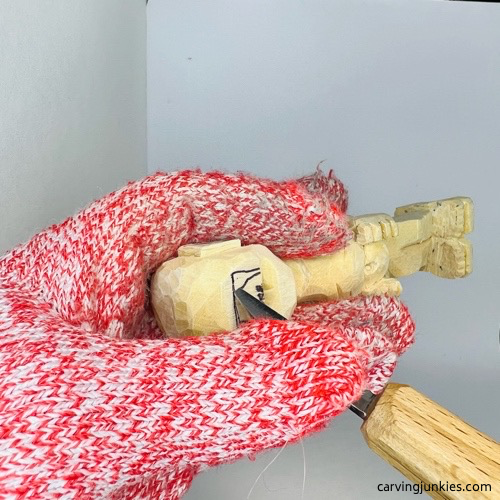 35. Making a pyramid cut
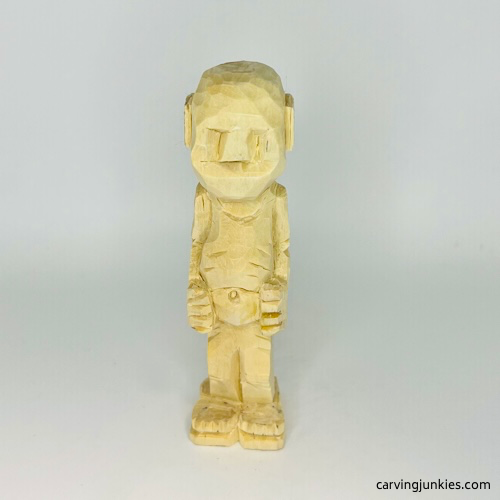 36. Second pyramid cut is completed
Refine more details on the caricature carving
Now that the nose is cut, shave a little wood off to push the forehead back (photo 37). Don’t go too thin because you want enough thickness to draw on the eyebrows (photo 38). You can also start the shape the nose by thinning the sides and rounding the bottom corners (see progress photo 38).
Carefully separate the eyebrows. We draw our knife along the top guideline and remove wood from above. Then separate the sides. Tip: Keep the two eyebrows as one piece until you split them in the middle with a small V-cut. This will help keep the wood stable as you cut around the sides of the eyebrows.
Once the eyebrows are separated you can carve the forehead back more (photo 39). Also add smile lines and draw the mouth (photo 39). Sketch the pointy ears and the receding hairline on the back and sides (photos 40-42).
You can also noodle the cheeks by angling your knife down toward the eye socket to remove wood.
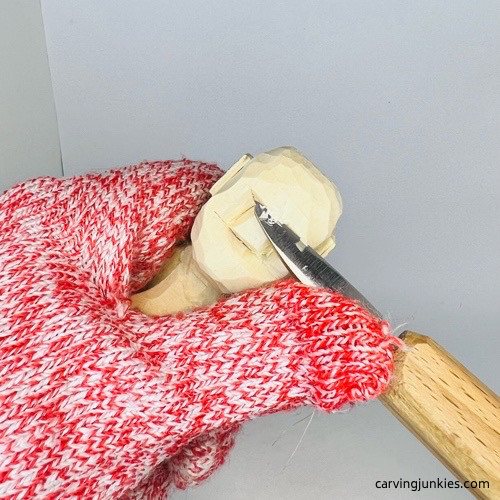 37. Cutting forehead back
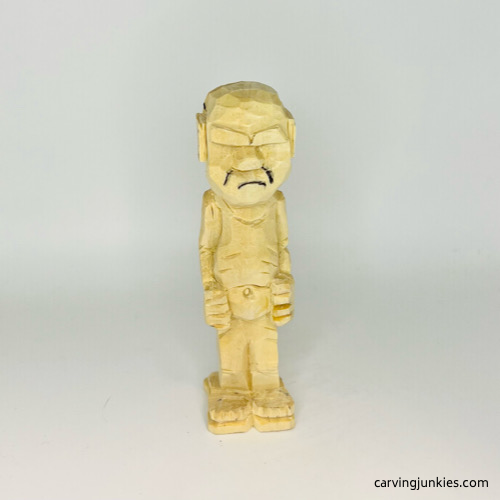 39. Details drawn on front
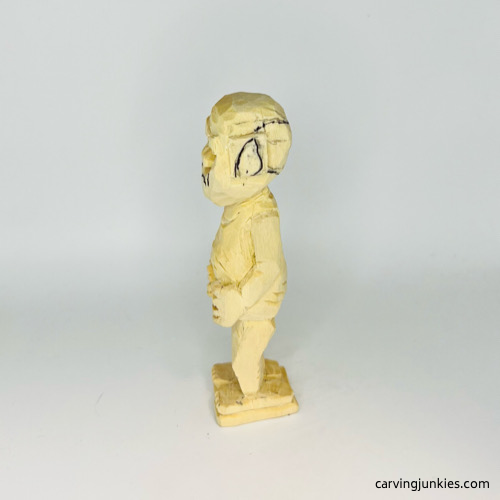 41. Left side of details
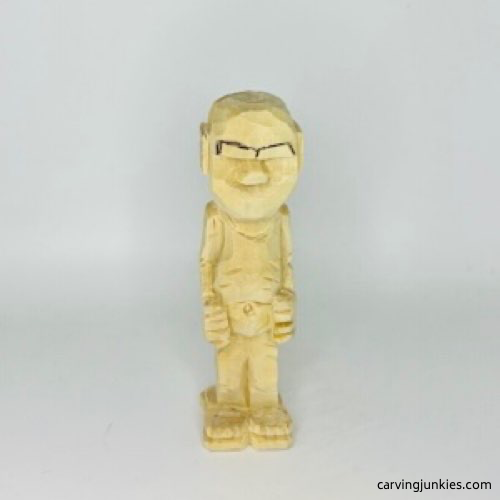 38. Eyebrows are drawn
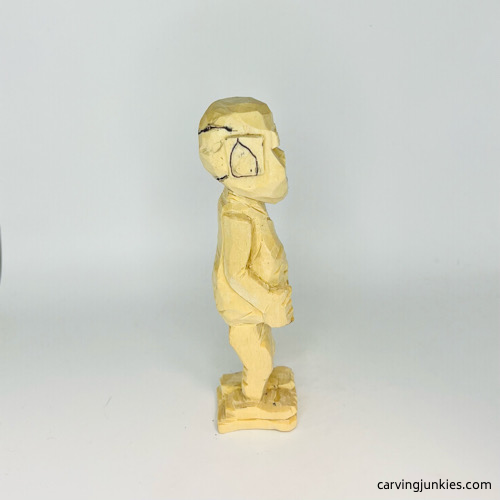 40. Right view of details
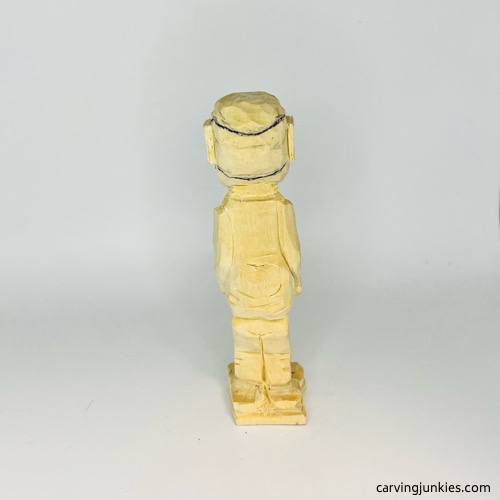 42. Back view of details
Carve more details on the caricature carving
Carve the pointed ears and the hair line on the back (photo 43). We use stop cuts and remove wood from above (on the top of the head) and below (on the bottom of the head). Then, extend the hairline around the ears (see photos 49,50 for reference).
Make deep stop cuts along the smile lines and remove wood from inside the chin area (photo 44). Before carving the lip, we shave wood off from the top of the lip down to create a little mound for the lip (photo 45).
Carve the lip (we use a line cut). Also, carefully carve the eyebrows. We used a V-tool (if you don’t have one make small V-cuts). Also, use the V-tool to carve the beard (photo 46), moving across the face (or make super small V-cuts with your knife). Use a U-gouge to scoop out some wood from each ear (or make a pyramid cut with your knife if you don’t have a gouge).
The final touch (if you have a U-gouge) is to curve the nostrils under the nose. Gently swirl the gouge half way around under the nose on each side (see progress photo 46).
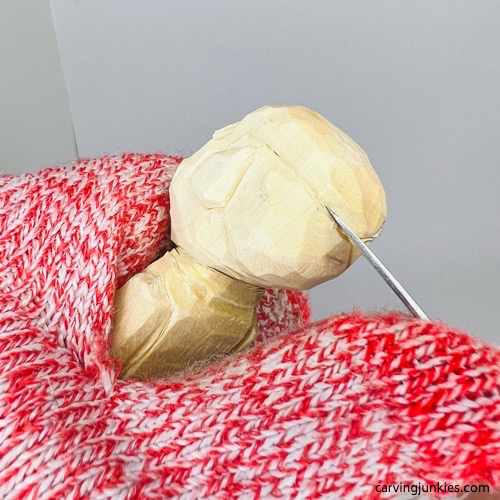 43. Cutting the hairline
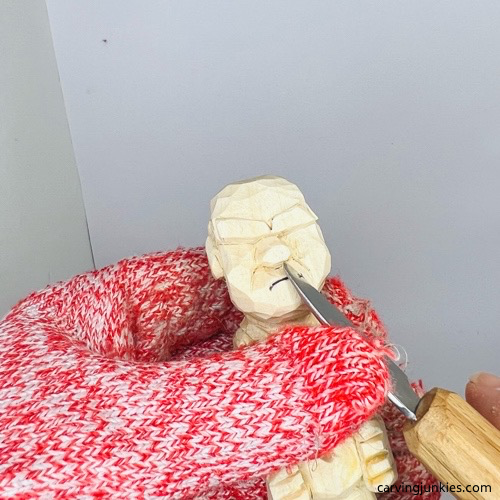 44. Carving the smile lines
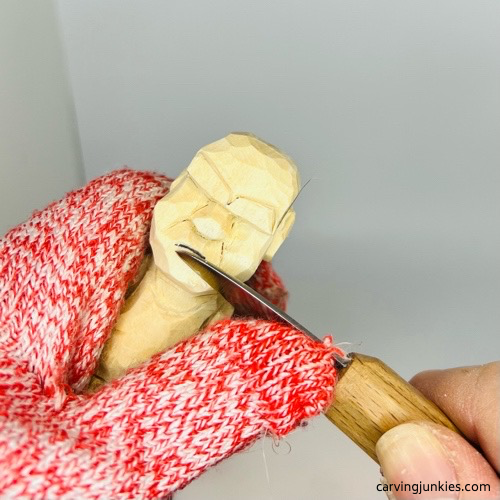 45. Shaping the lip and chin
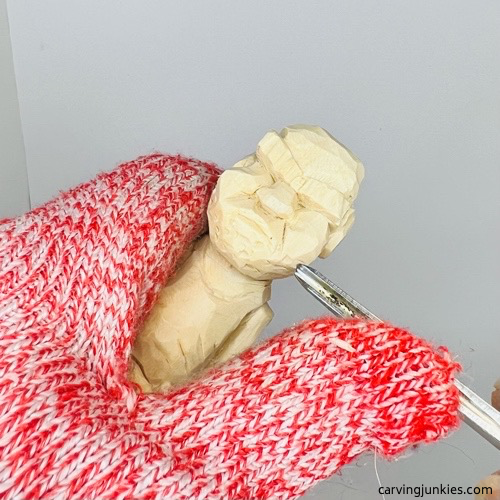 46. Creating the beard
Refine and clean up your caricature carving
Use a V-tool to create the hair on the fairy caricature carving. Alter the length of your cuts and have some cuts swirl into others. If you don’t have a V-tool, you can get the same effect with V-cuts using a sharp detail knife.
Prior to painting, check all your cuts and deepen any that will enhance your carving (also to prevent paint from bleeding). Clean up any fuzzies. We always wet our carving to see what areas need work.
Also, you will need to create a hole in one of the hands for the fairy’s wand. We use a micro hand drill because you can easily control the pressure. Drill at an angle toward the body to avoid cracking the hand.
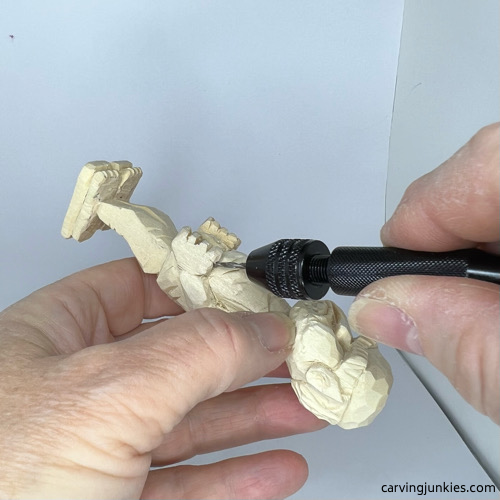 47. Drilling the hole
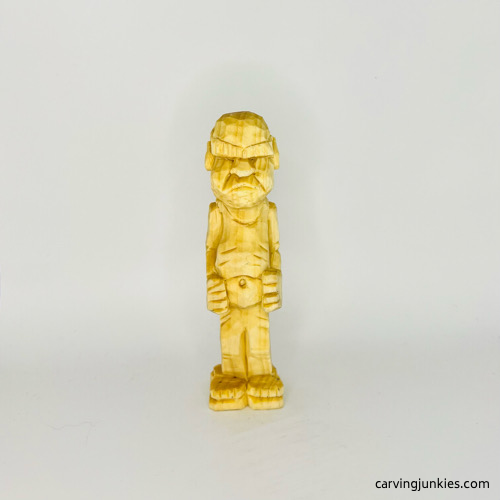 48. Front view prior to painting
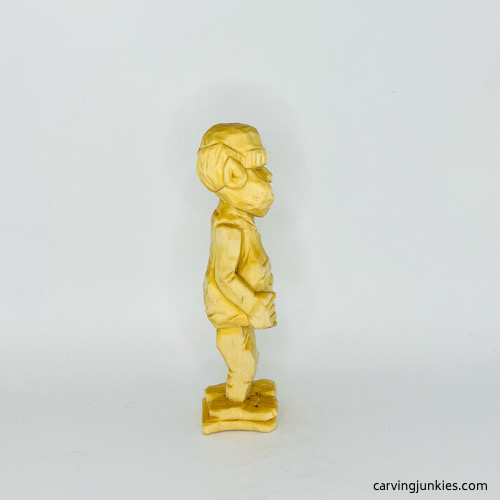 49. Right view prepainting
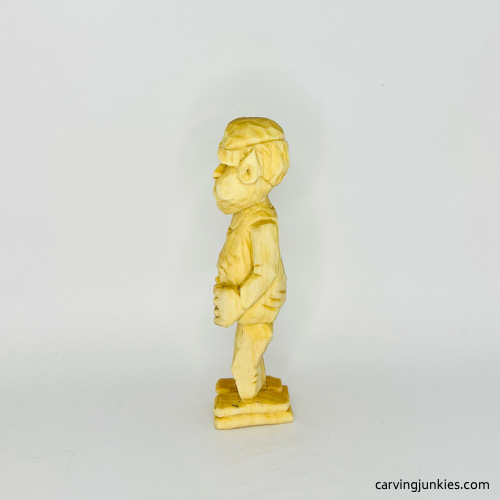 50. Left view before painting
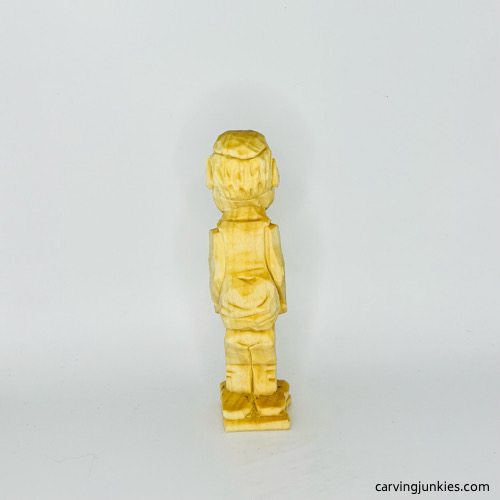 51. Back view of fairy caricature carving
Grab your paint!
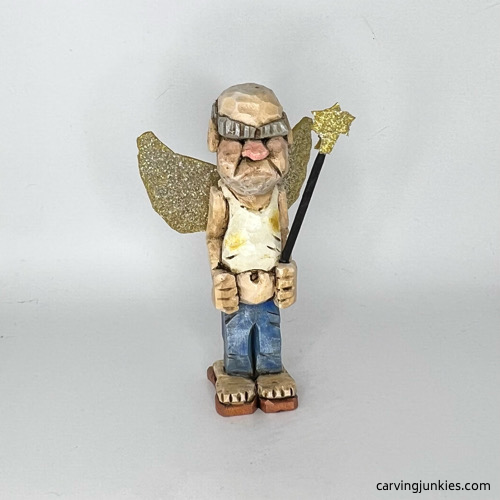 52. Front view of painted screw-up fairy caricature
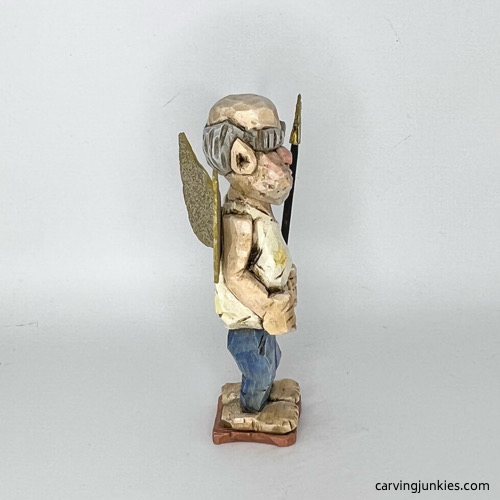 53. Right view of painted screw-up fairy caricature
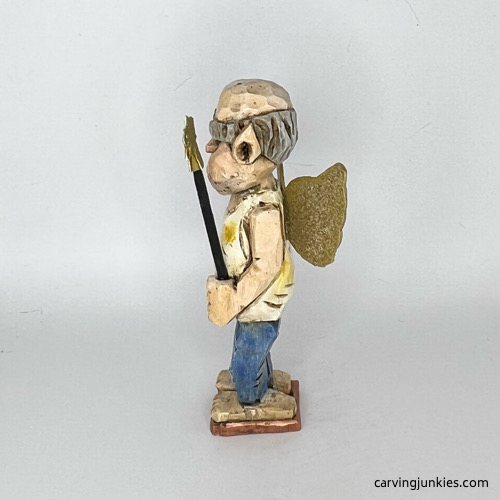 54. Left view of painted screw-up fairy caricature
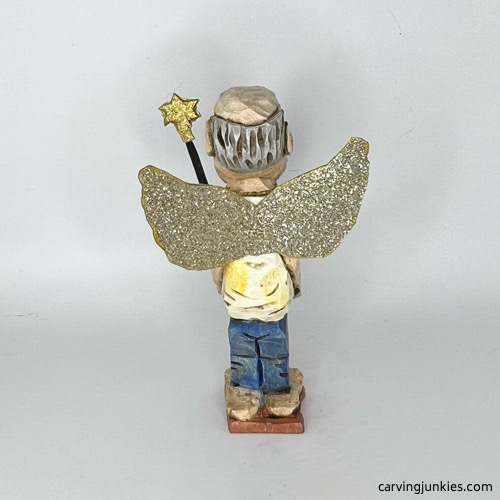 55. Back view of painted screw-up fairy caricature
It’s time to bring your screw-up fairy caricature carving to life with paint. Use whatever paint brushes you want (we like flat brushes). You can also use acrylic paints of choice. To learn more about painting a wood carving, read this page.
We typically create washes with acrylic paints by pulling a drop of paint together with a drop of water. Sometimes we use full paint (indicated as 100%).
Here are all the paints (and brands) we used for our screw-up fairy caricature:
- Face, head, necks, hands, feet: American natural buff (100%).
- Undershirt: Craftsmart vanilla.
- Soil marks on undershirt: DecoArt antique gold.
- Jeans: FolkArt true blue and dry brushed with Artist’s Loft titanium white.
- Nose and cheeks: Folk Arts lipstick red (very diluted).
- Edges of paper wings and star: Ceramcoat metallic gold.
- Toothpick wand: 100% Ceramcoat black.
- Inner ears: DecoArt fawn 100%. Also, dry brush this color to add depth to hands, feet, shoulders, face, head, and lips.
Finish: To get the dirty, antiqued look, we use a mixture that caricaturist Chris Hammack calls “turd polish.” First, completely seal the carving with at least 2 coats of Minwax polycyclic polyurethane spray. Brush on a concoction that is 3 parts Minwax aged oak gel stain with 1 part mineral spirits.
Wipe off immediately with paper towels (dispose of them outside as they are flammable). You may want to wear rubber gloves.
Note: If you do not seal the carving properly, the stain can ruin your piece. If you do not want to use this method, add a little brown paint and dry brush these sections instead.
Add wings and a wand to your caricature carving
To make the wings and the wand, use a piece of gold glitter cardstock paper that can be purchased at any big-box craft store.
Use our wing pattern (below) to trace the wings on the cardstock paper. Cut it out, flip it over and trace it again on the cardstock paper. Then stick both pieces together with a little glue in between. Once dry, you can bend the wings and use glue to attach them to your screw-up fairy caricature carving.
For the wand, we used some leftover cardstock to make two sides of the star and glued them to a painted toothpick that is glued into the hole in the hand. It really adds some interest to the screw-up fairy caricature carving.
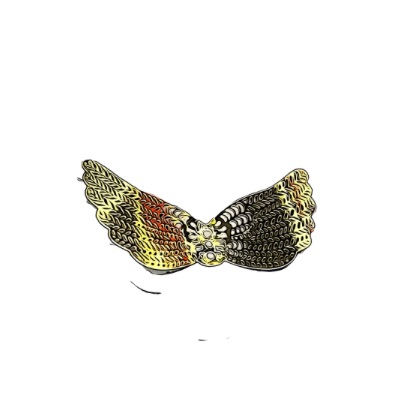
Caricature carving pattern
Photocopy this pattern to size to fit your wood block if you prefer using a pattern.
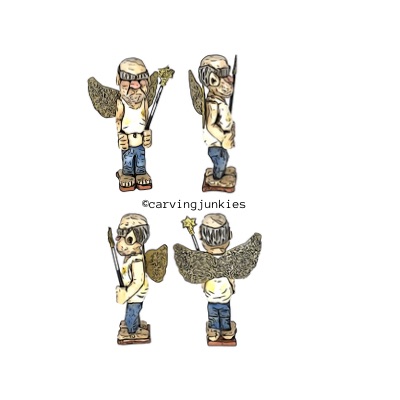
Caricature carving tutorial summary
- A caricature carving should make people smile and our cranky screw-up fairy is a real grinner
- This carving adds a challenge in carving the hands (tip: keep them thick to avoid crumbling)
- It is fun to add other elements to woodcarvings, like the hand-made wings and wand star from cardstock paper
- Check out our other wood carving caricatures
- We hope our screw-up fairy brings you lots of good wishes!
Get 50 Wood Carving & Painting Tips
FREE when you join our free Covered in Chips Club
Your information is 100% private and is never shared. Unsubscribe anytime. See our Privacy Policy .
Share page on:
Home | Privacy Policy | Terms of Use | Contact | Sitemap
