- Home
- Things to carve
- Wood carving tutorial
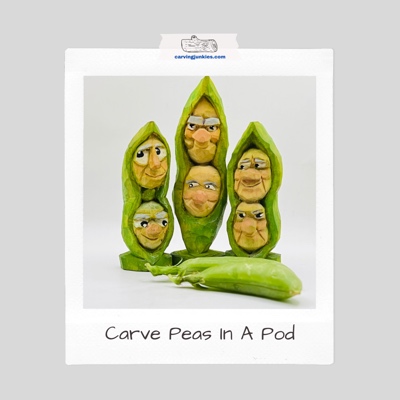
Two peas in a pod wood carving tutorial
These little whittles are great to practice carving faces.
LEVEL: EASY
Looking for a wood carving tutorial that will create some buzz? This two peas in a pod wood carving is a fun way to create humorous faces within an adorable green pea pod that is sure to make people smile.
This wood carving lesson has everything you need to succeed, including step-by-step instructions, easy-to-follow progress photos and a painting guide (at end).
Vary up the eyes and faces to create a passel of pea pod people!
Supplies for this wood carving tutorial
For this wood carving tutorial (the pea pod on the far right in the picture above), you will need a block of wood (I used basswood) that is 1 x 1 x 3 inches (2.5 x 2.5 x 7.6 cm).
If you want a longer face, you can go taller (the one in the middle in the picture above is 1.25 x 1.25 x 4 inches or 3.2 x 3.2 by 10.1 cm). To go larger, simply increase the dimensions of your wood block.
You will need a carving knife of choice (I switched between a long blade and a chip carving knife for my pyramid cuts).
A ruler and a pencil with an eraser is helpful to sketch as you go. You will carve off the corner, which creates a ready-made plane for the faces.
Gloves are a must for safety. I slipped recently while wearing 2 gloves on one hand and still bled a little!
Also, always protect your lap (and vital arteries) with a cutting board or a wooden box. Better to be safe than to be sorry!
Peas in a pod wood carving tutorial at-a-glance
See the key steps for this wood carving tutorial in the short video below.
First steps for this wood carving tutorial
Draw a line 2.75 inches (~7 cm) from the top to mark the top of the base, which you will need to support your pea pod (photos 1-4).
Draw a circle on top of the base line and another circle directly above it. These two circles should be touching slightly (photos 1,2). Use a round object (I used a water bottle top) to evenly sketch the two circles. Tip: draw a line halfway through your bottle cap to make it easy to get a perfect circle on each side of the corner. Each circle is about 1 inch (2.5 cm) wide.
Loosely sketch the curvy, outer and inner guidelines of the pea pod (photo 3). Use pencil so you can erase the parts of the circle that overlap. I used magic marker for this wood carving tutorial so you can see it better.
After erasing the overlapping areas, color in the wood that you will remove between the faces and at the top and bottom of the pea pod (photo 4).
You do not need guidelines on the back because you will easily be able to shape the back of the pea pod as you carve.
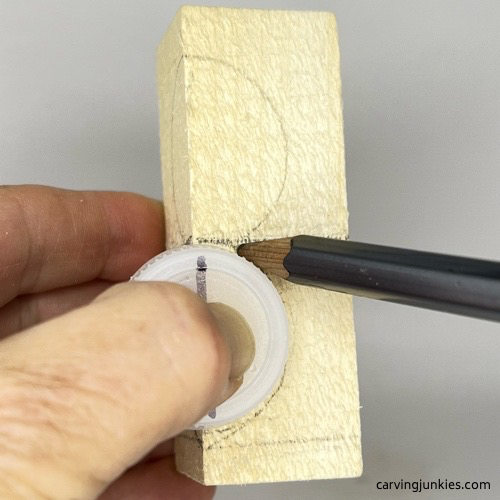 1. Drawing the circles
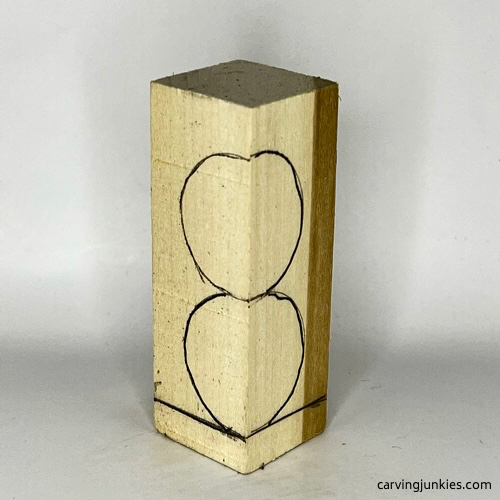 2. Baseline and circles together
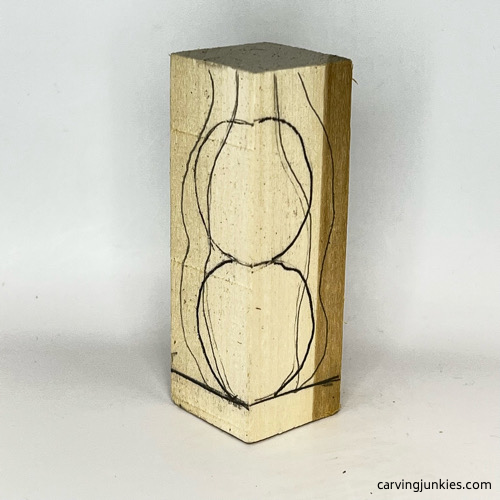 3. Sketched pea pod around circles
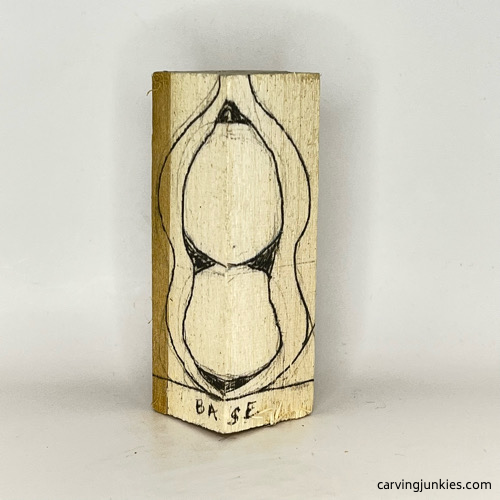 4. Guidelines are completed
Separate the faces
First, use a pyramid cut to remove the triangle on the top of the carving (photo 5).
Holding your knife like a pencil (for control), follow the guideline around the face. Then, make a slicing cut (photo 6) underneath your first cut. Carefully continue around until the face is completely separated (photo 7).
Repeat this process on the bottom face (completed in photo 8). Note: Redraw the bottom of the pea pod so it extends out a little bit (photos 7,8).
Also, mark the wood that you will remove to create the curved shape of the pea pod (photo 8).
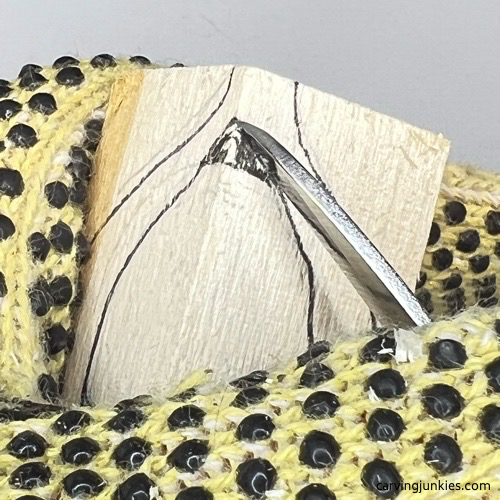 5. Making a pyramid cut
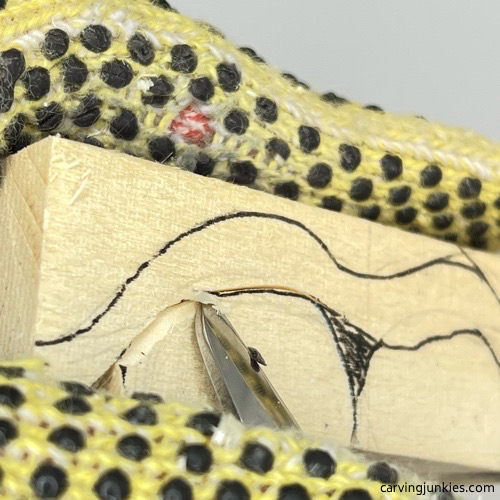 6. Making a slicing cut
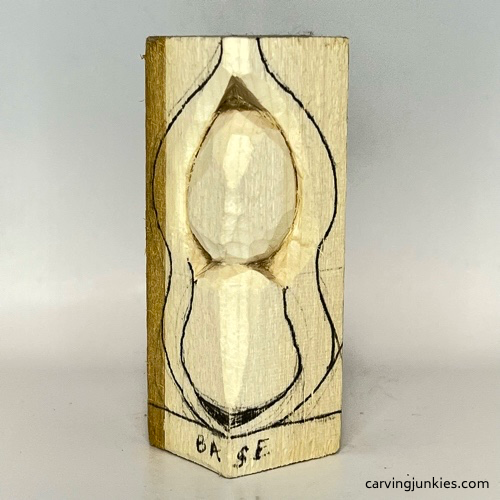 7. First face is separated
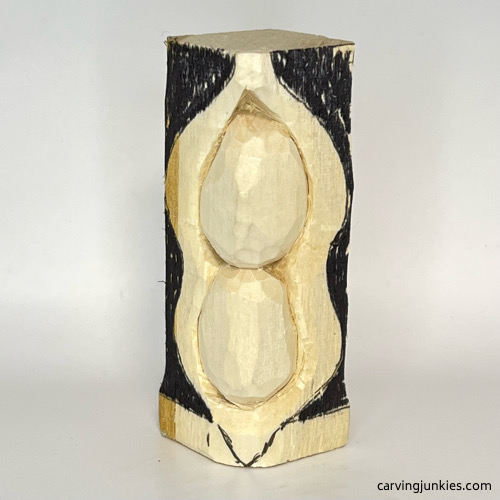 8. Both faces are separated
Separate the base
Use a stop cut (photo 9) at each corner—and remove wood from above your cut—to start to separate the base. Cut all around (skipping over the newly drawn bottom of the pea pod).
Then, use your knife to slice and shape the bottom of the pea pod so it is slightly raised on the base (see right side on photo 10). Finish the other side before jumping to the next step of this wood carving tutorial.
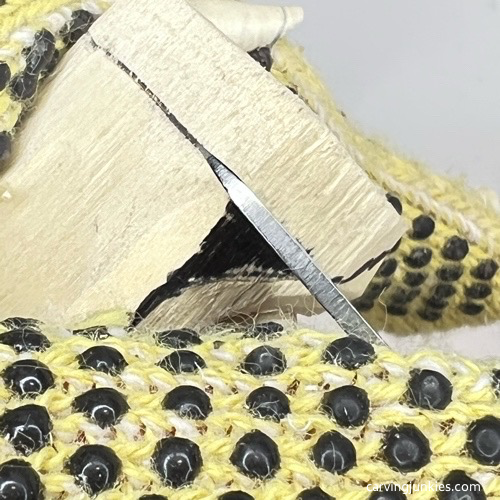 9. Separating the base
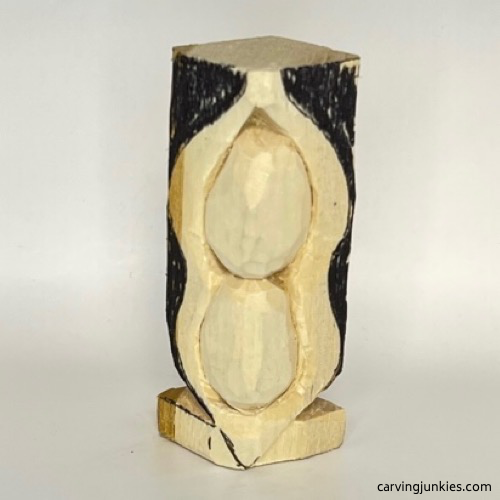 10. Right bottom of the pea pod is separated
Shape the pea pod
Make your first cut (I use a push cut) to remove wood on the right side (photo 11). Then, use your knive to remove wood around to the back of the pea pod (photo 12).
Tip: To shape the curve in the middle of the pea pod, start at the top of the curve and cut down to the middle. Then, start at the bottom of the curve and cut up to the middle. This will help you avoid splitting that occurs when you carve against the grain.
Remove wood from the other side in the same manner. When you are done, the front of your pea carving should look like photo 13.
Shape the back top of the pea pod into a point (completed in photo 14), but leave the rest of your shaping for later in the wood carving tutorial.
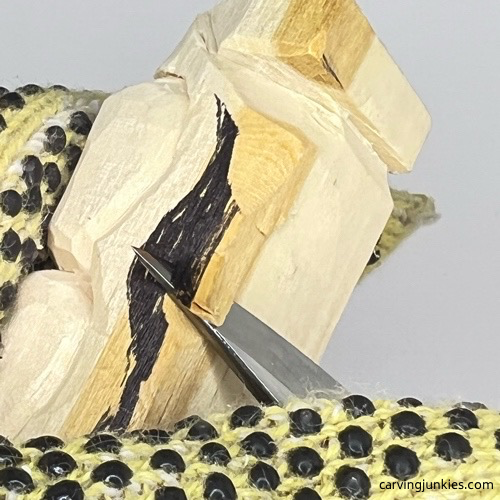 11. Removing wood from the side
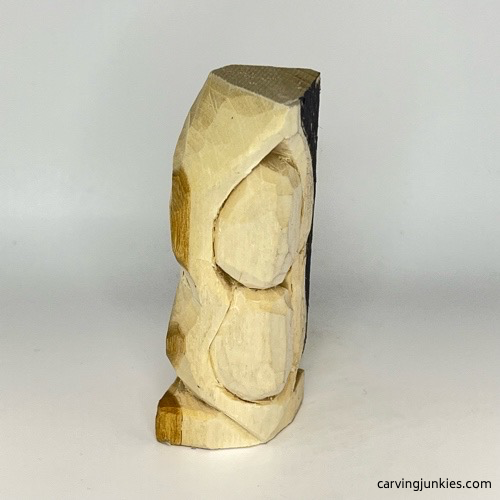 12. Side is carved
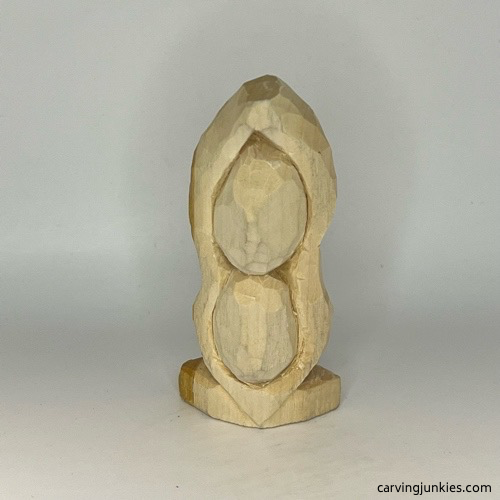 13. Both sides are carved
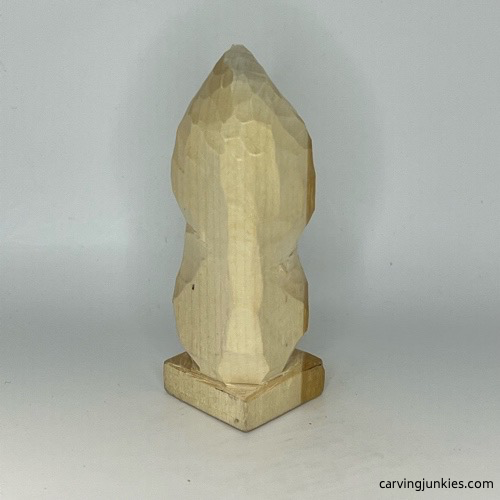 14. Back will be further shaped later
Carve the faces
The nose boxes should be drawn (photo 15) and carved using the carvingjunkies’ triangle-by-triangle nose carving system (with the adaptation of doing the stop cuts last).
Since the nose will be big, start by making the first cut of your pyramid cut (photo 16). Make the additional cuts to complete your pyramid cut. Repeat on the other side of the nose (completed in photo 17).
Now, make a series of stop cuts under the nose and remove wood from underneath (photo 17). Angle back the bridge of the nose (photo 18).
Mark additional wood for removal on the sides of the nose (photo 19).
Draw on the smile lines and carve them (photo 20). Draw additional facial details (photo 21). Carefully separate the eyebrows and the cartoon eyes. Add the cheek guidelines (photo 22) and separate them. Also, carefully separate the mouth (completed in photo 22).
You will create flat eye sockets, and paint the eyes on later, which will be much easier than carving them.
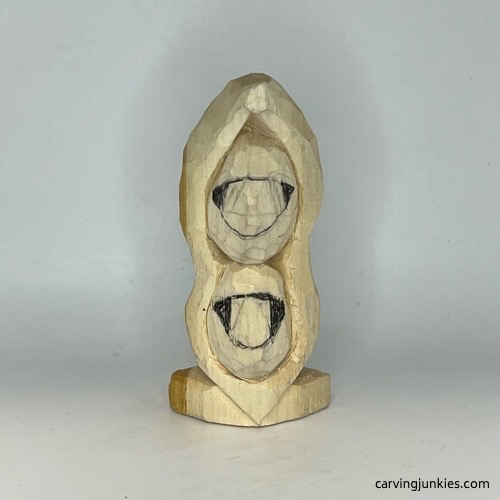 15. Noses boxes are drawn
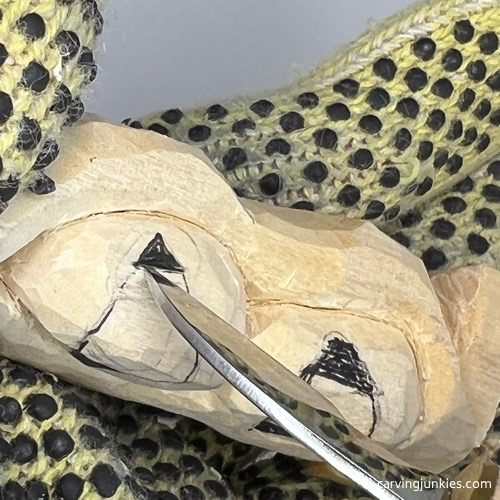 16. Making first pyramid cut
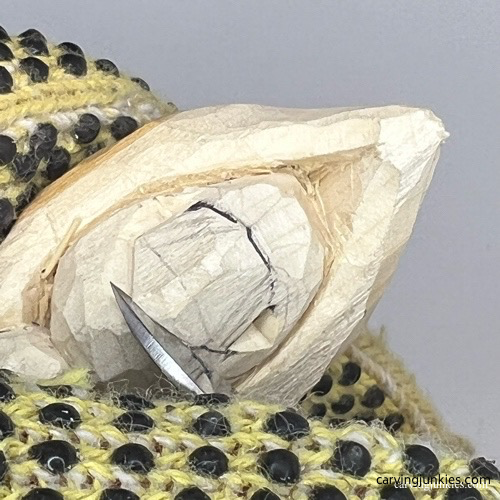 17. Separating bottom of nose
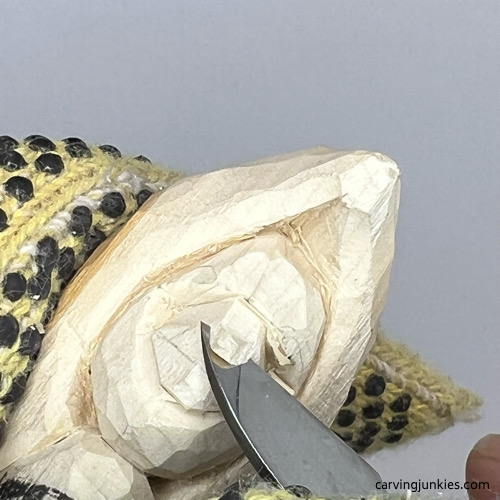 18. Cutting back bridge of nose
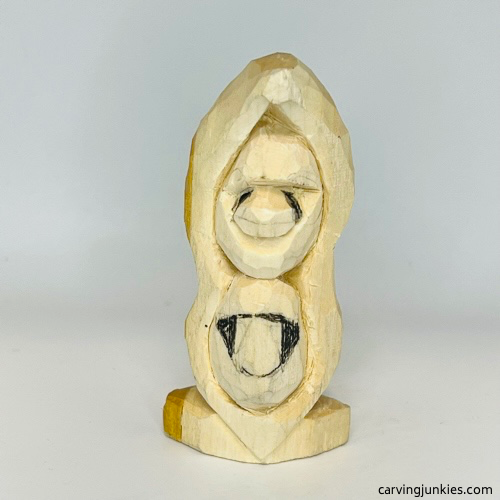 19. Wood is marked for removal
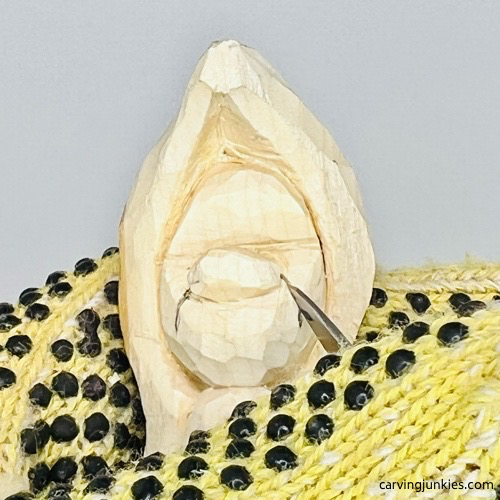 20. Adding and carving smile lines
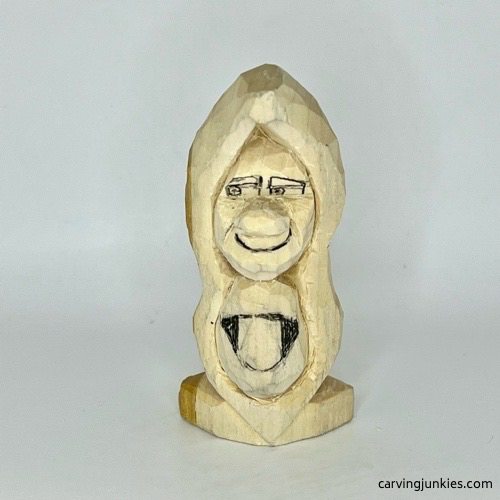 21. Facial details are added
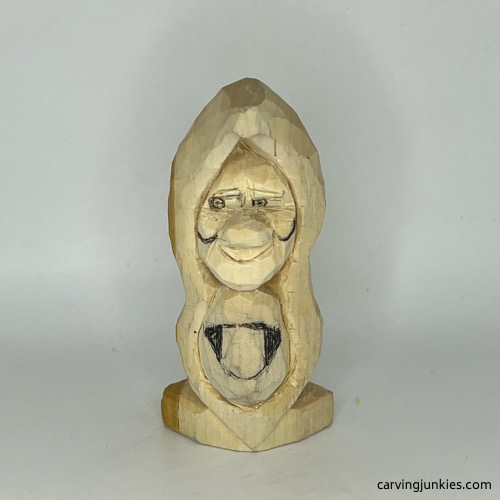 22. Cheek guidelines are added
Carve the bottom face
Carve the bottom face in the same way that you carved the top face (photos 23-25).
After the second nose is carved, shape the back of the pea pod (photo 26) and narrow the sides.
 23. Starting to carve the second nose
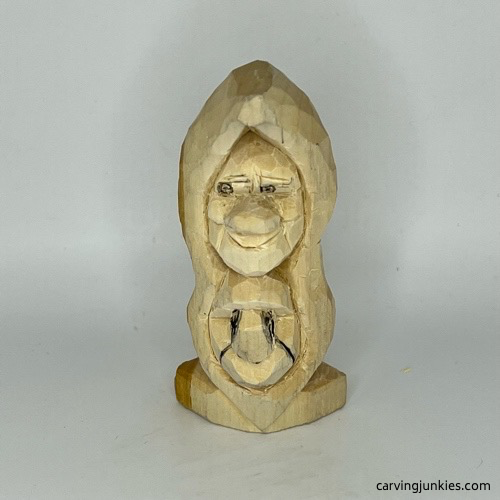 24. Marking wood for removal
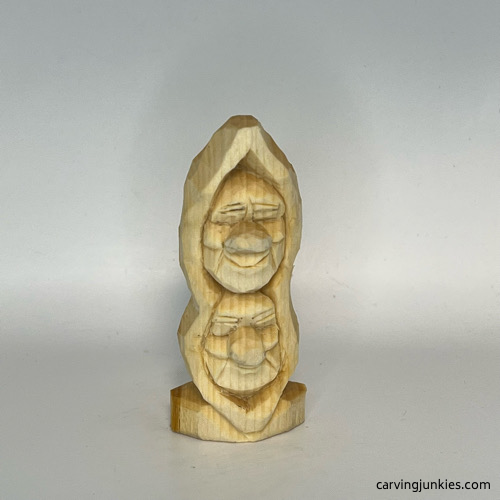 25. Details are carved
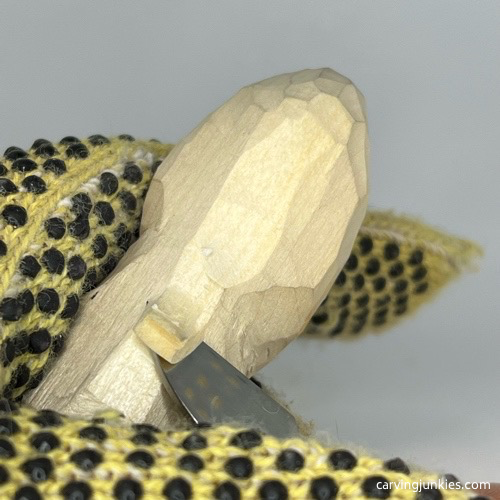 26. Shaping the back
Clean up your peas in a pod
Use your knife to deepen cuts on and around the face. You can also use a little sandpaper to smooth rough areas, especially the curves of the pea pod.
 27. Front view of unpainted peas in a pod
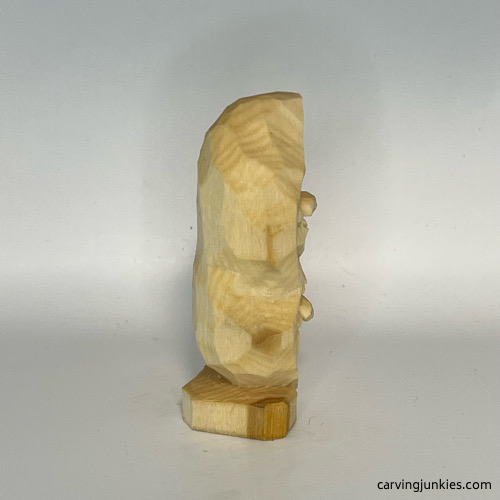 28. Right view of unpainted wood carving
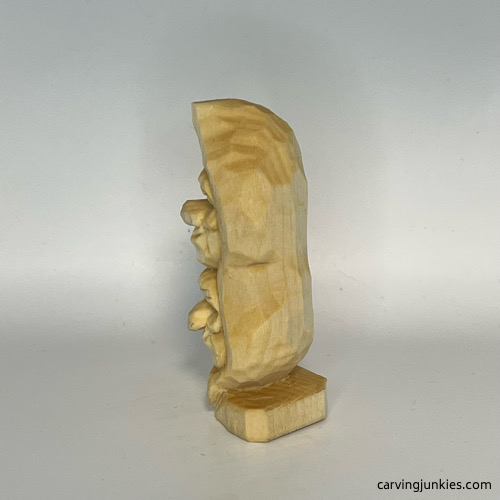 29. Left view of unpainted wood carving
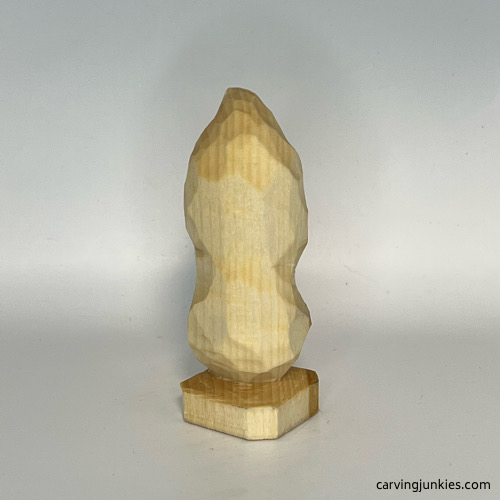 30. Back view of unpainted wood carving
Painting time!
I use acrylic paints—and a variety of paint brushes—that I’m always changing up and experimenting with. I really like angled brushes for getting into nooks and crannies.
All of the paints used were diluted with water to create a wash that can be added in layers (if more color is needed).
I usually start with the eye whites, but for this carving, I painted the whites over the face color. I wanted the entire face to have a slightly greenish hue.
- First coat of entire carving: A drop or two of Academy burnt sienna heavily diluted with water.
- Pea pod: FolkArt Apple orchard wash. Once completely dry, enhance facets by dry brushing Ceramcoat leaf green.
- Faces: Ceramcoat tawny light wash (you may need two layers).
- Eyes: CraftSmart ivory (100% paint). When completely dry, add Ceramcoat black (100% paint) with a toothpick for the pupils. When completely dry, use a toothpick to apply a spec of CraftSmart ivory (100% paint).
- Finish: Howard’s Feed ‘N Wax (dispose of paper towels or cloths outside because it is flammable).
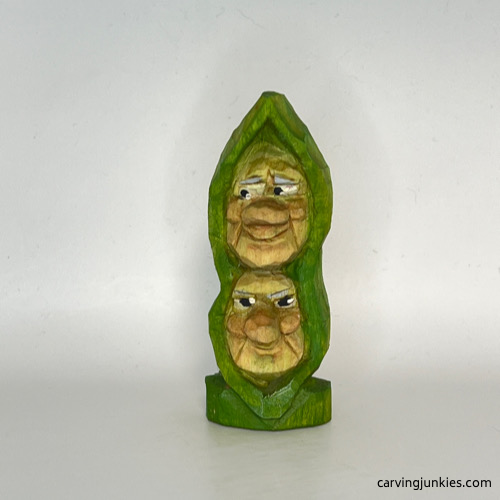 31. Front view of painted pea wood carving
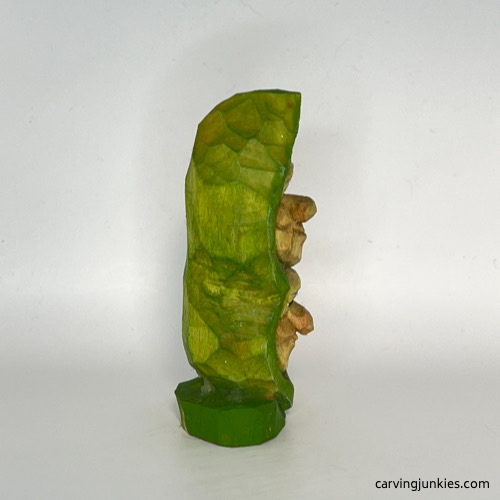 32. Right view of painted pea wood carving
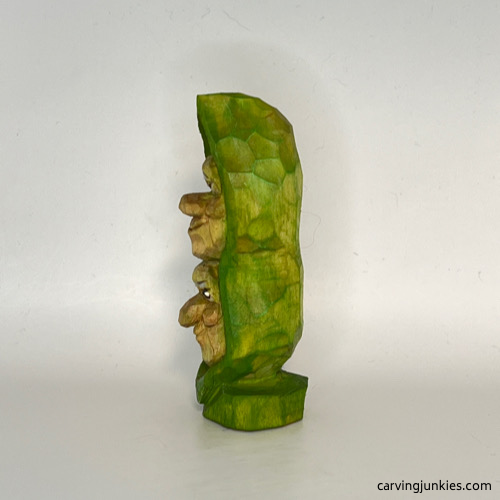 33. Left view of painted pea wood carving
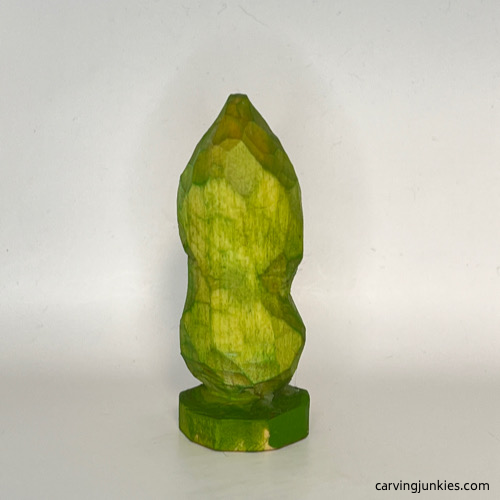 34. Back view of painted pea wood carving
Wood carving tutorial summary
- This is another fun wood carving tutorial that works up fast and lets you practice carving facial expressions.
- Get creative and make more of these little whittles with different expressions.
- Happy faces will be cuter than scary faces.
- You could also carve these without a base and glue them to a window box frame.
Get 50 Wood Carving & Painting Tips
FREE when you join our free Covered in Chips Club
Your information is 100% private and is never shared. Unsubscribe anytime. See our Privacy Policy .
Share page on:
Home | Privacy Policy | Terms of Use | Contact | Sitemap
