- Home
- Carving wood animals
- Whittle a cat
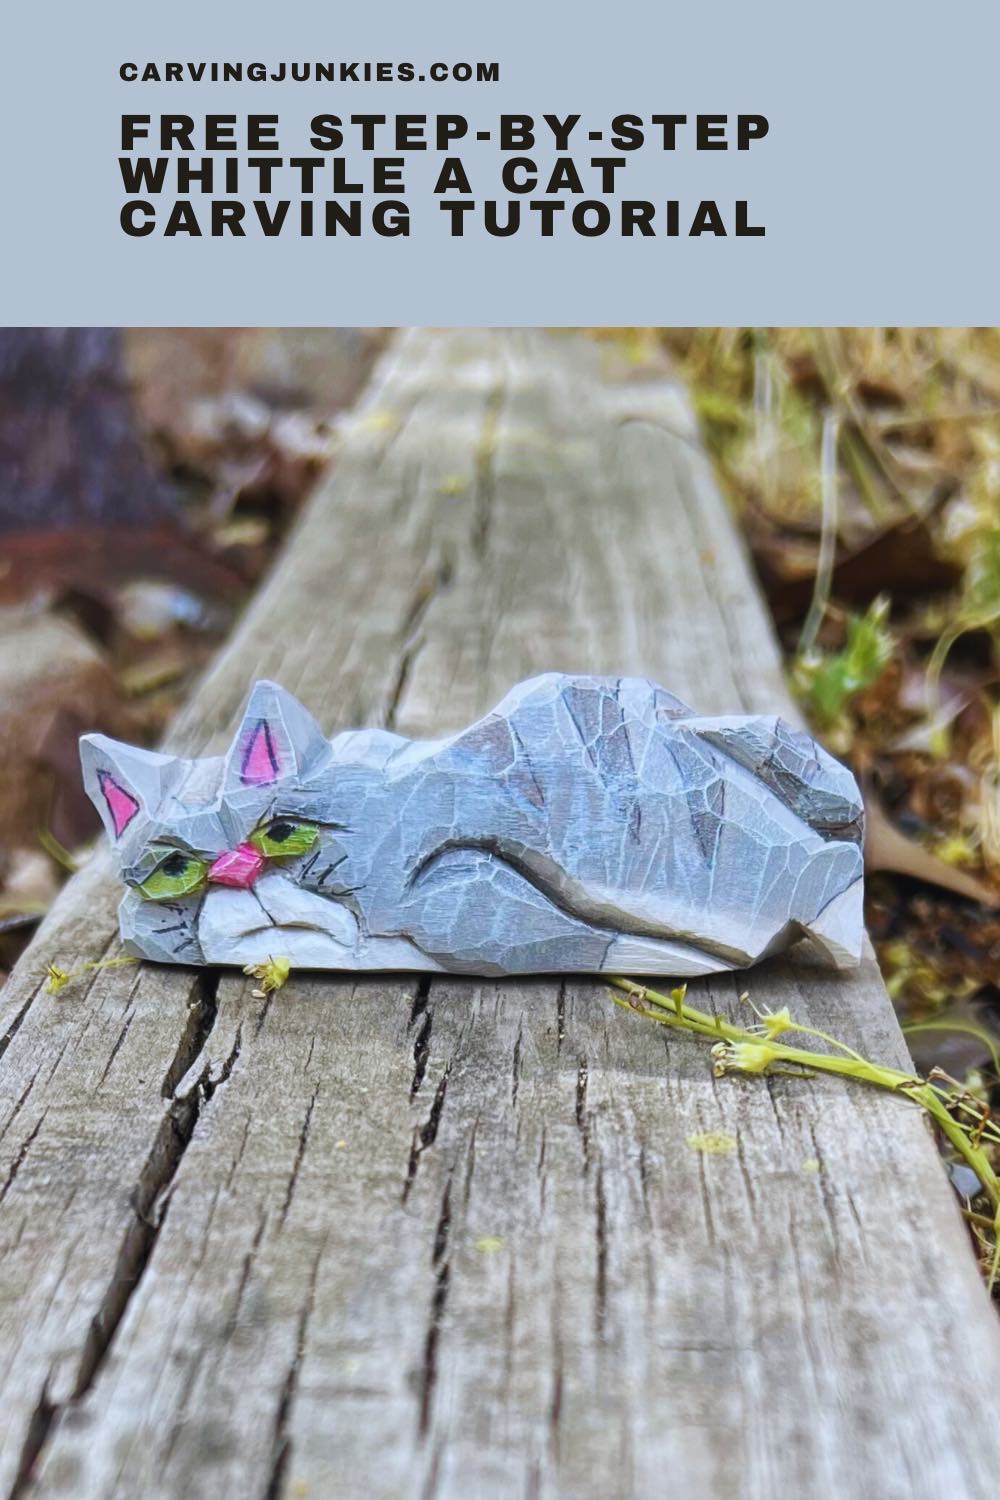
Fun whittle a cat tutorial
Carve yourself a grumpy, fat, cat caricature.
LEVEL: EASY
I’ve been wanting to do a whittle a cat tutorial and decided to model it after my much loved boy—Nermal—who went to the Rainbow Bridge over 10 years ago.* He was a big puddle of a cat. While he was not-so-nice to many people, he was 18 pounds of pure affection for me.
This little whittle is super fun to make and truly captures Nermal’s spirit—and his kitty death stare. And our rescue cat, Charlotte (who is so much like Nermal) recently struck a similar post (see photos below)!
I hope you have fun whittling him!
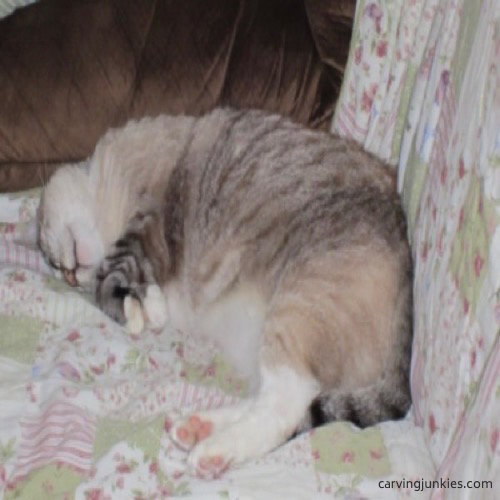 The inspiration for this whittle a cat tutorial
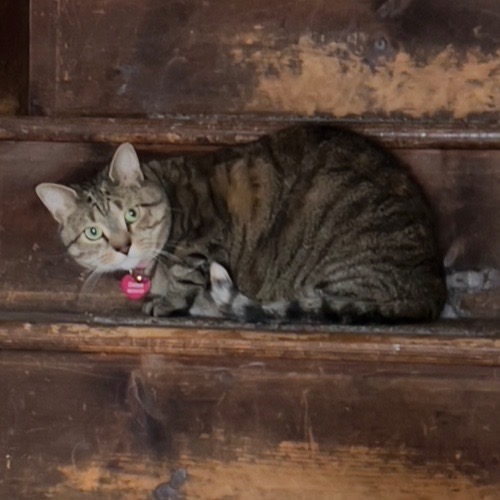 Our newest cat strikes the pose!
What you need for this whittle a cat tutorial
Start with a wood block that is 1 x 1 x 3 inches (2.5 x 2.5 x 7.6 cm).
You will need a ruler and something to sketch with. Wear a carving glove for safety and protect your leg arteries if you carve on your lap.
I used a rouhgout knife and switched to a smaller and thinner Helvie detail knife for the face details.
A painting guide is included at the bottom of this page If you want to use similar colors.
Whittle a cat tutorial at-a-glance
This short video walks you through the key steps for this whittle a cat tutorial. It may help to view it before you start.
Whittle a cat: Get started
Draw some guidelines—and mark wood to remove—on the top so you can roughout your wood block (photo 1). Your guidelines should be about 1/4 inch (0.6 cm) from the edges (photo 1).
On the front of your wood block, extend your lines from the top to the bottom corners (photo 2). Repeat on the back of your wood block (photo 3).
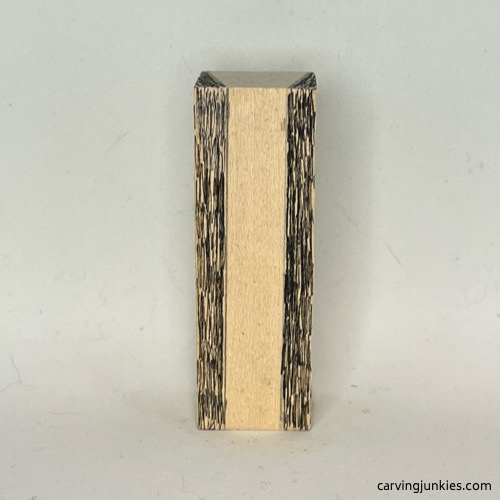 1. Wood is marked on top
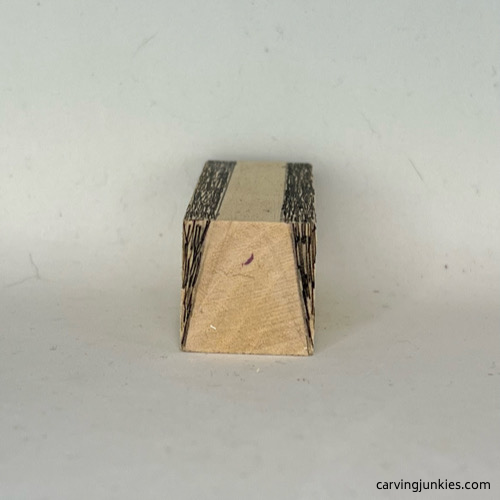 2. Wood is marked on the front
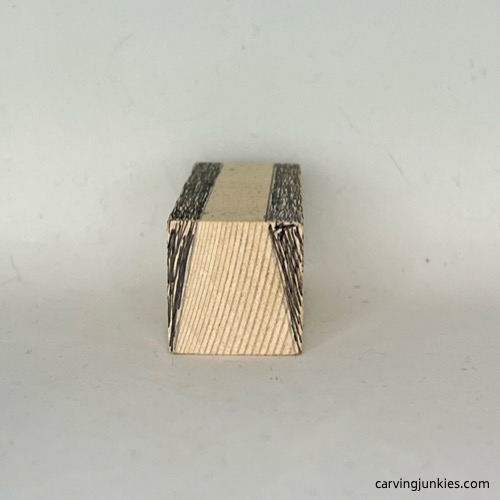 3. Back of block is marked
Whittle a cat: Roughout your block
Remove the wood that you marked (photos 4,5). You can use a push or pull cut. Repeat on the other side (completed in photo 6).
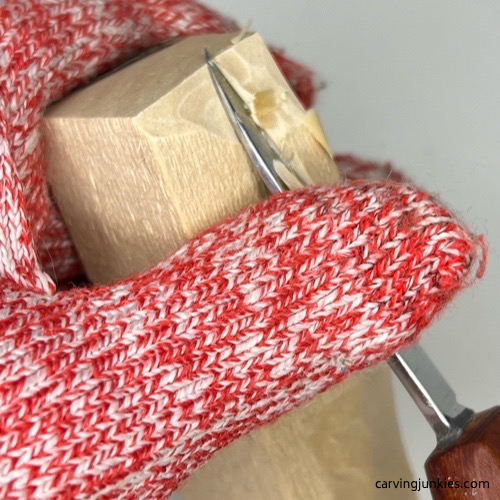 4. Roughing out the wood block
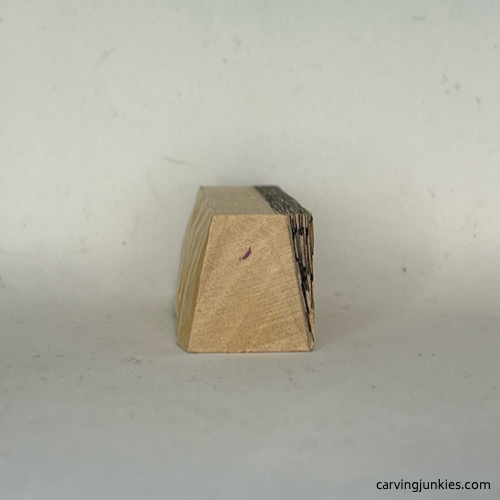 5. One side is shaped
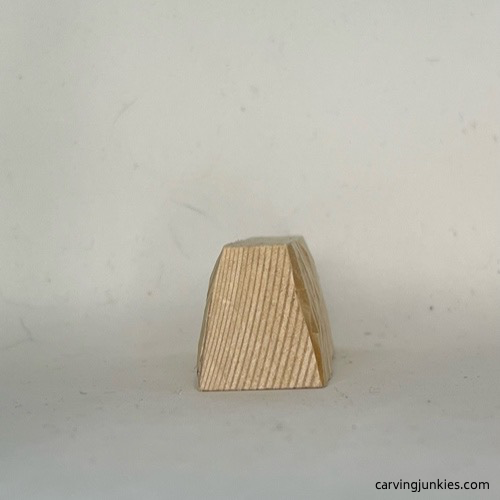 6. Both sides are shaped
Whittle a cat: Sketch details
On the front of your wood block, sketch your cat (photo 7). You can glue on the pattern at the bottom of the page (photocopy to size to fit your wood block), or trace the pattern on your wood block by pressing hard with pen. Or, you can sketch your cat using these measurements to guide you.
The width of the marked wood triangle on the lower left of the wood block (under the ear) is 1/4 inch (0.6 cm) wide. The bottom of the ears are each 1/2 inch (1.3 cm) at the widest point. The space between the bottom of the ears is 1/4 inch (0.6 cm). The space between the top of the ears is 3/4 inch (1.9 cm).
The width of the little hump is 1/4 inch (0.6 cm). The rest of the body is 1 1/2 inches (3.8 cm) long. The front paw is 1 inch (2.5 cm) long. The back paw (on the far right) is 1/2 inch (1.3 cm) long. The eyes are about 1/4 inch (0.6 cm) wide, and the nose is 1/4 inch (0.6 cm) wide.
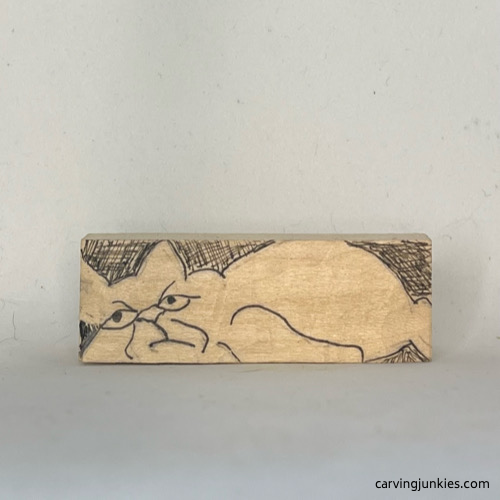 7. The cat front is sketched
Whittle a cat: Make your first cuts
Use a sturdy knife to make a pyramid cut In the lower left corner (photo 8). You will need to make additional pyramid cuts in the same place (photo 9) until you only have about 1/4 inch (0.6 cm) width of wood remaining (you will shape this uncut wood on the back later).
Now, remove the marked wood to shape the top and the backside of the cat (photo 10).
Use shallow pyramid cuts (or V-cuts) to remove wood around the front paw (photo 11).
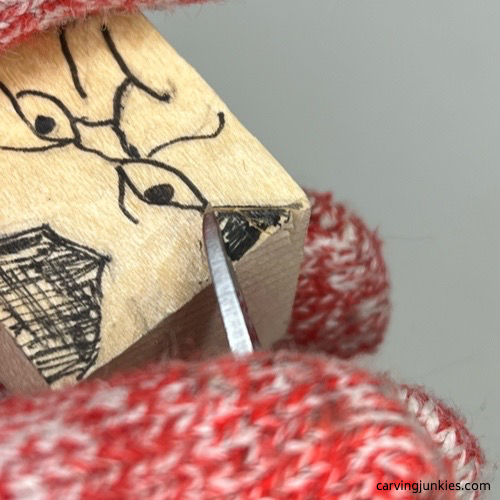 8. Starting a pyramid cut
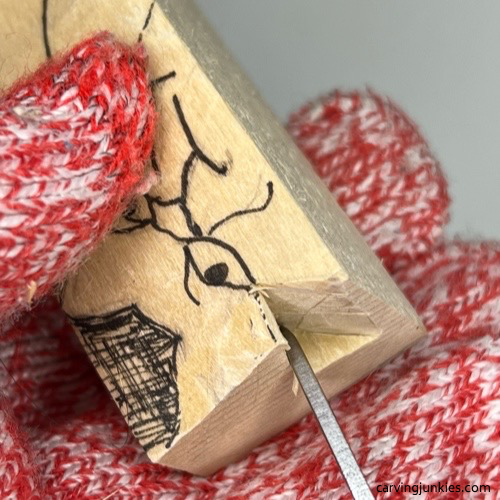 9. Making remaining pyramid cuts
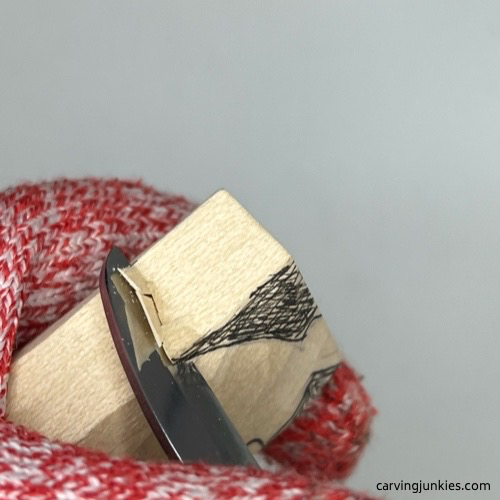 10. Removing wood from the top
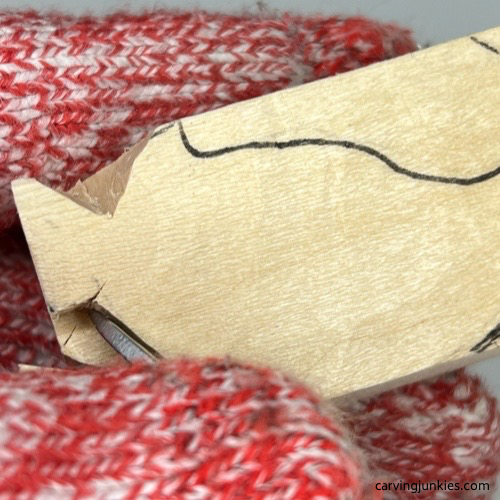 11. Starting to separate the paw
Whittle a cat: Sketch guidelines
Hold the wood so you are looking down at the top (photo 12). This will help you visually match your back guidelines to the guidelines on the front. Mark sections where you need to mindfully remove wood (without taking off too much) like the ear and the bigger hump (marked in photo 12).
Sketch the tail (photo 13). The tail starts 2.25 inches (5.7 cm) from the head end of the wood block, and extends all the way to the bottom of the back end of the block. The tail is 1/2 inch (1.3 cm) at its widest point and narrows at the top.
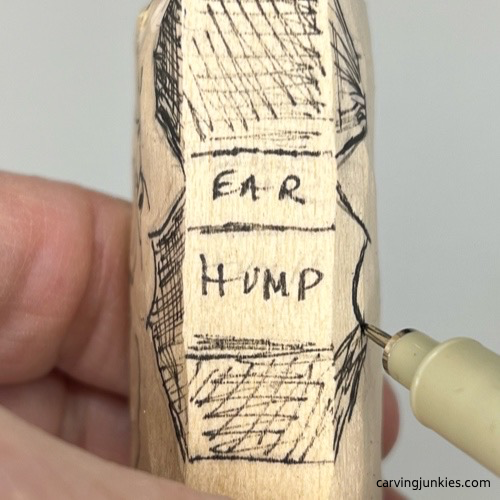 12. Sketching guidelines from the top
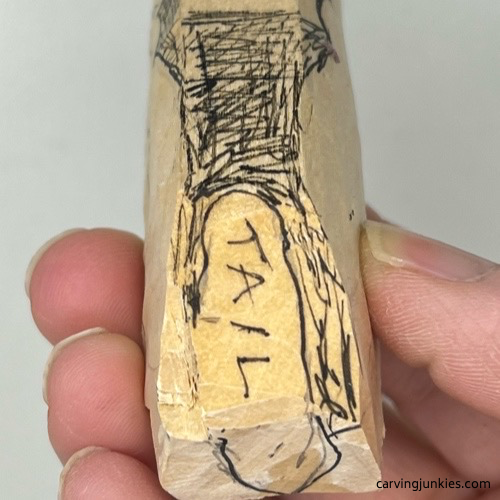 13. Tail is sketched
Whittle a cat: Remove more wood
Make a stop cut (photo 14)—and remove wood from around it—to start to shape the head and ears.
Continue to carefully remove wood between the ears (photo 15). This may be the most challenging part of this whittle a cat tutorial. Take your time and be careful not to break your knife tip. Also, be careful not to slip and carve off the ear. When you have full access with your knife, clean up any uneven cuts (completed in photo 16). Keep the ears thick for now to avoid breaking them.
Continue removing wood to carve the two humps and the body (photo 17). To separate the tail (photo 18), use stop cuts (or hold your knife like a pencil and move it along the guideline), removing wood from around the tail (photo 19).
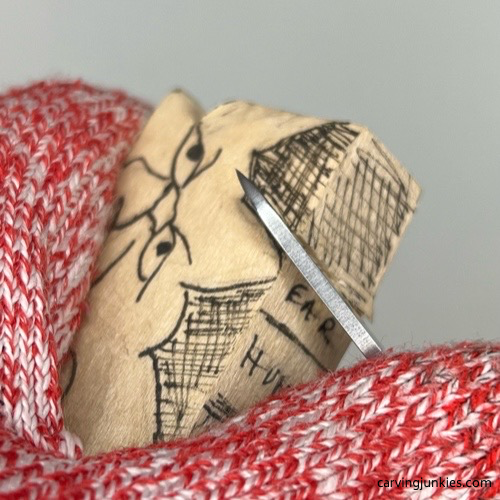 14. Making a stop cut
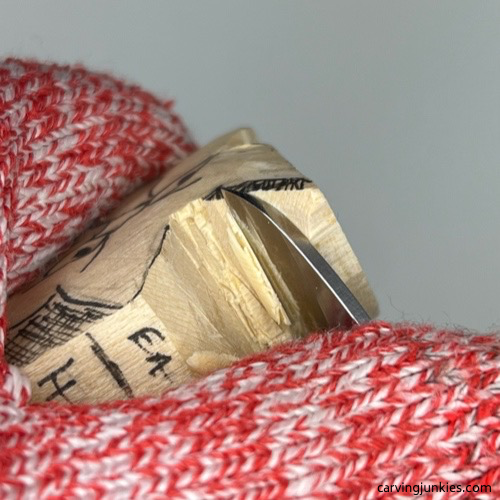 15. Removing wood
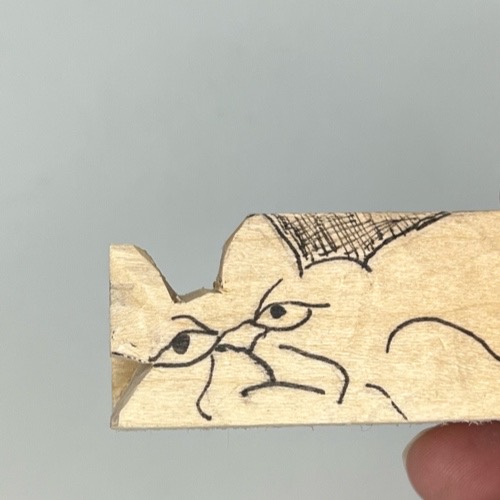 16. Ears are separated
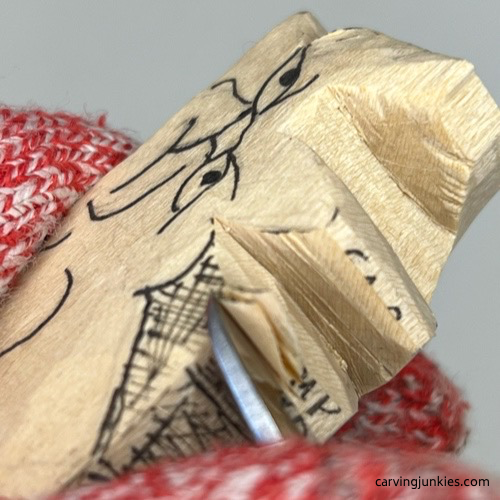 17. Removing wood across the top
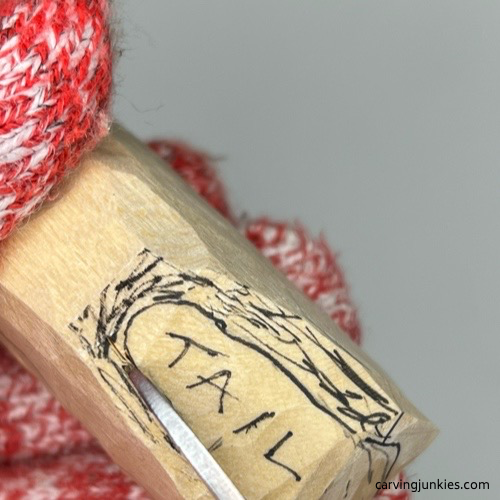 18. Separating the tail
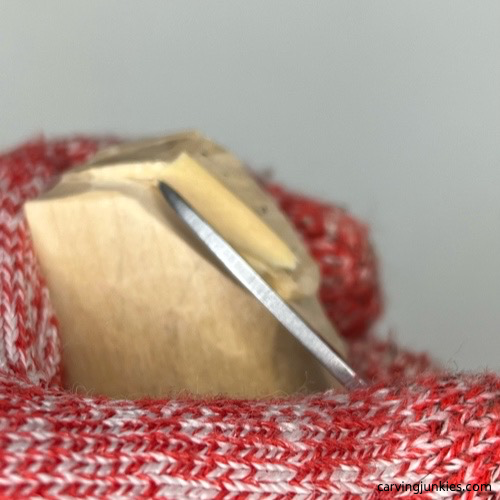 19. Removing wood around the tail
Whittle a cat: Refine sections
Use your knife to scoop out wood (turn your wrist as you make your cut) to create the valley before the second hump (photo 20). After removing wood around the tail, make a cut at a downward angle (photo 21) so the tail recedes into the body.
I switched to a smaller and thinner detail knife to carve the details on the face and body (photos 22, 23). You can use stop cuts or hold your knife like a pencil and move it along the guidelines. Then, make a second slicing cut to remove wood.
Once your guidelines are cut, very carefully slice some wood off from under the nose to create some depth (photo 23). Make a tiny chip cut in each corner of the nose to add shadow.
Also, make a downward, angled cut on each side—above the eyes—to add some depth to the forehead (photo 24). Thin the ears by shaving wood off the front and back (completed in photo 24). Create a slight curve by turning your wrist as you shave wood off each ear (visible in photo 24).
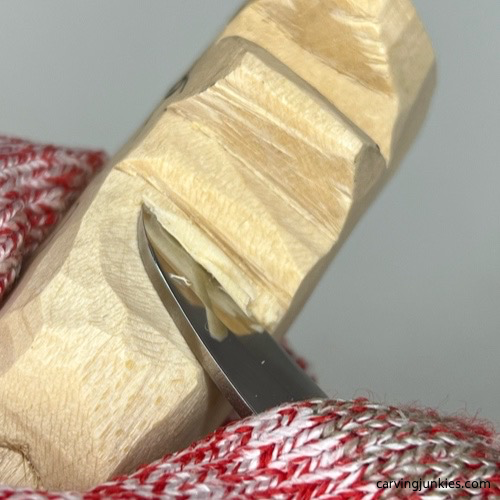 20. Curving the middle
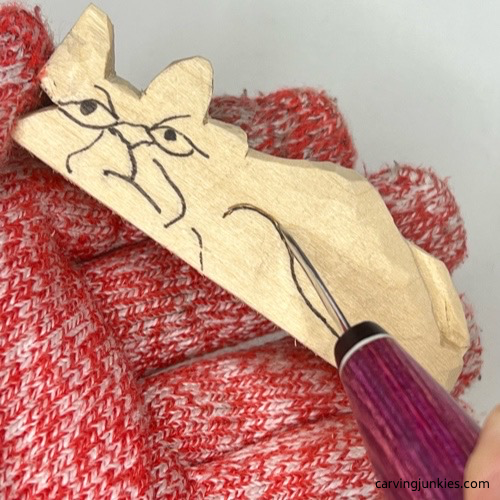 22. Separating the details
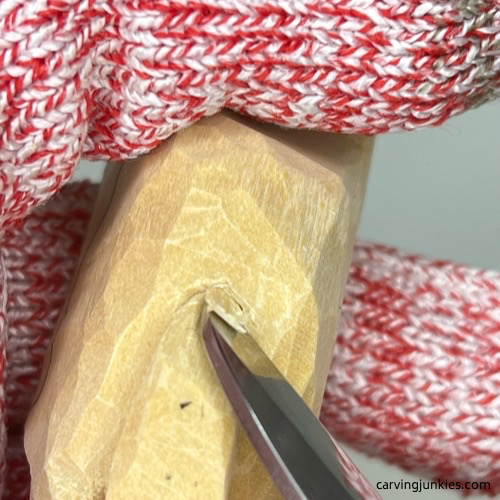 21. Shaping the top of the tail
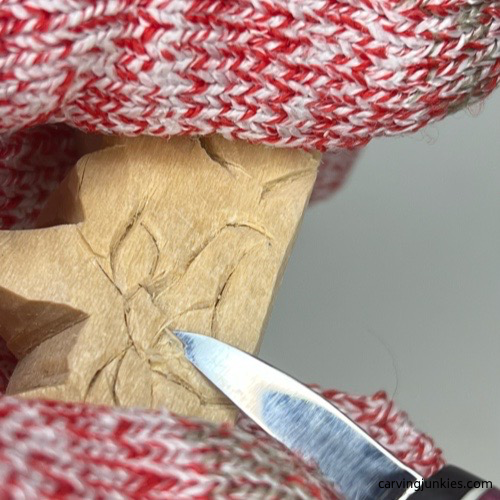 23. Adding depth
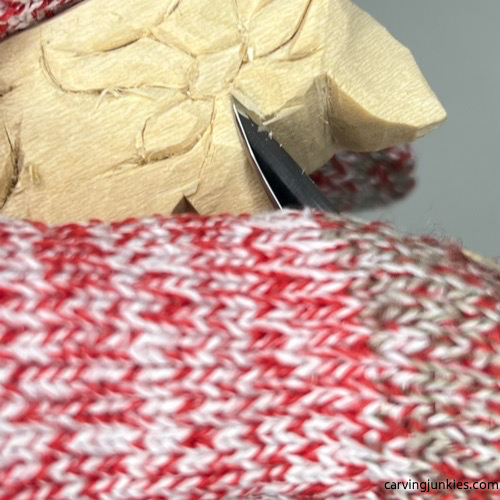 24. Carving the forehead
Whittle a cat: Final shaping
Shape the bottom of the back of the head (photo 25).
On the front, use black magic marker to outline the ears and color the pupils of the eyes (on small pieces you don’t want to risk breaking the ears or crumbling the eyes).
Mark the lower cheek (photo 26) where you will remove and round the wood (completed in photo 27).
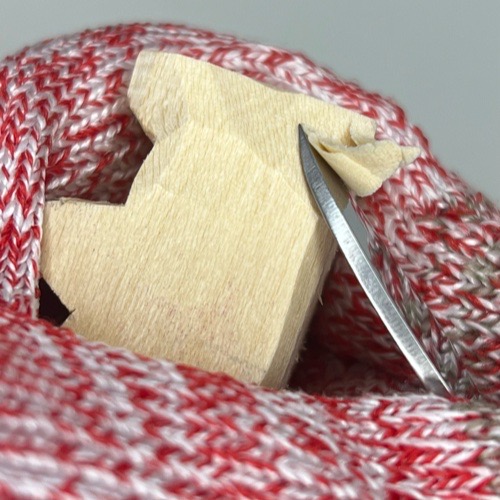 25. Shaping the back
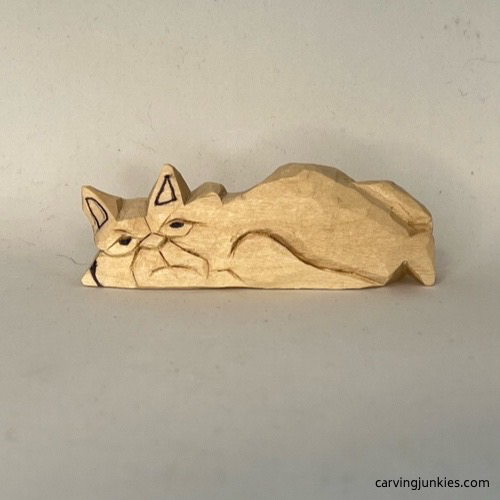 26. The cheek is marked
Whittle a cat: Final refinements
Refine the shape of your whittled cat, inspecting it from all sides to determine if you need to make any other adjustments. Use photos 27-30 as a reference.
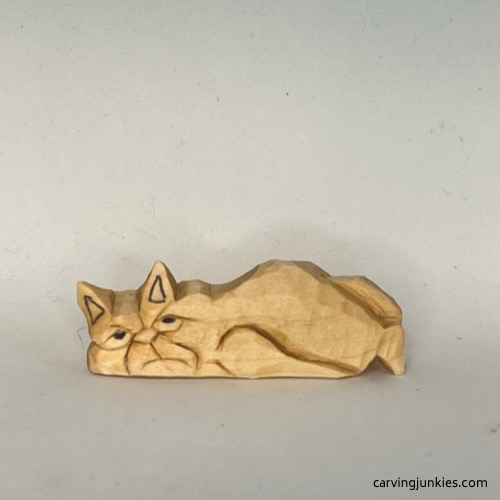 27. Front of unpainted whittled cat
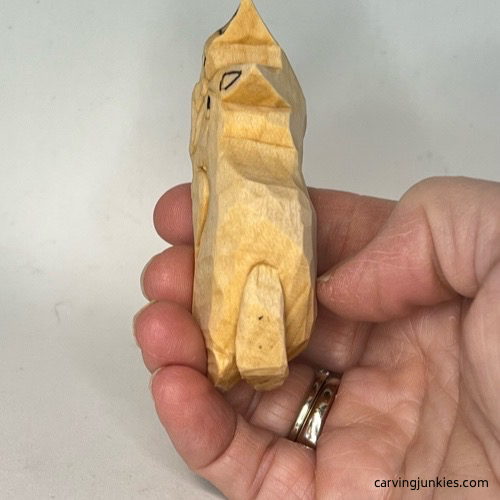 28. Top view of whittled cat
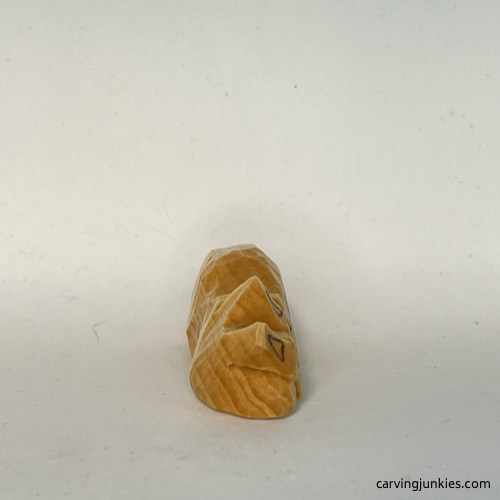 29. Side view of whittled cat
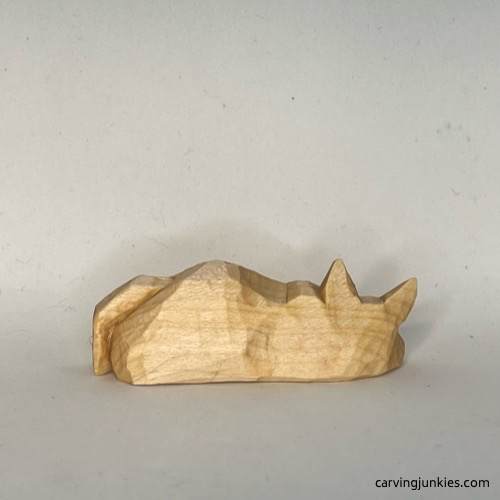 30. Back of whittled cat
Whittle a cat: Painting guide
Before painting, I sketched some stripes on the back and tail with pencil and went over them with a fine, black magic marker. They are about 1/4 inch (0.6 cm) wide.
Here are the acrylic paints I used if you want a similar look. Feel free to use whatever brushes you want. For this whittle a cat tutorial I used a small, flat brush. Also, check out this page on painting a wood carving for great tips and techniques.
- Face lines and other cut crevices: A very diluted wash with one drop of CraftSmart deep gray to create shadow.
- Paws, face, and belly: CraftSmart vanilla wash.
- Stripes: CraftSmart deep gray wash.
- Body: FolkArt steel gray wash (very diluted).
- Eyes: one drop Ceramcoat yellow mixed with 1 drop Ceramcoat leaf green and 2 drops of water.
- Nose and inner ears: Ceramcoat fuchsia wash.
- After drying for an hour: dry brush with Apple Barrel white.
- Whiskers and jowl dots: fine black magic marker.
- Use a finish of your choice, such as boiled linseed oil, polyurethane spray, or wax. I left my cat unfinished.
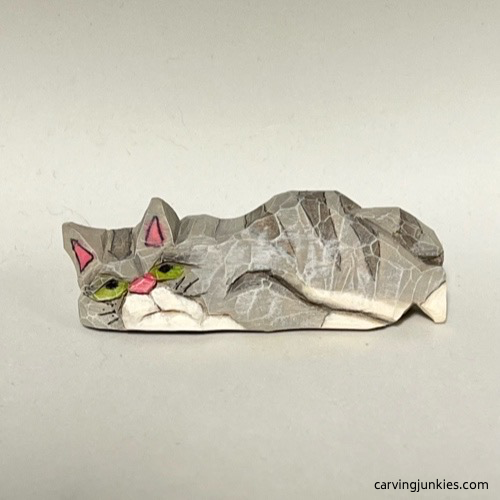 31. Painted front of whittled cat
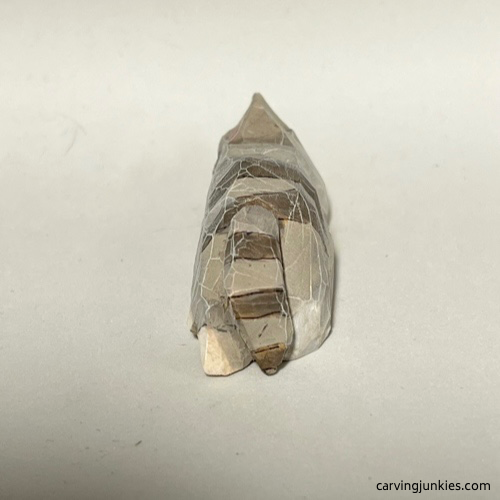 32. End view of painted cat
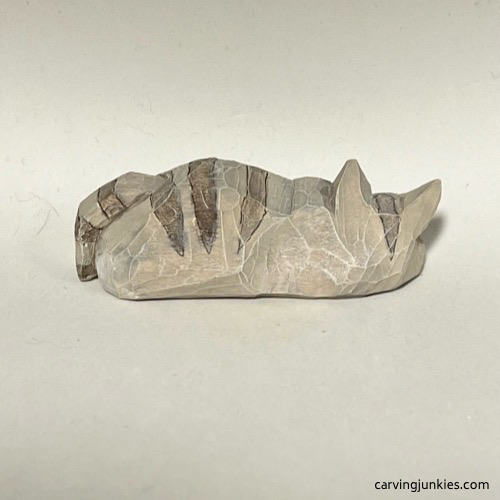 33. Backside of painted cat
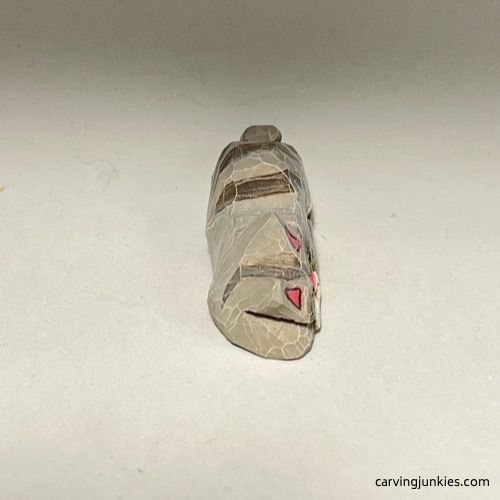 34. Top view of painted cat
Whittle a cat tutorial summary
- This humorous, whittled cat caricature is a lot of fun to make and he is packed with a kitty-death-stare personality.
- This design has him lying on his side so you only have to carve his front paws.
- Feel free to change up the painted colors of your whittled cat.
*I was also inspired by a cartoon cat illustration by @seecreate (under my Canva Pro content license) and adapted it to create this wood carving.
Get 50 Wood Carving & Painting Tips
FREE when you join our free Covered in Chips Club
Your information is 100% private and is never shared. Unsubscribe anytime. See our Privacy Policy .
Share page on:
Home | Privacy Policy | Terms of Use | Contact | Sitemap
