- Home
- Things to carve
- Viking wood carving
Valiant Viking wood carving
Bring this caricature to life with just a knife!
LEVEL: SOME CHALLENGES
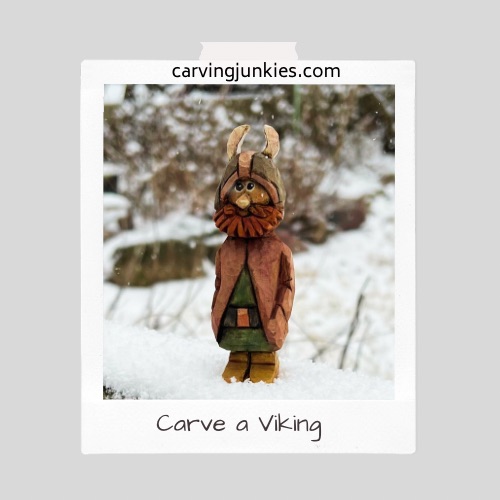
Unleash your inner Norse adventurer with this step-by-step Viking wood carving tutorial!
This easy-to-follow guide walks you through crafting a bold little Viking, complete with a metal helmet and those legendary horns.
Let the carving begin!
What you need to carve your Viking
- I used a wood block that is 1.25 x 1.25 x 4 inches (3.2 x 3.2 x 10 cm). Want to go bigger? No problem! I've also included a pattern at the end of this page if you prefer using a band saw to roughout your carving.
- Please always wear a carving glove for safety. If you're a lap carver, protect your leg arteries with something flat and hard.
- I used a roughout knife and switched to a smaller detail knife to carve the face and other details. But you could probably get away with just one knife.
- A pencil or pen and a ruler is needed to sketch your guidelines.
- I've included a free painting guide at the end of the tutorial.
Quick video overview
Before you start carving, it may help to watch this brief video that summarizes the key steps to this Viking wood carving tutorial.
Set up your Viking wood carving
Mark your wood block so you know which side is the front and back (photos 1,2). I marked all sides (F,B,R,L).
Sketch your guidelines about:
- 1.75 inches (4.4 cm) from the top on the front to mark the bottom of the head (photo 1).
- 1.5 inches (3.9 cm) from the top on the back to mark the bottom of the head (photo 2). Note: the back of the head is a little higher than the front.
- Sketch diagonal guidelines from the bottom of the head on the front to the bottom of the head on the back on each side (photos 3,4).
- On the front side: Sketch a guideline that is about 0.25 inches (1.3 cm) from the bottom to mark the top of boots (photo 1).
- On the back side: Sketch a guideline about 0.75 inch (1.9 cm) from the bottom to mark the back of the Viking's boots (photo 2).
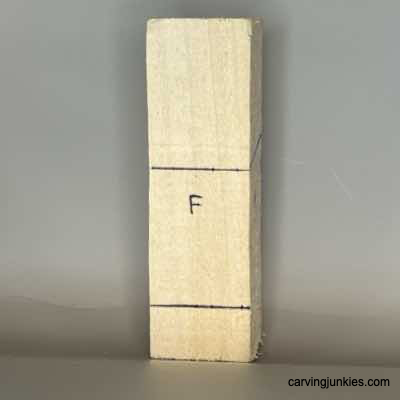 1. Front guidelines are drawn
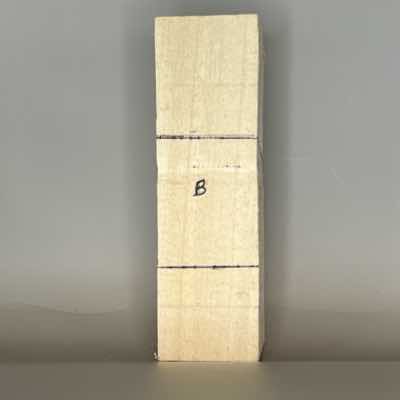 2. Back guidelines are drawn
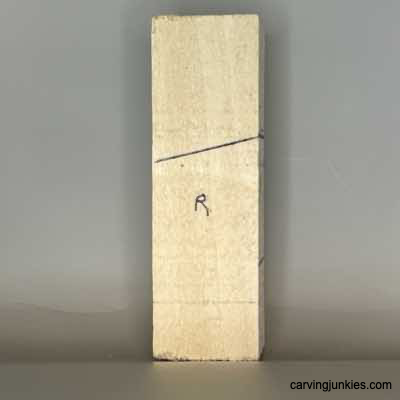 3. Right guidelines are drawn
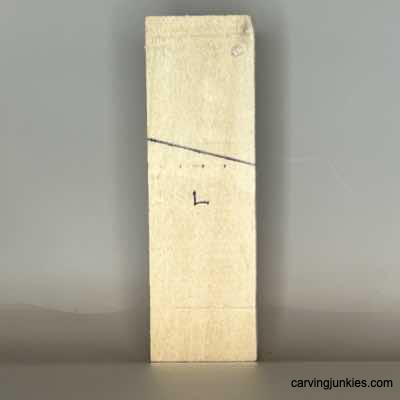 4. Left guidelines are drawn
Make your first cuts on your Viking wood carving
Use stop cuts to separate the head all around (photo 5), removing wood from underneath. I like to start in the corners and work my way toward the middle.
Use the same method to separate the boots on the front (photos 6) and the top of the boots on the back (photo 7).
Continue to remove wood from the front (photo 8) and the back to roughout the boots.
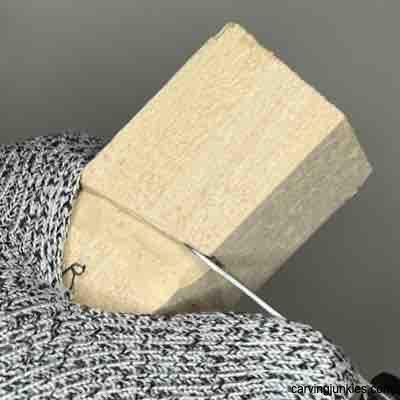 5. Making a stop cut
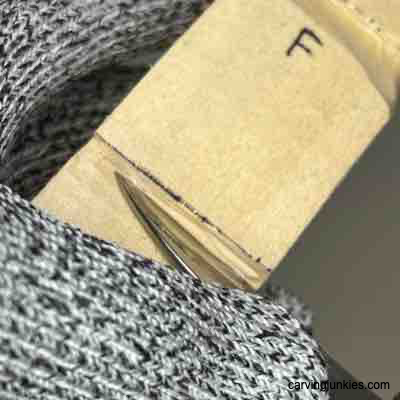 6. Separating boots (front)
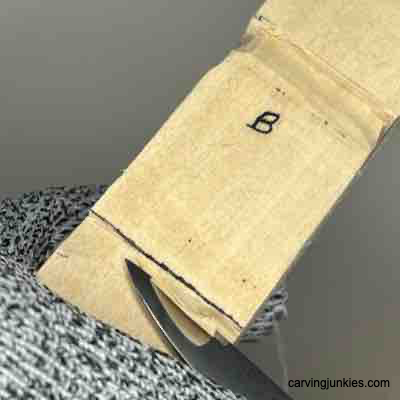 7. Separating boots (back)
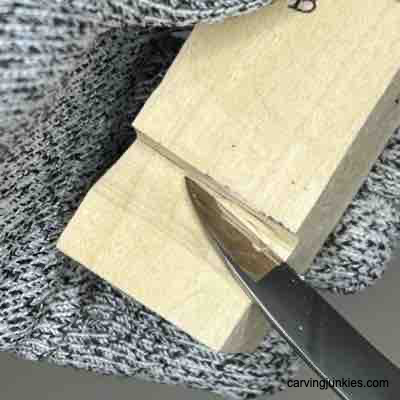 8. Roughing out boots (front)
Roughout the head of your Viking
Slightly round off all the corners on your Viking wood carving. Sketch a guideline halfway across the top of the block and add 2 guidelines about 1/4 inch (0.6 cm) from your middle guideline (photo 9).
Carve back the top of the head on the front to the first guideline (photo 10). Repeat on the back.
Draw a short guideline in the middle of the top of the block, and add lines about 1/4 inch (0.6 cm) on each side of the midline (photo 11), which will help guide your V-cut (photo 12). Tip: You may have to rock your knife back and forth to get through the tough end grain. It is okay if you need to make more than one pass. When completed, your carving should look like photo 14.
Shave wood back from each side to create a mound for the nose (photo 13).
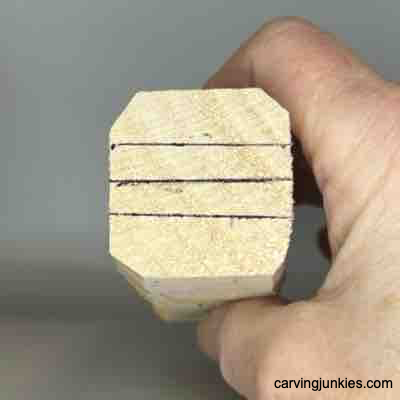 9. Guidelines on top
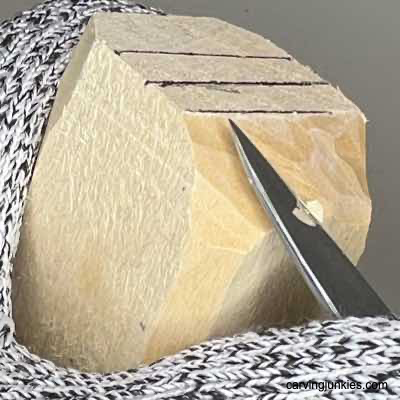 10. Carving back the front
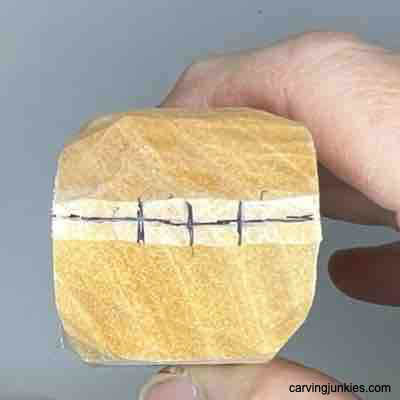 11. Lines are drawn
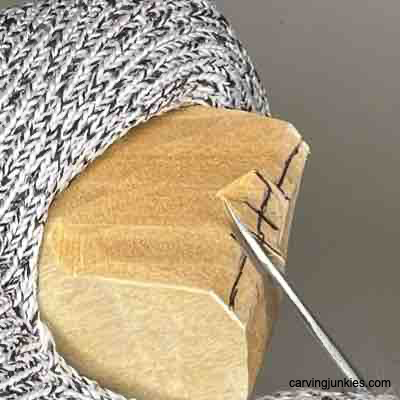 12. Making a V-cut
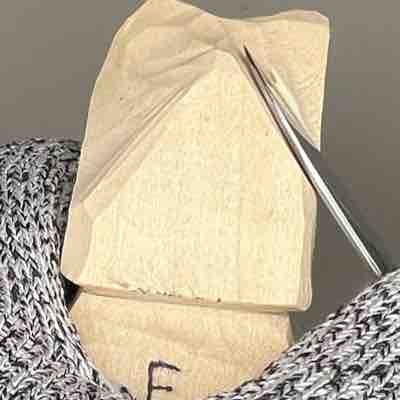 13. Setting up the nose
Shape the head of your Viking wood carving
Sketch some details on the head of your Viking wood carving, including the rim of the helmet (photo 14). This caricature will have a beard and mustache.
You want the helmet horns to sit back from the front of the helmet. Carefully make stop cuts above the guideline and remove wood from above (photo 15). I removed wood in layers. Take your time and be careful not to slip. You may want to put your piece on a table or in a vise for stability. After a few cuts, you will have greater access to remove more wood (photo 16) to set back the horns.
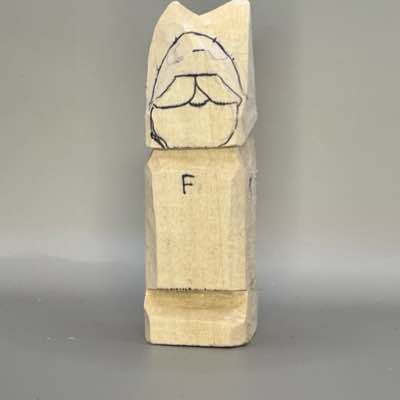 14. Face is sketched
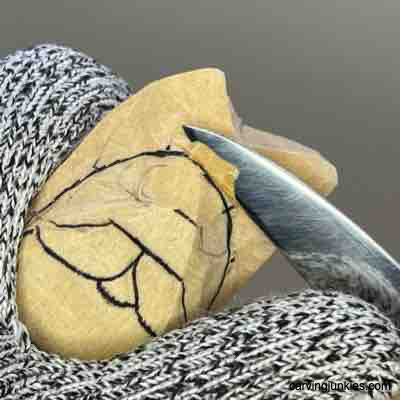 15. Removing wood above stop cut
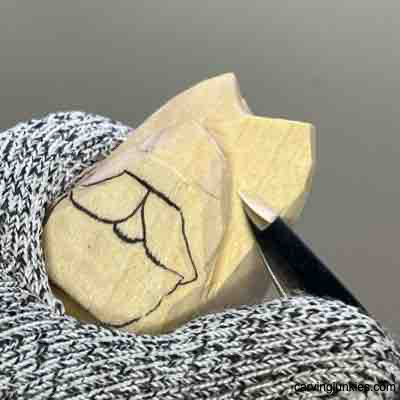 16. Removing more wood
Add details to your Viking
Sketch the horns on your Viking wood carving (photo 17). Remove wood to shape the horns and round the helmet (photo 18). Note: Save splitting the horns for the very end to avoid breaking them.
Reduce some wood from the back of your Viking wood carving. You can turn your wrist and make a sweeping motion to roughout the back of the horns and helmet (photo 19).
I used V-cuts to indent the sides of the horns (photo 20).
Also, start to angle the shoulders on both sides (photo 21).
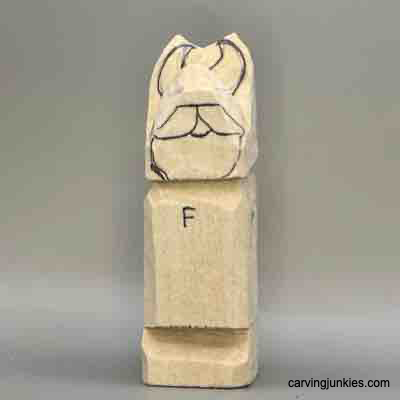 17. Horns are sketched
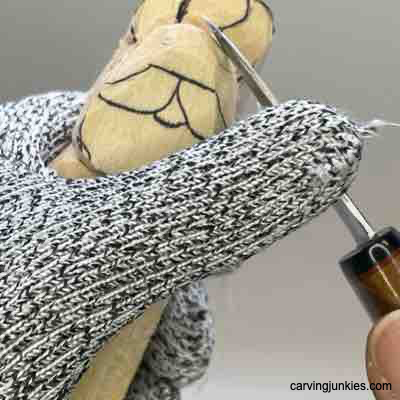 18. Rounding the helmet
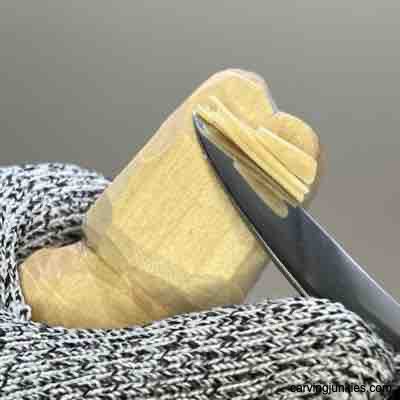 19. Shaping back horns
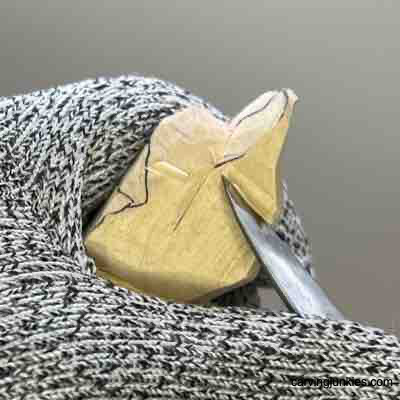 20. Making a V-cut
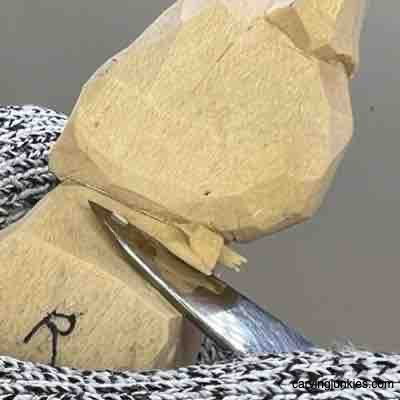 21. Angling the shoulder
Add more details to your Viking
Sketch the helmet all around (photos 22-25).
Shave off your sketch of the beard and mustache and replace them with a square on the front for the nose (photos 22). Note: For this carving, you will paint the eyes rather than carve them.
Sketch the Viking’s open robe (photo 22) and the arms on each side (photos 23,25). The Viking's hands are hidden in the pockets.
Mark wood to remove to narrow the Viking’s body all around (photos 22-25).
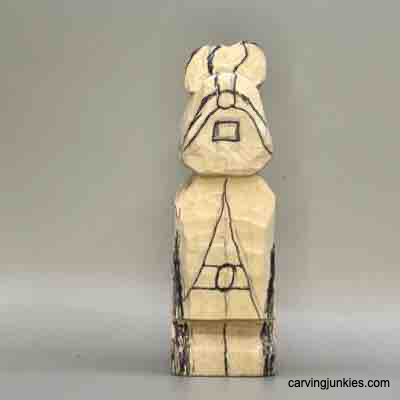 22. Front details
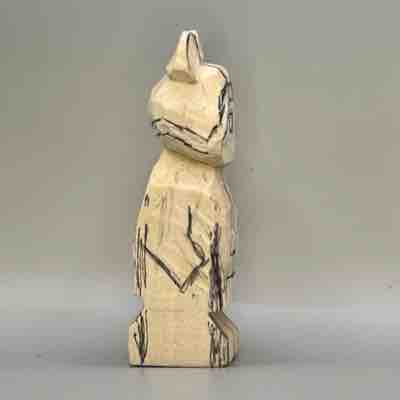 23. Right details
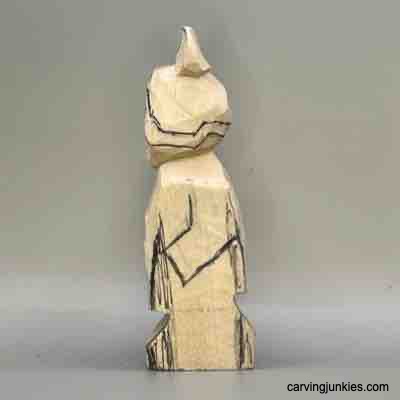 24. Left details
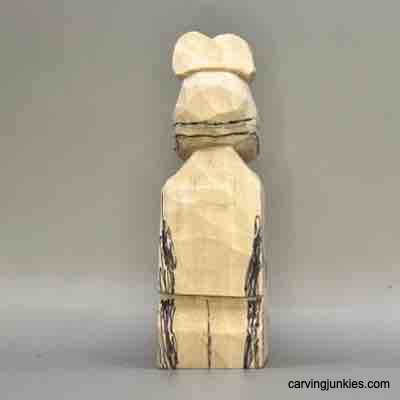 25. Back details
Carve more details
Separate the helmet from the head and the square for the nose. I ran my knife along each guideline (photo 26) and made a second slicing cut. This gives you greater access to carve the nose.
Separate the top of the helmet all around, the robe, and the belt (completed in photos 39-42). Continue to remove wood you previously marked. Once you have the desired body shape, use stop cuts to separate the arms on each side (photo 27).
Use pyramid cuts to carve the crook of each arm (photo 28).
Carefully make a series of V-cuts to carve the bottom of the beard (photo 29).
Use a V-cut to split the boots on the front (photo 30) and the back. You can shape the boots further later.
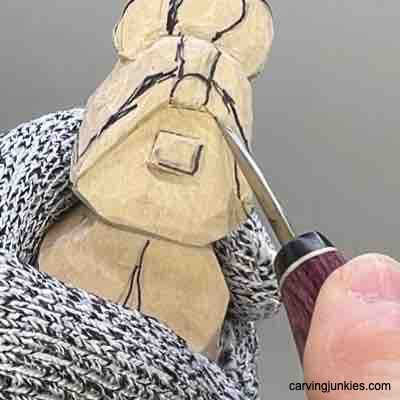 26. Separating the helmet
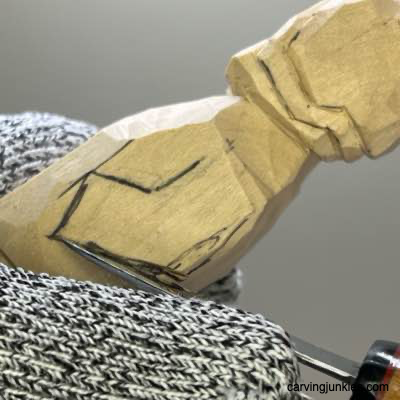 27. Separating the arms
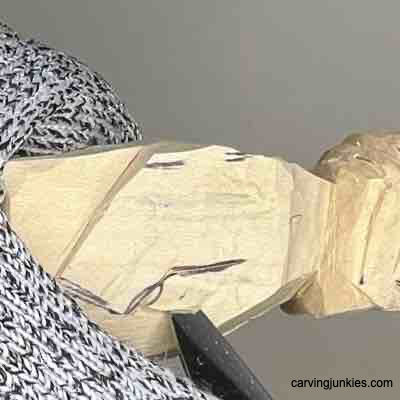 28. Completing pyramid cut
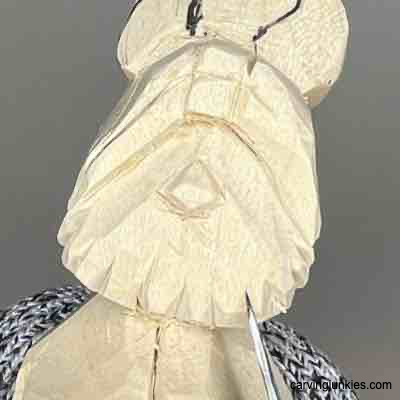 29. Making V-cut
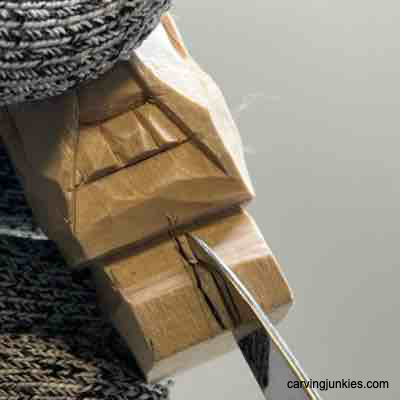 30. Splitting the boots
Continue to shape your Viking
Sketch the rough shape of the boots on the bottom of the wood block (photo 31) and remove the excess wood.
Use your knife to separate and shape the boots. I used stop cuts (photo 32), cutting toward the leg. Be very careful here not to break your knife, or crack the boots. Take your time and be intentional with your cuts.
Sketch where you will carve the shoulders on the back and the tush (photo 33). Also, sketch the new mustache (photo 34).
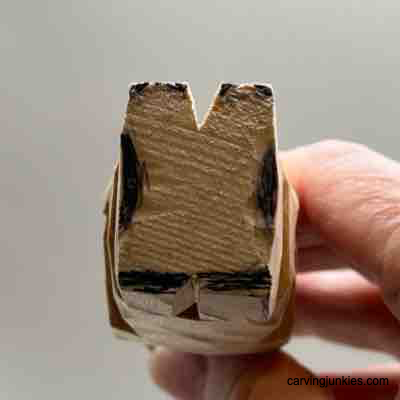 31. Sketched boots
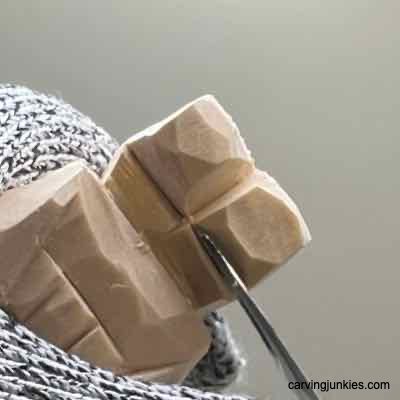 32. Using stop cuts
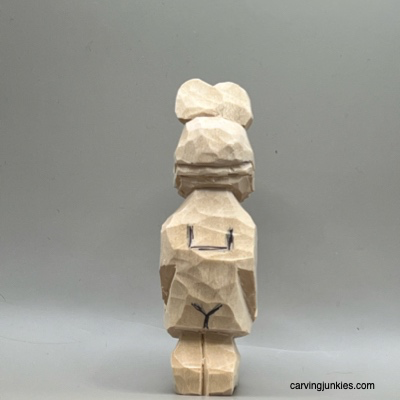 33. Back details
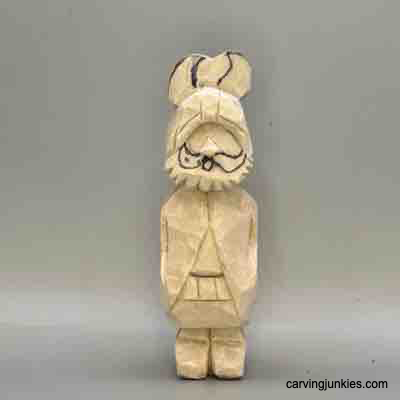 34. Sketched mustache
Make your final cuts
To separate the details on the back, you can use stop cuts or slicing cuts to separate the square. I then used pyramid cuts in each corner. This provided more access to cut under the arms and reduce the wood (photo 35). Check for symmetry as you carve.
Separate the tush (completed in photo 42). I held my knife like a pencil and moved it along the guideline, making a second slicing cut.
I used the same technique to separate the mustache. Carefully use V-cuts to add texture to the mustache (completed in photo 39). You could also use a V-tool.
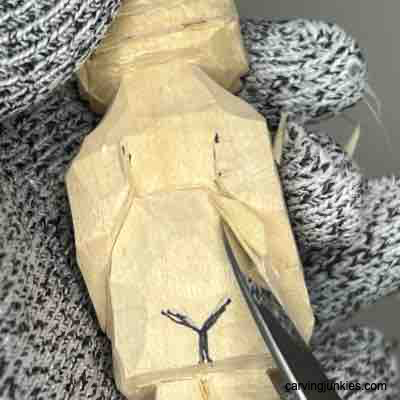 35. Shaping the back arms
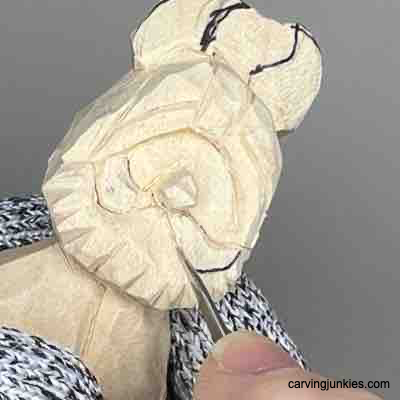 36. Separating the mustache
Separate the horns
Very carefully, make a shallow V-cut to start to separate the horns (photo 37). Continue making gentle V-cuts to get to the bottom of the horns. Take your time here.
Remove wood to shape the inner part of the horns (photo 38). I turned my wrist as I was carving to shave off wood. In places where I ran into grain issues (while carving upward) I stopped midway, and carved downward from the top to the middle.
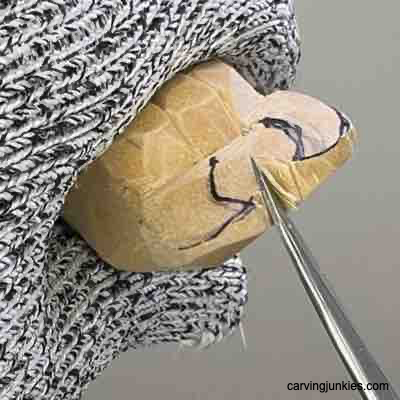 37. Splitting the horns
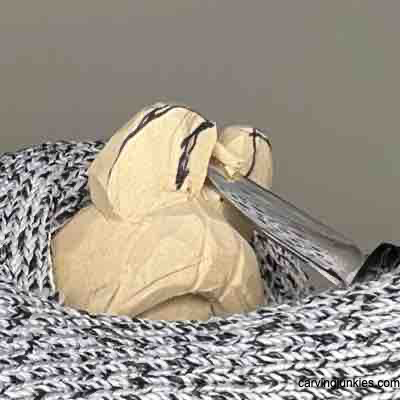 38. Shaping the horns
Refine your Viking wood carving
Clean up your cuts prior to painting your Viking wood carving.
I added a few additional V-cuts to fill in the beard (completed in photo 39) and added some wrinkles near the elbows (photo 39).
I also narrowed the boots (completed in photos 39-41) and used V-cuts to add heels.
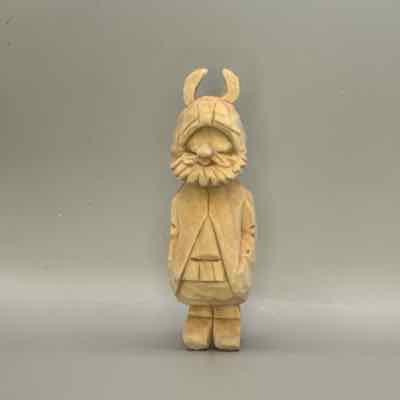 39. Front view of unpainted Viking
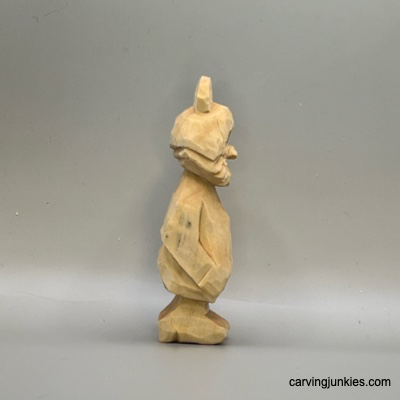 40. Right view of Viking
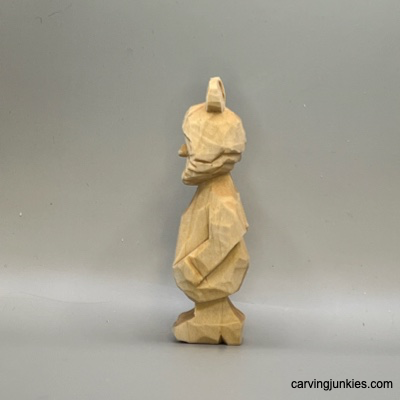 41. Left view of Viking
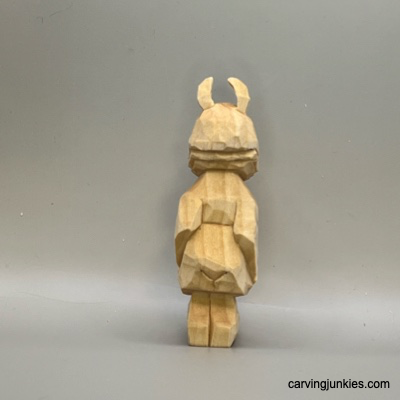 42. Back view of Viking
Paint your Viking wood carving
If you're new to painting wood carvings, read this comprehensive article, which explains about paint washes and provides other great tips.
If you want a Viking similar to mine, use these brands and colors (see the bottom of this page for those I recommend):
- Skin: Ceramcoat rosy beige wash.
- Beard: Ceramcoat pumpkin mixed with Winsor & Newton red iron oxide wash.
- Eye whites: Apple Barrel antique parchment white (100% paint).
- Pupils: Ceramcoat black (100% paint). Let dry and add CraftSmart vanilla (100% paint) with a toothpick.
- Horns: CraftSmart vanilla wash. After allowing paint to dry completely, I dry bushed with CraftSmart chocolate brown.
- Helmet: CraftSmart deep gray wash and FolkArt rose gold metallic (100% paint).
- Robe: CraftSmart chocolate brown wash. I dry brushed with the same color.
- Shirt: DecoArt forest green wash. I dry brushed with the same color.
- Belt and buckle: Ceramcoat black wash and FolkArt rose gold metallic (100% paint).
- Shoes: FolkArt Golden Ochre wash. I dry brushed with the same color.
- Finish (optional): I applied 2 coats of polyurethane spray. After drying, I used homemade "turd" polish (3 parts Minwax Aged Oak Gel Stain and 1 part mineral spirits). Apply with an old toothbrush and quickly remove most of the polish with paper towels. Throw the used paper towels outside in the trash (they are combustible).
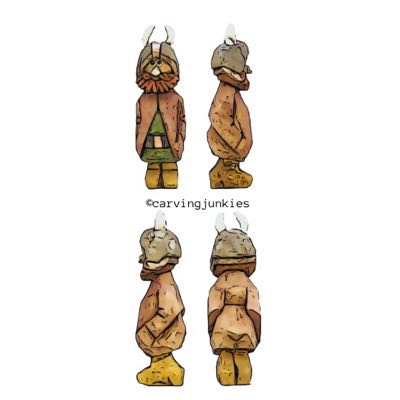
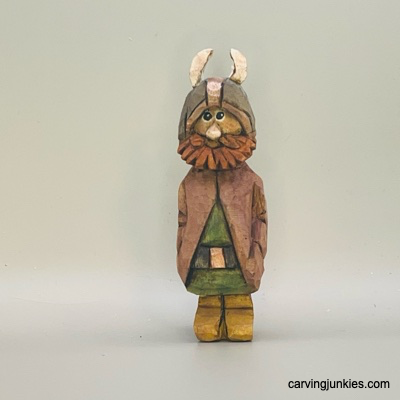 43. Painted Viking (front)
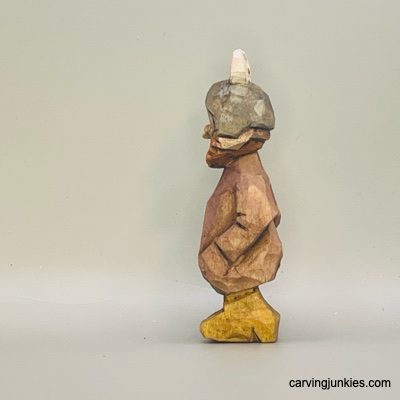 45. Painted Viking (left)
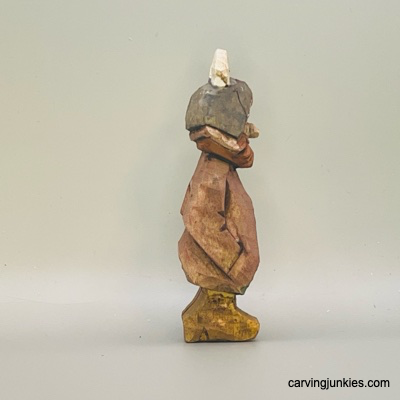 44. Painted Viking (right)
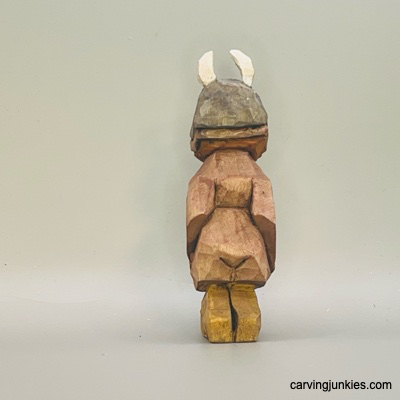 46. Painted Viking (back)
Viking wood carving pattern
Simply photocopy this pattern to size to fit any wood block.
Viking wood carving tutorial summary
- This tutorial provides some fun challenges, such as carving the horns.
- To make it a little easier, you will be painting the eyes instead of carving them.
- Feel free to vary up the colors of your Viking wood carving.
- For more information about how Vikings looked, enter "images of vikings" into your Web browser.
Get 50 Wood Carving & Painting Tips
FREE when you join our free Covered in Chips Club
Your information is 100% private and is never shared. Unsubscribe anytime. See our Privacy Policy .
Share page on:
Home | Privacy Policy | Terms of Use | Contact | Sitemap


