- Home
- How to whittle wood
- Simple wood whittling
Simple wood whittling tutorial
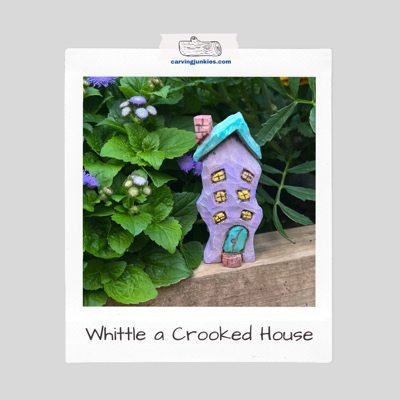
Carve yourself a crooked house
LEVEL: EASY
This simple wood whittling tutorial to carve a mini crooked house is fun and easy. This project is small enough to take with you outdoors (as I did on a recent camping trip in Maine).
The inspiration for this adorable little house came from an illustration I saw online (credit: Lineartestpilot). I knew I wanted to carve it in wood.
I hope you have as much fun with this simple wood whittling project as I did!
What you will need for this simple wood whittling tutorial
Start with a wood block that is 1 x 1 x 3 inches (2.5 x 2.5 x 7.6 cm). To make a larger house, simply increase the dimensions.
You will be carving off the front corner of your turned block (photo 1), which will give you more space for your little house. Use a pencil to sketch your guidelines.
You probably only need one sharp knife for this piece. If you use a long-bladed knife, you might want to switch to a smaller bladed detail knife to carve the tiny windows.
Always wear a carving glove for safety. If you carve across your lap, also place a flat piece of wood—or a plastic cutting board—across your thighs to protect your vital blood arteries from a knife slip.
Strop your knife every 30 minutes to keep it super sharp. There is nothing more dangerous (or frustrating) than a dull knife!
As always, a painting guide is included at the end of this tutorial if you want your crooked house to look like mine.
Simple wood whittling tutorial at-a-glance
It may help to watch this short video—which has snapshots off all the steps—before you start this simple wood whittling project.
Set up your simple wood whittling project
Turn your wood block (as shown in photo 1) and mark the areas of wood that you will remove (from the top all the way to bottom) to flatten the front and back of your wood block. It may take several passes. Also round the remaining corners on the left and right sides to create a rectangular shape.
Once you have your roughout, sketch the curvy house on the front, marking the areas of wood you will remove (photo 2). You can freehand sketch the pattern. Or, photocopy the pattern at the end of this page to size to fit your block. Cut out the pattern with a scissors and trace it on your wood block. Note: You can skip sketching the windows and door. I ended up carving them off to create a flatter front surface on my crooked house.
Use your knife to remove wood from the top right of the block (photo 3) to carve the roof. Tip: Move your fingers out of the way if you’re holding the piece in your hand!
Make a stop cut on the inside edge of the chimney (photo 4) and remove wood from around it. Shave wood off the other side of the chimney and shape it.
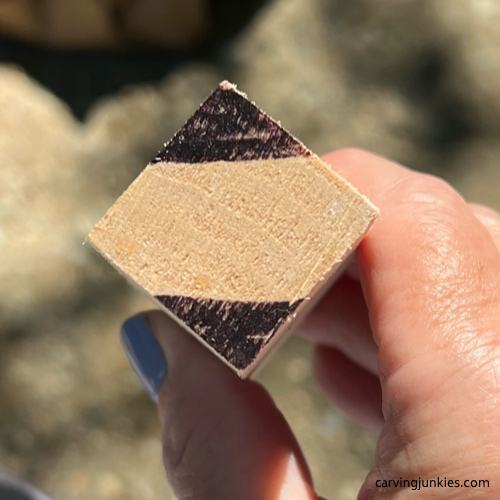 1. Wood is marked for removal
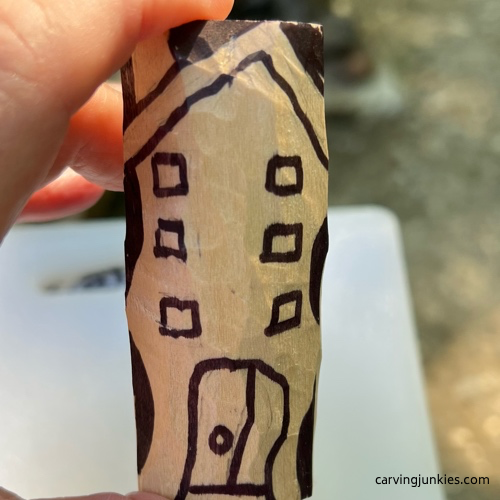 2. Guidelines are drawn
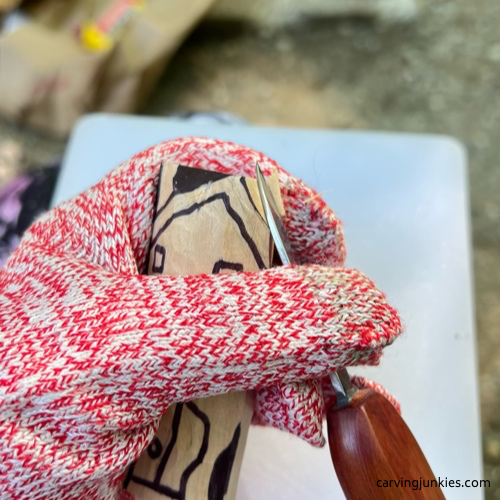 3. Shaping the roof
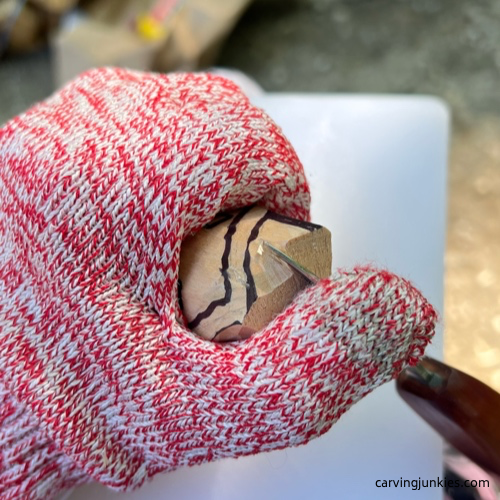 4. Making a stop cut
Carve the curves and roof eaves on your simple wood whittling
Use your knife to remove marked wood on each side of your house (photo 5). You often run into grain issues when you carve curves. Carving from the bottom up to the middle (photo 5)—and switching from the top down to the middle—should make carving easier. If that doesn’t help, make a stop cut across the middle and try again.
Make stop cuts along the underside of the roof eaves (photo 6) and remove wood from underneath. Also, make a shallow stop cut at the bottom of the chimney and remove a little wood from underneath (visible in photo 10).
Tip: Once you have the general shape of the front of your house (you will carve the back later) you may need to remove some additional wood to ensure that you have a flat surface to add—and carve—the windows.
Use stop cuts to separate the front step (photo 7). Now, sketch the crooked door (photo 8). Hold your knife like a pencil and cut along the guideline. Make a second slicing cut to remove the wood (photo 9). Or, you can use stop cuts here.
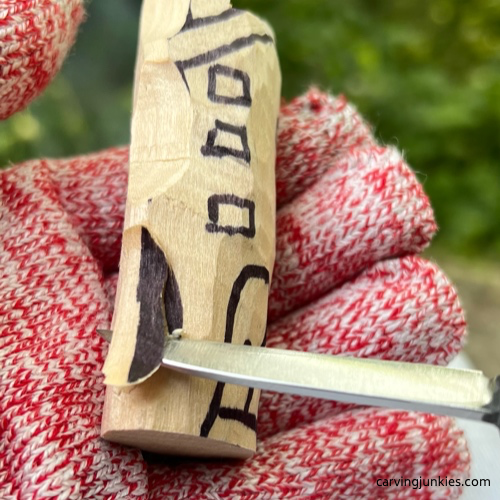 5. Shaping house sides
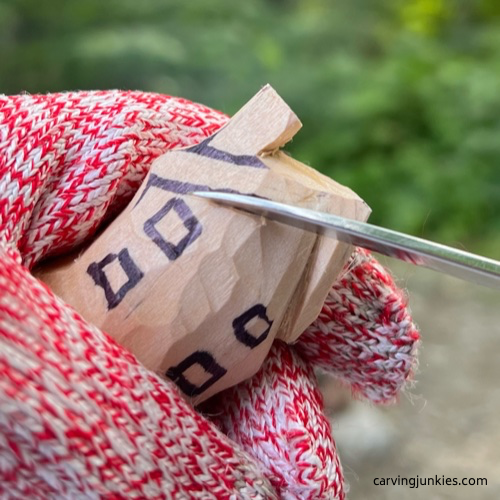 6. Separating the roof eave
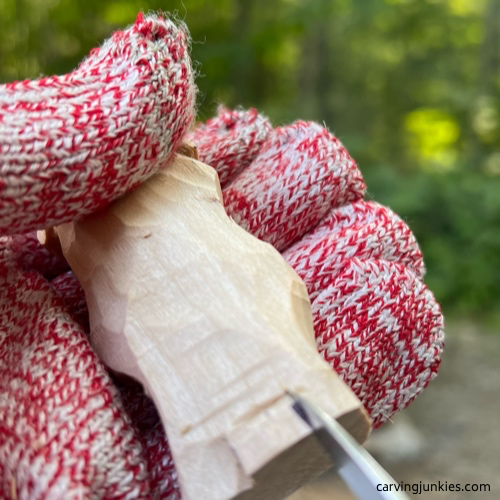 7. Separating the step
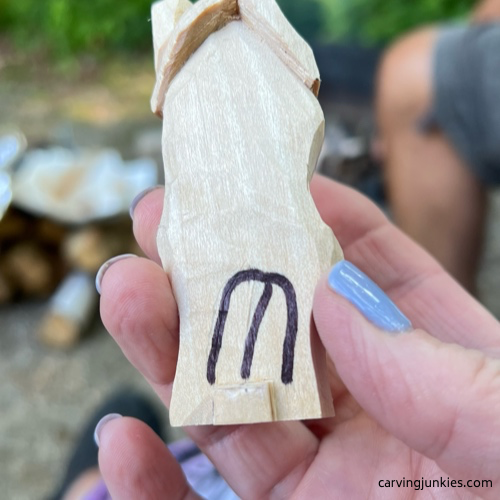 8. Door is drawn
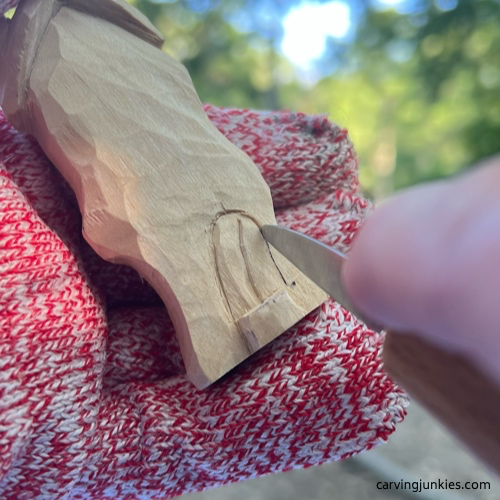 9. Separating the door
Add some details to your simple wood whittling
Sketch the 6 small windows at an angle on your crooked house (photo 10). Carve the windows the same way you carved the door (photo 11).
With a pencil, extend your front roof eave guideline around the sides—and across the back (photo 12)—and use your knife to separate it (completed in photo 13).
If needed flatten the back of the house. Sketch the larger back windows at an angle (photo 13) and carve them (completed in photo 14).
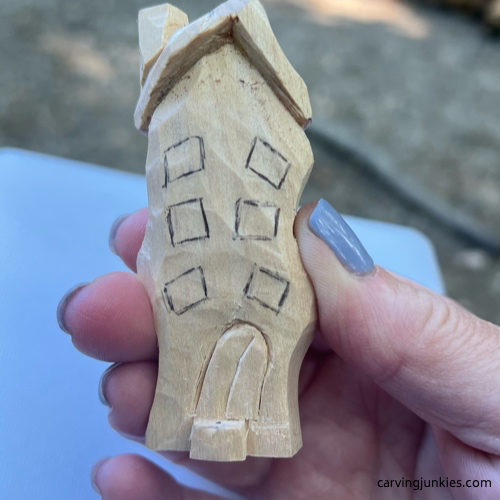 10. Windows are sketched
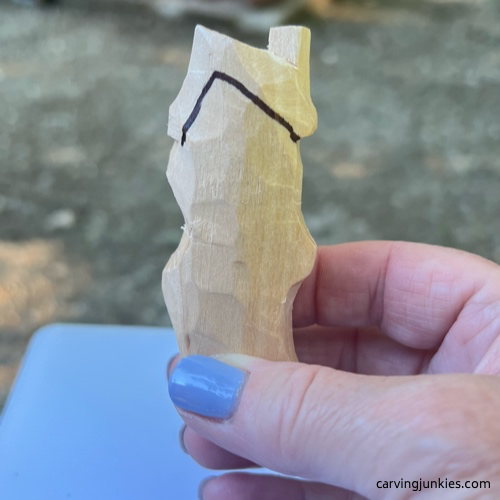 12. Back eave is drawn
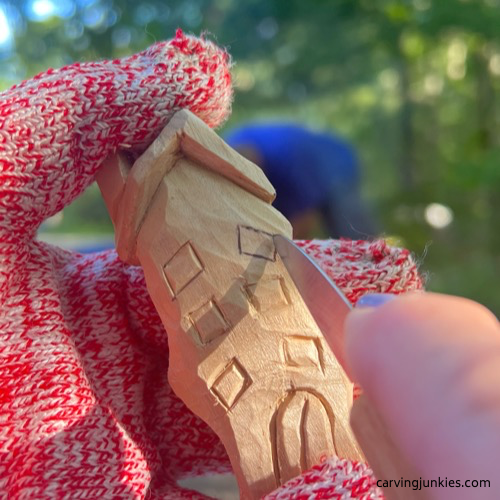 11. Carving the windows
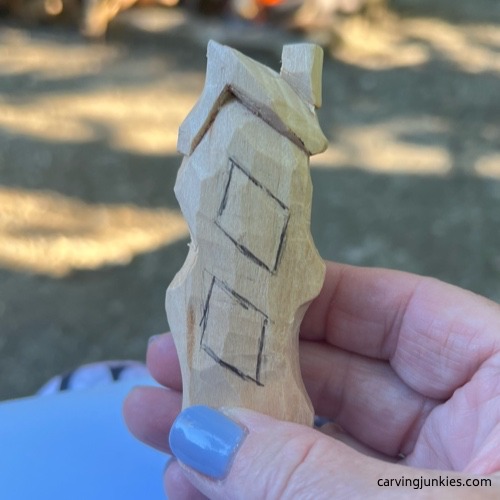 13. Back windows are drawn
Finish your simple wood whittling
Refine the shape of your crooked house (photos 14-17) . Add small chip (pyramid) cuts in the corners of all the windows, bottom sides of the door, and under the roof (in the middle) to add shadow.
Clean up any ragged cuts on this simple wood whittling project. Tip: I use a denture brush to clean up fuzzies.
Now, it’s time to paint!
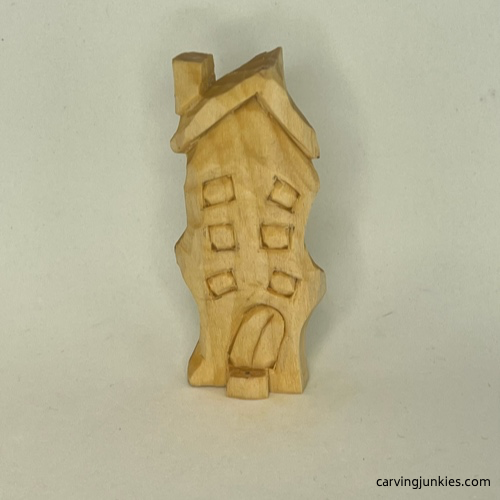 14. Front of whittled house
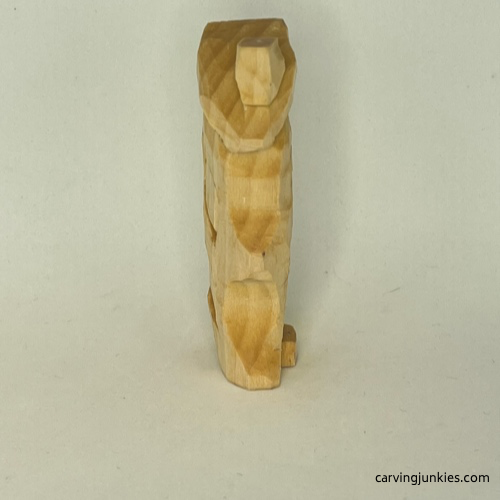 15. Right view of whittled house
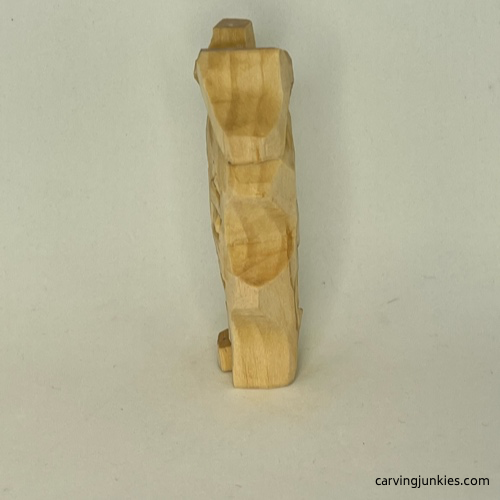 16. Left view of whittled house
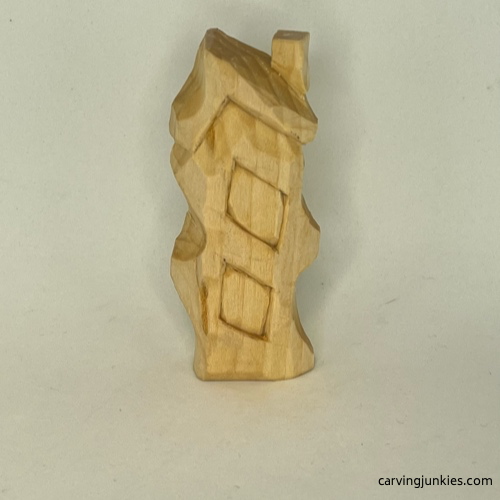 17. Back of whittled house
Paint your simple wood whittling
For great tips, read this page on painting a wood carving. Use whatever acrylic paints and paint brushes that you like. Dilute the paint with water (called a wash).
If you want a similar look, use these paint colors:
- Base coat for the entire piece: Craft smart ivory wash.
- Cut lines and steps: DecoArt burnt umber wash (very diluted).
- House front: Ceramcoat purple wash. Highlight with Craft smart purple.
- Windows: Ceramcoat yellow 100%. Once dry, I used a fine point black magic marker to sketch the window panes.
- Roof and door: Ceramcoat Tahiti blue wash.
- Door knob: Apple barrel flamenco red 100%.
- Chimney and step: Apple barrel flamenco red wash. Once dry, I used a fine point black magic marker to draw the bricks. You could also use black paint with a toothpick.
- Step: DecoArt burnt umber wash.
- Window, door, and step cut lines: 100% DecoArt burnt umber applied with toothpick.
- After your house is completely dry, dry brush the roof and areas of the house with Craft Smart vanilla.
- Use whatever finish you like (I did not add a finish to mine before taking the photos).
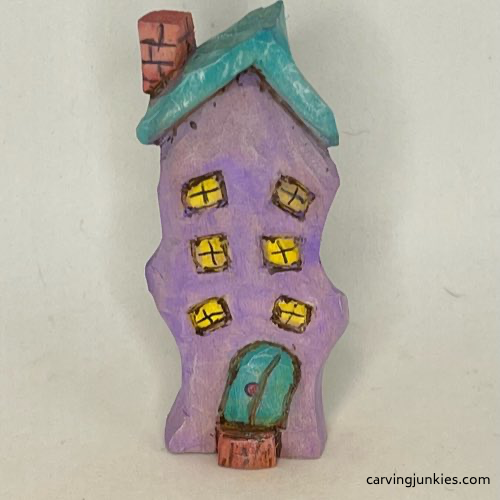 18. Front view of painted house
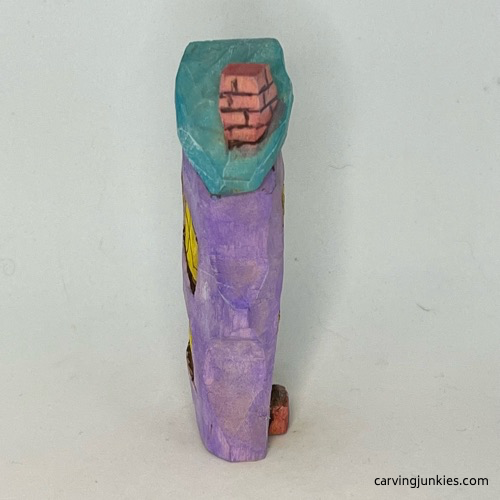 19. Right view of painted house
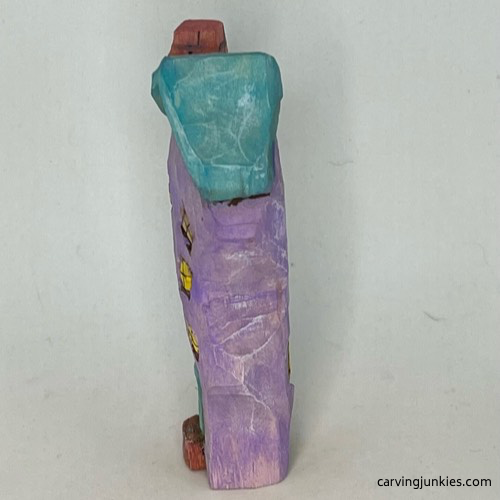 20. Left view of painted house
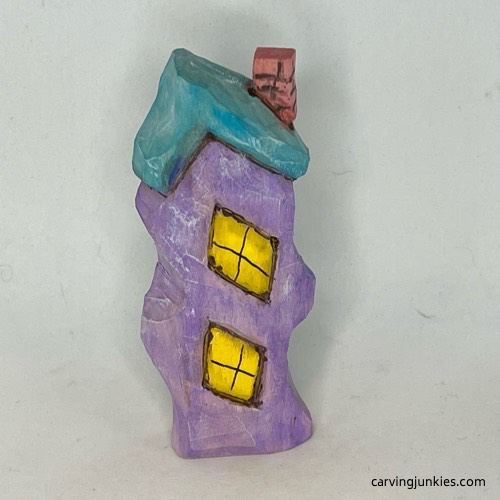 21. Back view of painted house
Simple wood whittling tutorial summary
- This simple wood whittling project if fun, fast, and easy to whittle.
- It’s a great project to carry with you because it is small and requires primarily one knife.
- You can easily adapt this pattern to carve yourself a little village of houses with different shapes and colors.
Get 50 Wood Carving & Painting Tips
FREE when you join our free Covered in Chips Club
Your information is 100% private and is never shared. Unsubscribe anytime. See our Privacy Policy .
Share page on:
Home | Privacy Policy | Terms of Use | Contact | Sitemap
