- Home
- Easy wood carving ideas
- Pumpkin wood carving
Expressive pumpkin wood carving tutorial
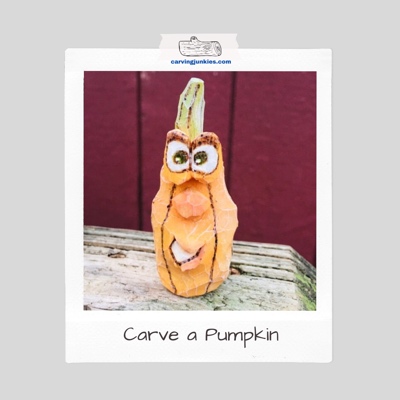
You can easily carve our funny Jacques O' Lantern.
Introducing a pumpkin wood carving that is quick to carve and sure to bring a smile to your face.
This cute pumpkin—who hails from Paris—makes a perfect gift to give this Halloween, to create for yourself, or to decorate your home.
Happy Halloween wood carving!
What you will need for this pumpkin wood carving
- A basswood block (ours is 1-inch x 1-inch by 3-inches (2.54 x 2.54 by 7.62 cm), and you can easily make it bigger if you want.
- Wood carving knife of choice (we prefer a knife with a long tip and wide surface to easily shave wood off).
- Acrylic paints and paint brushes of choice (painting guide is provided at the end).
- Pencil to draw on the design (magic marker is optional).
- Wood burning pen (optional).
- Sturdy carving gloves for safety.
Pumpkin wood carving tutorial at a glance
Carve the corners off and draw guidelines for your pumpkin wood carving
- Carve the 4 corners off your block to create a cylinder shape all around (photo 1).
- Draw a line about 3/4 of an inch from the top to mark the top of the eyes of the pumpkin wood carving.
- Draw a circle on the top of the pumpkin to indicate where the stalk will come to a point (photo 1).
- Draw a second line about a 1/4 inch lower than your first line to mark the midpoint of the eyes (photo 2).
- Draw the outline of the eyes of the pumpkin wood carving (photo 2).
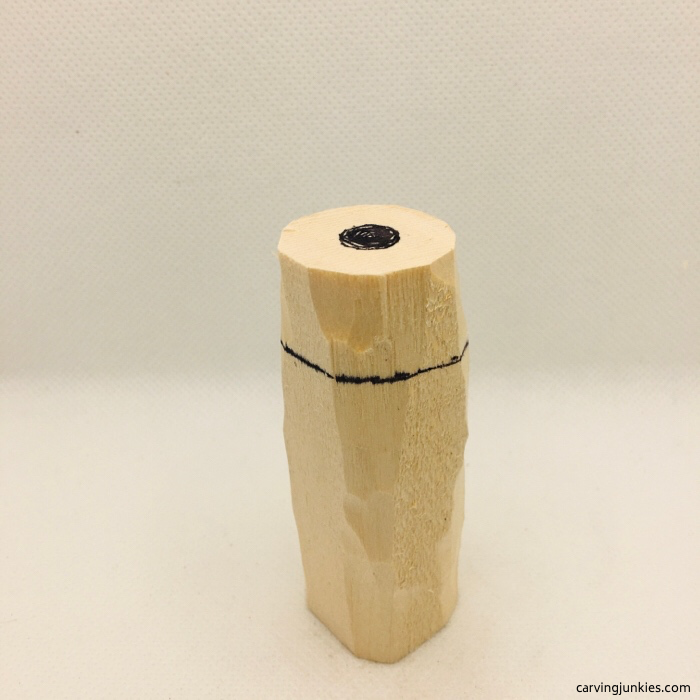 1. All the corners are rounded
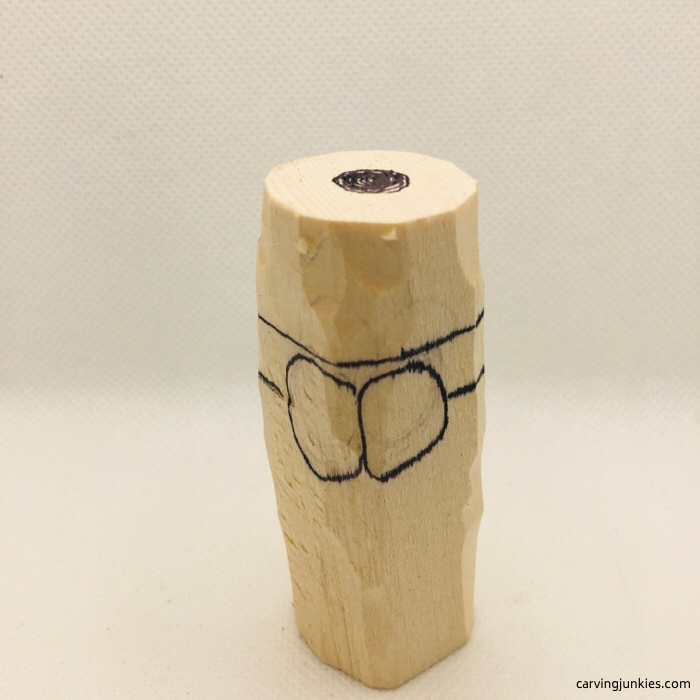 2. All the guidelines are drawn
Shave the top of the pumpkin wood carving to make the stalk
- Start to carve the stalk of the pumpkin by shaving wood off (photo 3), kind of like you are shaving a pencil. You will end up with a point (photo 4).
- Make a stop cut on the side of each eye, removing wood from underneath to create a notch (photo 5).
- Continue to cut all around, which will make it easier to remove more wood and narrow the stalk of the pumpkin wood carving (photo 6).
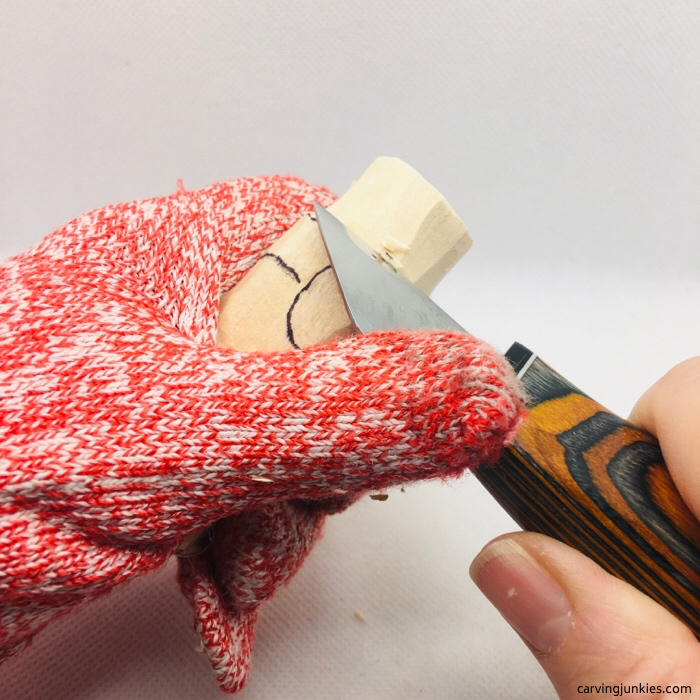 3. Starting to shave wood off
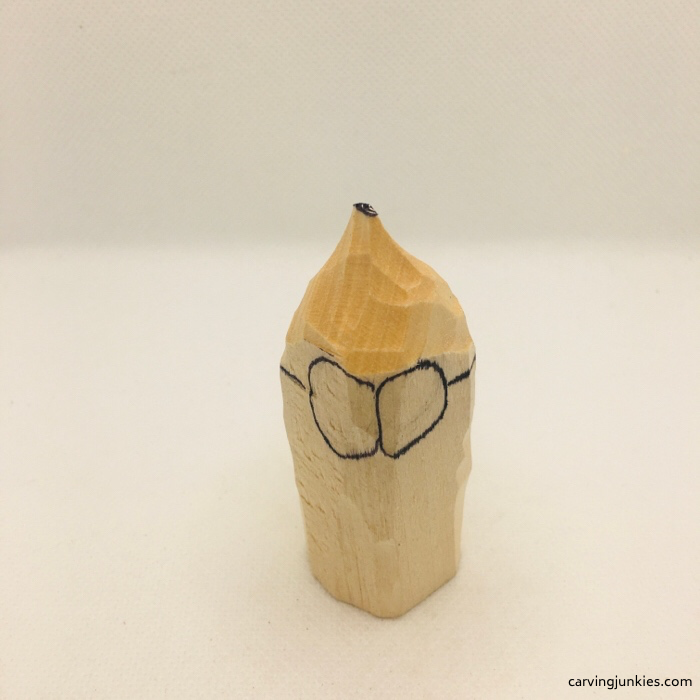 4. Point of the stalk is formed
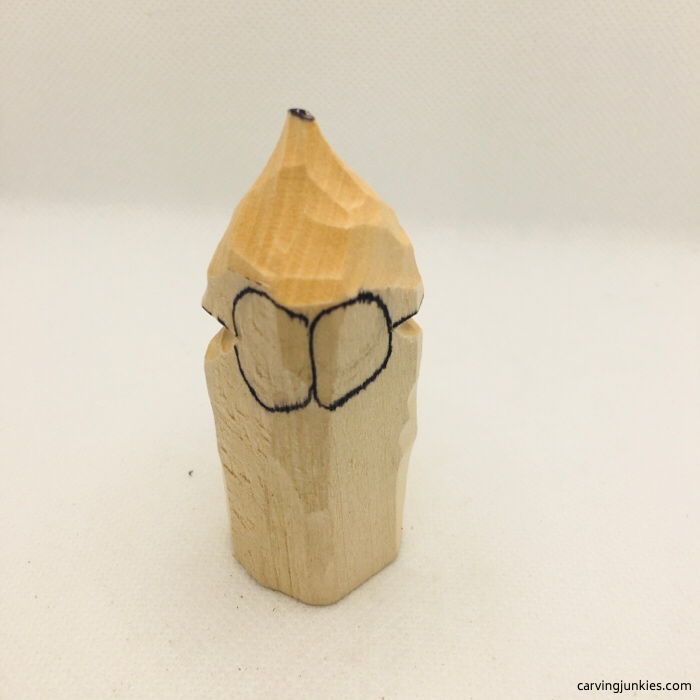 5. Eyes are notched at the midpoints
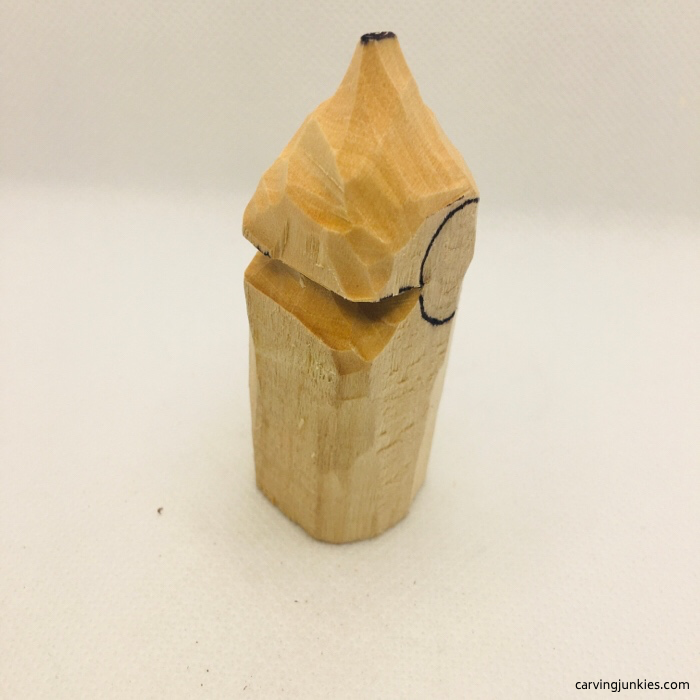 6. The wood is separated all around
Shape the stalk of the pumpkin wood carving
- Make a pyramid cut above the eyes, which will make it easier to remove more wood (photo 7).
- Carefully remove wood to narrow the stalk, starting at the bottom of the stalk (photo 8).
- Once the stalk is fully shaped, draw on the face of the pumpkin wood carving and mark additional wood to remove around the eyes (photo 9).
- Remove the marked wood around the eyes (photo 10).
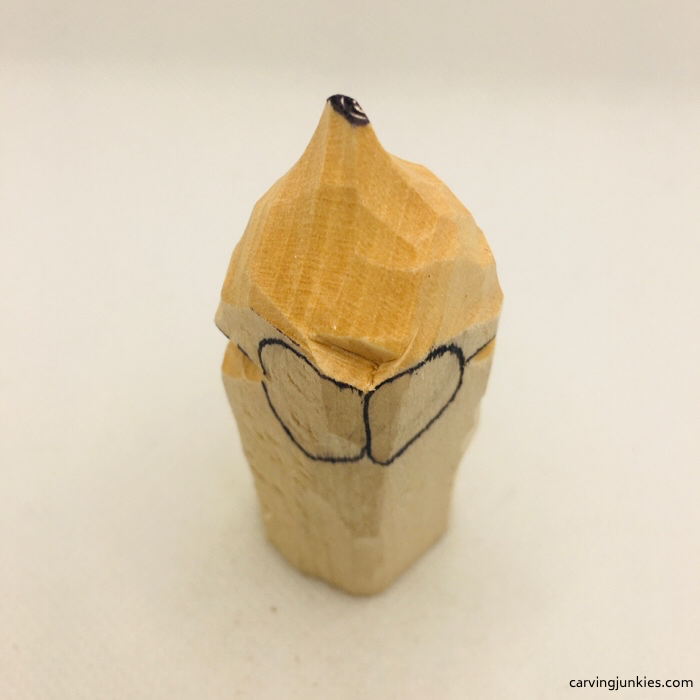 7. Pyramid cut at the top of the eyes
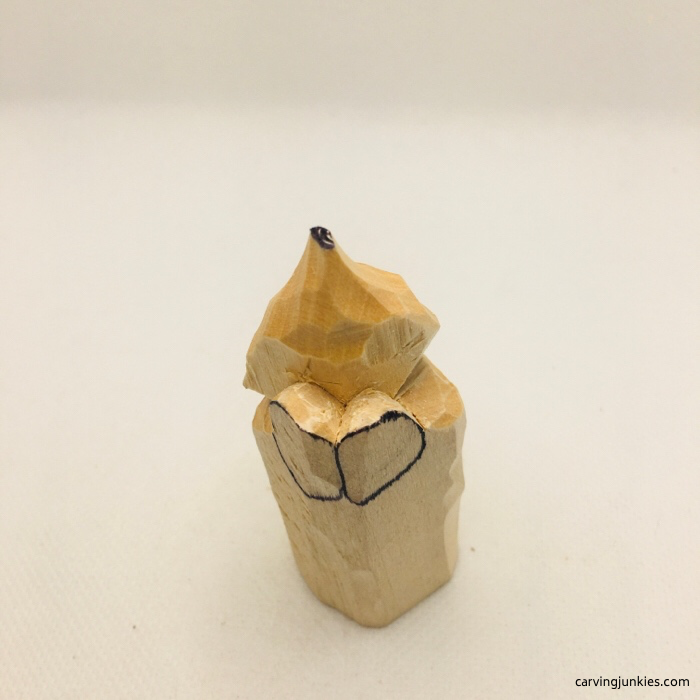 8. Starting to narrow the stalk
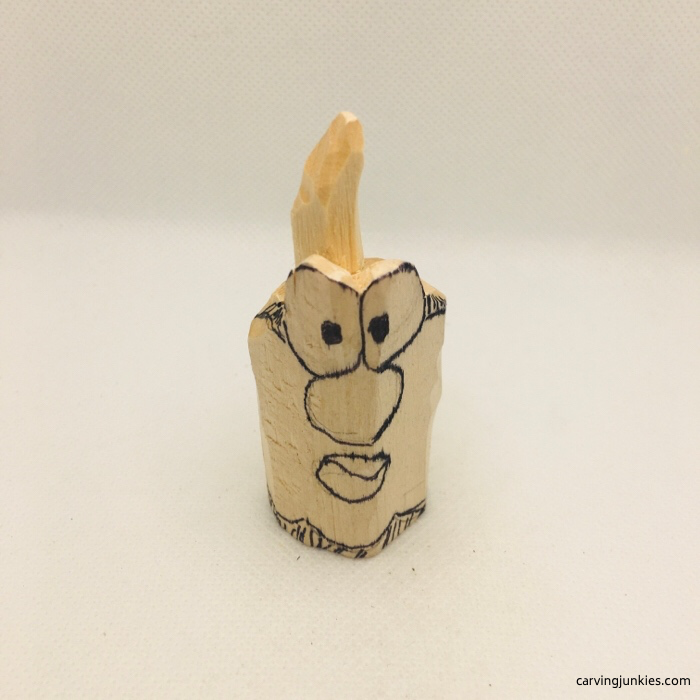 9. Stalk is shaped and face is drawn
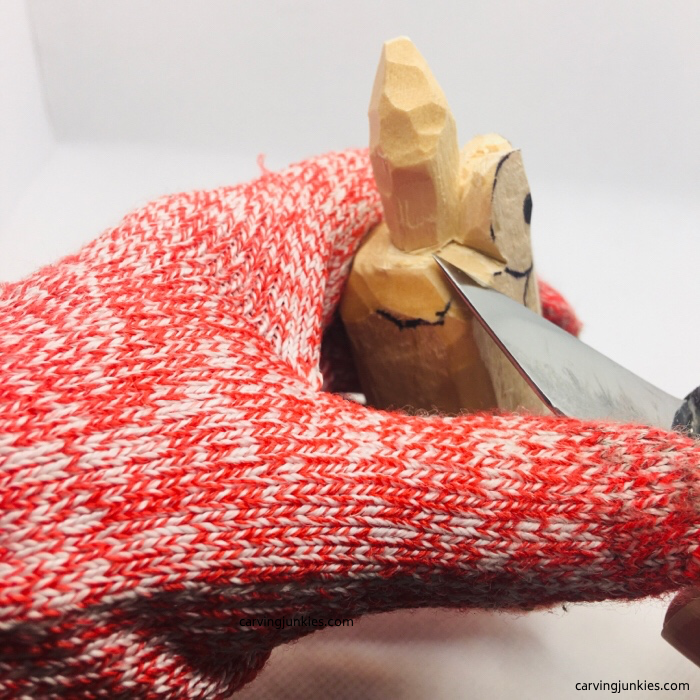 10. Removing wood around the eyes
Start the nose of the pumpkin wood carving
- Use a stop cut to start the nose of the pumpkin wood carving and remove wood from underneath (photo 11).
- Make a cut from the top of the nose down along the guideline (photo 12).
- Make a slicing cut from the bottom up to remove wood (photo 13).
- Make another stop cut under the eye to remove wood from underneath (photo 14).
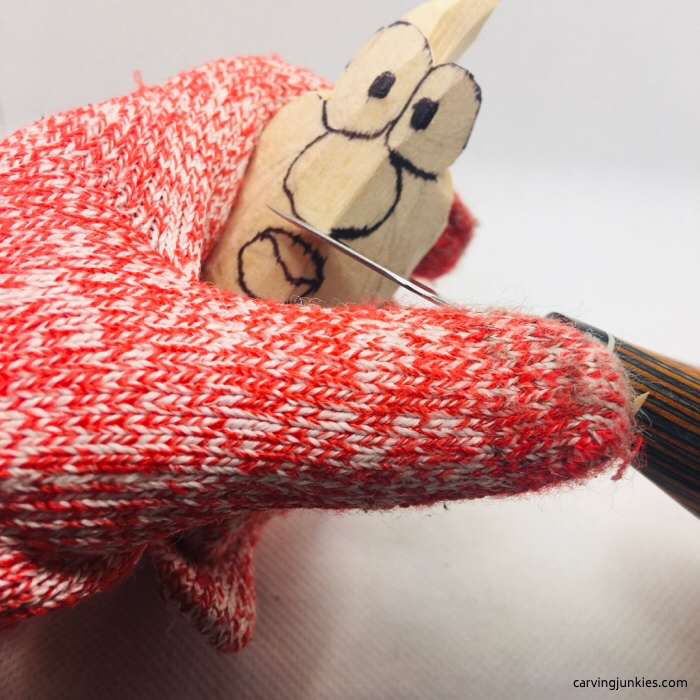 11. Starting the nose with a stop cut
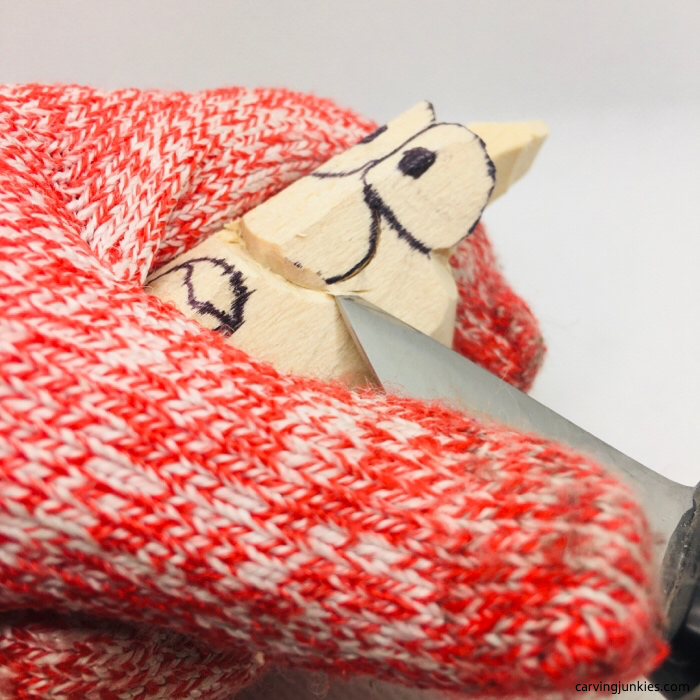 13. Slicing wood off from the bottom up
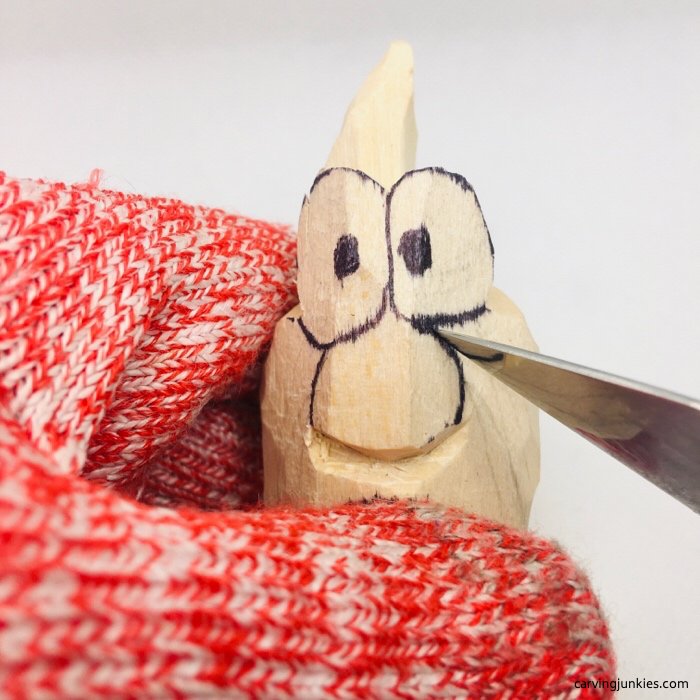 12. Making a cut from the top down
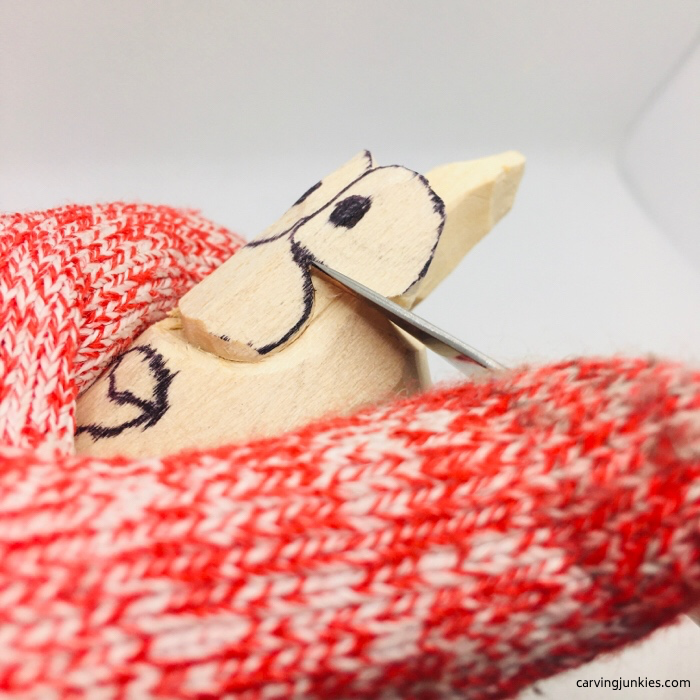 14. Making a stop cut under the eye
Shape the nose and cheeks of the pumpkin wood carving
- Start to remove wood around the nose to form the cheeks (photos 15, 16).
- Use a stop cut to separate the nose from the eyes on the pumpkin wood carving (photo 16).
- On the front, remove some wood below the eyes so the pumpkin wood carving is pear shaped (photo 16).
- If you have a U-gouge you can use it to cut the nostrils (photo 17). Otherwise, carefully use a detail knife to avoid cracking the wood.
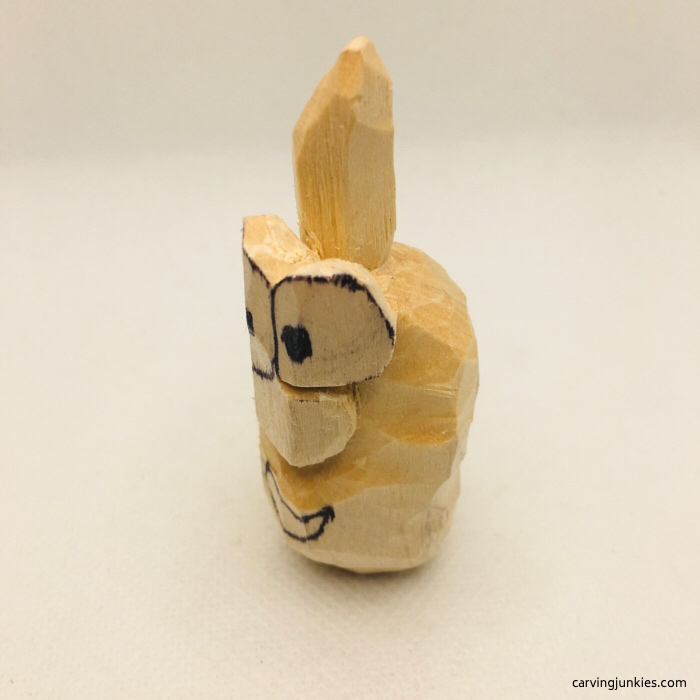 15. Starting to shape the cheeks
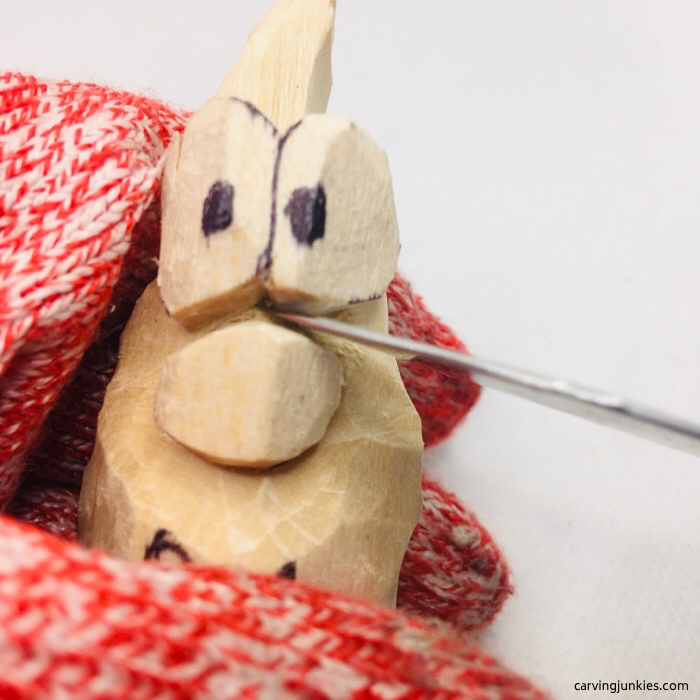 16. The nose is separated
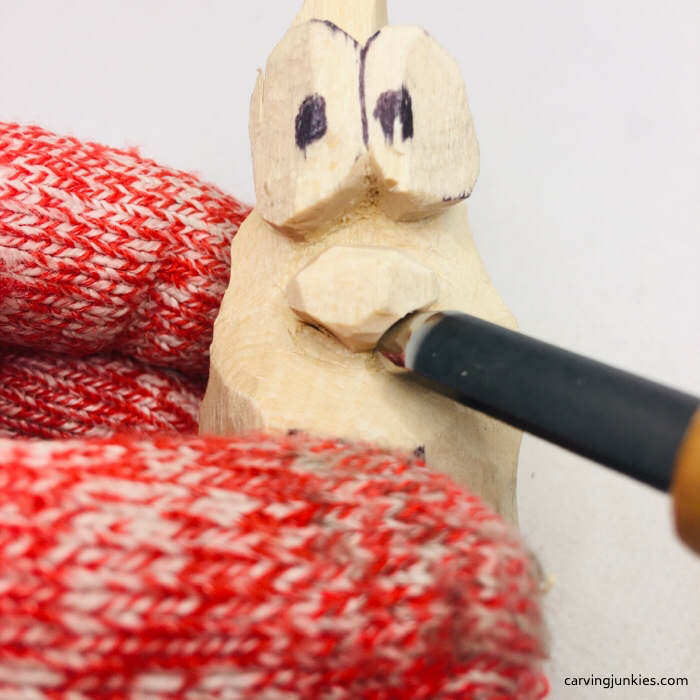 17. The nostrils are cut
Noodle the shape of the pumpkin wood carving
- Remove wood from the sides to get the shape you want for your pumpkin wood carving (photos 18,19).
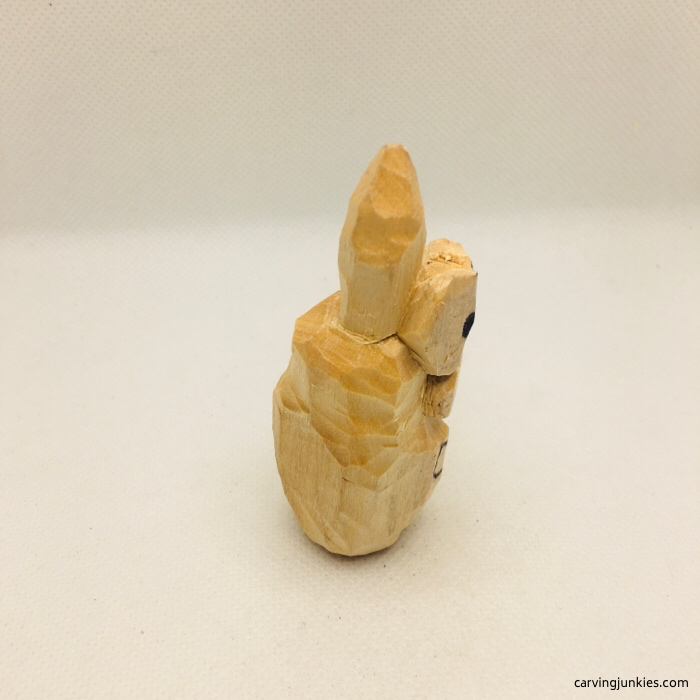 18. Right view of the pumpkin wood carving
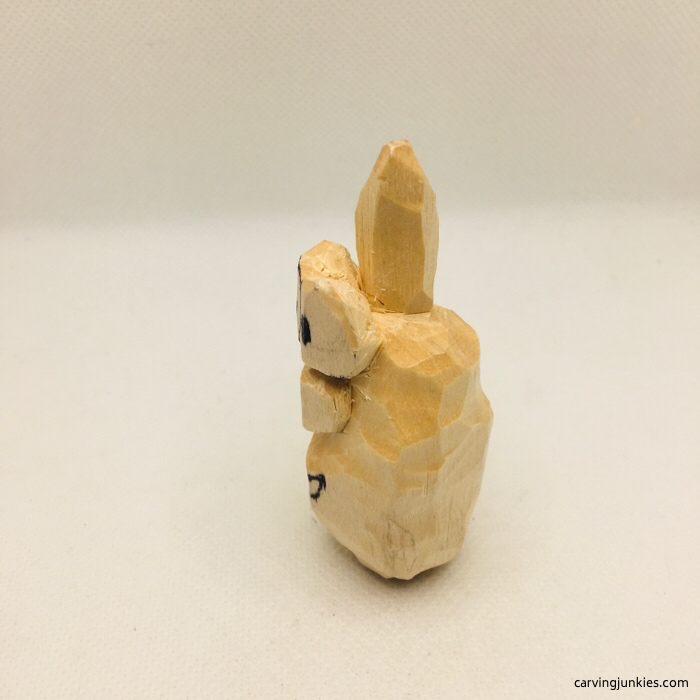 19. Left view
Create the mouth of the pumpkin wood carving
- Shave wood from bottom of the lip down, creating a mound for the mouth (photos 20,21).
- Cut along the top of the mouth outline and shave some wood down right under the guideline (photo 22).
- Also make a stop cut along the bottom lip and very carefully shave wood off inside the mouth to form the teeth (photo 23).
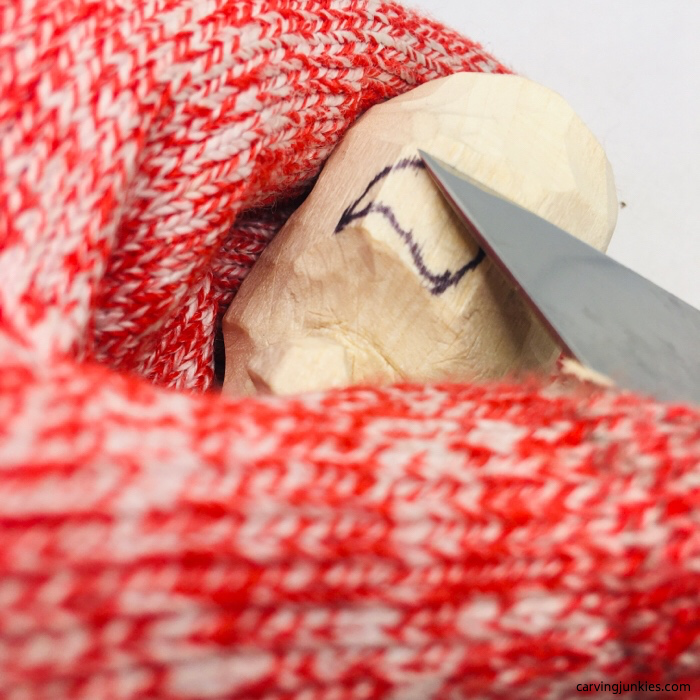 20. Starting the mound for the mouth
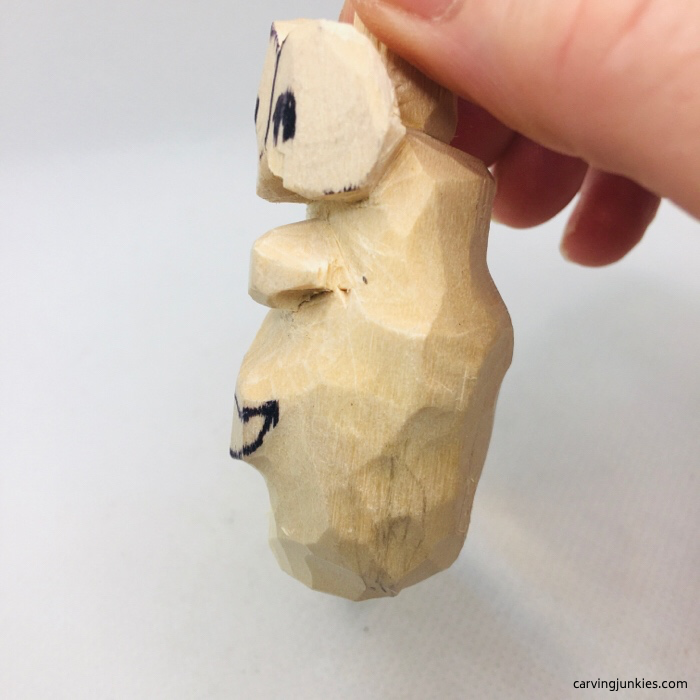 21. Side view of the mouth
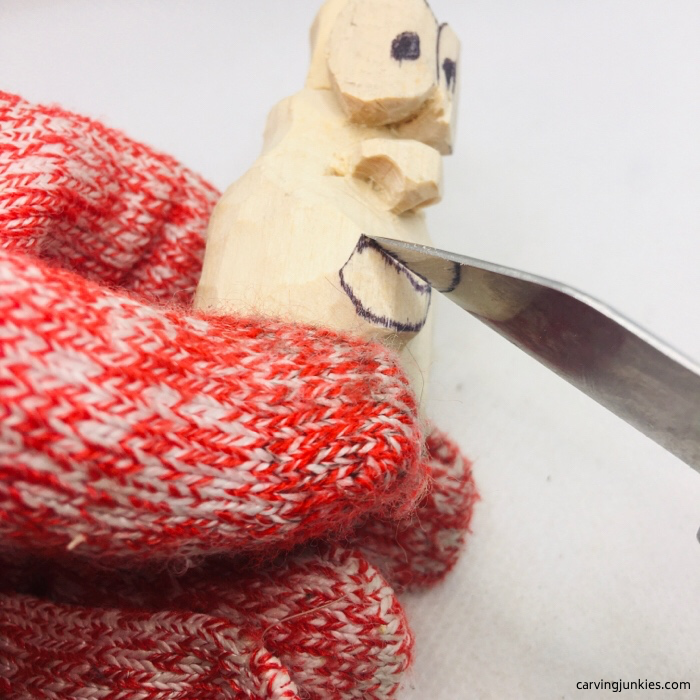 22. Cutting along the top of the mouth
Add your detail lines to the pumpkin wood carving
- Draw lines on the stalk and the pumpkin that you can wood burn, or paint on later, if you don't have a wood burning pen (photos 23-26).
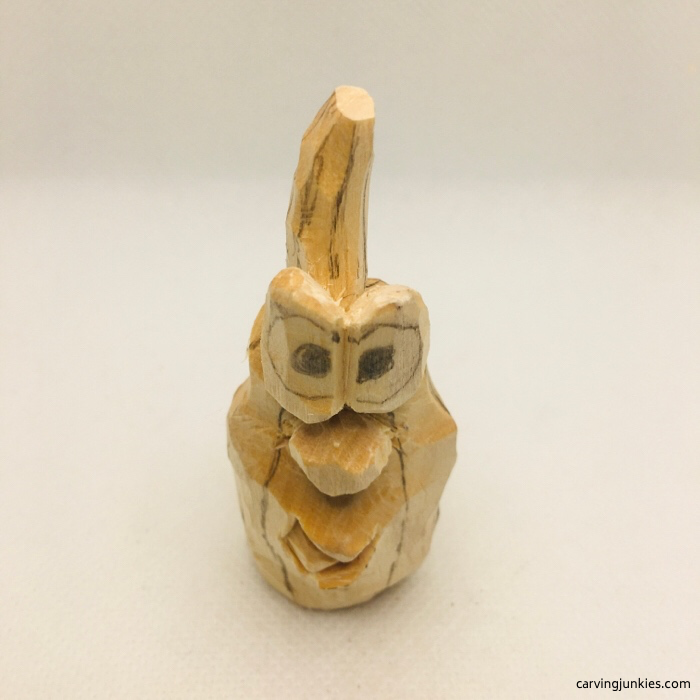 23. The mouth is shaped and lines are added
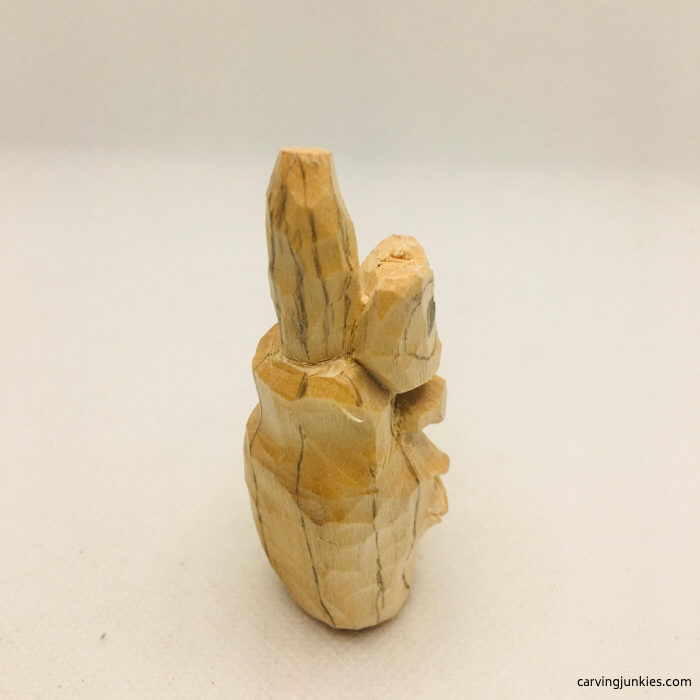 24. Right view
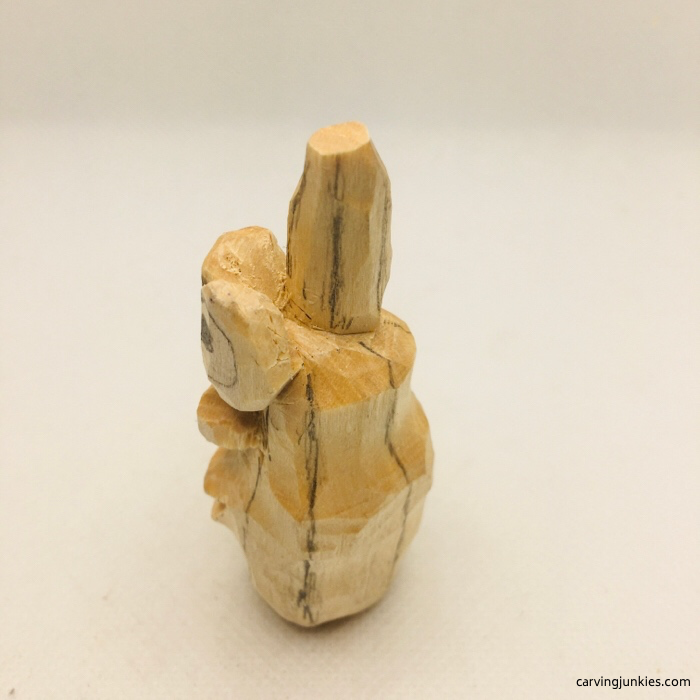 25. Left view
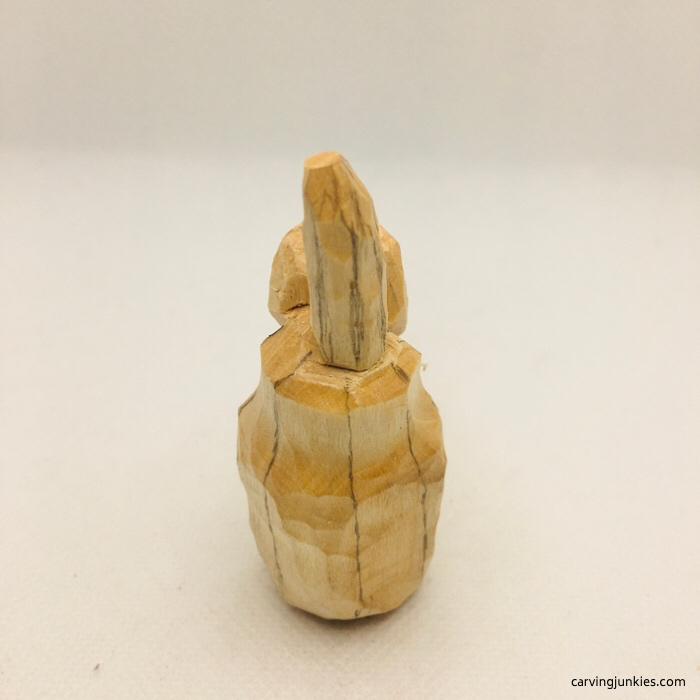 26. Back view
Wood burn and paint the pumpkin wood carving
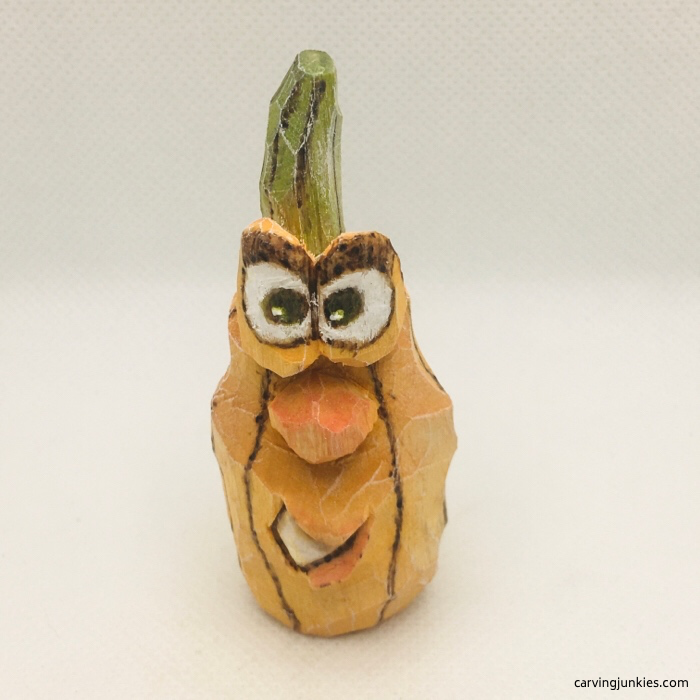
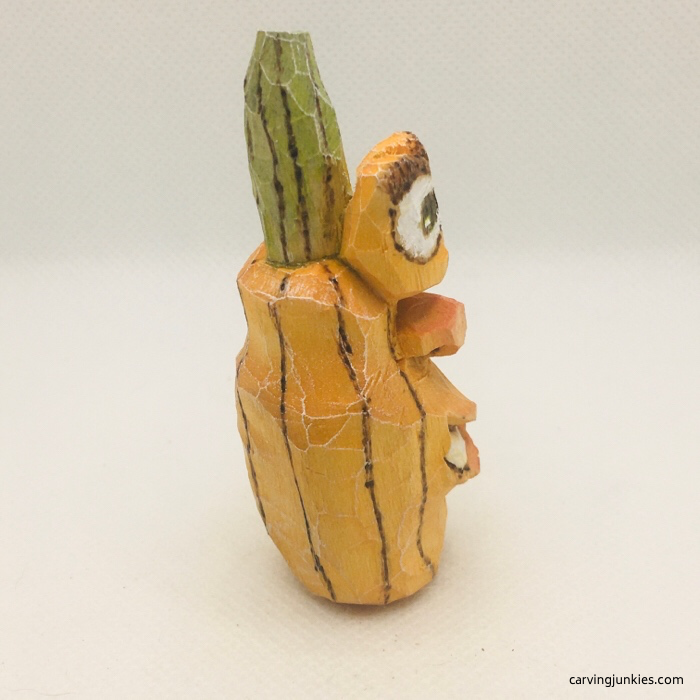
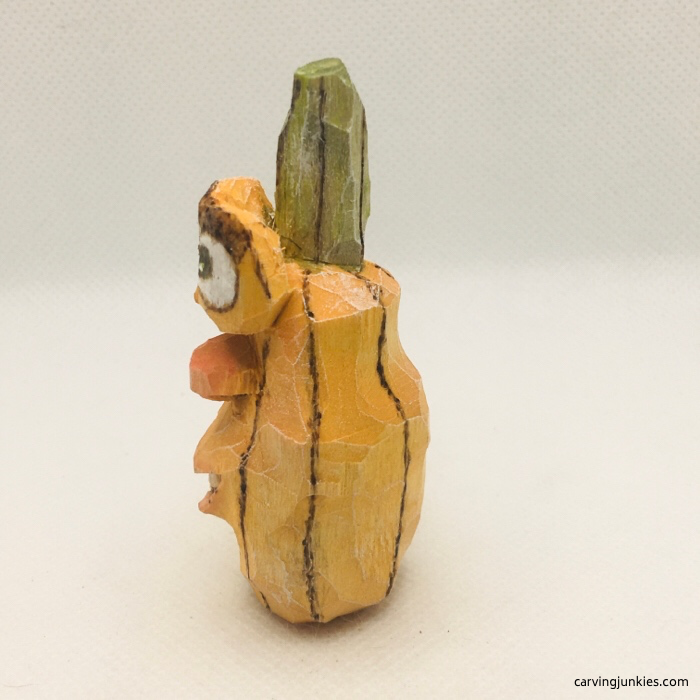
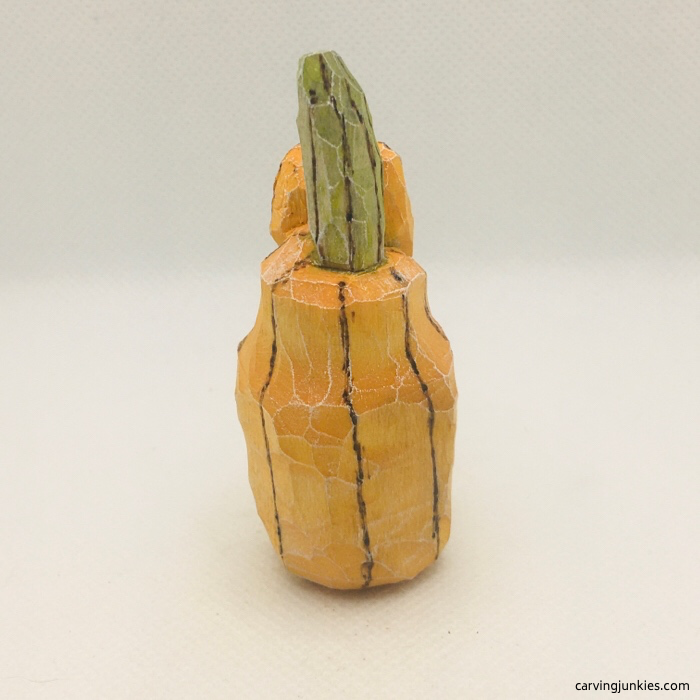
To get this look for your pumpkin wood carving:
- Use a wood burning pen to burn lines on the stalk, pumpkin, and the mouth. Also burn the outline of the eyes, the eyebrows, and the irises of the eyes. If you do not have a wood burning pen you can use brown paint the achieve a similar look.
- Whites of the eyes and teeth: Artists Loft titanium white (100%). Use a toothpick to add a speck of white in the pupil of each eye.
- Pumpkin body: 2 drops of Craft Smart jack o' lantern mixed with 25 drops of water.
- Stalk: 1 drop of Artists deep green permanent mixed with 10 drops of water. Save what’s left over.
- Top of the nose: 1 drop of Apple Barrel cameo pink mixed with 10 drops of water.
- Irises of the eyes and top of the stalk: Add one drop of Craft Smart yellow paint to the leftover green paint mixture.
- Dry brush the pumpkin wood carving with Artists Loft titanium white (100%).
- Finish your pumpkin wood carving with 2 coats of semi-gloss polyurethane spray.
Want painting tips? Click here.
Summary of our pumpkin wood carving tutorial
- This pumpkin wood carving is fast to carve and can be finished in a few hours, if you use a small block.
- You can carve additional pumpkins with different facial expressions to complete your pumpkin wood carving collection.
- Wood burning gives the carving extra definition, but you can achieve a similar look with paint.
- Our pumpkin wood carving makes a wonderful gift or decoration for the trick or treaters in your life.
Get 50 Wood Carving & Painting Tips
FREE when you join our free Covered in Chips Club
Your information is 100% private and is never shared. Unsubscribe anytime. See our Privacy Policy .
Share page on:
Home | Privacy Policy | Terms of Use | Contact | Sitemap
