- Home
- Things to carve
- Mummy wood carving
Marvelous Mummy Wood Carving Tutorial
LEVEL: EASY
You can make this super easy mummy very quickly using just a knife.
You will love this mummy wood carving tutorial whether you are a beginner carver—or have been carving for a while. It is packed with textured details but is very easy to carve. It should even bring a smile to your face.
I typically use small wood blocks for my designs, but you can easily increase the size.
Let’s start this carving party!
What you need for your mummy wood carving
For this mummy wood carving tutorial you will need a wood bock (I used basswood) that is 1 x 1 x 3 inches (2.5 x 2.5 x 7.6 cm). You can easily scale the pattern to fit a larger block by simply doubling or tripling all the provided measurements.
A pencil with an eraser will be needed to sketch the pattern. Or, you can photocopy the pattern to size and glue it to the block, using the pattern to guide your cuts. You will also need a small ruler (a great addition to your everyday carving kit) if you are following my measurements.
You can use just one knife for this entire mummy wood carving. Please always use a carving glove for safety. I re-enforce my leather-lined Kevlar glove with vet tape for added protection.
If you are carving across your legs, a hard piece of wood or a cutting board on your lap should protect the precious femoral arteries in your legs from unintentional slips. It only takes one knife poke-through to cause some serious damage! Please err on the side of caution when it comes to your safety.
Mummy wood carving tutorial at-a-glance
Watch this short video to see the key steps for creating your mummy wood carving before you start.
Starting your mummy wood carving
Before drawing your guidelines, slightly round off the four corners on your wood block with your knife. You will be carving off the corner for this project. This means that your sketch (or pattern) will stretch across two sides of your wood block (photo 1).
Don’t worry about perfection when measuring or sketching your guidelines for this little whittle. After all, he’s supposed to be a haphazardly bandaged mummy!
Draw a guideline that is 1.5 inches (1.3 cm) from the bottom of your wood block to mark the bottom of the body (photos 1-4). Each leg is about 1/2-inch (1.3 cm) wide and 1/2-inch (1.3 cm) tall. The shoes are about 1/4-inch (0.6 cm) tall (photos 1-4). Mark the wood that you will remove to carve the legs (in black in photos 1-4)
The arms start about 1.75 inches (4.4 cm) from the bottom (photo 1). They are about 1/2 inch (1.3 cm) wide. Draw mittens for the hands (photo 1).
The wide eye socket is about 1/2-inch (1.3 cm) on each side and about 1/4-inch (0.6 cm) tall at the widest point (photos 1-3). The bottom of the eye socket sits about 2.25 inches (5.7 cm) from the bottom of the wood block (photos 1-3).
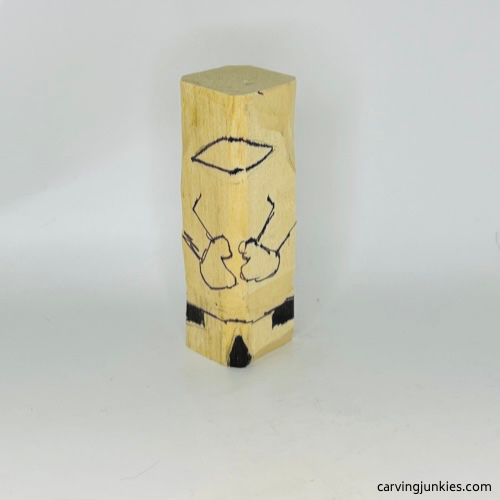 1. Front guidelines are drawn
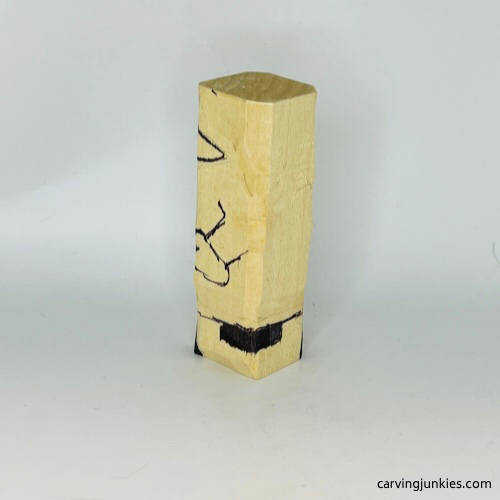 3. Marked wood on left side
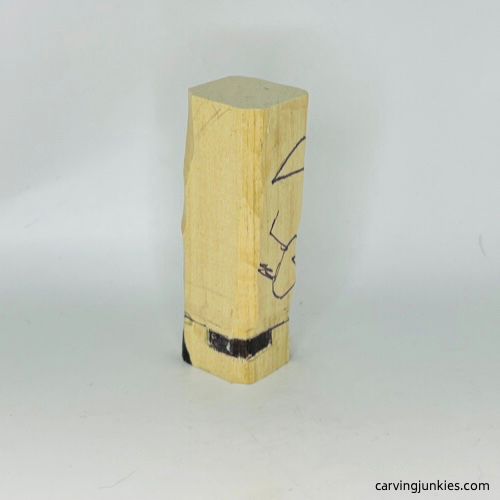 2. Marked wood on right side
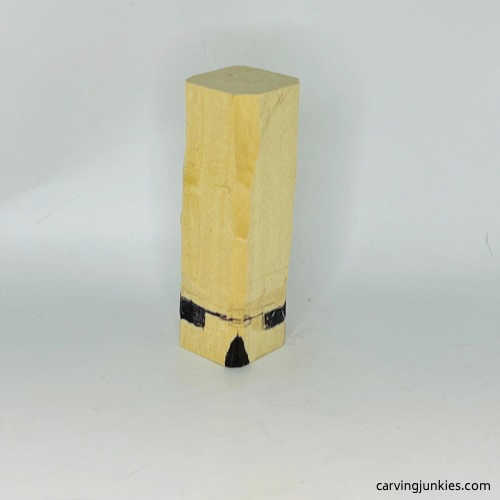 4. Back view of marked wood
Make your first cuts on your mummy wood carving
Separate the bottom of the mummy all around using stop cuts (photo 5), removing wood from underneath.
Use a wide pyramid cut to separate the legs on the front and the back (photo 6). Tip: Make a cut on each side first. Then, make your bottom cut to cleanly remove the wood chip.
Use stop cuts to separate the tops of the feet all around (completed in photo 7). Then, make a small pyramid cut at the top of the legs to widen the space between them. Tip: Hold off narrowing the legs until you round down the body later, which will give you greater access. It will be challenging to get your knife into the space at this point and you certainly don’t want to break it.
Turn your mummy wood carving upside down and sketch the bottom of the shoes (photo 8), which you will also carve later.
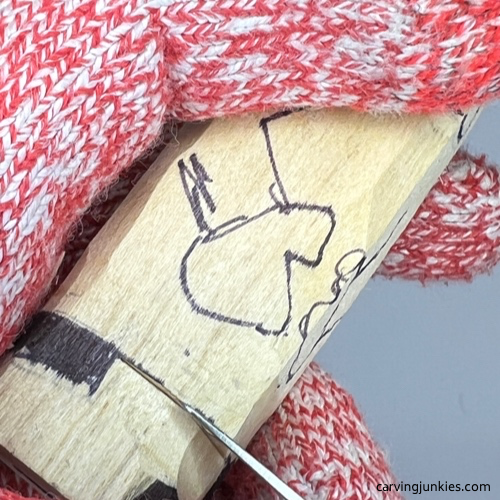 5. Making a stop cut
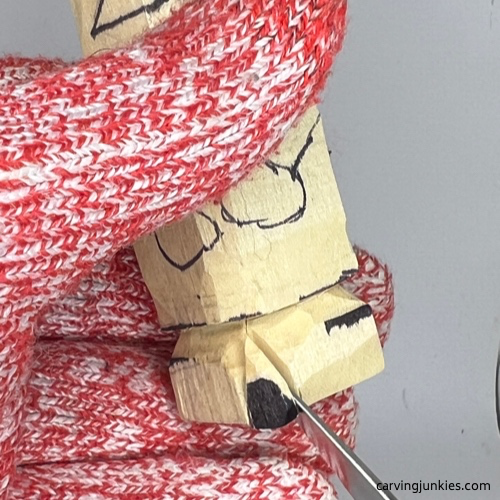 6. Making a wide pyramid cut
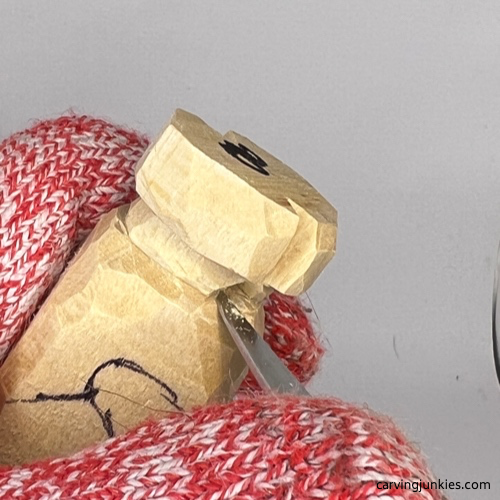 7. Making a small pyramid cut
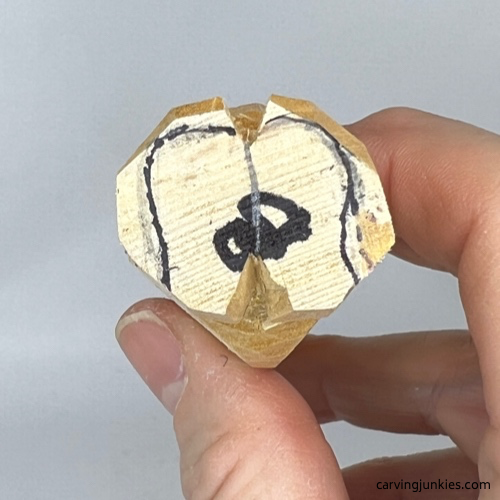 8. Shoes are drawn
Shape the head on your mummy wood carving
Use your knife to remove wood to round the top of the head (photo 9) until you have the desired shape (completed in photo 10).
Separate the eye socket all around (photo 10). You can use stop cuts here. Or, you can hold your knife like a pencil and make your first cut. Then, make a second slicing cut inside the eye socket guideline to remove a sliver of wood.
Once the eye socket is separated, use your knife to remove wood and flatten the eye socket (photo 11).
Now, make a wide V-cut on each side (photo 11)—about 1.5 inches (1.3 cm) down from the top of the head—to separate the head from the body (completed in photo 13). Tip: Do not cut too deeply because the bandages make the neck appear much wider than it would normally be (visible in photo 13).
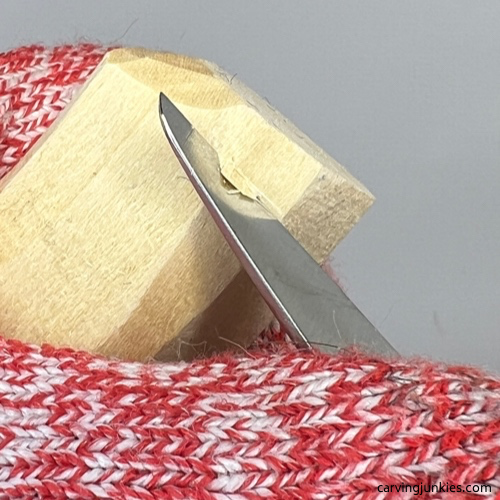 9. Carving the head
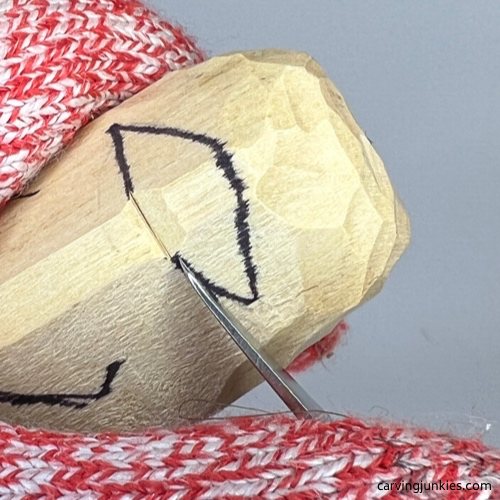 10. Separating eye socket
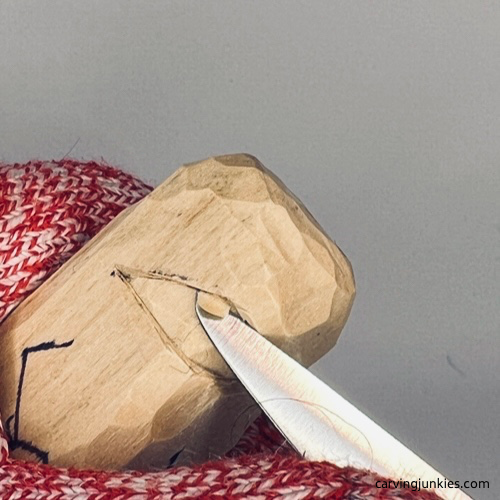 11. Flattening eye socket
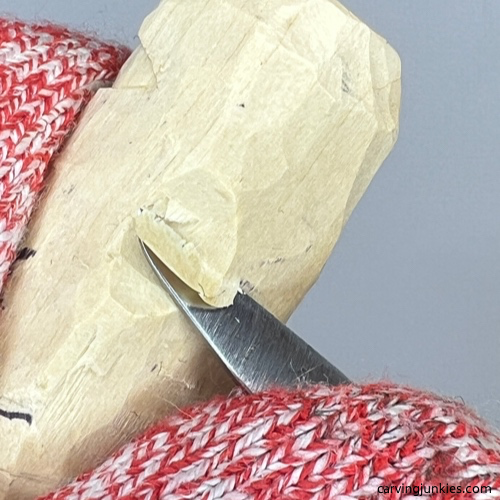 12. Making wide V-cut
Add some details to your wooden mummy carving
Sketch the bandages that will wrap around the head and the body of your mummy wood carving (photos 13-16). You want some of the bandages to wrap under other bandages (photos 14,15), which is more visible after carving them (see photos 24-26).
Tip: Do not draw your bandages uniformly or straight across. Adding some curves will make them look like they are loosely wrapped.
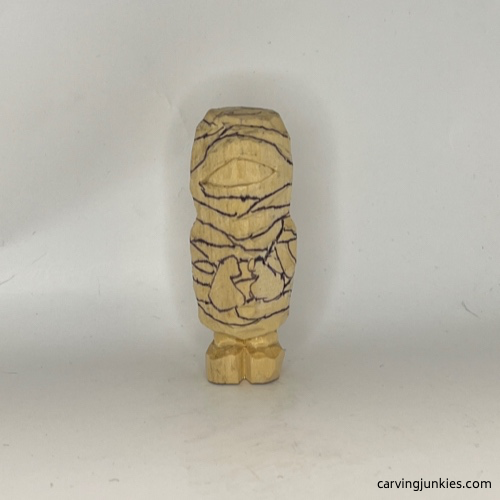 13. Front details are added
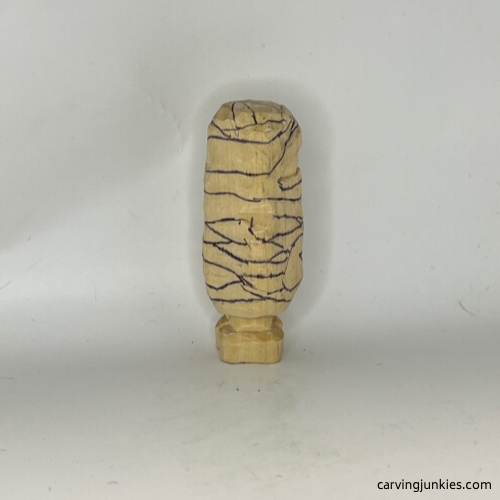 14. Right view of drawn details
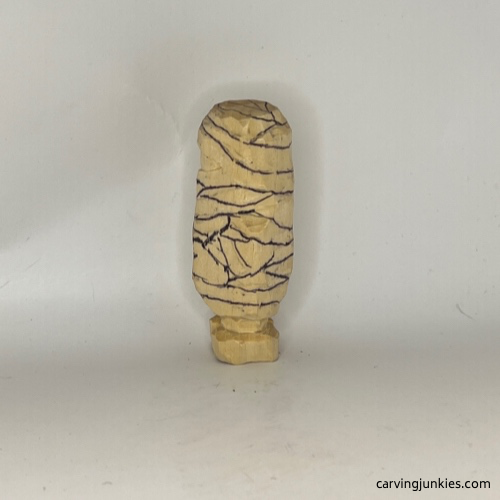 15. Left view of drawn details
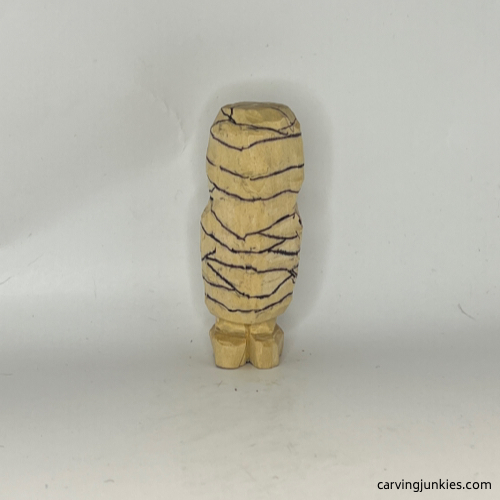 16. Back view of drawn details
Carve the details on your mummy wood carving
Use your knife to round the bottom of the body down (photo 17) all around, which will give you greater access to narrow the legs.
Now, separate the bandages. Use stop cuts, removing wood from under your cuts (photo 18). Take your time and clean up your cuts as you go. Tip: Separate and shape the arms using stop cuts before you carve the bandage on each arm (photo 19). It is easy to miss the arms!
After the bandages are carved, narrow the legs and shape the shoes. You may also need to reduce the height of the shoes (photo 20). Be very careful here. Angle your cuts against the mummy’s legs whenever possible to minimize risk of cracking the wood or slicing the foot off! Once you have the desired shape of the shoes, mark where you will make small V-cuts (on each side) to carve the heels (photos 21,22).
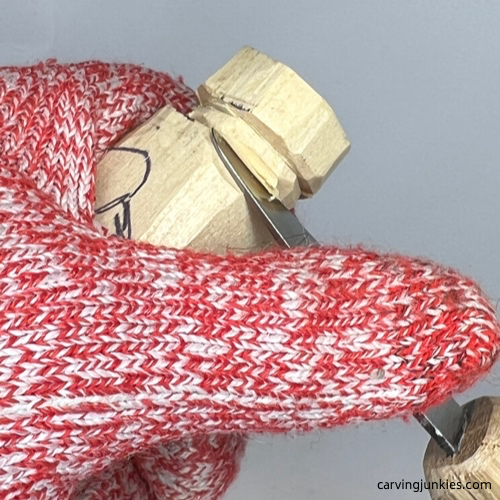 17. Narrowing the legs
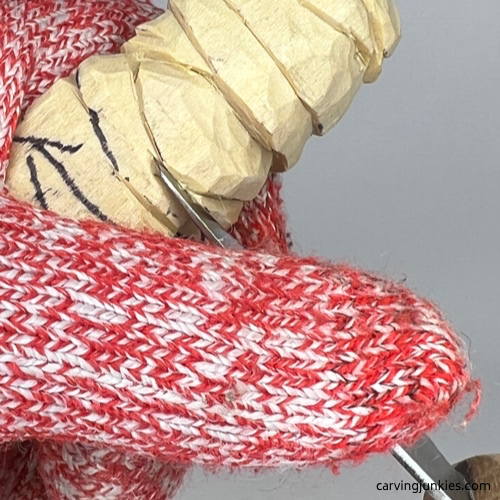 18. Making a stop cut
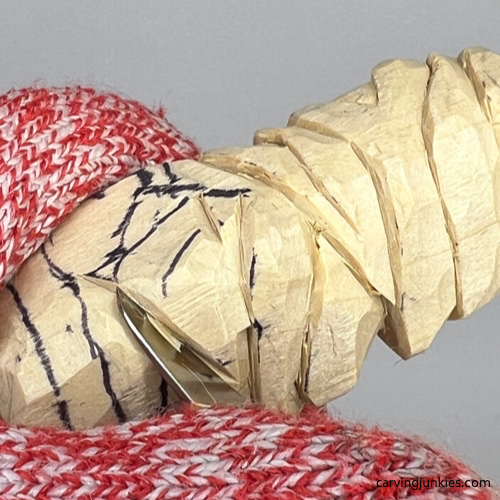 19. Separating the bottom of the arm
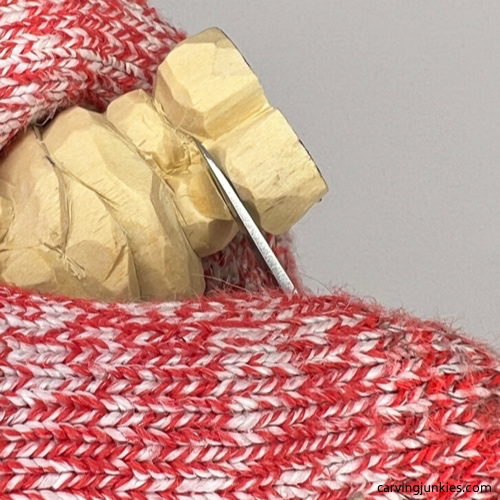 20. Reducing height of the shoes
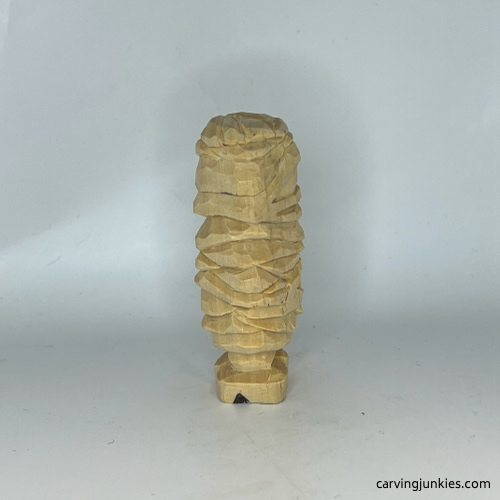 21. Left heel is drawn
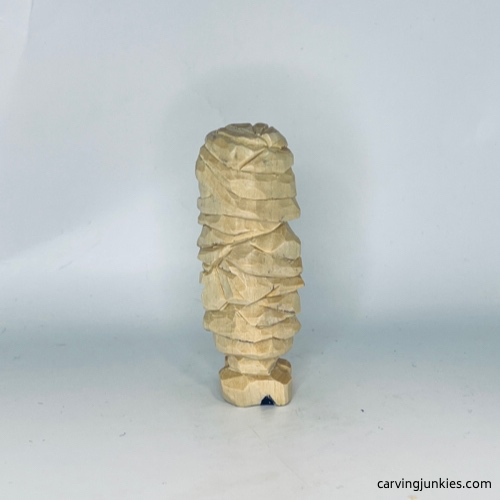 22. Right heel is drawn
Refine your mummy wood carving
Prior to painting, clean up any wood fuzzies and deepen your cuts to help add shadow (photos 23-26). This is very important for your mummy wood carving because the bandages are primarily off-white.
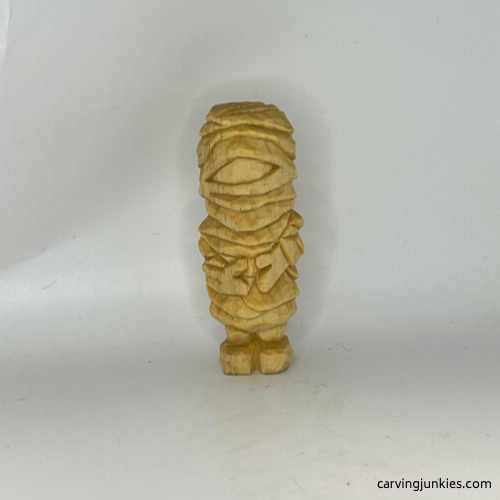 23. Front view of unpainted mummy wood carving
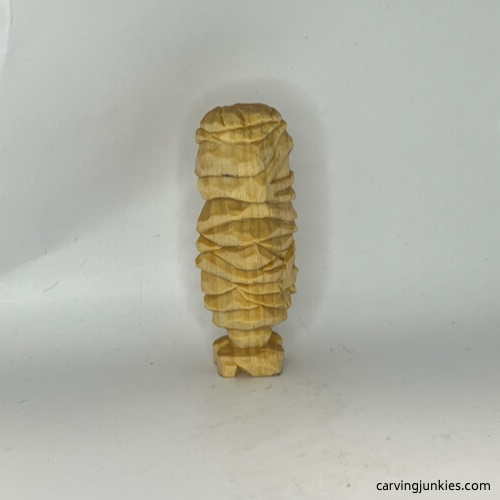 24. Right view of mummy wood carving
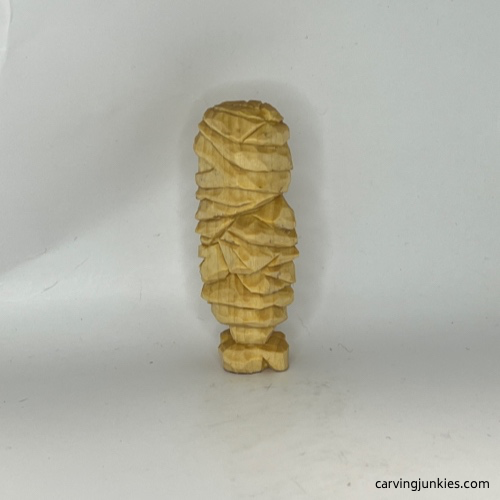 25. Left view of mummy wood carving
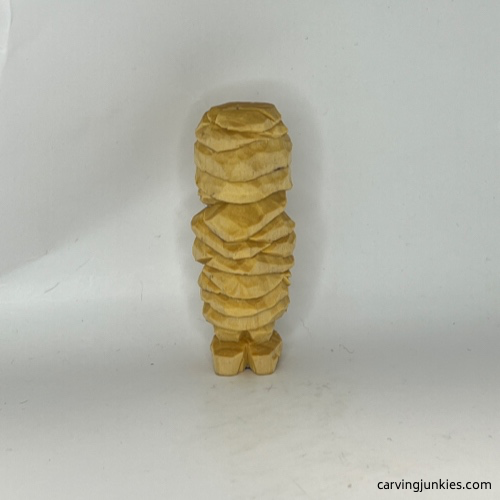 26. Back view of mummy wood carving
Paint your mummy wood carving
Your mummy wood carving will require several layers of watered down paint to add shadow and to make the bandages pop as much as possible. You can use whatever acrylic paints you want.
To get this exact look, here are the paint colors (and brands) that were used. Unless otherwise noted, create a wash with your paints. I use an eye dropper filled with water and add the water to the paint until the paint is a milky consistency.
- Bandages: Apply two coats of CraftSmart ivory wash. Allow to dry completely and dry brush some bandages with Artist’s Loft titanium white.
- Eye socket: 100% Ceramcoat black.
- Eye pupils: 100% Ceramcoat bright yellow applied with a painting dot tool (you can also use a toothpick or the end of a pencil).
- Shading under bandages: Very diluted Ceramcoat black wash applied just under the bandage cuts. Blend well with a clean, wet brush.
- Finish: Use your sealer of choice. I used a Mod Podge Matte-Mat-Mate spray (spray outdoors due to strong odor).
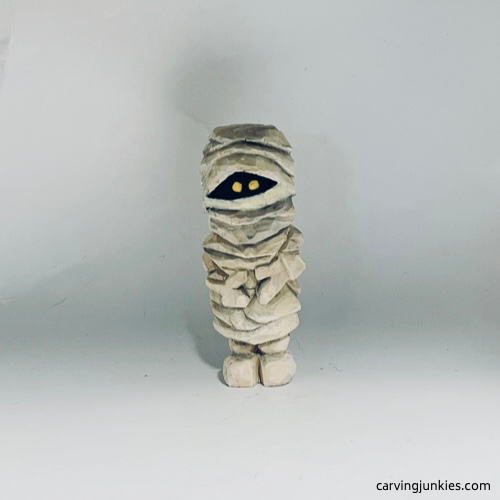 27. Painted front of mummy wood carving
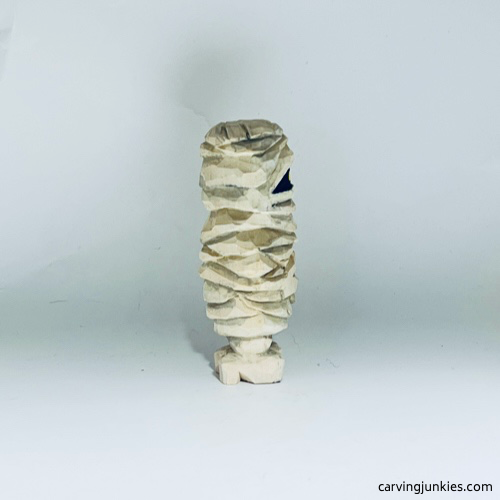 28. Right view of painted mummy wood carving
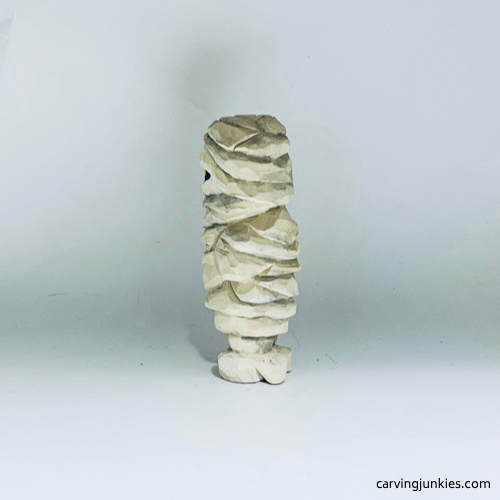 29. Left view of painted mummy wood carving
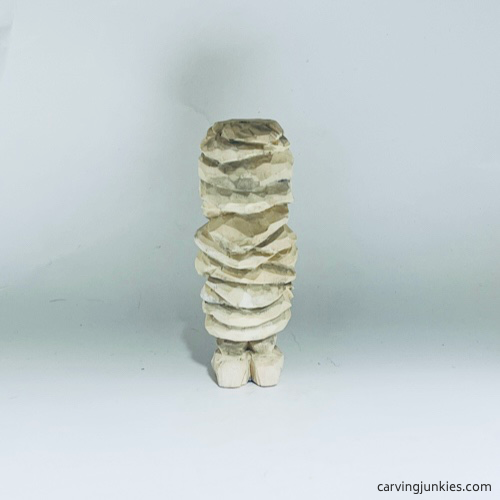 20. Back view of painted mummy wood carving
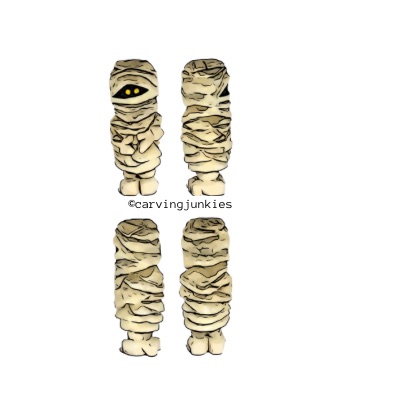
Free mummy wood carving pattern
If you prefer to carve your mummy from a pattern, photocopy this to size to fit your wood block.
Summary of mummy wood carving tutorial
- This little mummy wood carving tutorial is super easy and tons of fun to carve, making it a great project for beginners.
- Be sure your bandages are not all even—or run straight across—to give the illusion that they are sagging.
- Use an ivory base color (not bright white) to avoid harsh lines and to help the bandages pop.
- Try varying up the color of the pupils if you make more than one mummy wood carving.
Get 50 Wood Carving & Painting Tips
FREE when you join our free Covered in Chips Club
Your information is 100% private and is never shared. Unsubscribe anytime. See our Privacy Policy .
Share page on:
Home | Privacy Policy | Terms of Use | Contact | Sitemap

