- Home
- Things to carve
- Green man wood carving
Green man wood carving tutorial
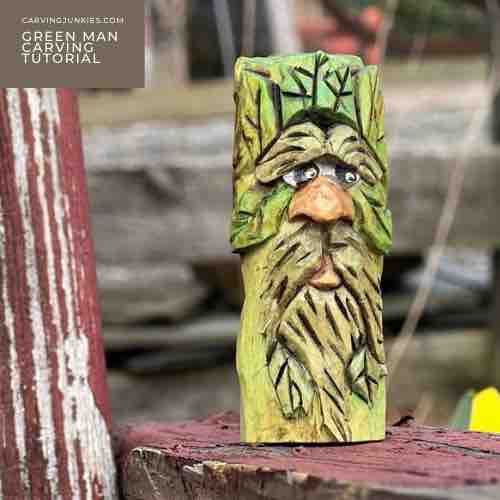
Carve a captivating green man.
LEVEL: SOME CHALLENGES
Follow this green man wood carving tutorial to create your very own masterpiece using just a carving knife (with suggestions for other tools that can be substituted).
A symbol steeped in folklore and nature, this little whittle is characterized by green vegetation, leaf motifs, a prominent nose, and his flowing beard and mustache.
This super-fun wood carving is filled with intricate details-from the delicately veined leaves to the distinctive facial features-that give our green man his unique identity.
Grab your knife and let's get carving!
What you will need for your green man wood carving
- Start with a wood block (I used basswood) that is 1 x 1 x 3 inches (2.5 x 2.5 x 7.6 cm).
- I will show you how to carve this green man wood carving with just a knife, but suggest places where you may want to use a V-tool or U-gouge.
- I can never stress enough how important it is to wear a good carving glove. If you carve over your lap, also protect your legs with a hard piece of wood or even a simple cutting board.
- Keep a pencil, eraser, and a ruler nearby for a few quick measurements and for freehand sketching.
- A free painting guide is provided at the end if you want your green man wood carving to look like mine.
Green man wood carving tutorial at-a-glance
Watch this short video to see the key steps for this green man wood carving before you start to carve him.
Set up your green man wood carving
You will carve off the corner for this green man wood carving tutorial, which will give you more room to work with.
Sketch a guideline that is about 1 inch (2.5 cm) from the bottom all around (photo 1).
Add another guideline that is 1/2 inch (1.3 cm) higher to mark the bottom of the nose (photo 1). It should extend about 1/2 inch (1.3 cm) on each side of the wood block.
Sketch a third guideline that is 1/2 inch (1.3 cm) higher to mark the eyeline (photo 1). It can be a tiny bit shorter than your nose guideline. Also, angle this guideline slightly from the top down (on each side of the block) to make it easy to set up the eyes (photo 1).
Make a stop cut across each side of the nose guideline (photo 2). Use your knife to meet this cut and remove wood from under it. Tip: I like to carve several layers (visible in photo 2) before I make one cut along the nose guideline to remove all the layers of wood. This helps avoid wood fuzzies and gives your piece a cleaner look.
Make a stop cut to separate the eye line (photo 4). Use your knife to remove wood from underneath, carving up to the eye line (photo 5).
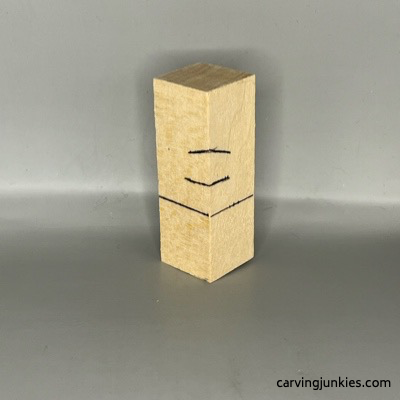 1. Guidelines are sketched
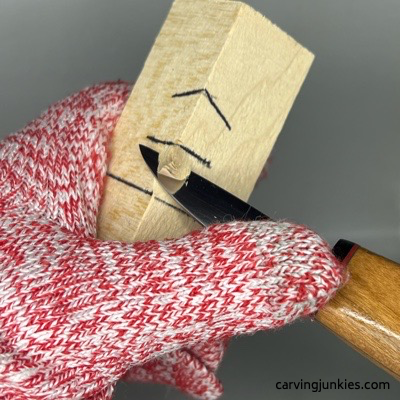 3. Removing wood
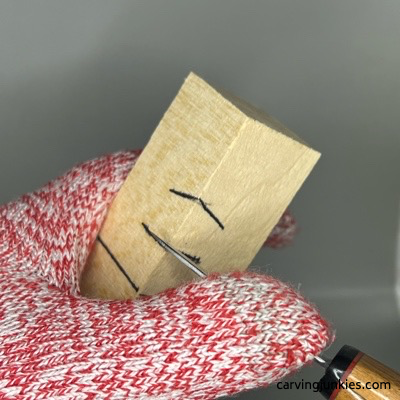 2. Making a stop cut
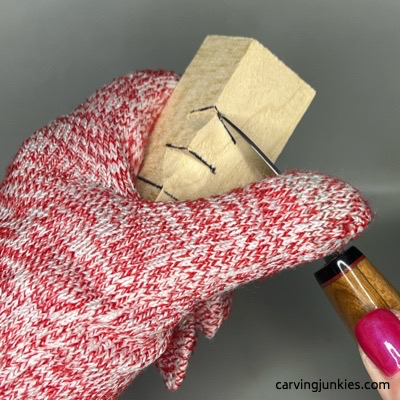 4. Eye line stop cut
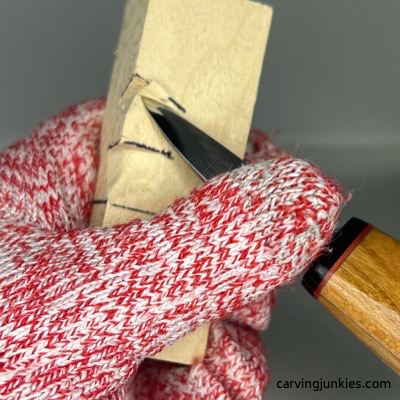 5. Carving up to eyeline
Roughout the shape of your green man wood carving
First, sketch the eyes and nose on your green man wood carving to reserve the wood for placement (photo 6).
Use your knife to remove wood to flatten the front and back surface of the wood block (photo 7) a bit. You can use a paring cut or a push cut here.
Sketch the front design of your green man wood carving (photo 8). Make sure you reserve enough wood above the eyes to allow for his bushy eyebrows (photo 8). I used a stop cut to separate the bottom of the eyebrows from the top of the eye line (visible in photo 10) to make it easy to place the eyes later.
Tip: I find it easier to keep one long eyebrow (a unibrow) across and wait until later to slightly separate it with a pyramid cut (completed in photo 29). This helps prevent the wood from crumbling.
Using V-cuts, slightly separate the head on the sides and back (photo 9 and visible in photos 33,34).
Use pyramid cuts to remove the triangles around each side of the mustache (photo 10).
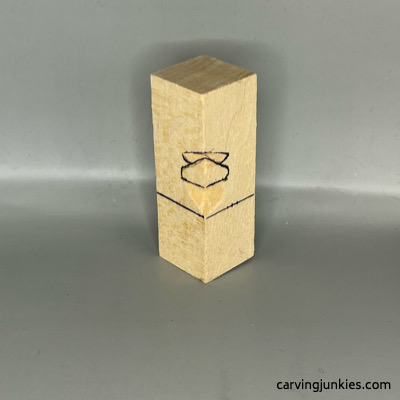 6. Eyes and nose are sketched
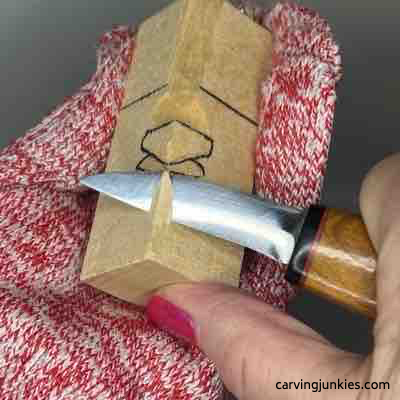 7. Flattening the wood block
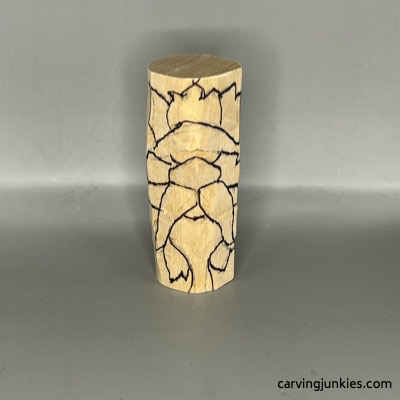 8. Front design is sketched
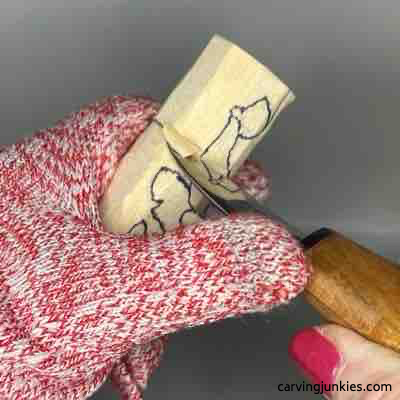 9. Separating head around
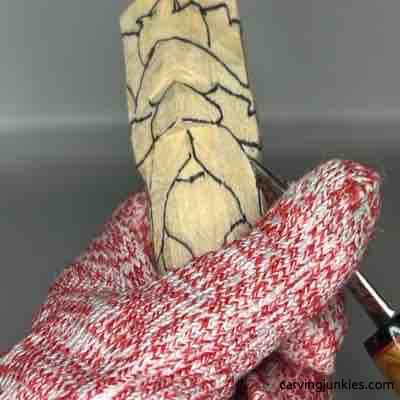 10. Making a pyramid cut
Separate the front of your green man
Separate the details on the front of your green man wood carving (photo 11). I held my knife like a pencil to make my first cut and then made a second slicing cut. You could also use a paring cut. Or, you could use a V-tool here.
Separate the nose (photo 12) and start to shape the nose. I held the piece upside down and shaved wood off to narrow the top of the nose (photo 13).
Sketch the nostrils on the nose (photo 14), which we will carve in the next section.
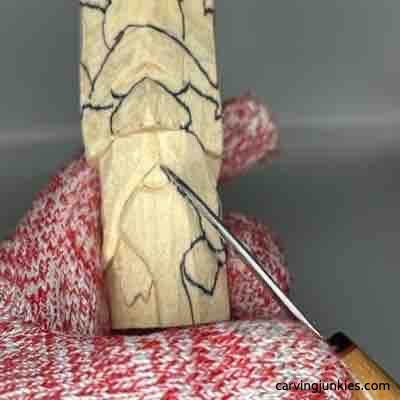 11. Separating the mustache
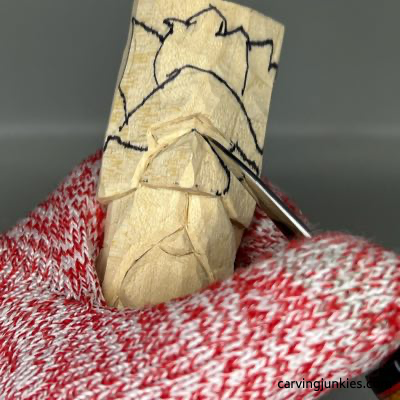 12. Separating the nose
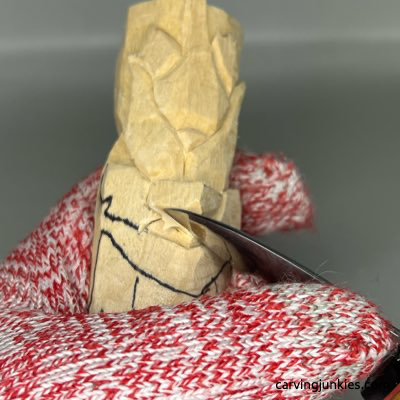 13. Shaping the nose
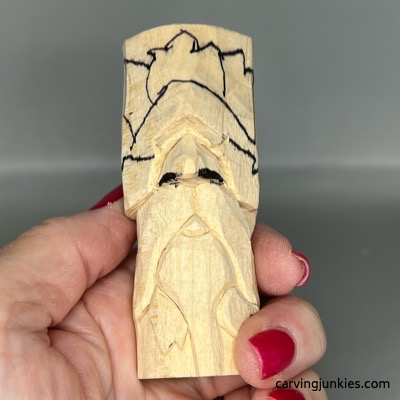 14. Nostrils are marked
Continue to carve details on your green man
You can make a slicing cut to shape the nostrils (photo 15), or use a U-gouge. If using a knife, it may help to start in the middle of the nostril and work your way outward on each side. You can also hold your piece upside down and scoop the wood off under the nostrils (photo 16).
I carved the left nostril with a U-gouge and I used a knife on the right nostril. They pretty much look the same (visible in photo 21).
Continue to separate the side leaves (photos 17,19). I used pyramid cuts to carve the leaves on the top of the head (photo 18). Be careful here because the end grain can be tough to carve. I removed wood in several layers to avoid breaking my knife tip.
Mark a spot between the eyes (photo 20) where you will make a narrow V-cut to separate the eyes (completed in photo 21).
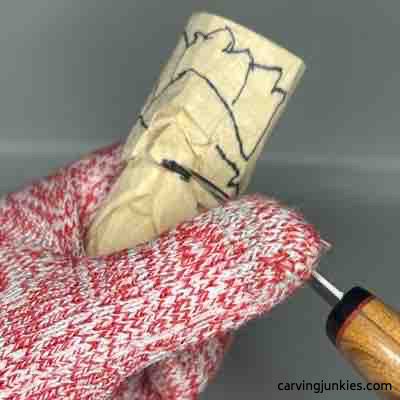 15. Carving the nostril
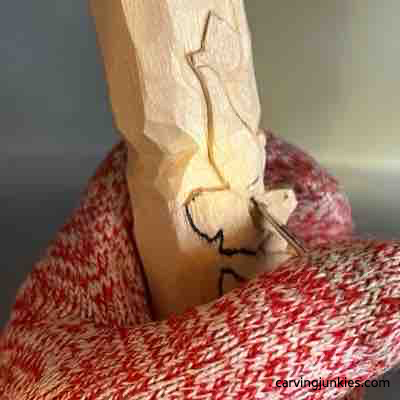 16. Shaping the nostril
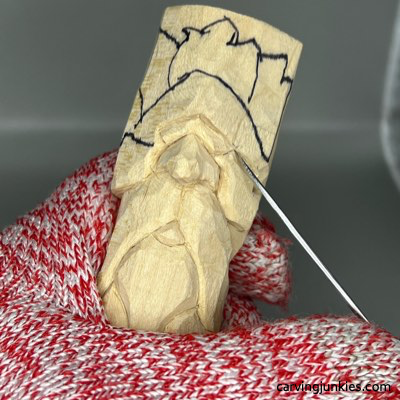 17. Separating side leaves
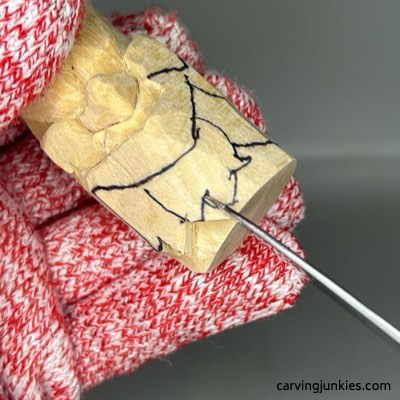 18. Separating top leaves
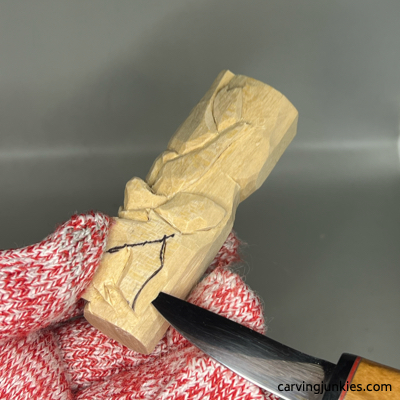 19. Separating more leaves
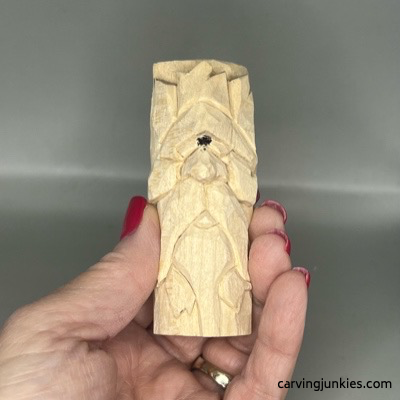 20. Eyes are marked for cutting
Add more details to your green man wood carving
Now that you carved the front of your green man (photo 21), sketch the leaves on the back (photo 22) and sides (photos 23,24). You can sketch some large diamonds. They do not have to be the same size or shape.
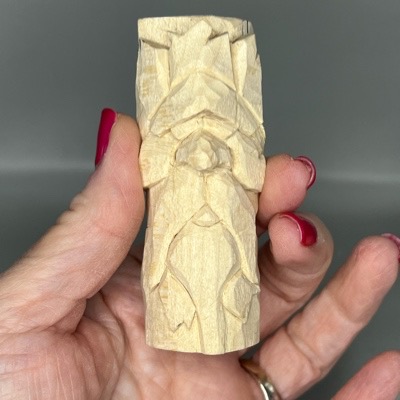 21. Front progress
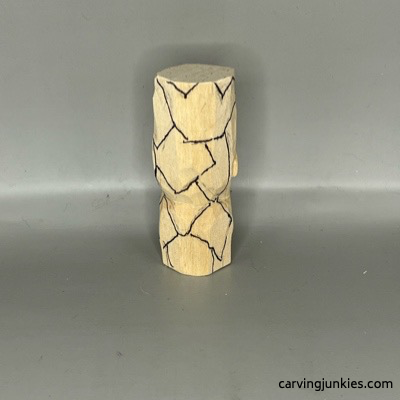 22. Back design
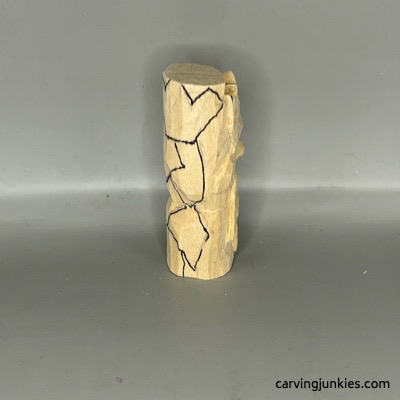 23. Right design
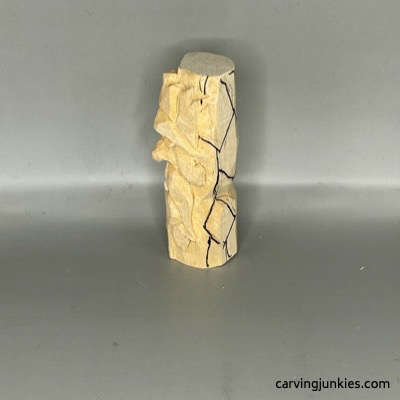 24. Left design
Carve more details on your green man
I used narrow V-cuts to separate the leaves on the back (photo 25). You could also use stop cuts, paring cuts, or hold your knife like a pencil. You could also use a V-tool here.
Once all the leaves are separated, randomly sketch the leaf veins all around (photos 26, 27) and carve them (photo 28).
Sketch the curvy lines of the bushy eyebrows (photo 26). I made one cut—and a second, narrow slicing cut—with my knife to cleanly remove wood while carving the eyebrows (photo 29). You could also use a V-tool here.
Also, mark a triangle between the eyebrows (photo 25) that you will remove with a pyramid cut after you carve the details on the eyebrows (to avoid crumbling), which are completed in photos 28, 29.
I made wide V-cuts at an angle with a smaller detail knife to carve the mustache on my green man wood carving (photo 30). You could use a V-tool here as well. Tip: Vary your cuts for interest, but have them flow in one direction.
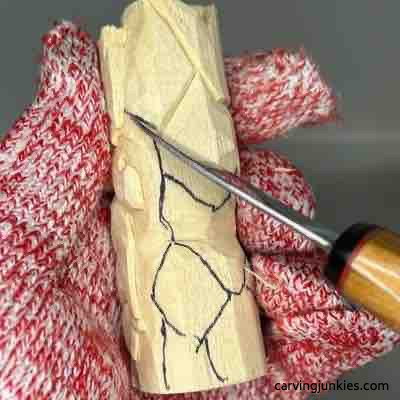 25. Separating back leaves
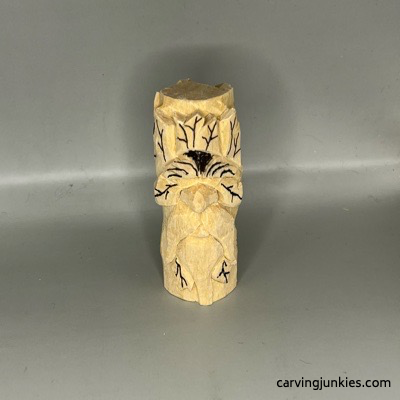 26. Adding leaf details
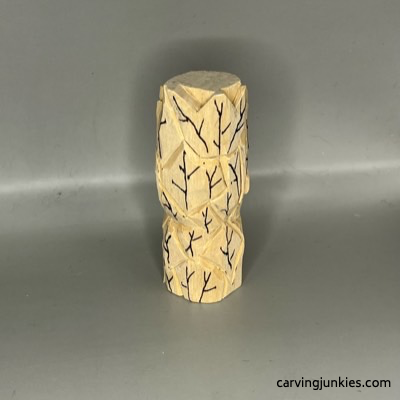 27. Back view of details
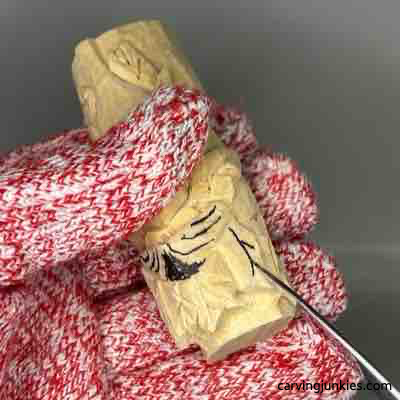 28. Carving leaf details
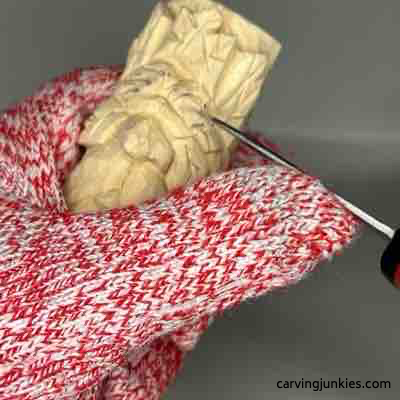 29. Carving eyebrows
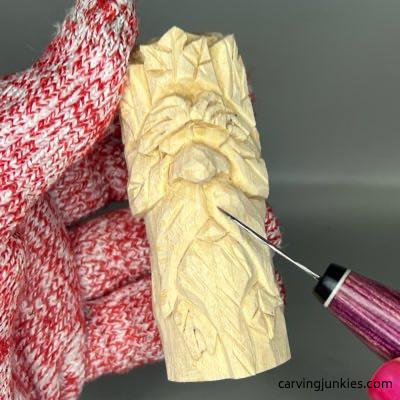 30. Adding V-cuts on mustache
Refine your green man wood carving
Carve down the top of your green man to remove the end grain, and to reduce the height slightly (photos 31-34). This is important to ensure that your paint will match the rest of your green man wood carving.
Clean up your cuts prior to painting. You can also wash the piece with soap and water to remove any pencil marks.
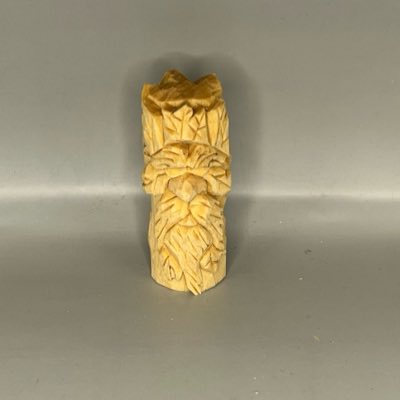 31. Front view of green man
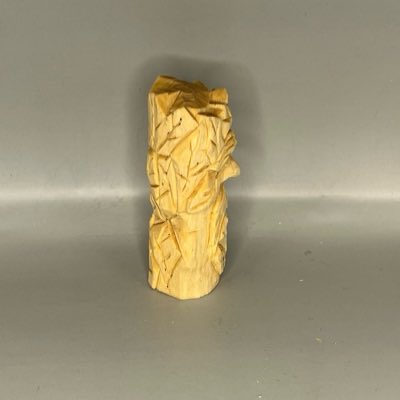 32. Right view of green man
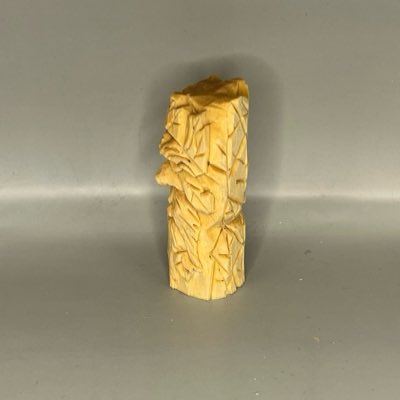 33. Left view of green man
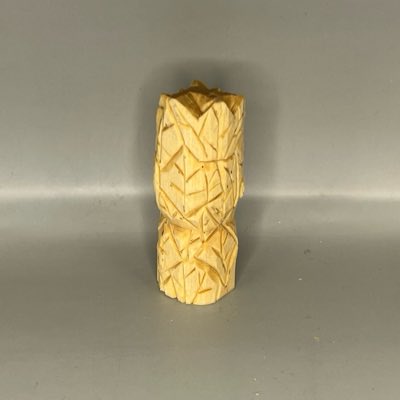 34. Back view of green man
Paint and finish your green man wood carving
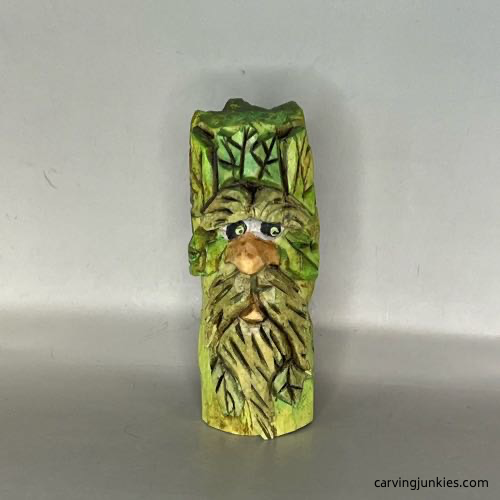 35. Painted green man (front)
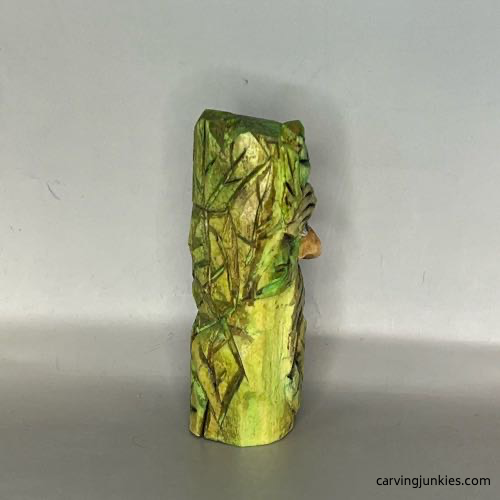 36. Painted green man (right)
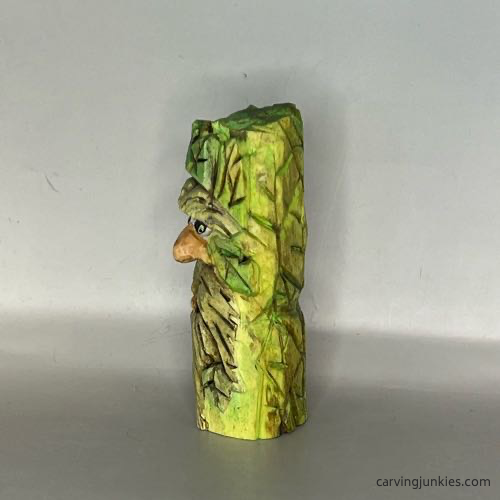 37. Painted green man (left)
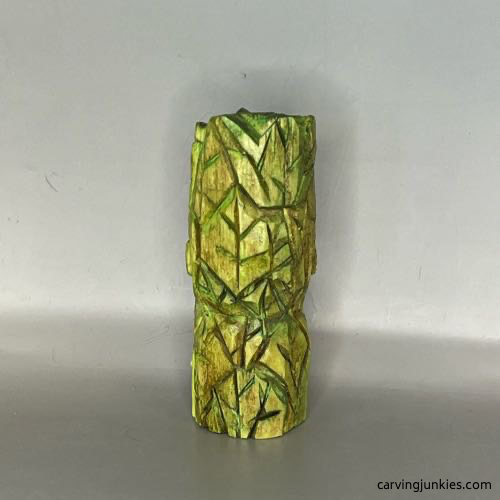 38. Painted green man (back)
Read this page for some great tips about painting a wood carving. Unless noted, I diluted acrylic paints with water to create a thin wash.
Here are the paint colors I used if you want a similar look:
- Eyes: Apple Barrel dolphin gray (100% paint).
- All leaves (base): Folk Art apple orchard wash.
- Leaf veins: Folk Art bright green wash.
- Leave accents: CraftSmart green teal wash and quickly blot with a paper towel.
- Mustache: Folk Art wild wasabi wash.
- Eye pupils: 100% wild wasabi green. Let dry and use 100% Ceramcoat black applied with a toothpick or mandala dot.
- Nose and lip: Walnut oil medium. You could also used boiled linseed oil.
- Optional Finish: Allow piece to dry overnight. Use a polyurethane spray (at least twice) to properly seal. Add some "turd polish" with a toothbrush and wipe off after a minute or two. Dispose of the paper towels outside as they are flammable. To make turd polish, mix 3 parts Minwax Aged Oak Gel Stain with 1 part of Mineral Spirits. I keep it stored in a glass jar in a cool place.
- You could also substitute another type of antiquing medium for turd polish.
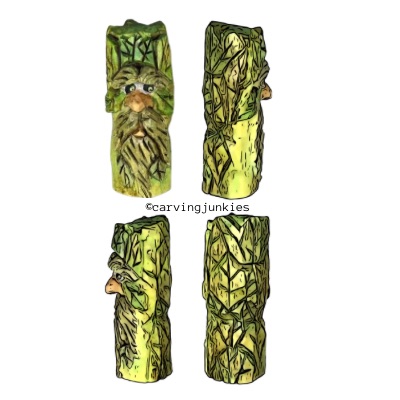
Green man wood carving pattern
Photocopy this pattern to size to make a bigger green man wood carving or to create your roughout with a band saw.
Green man wood carving tutorial summary
- This green man wood carving tutorial is easy to follow and results in a piece with lots of texture and details.
- You can carve with just a knife, or use a V-tool and U-gouge in some places.
- Adding turd polish after sealing the piece with polyurethane spray helps make the details "pop."
Get 50 Wood Carving & Painting Tips
FREE when you join our free Covered in Chips Club
Your information is 100% private and is never shared. Unsubscribe anytime. See our Privacy Policy .
Share page on:
Home | Privacy Policy | Terms of Use | Contact | Sitemap
