- Home
- Wood carving gnomes
- DIY Fall Gnome
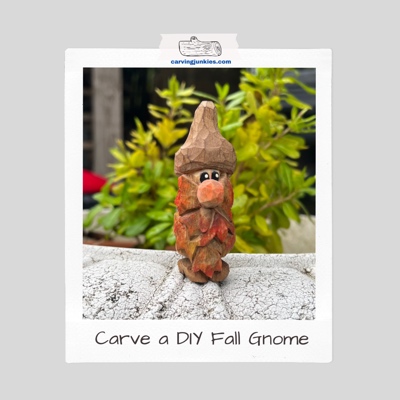
DIY fall gnome wood carving
Easy-to-follow tutorial to create your own woodland gnome.
LEVEL: SOME CHALLENGES
Are you ready to sprinkle a dash of autumn enchantment into your very own DIY fall gnome wood carving? We're about to embark on a journey into the mystical forest of creativity. Get your carving tools ready and set your imagination free.
In just a few simple steps, you'll transform a block of wood into a charming companion that will bring smiles and warmth to your autumn days. Gather your materials, a cup of hot cider, and get cozy. Imagine the crisp fall air, leaves crunching underfoot, and the scent of pumpkin spice as you bring your magical gnome to life.
Materials needed for your DIY fall gnome wood carving
- I used a basswood block that is 1 x 1 x 3 inches (2.5 x 2.5 x 7.6 cm). You will carve off the corner on this piece to give you extra room for the front and back.
- If you want a larger gnome, double or triple the measurements.
- You will need a pencil or pen to sketch your guidelines.
- I used a long-blade carving knife for removing wood and switched to a shorter knife for details. But you can probably do the entire piece with just one knife. Tip: You could also use a V-tool for separating the leaves.
- Please always wear a carving glove for safety. If you are a lap carver, protect your thighs with a hard piece of wood or a plastic cutting board.
- I've included a painting guide at the end if you want your DIY fall gnome to look similar to mine. Use whatever paint brushes you like with your acrylic paints.
Tutorial at-a-glance
Watch this quick video of the key steps to make your DIY Fall gnome wood carving.
Start your DIY fall gnome wood carving
Sketch a square box to reserve wood for the nose (photo 1). Mine is about 1-inch (2.5 cm) wide.
Round the corners and start to remove wood to rough out the hat on your gnome (photo 2). It is a bit like sharpening the end of a wide pencil. Turn your piece frequently to maintain symmetry. You will refine the shape later.
One you have your desired shape, make a stop cut across the top of the nose (photo 3). Remove wood from above the nose to create a flat surface for the eyes (completed in photo 4).
Sketch the leaves on the front (photo 4). Tip: Draw one leaf on a piece of paper, cut it out, and use it to trace your other leaves. They do not all have to match perfectly.
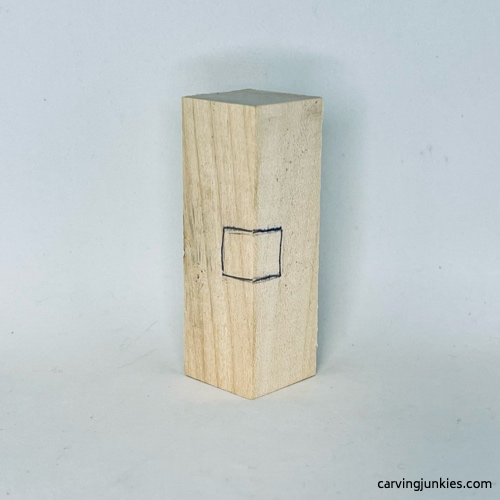 1. Wood is reserved for the nose
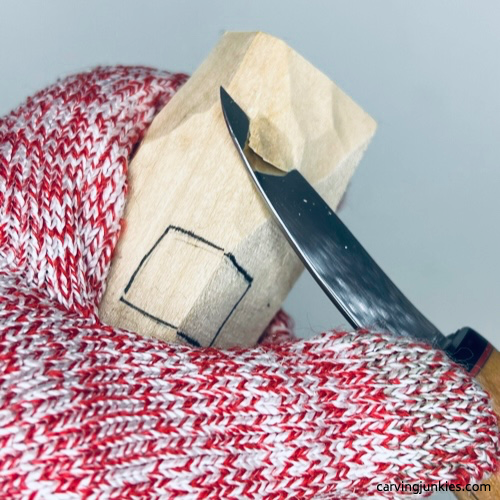 2. Shaping the gnome
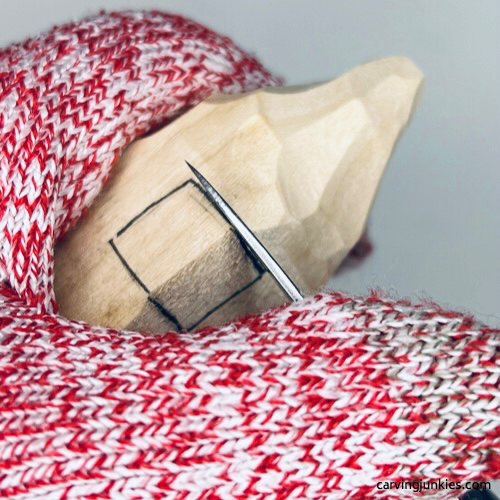 3. Making a stop cut
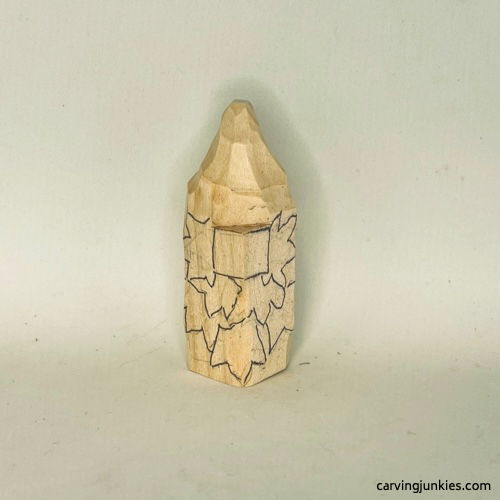 4. Details are drawn
Shape the nose of your DIY fall gnome wood carving
Make stop cuts to separate the square nose all around (completed in photo 5). You could also use a V-tool. Make pyramid cuts in each corner to round the nose (photo 5).
Round the nose further to get your desired shape (completed in photo 6).
Use your knife to separate the leaves on the front side of your DIY fall gnome wood carving (photo 7). Tip: Use pyramid cuts between the leaves and remove additional wood, as needed.
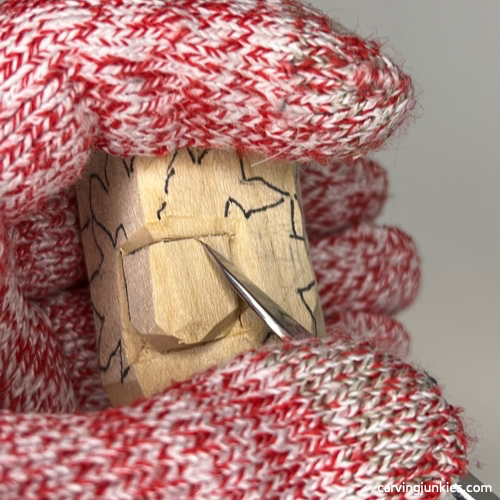 5. Rounding the nose
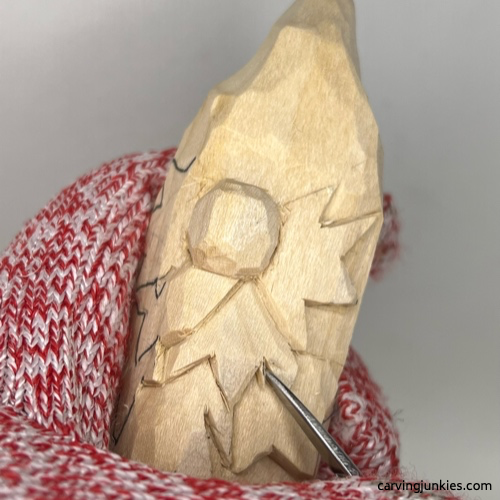 6. Separating the leaves
Add details to your DIY fall gnome wood carving
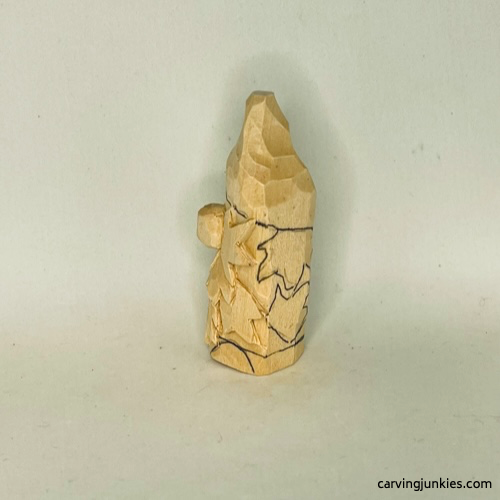
Sketch the rough shape for the shoes on the front (photo 9). Add guidelines all around to mark the top of the shoes and the bottom of the hat (photos 7-10).
Also, sketch the leaves on the back (photo 10) of your DIY fall gnome wood carving.
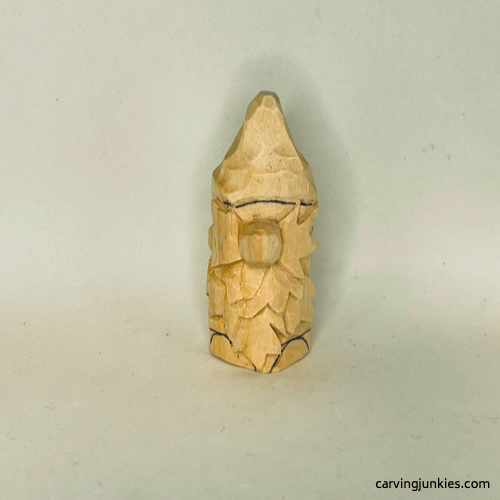 7. Front details are drawn
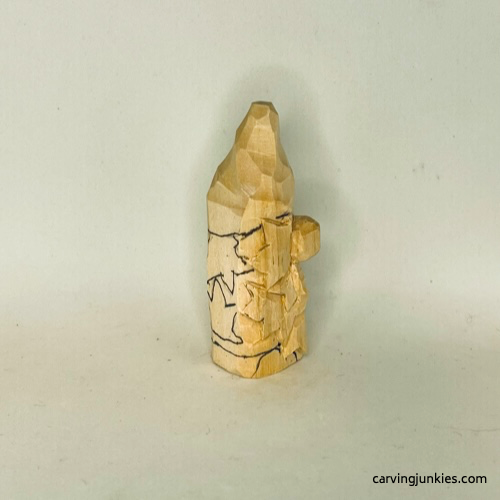 8. Right view of details
 9. Left view of details
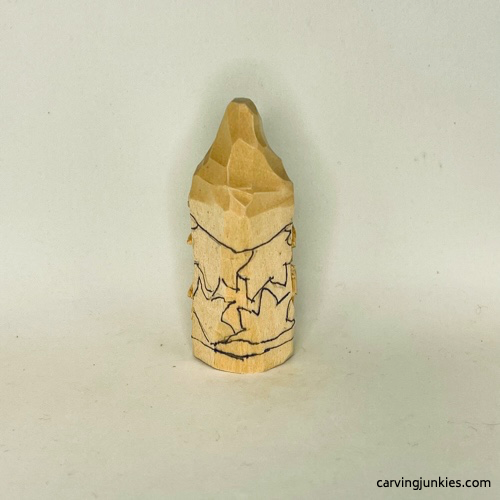 10. Back view of details
Carve the details
Use stop cuts to separate the hat all around, removing wood from underneath (photo 11). Tip: Skip over the leaves if they intersect with your hat.
Use the same method you used previously to separate the leaves on the back (photo 12).
Cut into the piece (photo 13) to create space between the top of the shoes and the bottom of the leaves, removing wood from underneath. Continue in the same manner on the sides (photo 14).
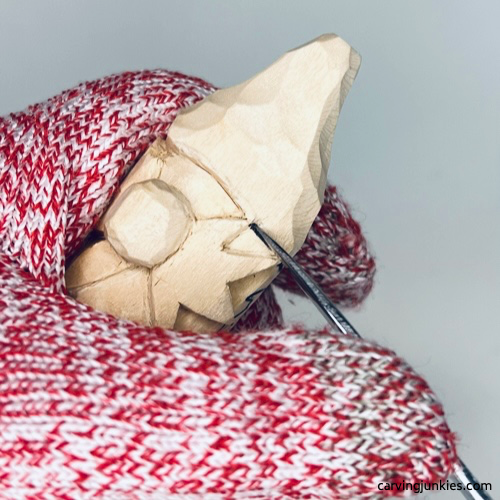 11. Separating the hat
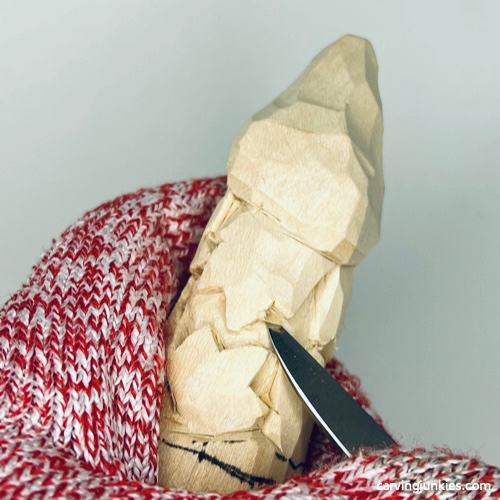 12. Separating back leaves
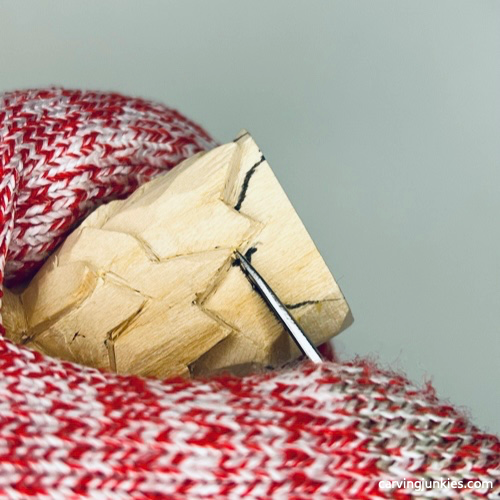 13. Cutting in to start the shoes
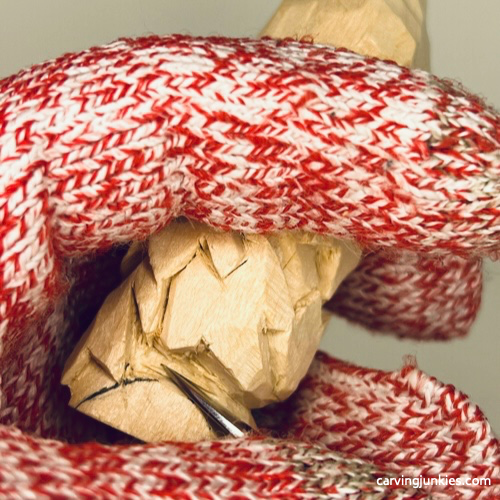 14. Removing wood around the shoes
Refine the shoes of your DIY fall gnome wood carving
Mark wood to remove to shape the sides of the shoes, and to mark where you will split the shoes on the front (photo 15) and the back (photo 16).
Carefully slice marked wood off each side (photo 17). Use V-cuts to split the feet. Tip: Don’t split the feet completely to help maintain stability.
Once the shoes are shaped, make small V-cuts (photo 18) on the sides to notch each heel.
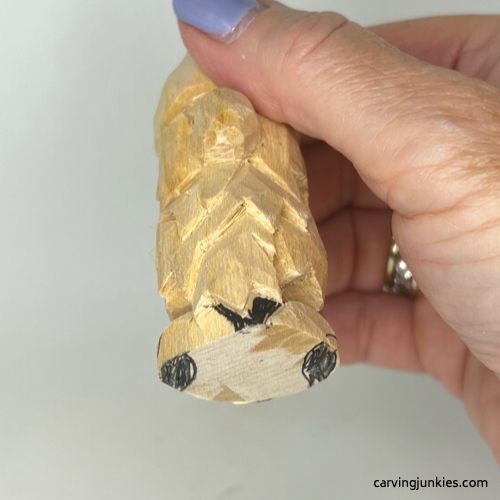 15. Wood is marked for removal
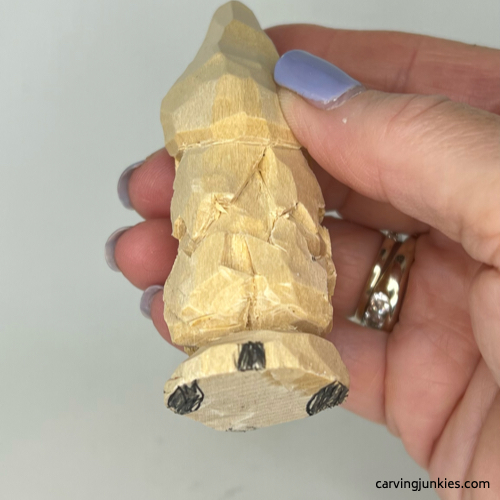 16. Wood on back to remove
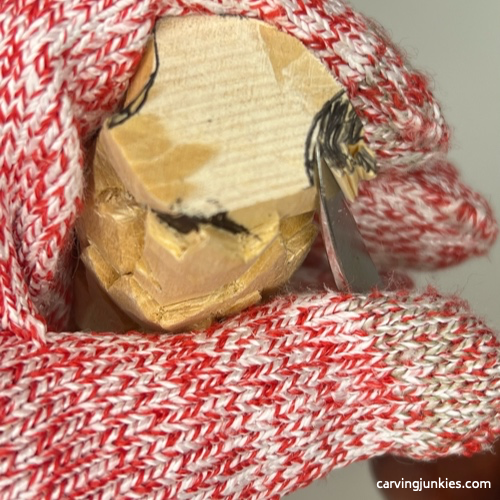 17. Shaping the shoes
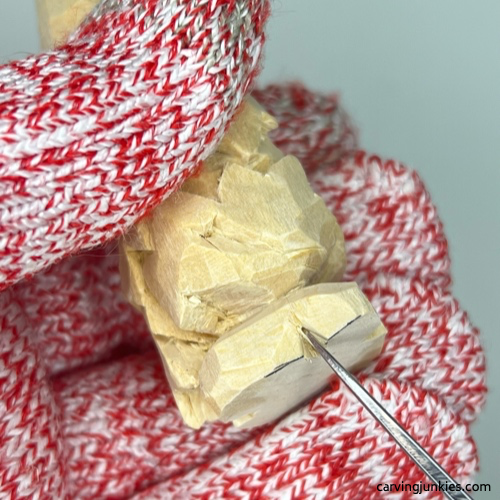 18. V-cut for heel notches
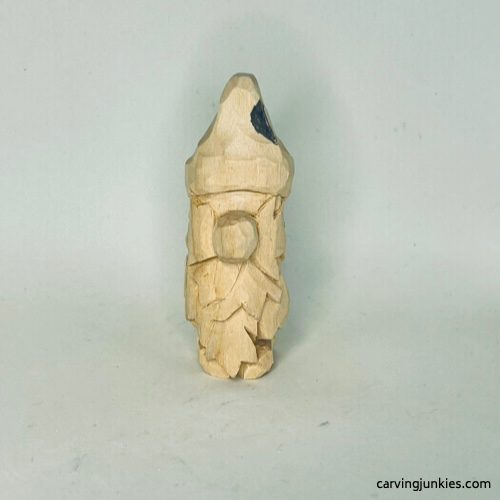 19. Hat notch wood is marked for removal
Finish your DIY fall gnome wood carving
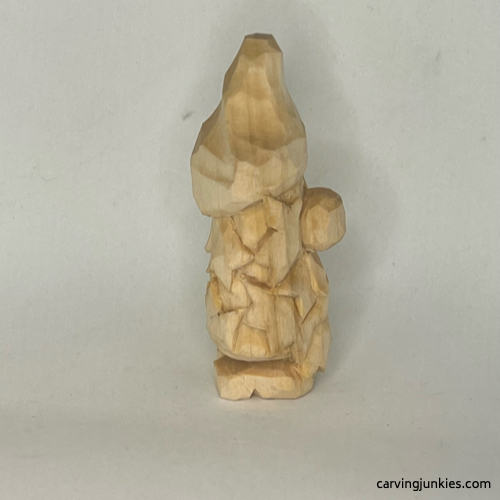
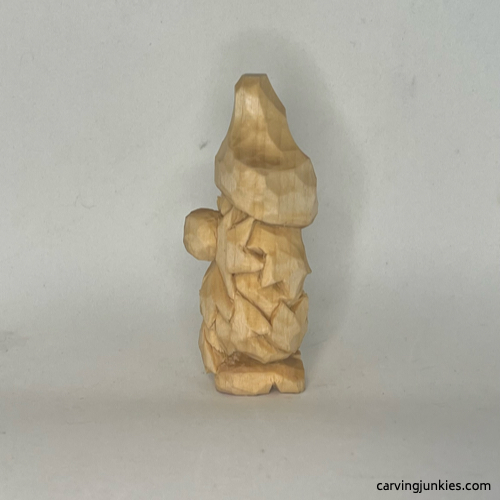
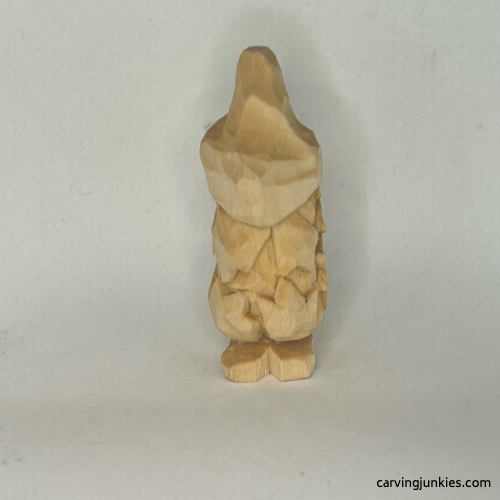
Refine the shape of your gnome, carving the hat to look like an acorn (photos 20-23). You can use a wide V-cut to start to remove the wood you marked on the hat, and turn your wrist as you carve to scoop the wood our.
Clean up your cuts, especially around the leaves.
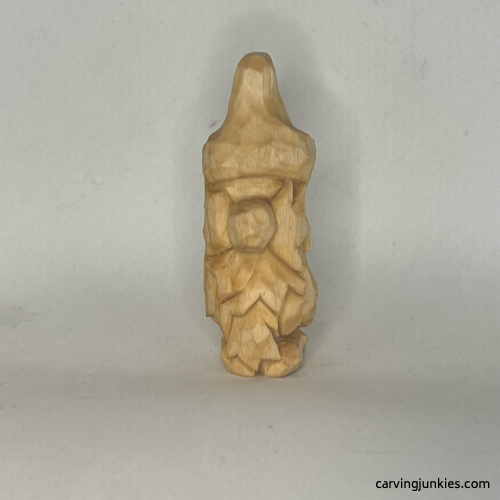 20. Front view of unpainted gnome
 21. Side view of unpainted gnome
 22. Left view of unpainted gnome
 23. Back view of unpainted gnome
Time to paint your DIY fall gnome
Read this page for great tips on painting a wood carving, including how to create a wash. Be sure to let paint dry completely before adding another color.
Here's what was used if you want to get the same look:
- Shadows of leaves and hat: Deco Art burnt umber wash.
- Hat and body (first layer): Deco Art buttermilk wash.
- Eye socket: After allowing previous coats of paint to dry, use Minwax natural stain (optional).
- Pupils: Ceramcoat 100% black paint.
- Eye whites: 100% Craftsmart vanilla applied with a small Mandala dot tool. You could also use a toothpick.
- Nose: Ceramcoat tangerine wash. When dry, apply Minwax natural stain (optional).
- Hat: Minwax golden oak stain. Or use brown paint.
- Body shadows: Minwax golden oak stain.
- Leaves: Vary between Ceramcoat tangerine wash, Apple Barrel flamenco red wash, and 100% Ceramcoat yellow mixed with Americana flamenco red (applied to ends with sponge).
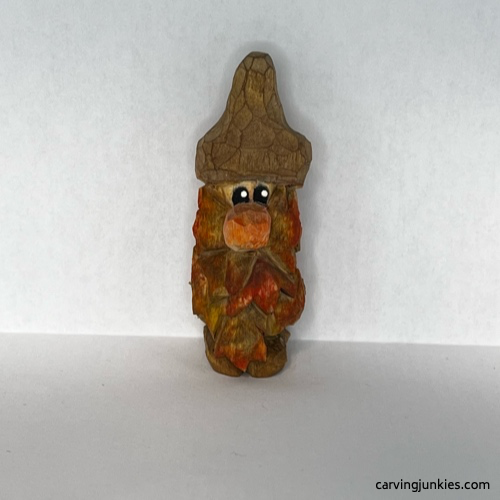 24. Front of painted gnome
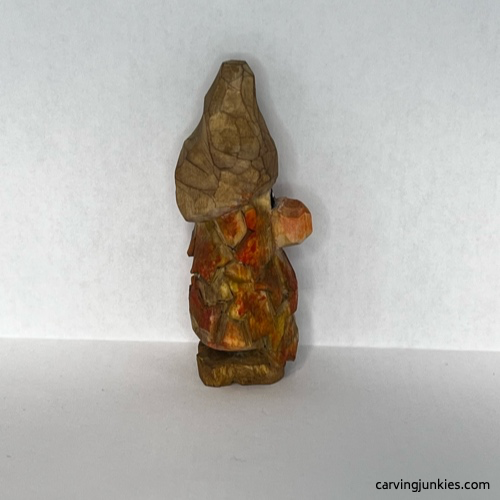 25. Right view of painted gnome
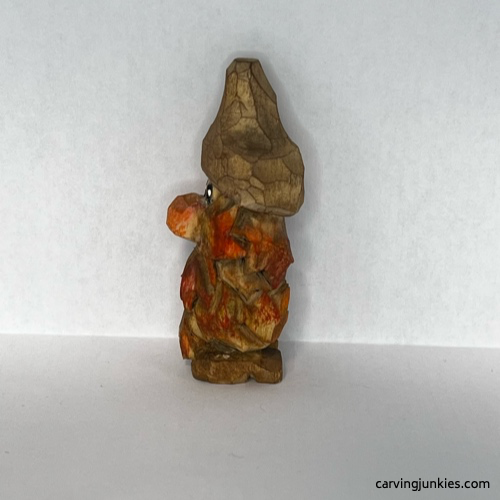 26. Left view of painted gnome
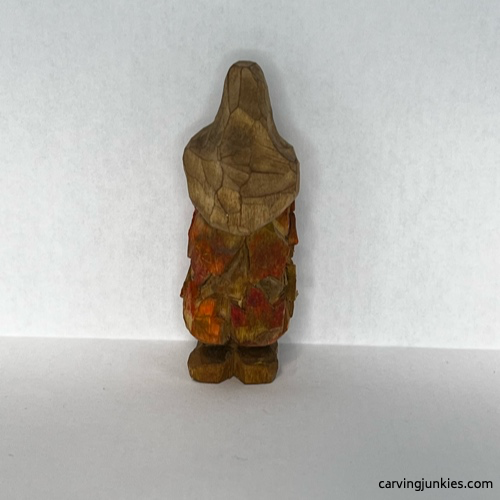 27. Back of painted gnome
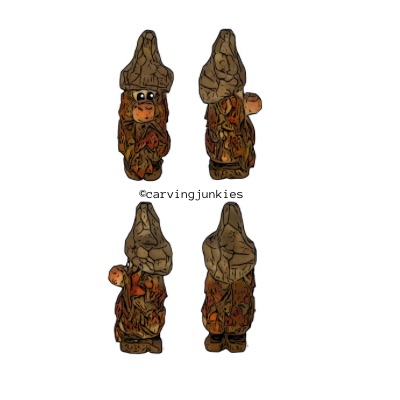
DIY fall gnome wood carving pattern
If you prefer to carve your fall gnome with a pattern, photocopy it to size to fit your wood block.
Get 50 Wood Carving & Painting Tips
FREE when you join our free Covered in Chips Club
Your information is 100% private and is never shared. Unsubscribe anytime. See our Privacy Policy .
Share page on:
Home | Privacy Policy | Terms of Use | Contact | Sitemap
