- Home
- Christmas wood carving ideas
- Christmas wood carving
Christmas wood carving tutorial
Carve an adorable gnome with a Christmas tree hat
LEVEL: EASY
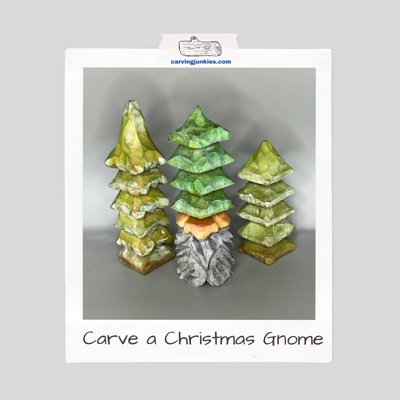
Welcome to the heart of holiday creativity with this adorable Christmas wood carving. This step-by-step tutorial will allow you to create a whimsical little gnome with a tall Christmas tree hat. You can also use the same hat-carving technique to create some charming mini-Christmas trees (pictured below).
This cute gnome is a fun and fast carve that makes a great stocking stuffer. You can order some colored micro-lights from Amazon, which really completes the look! Or, add some screw eyes to turn your carvings into fun hanging ornaments.
Let's get carving!
Christmas wood carving tutorial supplies
For this Christmas wood carving tutorial, I used a basswood block that is 1 x 1 x 4 inches (2.5 x 2.5 x 10 cm).You can easily adapt this tutorial to carve a much larger Christmas tree gnome.
- You will need a pencil and a pencil eraser to sketch your guidelines.
- Use your carving knife of choice. I used a #11 U-gouge to carve the nostrils but will provide instructions if you only have a knife.
- Always wear a safety glove when you carve. Also, use a flat piece of wood, or a kitchen cutting board across your lap, if you like to carve above your lap.
- A painting guide is included at the end if you want the same look.
Christmas wood carving tutorial at-a-glance
Check out this short video to see the key steps to make your Christmas wood carving.
Starting your Christmas wood carving
You will carve off the corner for your Christmas wood carving, which will give you depth for the oversized nose.
Draw a guideline about 1.2 inches (3.2 cm) from the bottom to mark the bottom of the wide nose, which is about 1/2 inch (1.3 cm) on each side of the corner (photo 1). Draw another 4 guidelines (above the nose guideline) all around that are about 1/2 inch (1.3 cm) apart (photo 1).
Make a stop cut along the first guideline (photo 2) and remove wood from underneath (completed in photo 3). Sketch the sides of the nose (photo 3).
Make your first cut along the new nose guideline (photo 4). Use a second slicing cut to remove the wood (photo 5). Repeat on the other side (completed in photo 10).
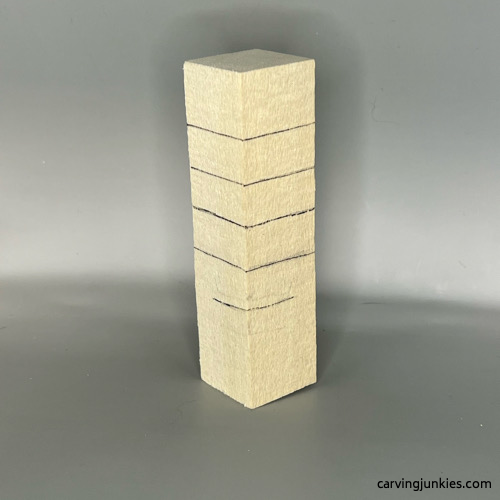 1. Guidelines are drawn
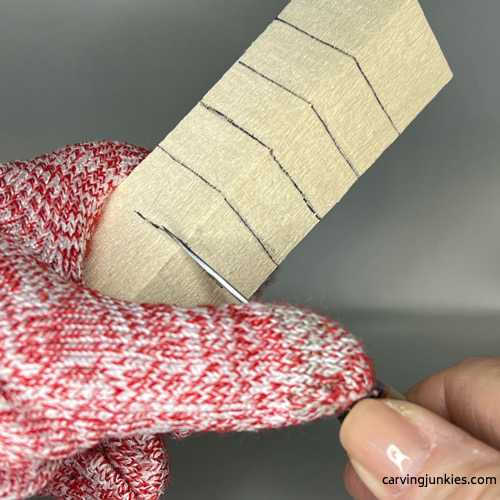 2. Making a stop cut
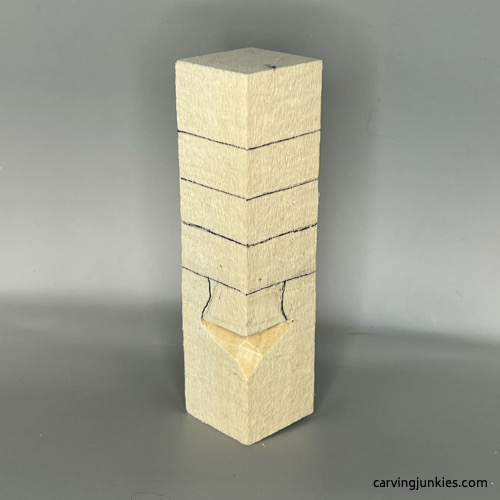 3. Stop cut is completed
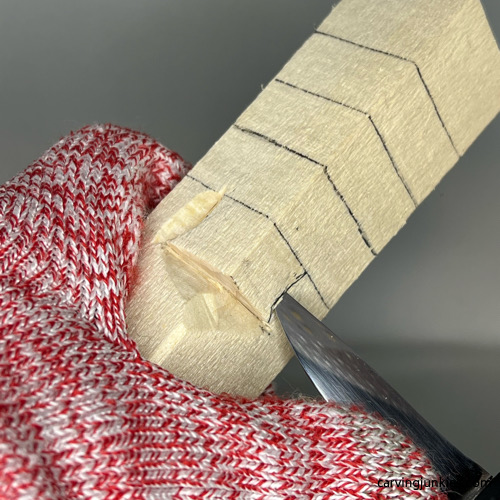 4. Making first cut
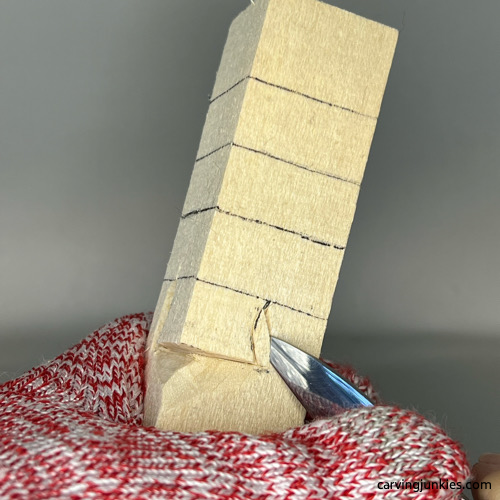 5. Second slicing cut
Separate the tree hat of your Christmas wood carving
Use stop cuts to separate each guideline all around, removing wood from underneath (photo 6). Tip: Carve each corner first (photo 7) and work your way toward the middle.
Once the tree sections are separated, narrow the top of the tree (photo 8), which is completed in photo 12. Shaping the top is a bit like sharpening a pencil point. Turn your carving frequently to check for symmetry.
Tip: Use these same instructions for a tree-only carving. You can also use small V-cuts to create a notched tree (pictured with lights at the top of this page).
Once the tree sections are separated you will have greater access (photo 9) to shape the top of the nose (completed in photo 10).
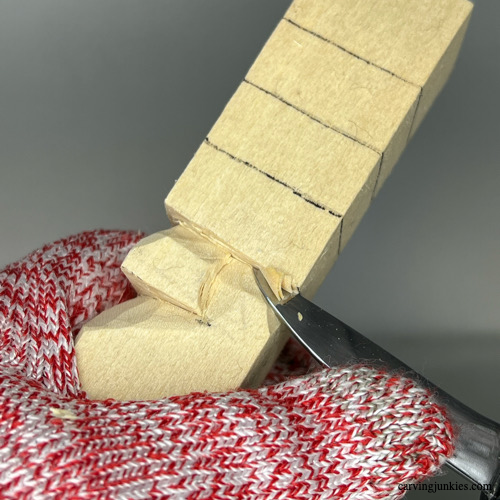 6. Separating tree bottom all around
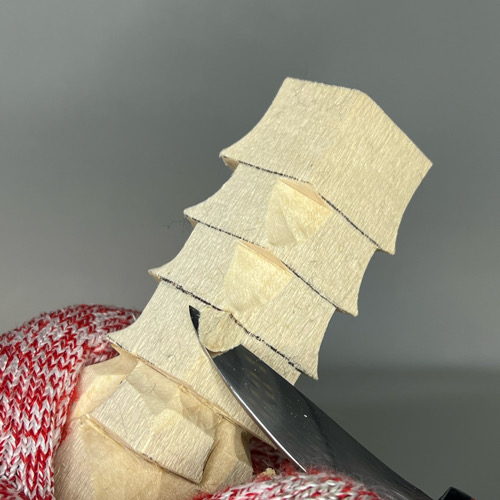 7. Separating the tree sections in the corners
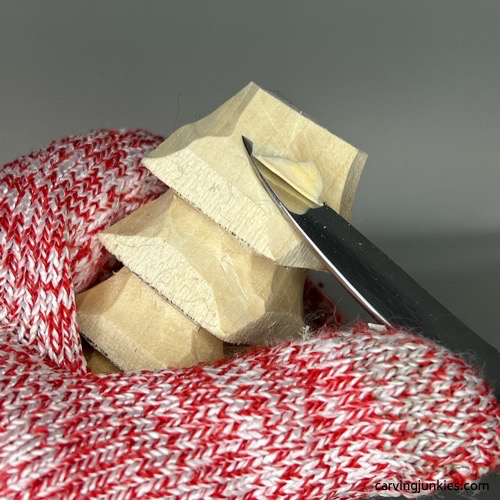 8. Shaping top of tree
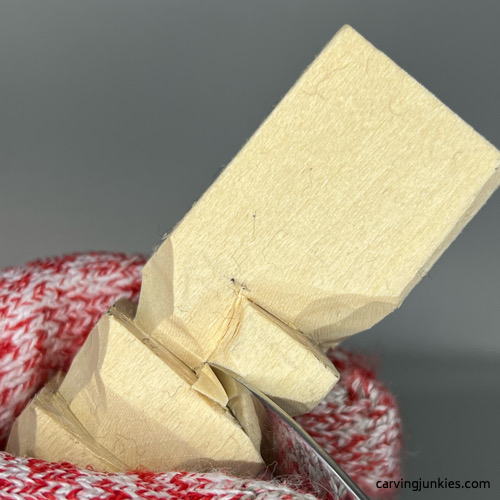 9. Shaping top of the nose
Carve some details on your Christmas wood carving
Mark the wood you will remove to carve the nostrils on your Christmas wood carving (photo 10). Twirl your U-gouge to carve each nostril (photo 11). Use your knife to clean up the cuts. If you don't have a U-gouge, turn the piece upside down and use your knife to carefully slice off the wood.
Sketch some guidelines for the beard and mustache on the front (photo 12), and the hair on the back of your Christmas wood carving (visible in photo 15). Your guidelines should not be exactly the same, and some should have an "S" shape. Mark the bottom of the beard (photo 12) with a triangle that you will remove with a V-cut (completed in photo 16).
Also, sketch the cheek guidelines (photo 12). Use a stop cut, or a paring cut, to separate the cheeks (completed in photo 16).
Use a stop cut to separate the large beard triangle on the front (photo 13) of your Christmas wood carving.
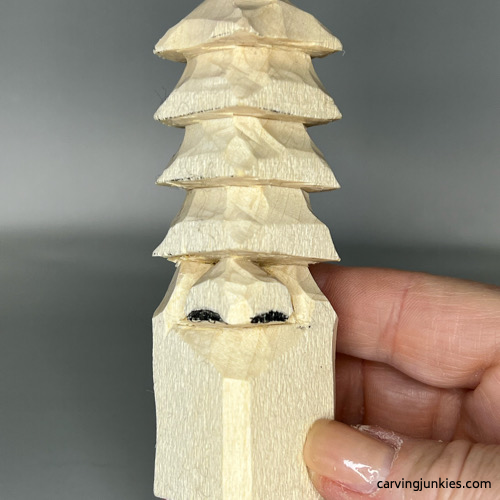 10. Nostrils are marked for carving
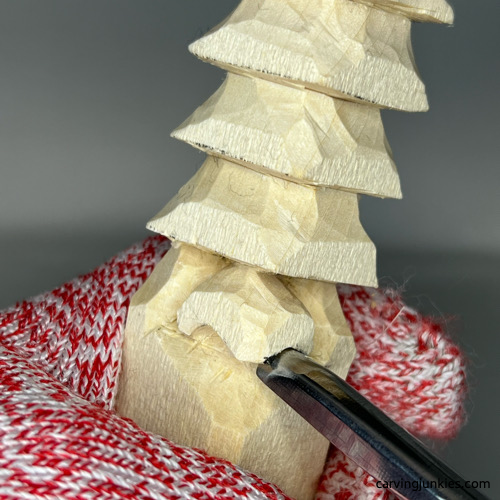 11. Using U-gouge to carve nostrils
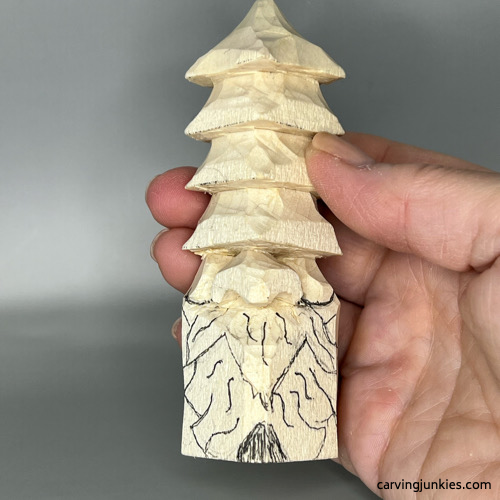 12. Beard guidelines are drawn
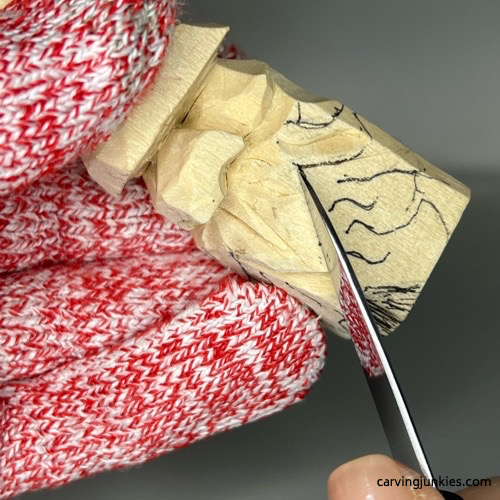 13. Separating beard triangle
Refine your Christmas wood carving
Make V-cuts with your knife to carve the mustache on each side (photo 14).
To carve the hair on the back, you can use paring cuts (or hold your knife like a pencil) to make your first cut. Then, make a second slicing cut to remove a sliver of wood (visible in photo 15).
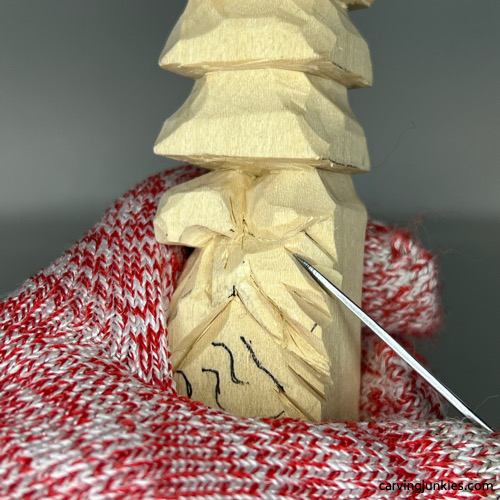 14. Carving the mustache
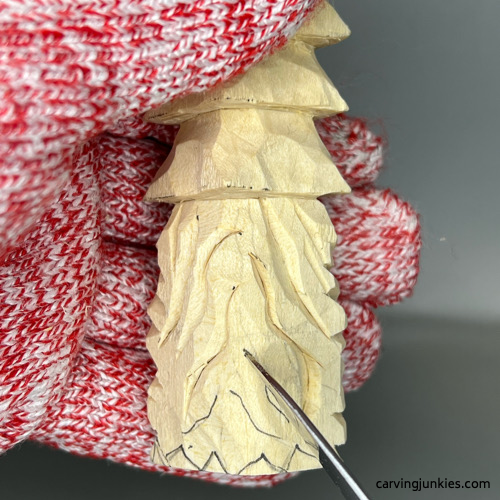 15. Carving the back hair
Finish your Christmas wood carving
Noodle the final shape of your Christmas wood carving (photos 16-19) and clean up any wood fuzzies prior to painting.
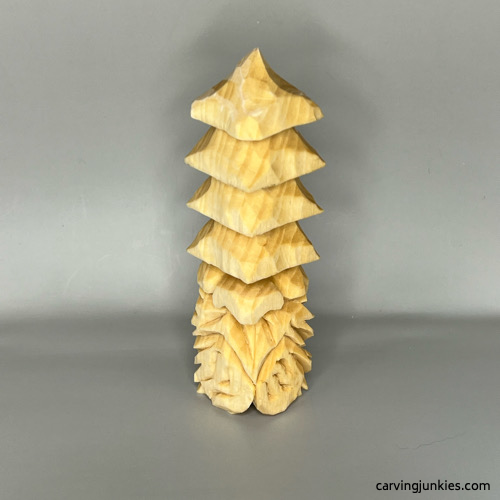 16. Front view of unpainted gnome
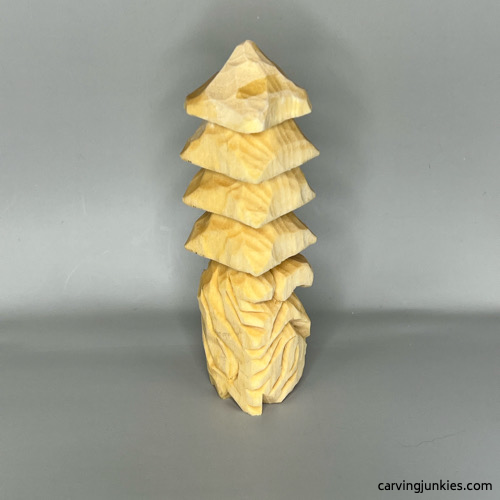 17. Right view
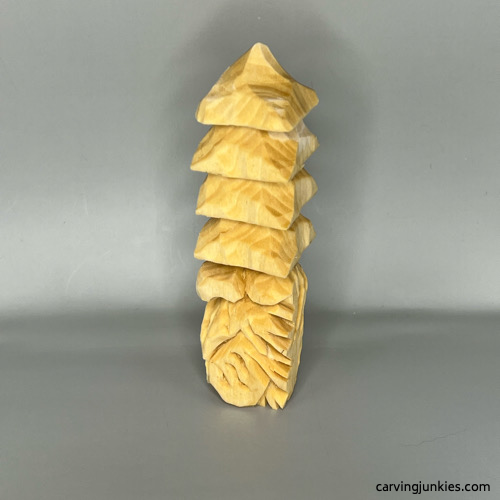 18. Left view of unpainted gnome
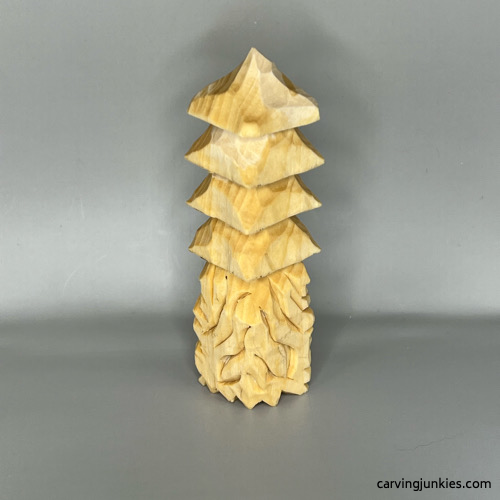 19. Back view
Paint your Christmas wood carving
If you are new to wood carving, read this page about painting a wood carving. I've included the acrylic paints I used to help you get the same look. Use whatever paint brushes you like. I personally like flat brushes and slanted brushes for corners.
- Nose and cheeks: I used walnut oil for all the fleshy areas. It works great! You could also use boiled linseed oil. Tip: Mark one brush with magic marker that you will only use for applying walnut oil (or boiled linseed oil). Let dry completely and dab on a very diluted wash of Apple Barrel flamingo red. You may need to apply in several layers.
- Beard and mustache: Use a very diluted wash of Ceramcoat black to highlight the cuts. Let dry and apply a wash of CraftSmart deep gray. Let dry. Dry brush with 100% dark gray and 100% Ceramcoat ivory.
- Tree hat: Use a wash of Ceramcoat leaf green. Let dry. Dry brush bottom of tree sections with 100% Ceramcoat ivory.
- Let your piece dry at least overnight and seal with walnut oil or your sealer of choice.
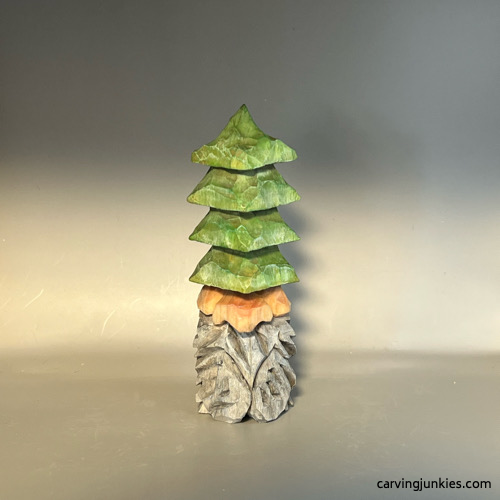 20. Front view of painted gnome
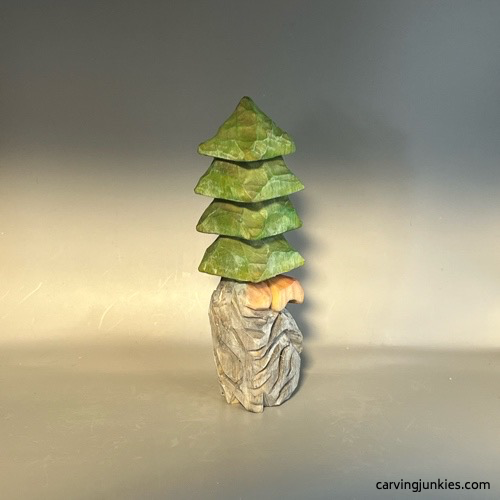 21. Right view of gnome
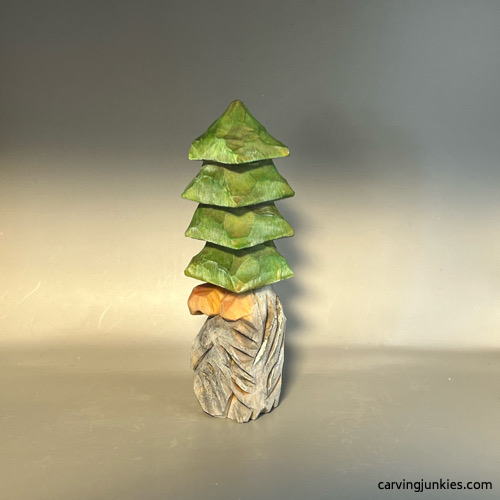 22. Left view of gnome
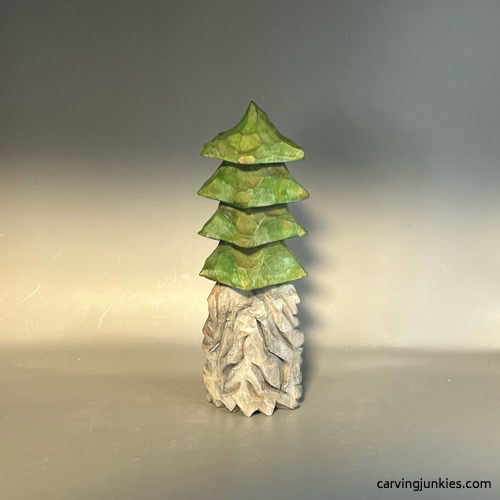 23. Back view of gnome
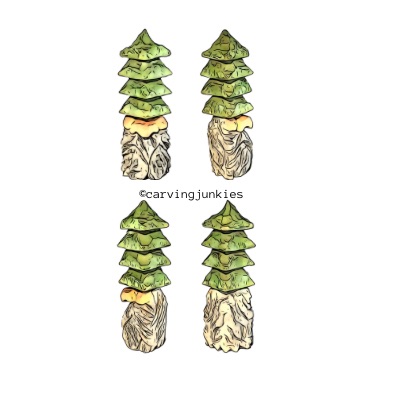
Christmas wood carving pattern
If you prefer to carve your Christmas wood carving with a pattern, photocopy this to size to fit your wood block.
Christmas wood carving summary
- This Christmas wood carving is super fun and easy to carve.
- It makes a great holiday decoration, or add eye hooks to create hanging ornaments.
- You can use the same instructions to carve some small Christmas trees.
- After you make this wood carving, check out my other tutorials for more Christmas tree wood carvings, a Christmas tree wood carving character, and my wooden Christmas carolers.
Get 50 Wood Carving & Painting Tips when you join our FREE Covered in Chips club.
Share this page
carvingjunkies.com never sells your personal information.
This site uses cookies for its operation and to enhance your experience. As an Amazon Associate and Focuser Carving affiliate we earn from qualifying purchases.
Home | About Us | Privacy Policy | Terms of Use | Contact | Sitemap
