- Home
- Things to carve
- Carving a cross
Carving a cross tutorial
Make yourself an elegant pocket cross.
LEVEL: SOME CHALLENGES
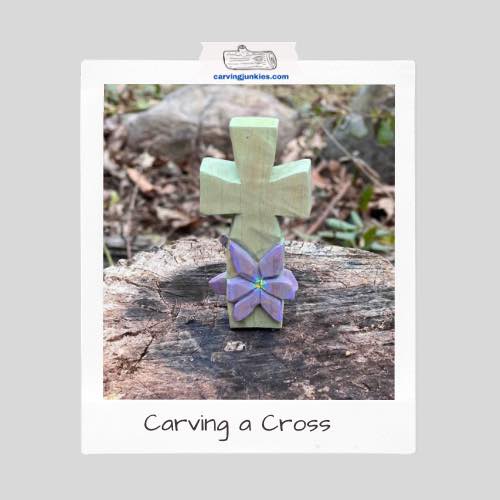
Thinking about wood carving a cross? This tutorial will show you how to carve a simple, elegant pocket cross that makes an ideal Easter gift. Or, you can create a more rustic cross to carry every day by using a wood stain instead of pastel-colored acrylic paints.
Whether you're an experienced woodworker – or a beginner looking for a special project – this tutorial is designed to help you carve a cross that embodies tradition and spirituality. Let’s carve it together!
Carving a cross: What you need
- Start with a basswood block that is approximately 1.75 x 3.5 inches (4.4 cm x 8.9 cm) and about 3/4 inch (1.9 cm) deep.
- As with all my little whittles, you can easily double or triple the measurements to make a larger cross.
- You can probably use one carving knife with a long blade for carving this cross, such as a roughout knife. However, you may want to switch to a smaller detail knife to carve parts of the flowers. If you're looking for some great wood carving knives, check out this page about the best knives for wood carving.
- Whenever you carve, always wear a good carving glove for safety.
- If you carve over your lap, place a hard piece of wood, or a kitchen cutting board, over your legs to protect your crucial blood arteries.
- You can use a pencil or pen to draw your guidelines and the flowers. Using pencil makes it easy to erase and redraw your guidelines.
- There is a painting and finishing guide at the bottom of this page if you want to use similar acrylic paint colors. Use your paint brushes of choice.
Carving a cross tutorIal at-a-glance
Watch this short video to get an overview of the key steps for this carving a cross tutorial before you start cutting the wood.
Carving a cross: Set up
Sketch a center line on the front and back sides of your wood block. Then, sketch a cross that is about 1 inch wide (2.5 cm), which is wider than your final design. Going wider here will ensure that you will have enough wood to work with.
Once you draw the cross on the front (photo 1), extend your guidelines across the sides (photos 2,3), which will help you line up your sketch on the back (photo 4).
Loosely sketch the petals of the flower on the front and the back (photos 1,4). When you carve the flower you will be able to refine the shape of the petals. In this design, a few flower petals extend beyond the cross. This is optional. If you want to make your cross easier to carve, draw your flowers about half the size pictured below (photos 1,4) so they will be entirely contained within the cross.
Also, mark the wood that you will remove around the cross (photos 1-4).
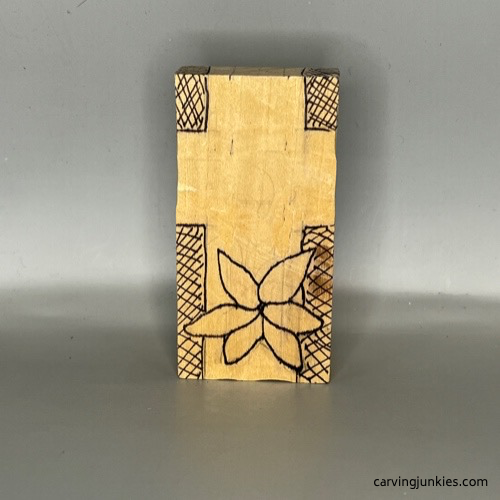 1. Front view of guidelines
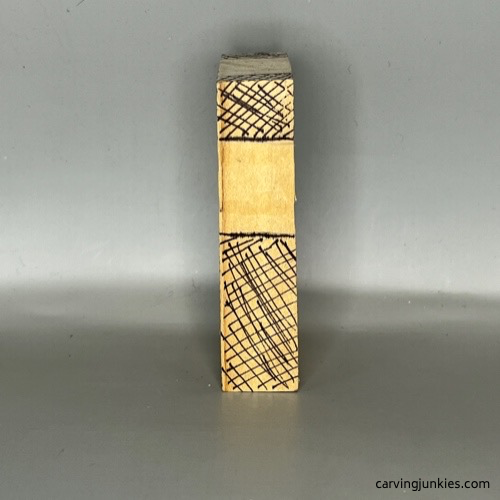 2. Right view of guidelines
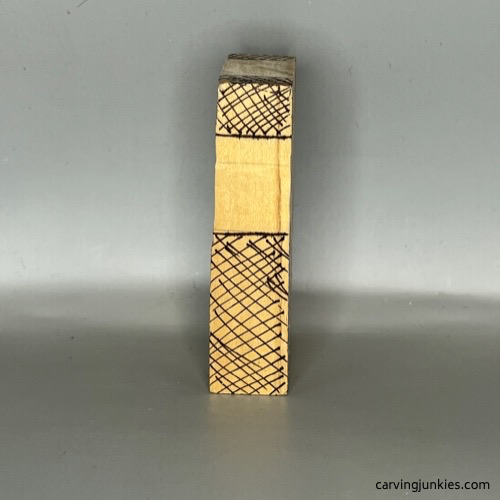 3. Left view of guidelines
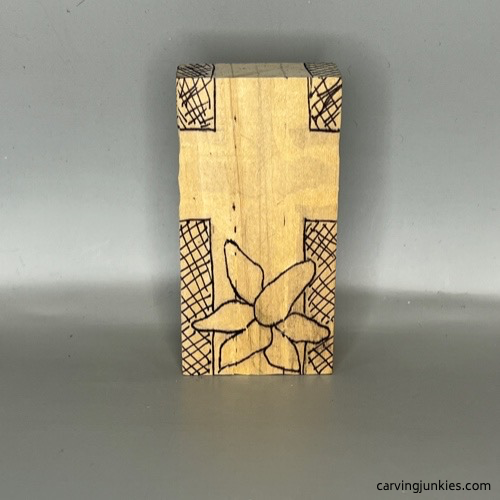 4. Back guidelines are sketched
Carving a cross: Rough it out
Start by slicing off wood on the top right corner (photo 5). Use stop cuts to remove the last sections of wood (photo 6). I used a roughout knife with a long, 2-inch (5 cm) blade here. Tip: Rock your knife back and forth to make deeper stop cuts. Remember to strop your knife every 20-30 minutes to keep it super sharp.
Continue removing wood to roughout the cross (photo 7). You can use a combination of V-cuts, stop cuts, or paring cuts to remove wood. It's really a matter of personal preference and what cut is easiest—and most comfortable—for you. You may have to make several passes to remove all the wood.
To carve the flower, use a combination of stop cuts, paring cuts, and pyramid cuts. Or, hold your knife like a pencil and move it along the flower guideline, removing wood from around your cuts (photo 8). I ended up carving the back flower first, but it doesn’t matter which side you start with.
Tip: Leave the width of flower petals thick for now. You will reduce and refine them later.
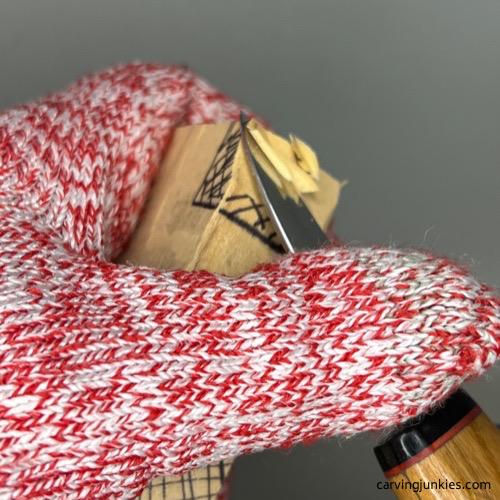 5. Slicing wood off
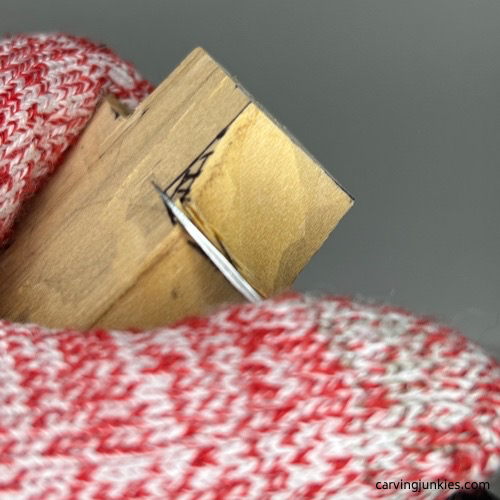 6. Making a stop cut
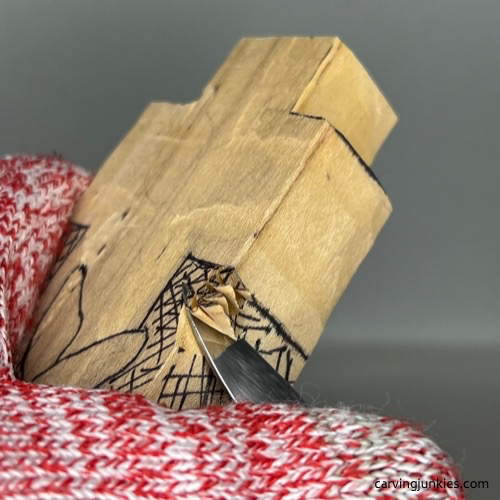 7. Removing more wood
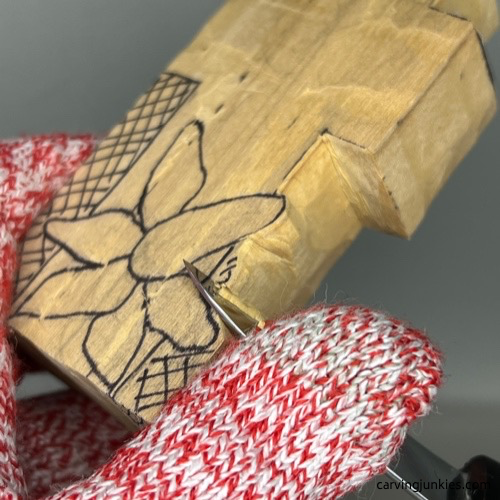 8. Separating flower petals
Carving a cross: Carve the other side
Repeat the same process on the other side of the cross to remove wood and shape the second flower (photo 9).
Hold your knife at an angle to shape the top sections of the cross (photo 10). Tip: Turn your wrist as you carve to scoop wood off and create a slight curve (visible in photos 11 and 14).
Once you have the desired shape of both flowers, very carefully remove wood from behind the flower petals. Keep the flower petals thick enough to prevent them breaking from breaking. The desired flower petal thickness is visible in photos 12 and 13.
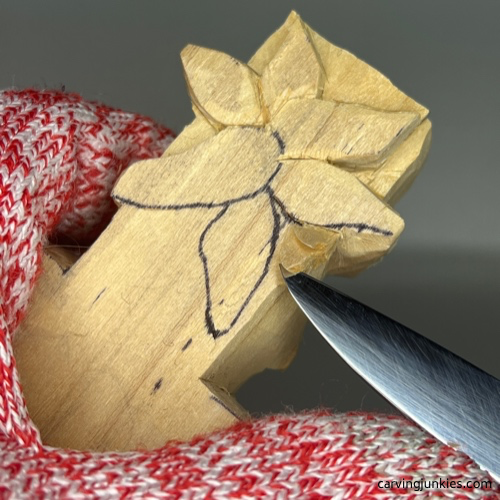 9. Shaping the back flower
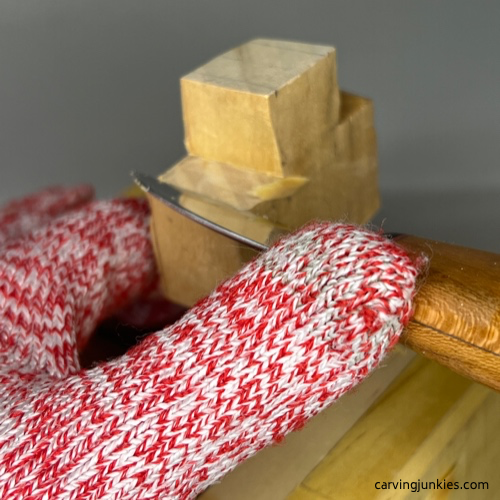 10. Shaping the top
Carving a cross: Refine it
Using your knife, continue to refine the shape of your cross. When you are finished, your cross should look similar to photos 11 to 14. Clean up your cuts and remove any wood fuzzies. I used some sandpaper to smooth my cross prior to painting. Tip: Don’t use your knife again after using sandpaper.
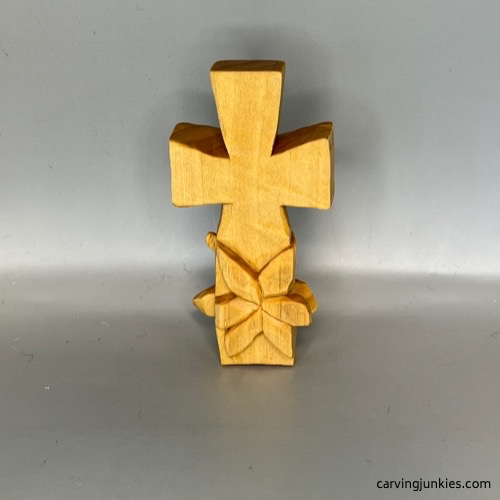 11. Front view of unpainted cross
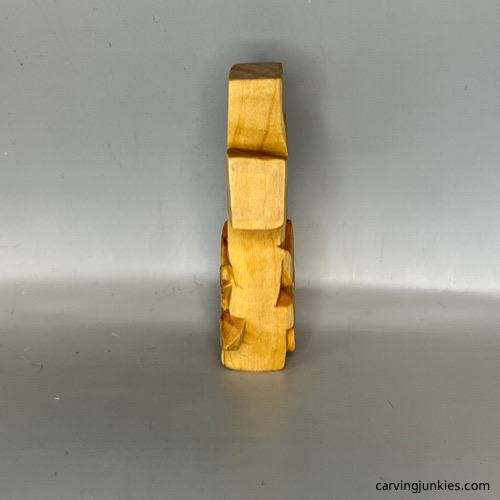 12. Right view of unpainted cross
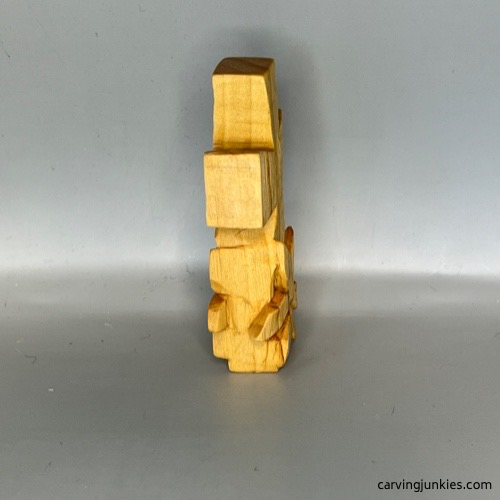 13. Left view of unpainted cross
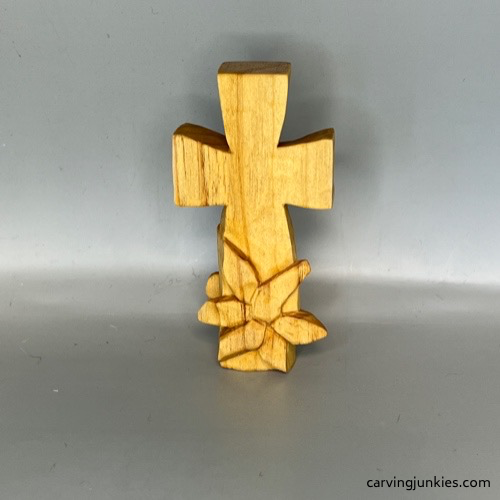 14. Back view of unpainted cross
Carving a cross: Paint it
For some general tips on painting a wood carving, read this.
Here are the acrylic paints I used if you want a similar look for your cross:
- Cross: FolkArt wild wasabi wash.
- Flower petals: Ceramcoat purple wash.
- Center of flower: Ceramcoat turquoise wash.
- Dots in center: Ceramcoat yellow (100% paint) applied with a toothpick.
- Finish: Walnut oil medium.
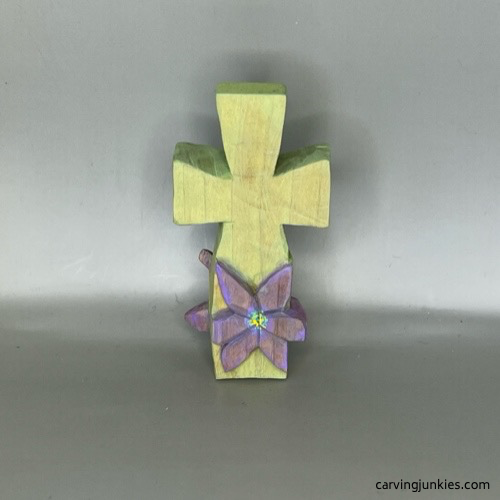 15. Front of painted cross
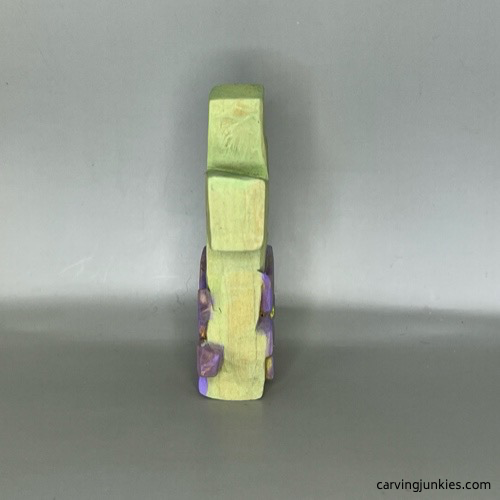 16. Right view of painted cross
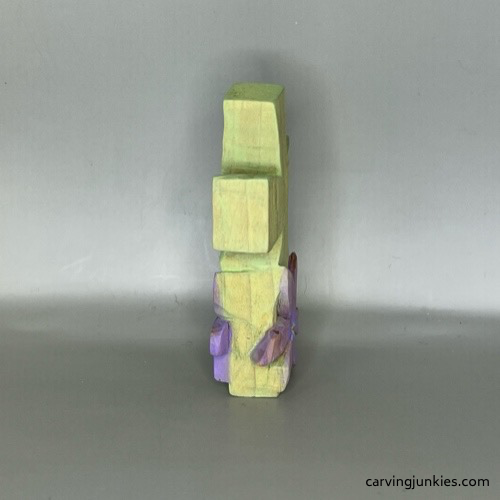 17. Left view of painted cross
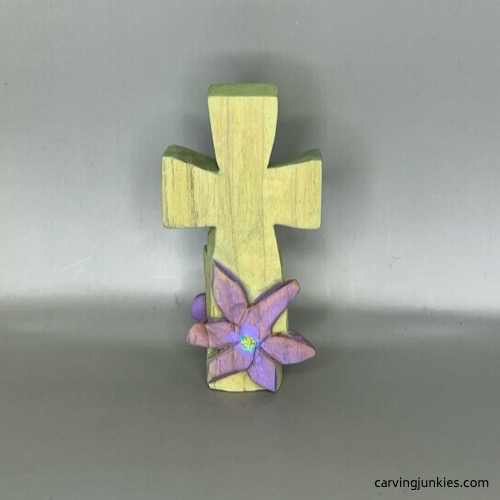 18. Back view of painted cross
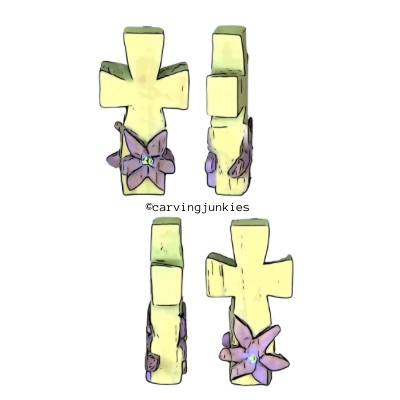
Carving a cross pattern
If you prefer to work with a pattern, you can photocopy this to size to fit your wood block.
Carving a cross tutorial summary
- This small pocket cross is easy to make with this step-by-step tutorial.
- Use acrylic paints—with pastel Easter colors—or perhaps try a more natural stain for year-round use.
- Add more flowers if you like—or no flowers at all.
- This pocket cross makes a lovely gift for believers.
- One of the loveliest gospels to read during Easter is the Gospel of John.
Get 50 Wood Carving & Painting Tips
FREE when you join our free Covered in Chips Club
Your information is 100% private and is never shared. Unsubscribe anytime. See our Privacy Policy .
Share page on:
Home | Privacy Policy | Terms of Use | Contact | Sitemap
