- Home
- Things to carve
- Angel wood carving
Amazing angel wood carving tutorial
Carve this cute pocket angel for yourself—or for someone you care about.
LEVEL: SOME CHALLENGES
Unleash your creativity with this step-by-step angel wood carving tutorial. This tutorial is perfect for beginners—and seasoned wood carvers alike—with the opportunity to carve some intricate details on a small wood block.
Angels represent hope and protection. This angel is small enough to slip into a pocket, making it a wonderful gift for anyone who needs a spiritual lift. Make one for yourself to display on a mantle, bookshelf, or anywhere you want an angel to watch over you.
What you will need for this angel wood carving tutorial
Use a 1 x 1 x 3 inch (2.5 x 2.5 x 7.6 cm) block of wood (I used basswood). You’ll also need a ruler, something to sketch your guidelines with, and an eraser (if you use pencil).
I used a wood burner for the wings, facial details, and carve lines, but you can achieve the same look with a very sharp detail knife and brown paint. I’ll provide some tips for what cuts to use within the tutorial itself.
Remember to stop and strop your knife every half hour or so. If you like carving on your lap, place a large wood board, wood box, or even a cutting board across your lap for safety. A carving glove is also a must for safety.
As always, there is a painting guide at the end of this page, if you want an angel with the same look.
Angel wood carving tutorial at-a-glance
This short video summarizes the key steps to this tutorial—and may be helpful to watch before you begin your angel wood carving.
Starting your angel wood carving
You will carve off the corner of the wood block to give you enough room for the wings on your angel wood carving. First, round off all the corners (started in photo 1 and completed in photo 2).
Sketch the front of the angel (photo 2). The head is 3/4 of an inch (1.9 cm) wide and 1 inch (2.5 cm) long. The body is about 1.75 inches (4.4 cm) long, 3/4 of an inch (1.9 cm) wide at the narrowest point, and 1.5 inches (3.8 cm) at the widest point. Both wings are a 1/2 inch (1.3 cm) wide at their widest point. Mark where you will split the tops of the wings (photo 2).
Please don’t worry if your measurements are not exactly the same. It won’t change the basic shape of your angel wood carving.
 1. Rounding the wood block
 2. Guidelines are drawn
Separate the wings on your angel wood carving
To separate a wing, I held my knife like a pencil (photo 3) and moved it down the guideline. I made a second slicing cut to remove the wood cleanly (completed in photo 5). You could also use a V tool. Repeat the same process on the other wing.
Use a pyramid cut (or a V-cut) to slightly separate the top of the wings (photo 4). You will remove more wood later in this tutorial to fully split the top of the wings. Be super careful to avoid breaking the tip of your knife. It will be a bit challenging to remove the end grain on the top of your block. Don’t skip this step, however, or you risk your paint not adhering evenly.
Once both wings are separated, shave off some wood to flatten the wings (photo 5) and set them back from the body.
Now, separate the hair with your knife (completed in photos 5,6). You can use stop cuts, or a V-tool. You can also start to shape the top of the head (completed in photo 6). You will refine the head further later.
 3. Separating the right wing
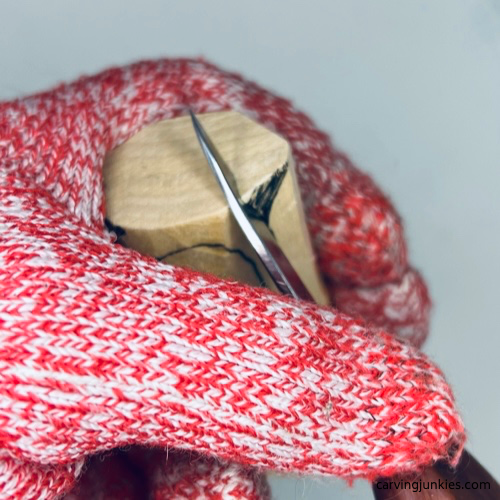 4. Making a V-cut
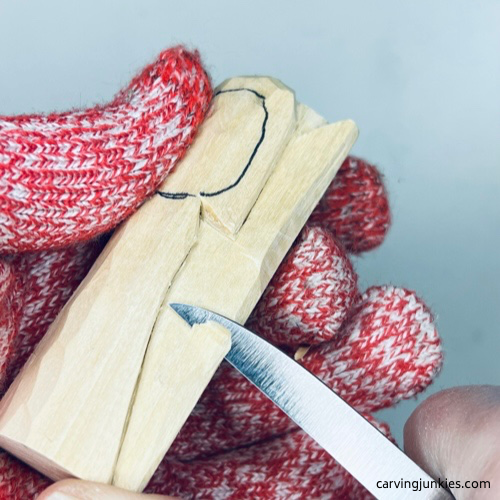 5. Reducing wood to flatten the wing
Add some details to your angel wood carving
Mark the bottom of the wings (photo 6) where you will remove wood with stop cuts, or wide pyramid cuts (rocking your knife to make a deep cut). Tip: You may have to remove the wood in layers. Once you remove this wood, you can continue to shape the wings (completed in photo 9).
Use stop cuts to separate the head from the neck and hair, removing wood from around your cuts (photo 8). You can also use a V-tool here.
Draw some details on your angel wood carving, including the eyes and eyelashes, a line that you will carve to create the bottom of the nose and cheeks, the smile line, the arms, and the hands together in a prayer pose (photo 9). The width of each eyelash is about 1/2 inch (1.3 cm) and is about a 1/4 inch (0.6 cm) from the top of the head. The line for the bottom of the nose/cheeks is about a 1/4 inch (0.6 cm) lower than the eyelashes. The width of the mouth is a little less than a 1/2 inch (1.3 cm). The arms are about a 1/4 inch (0.6 cm) wide. The hands are about 1/2 inch (1.3 cm) long. Also, sketch a part in the middle of the hair (photo 9).
Now, use stop cuts to separate the outer arms (photo 10) and the hands (completed in photo 12). I used pyramid cuts to carve each crook at the elbow of the inner arms (completed in photo 12). You can also use a V-tool here.
 6. Wings are marked for shaping
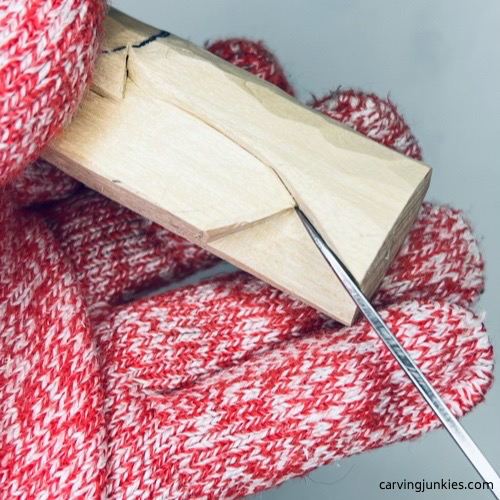 7. Removing wood to shape wing bottom
 8. Separating the head
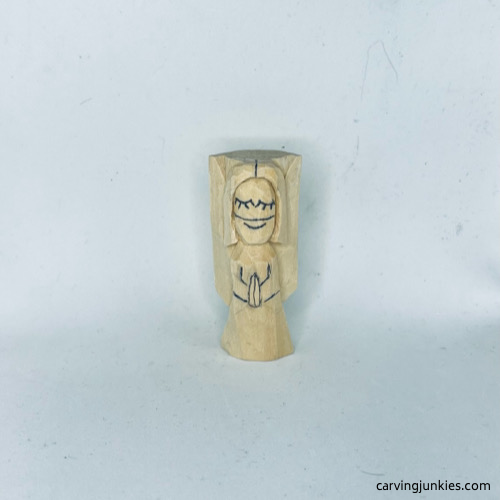 9. Details are sketched
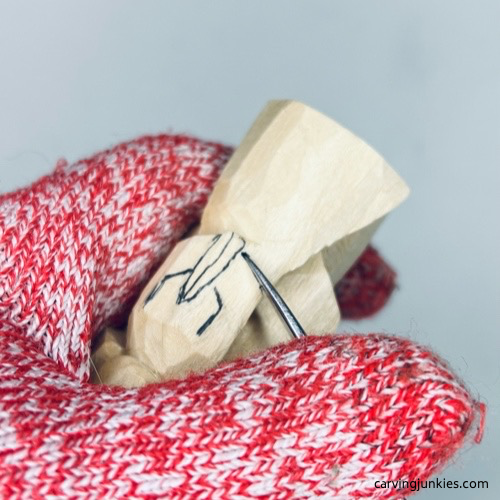 10. Separating the arms
Carve the facial details on your angel wood carving
Use stop cuts to separate the guideline that marks the bottom of the nose and cheeks (photo 11), removing wood from underneath. Mark two triangles (photo 12) that you will remove with small pyramid (chip) cuts to create the nostrils. This is a very easy method to carve a nose and cheeks that I picked up from carver Bruce Ankeny. Now, mark the nose further (photo 13) for shaping and to separate the cheeks (completed in photo 14). Remove some wood from underneath the nose to give it more depth. Note: You may need to redraw the mouth.
Shape the cheeks (completed in photo 14). You can use a stop cut or any other cut. Use a narrow V-cut to create the part in the hair (completed in photo 14). Or, you can use a V-tool.
 11. Making a stop cut
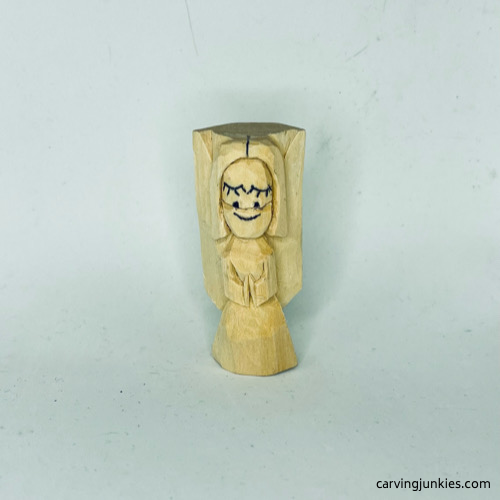 12. Nose triangles are marked
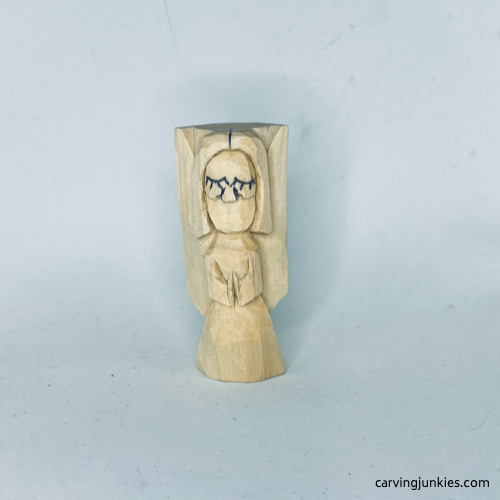 13. Marking nose further
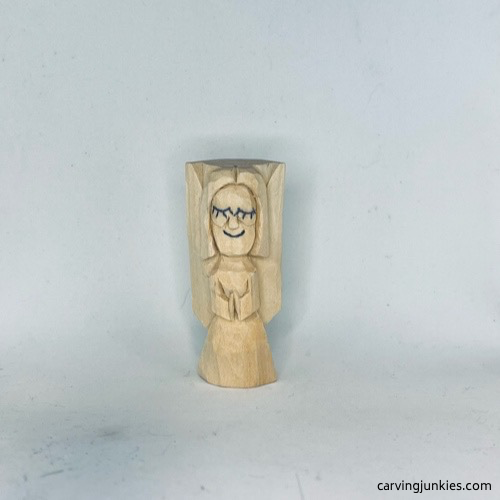 14. Nose is shaped
Start the back of your angel wood carving
Sketch a curved line on the top of the head of your angel wood carving (photo 15). This marks the back of the head. The entire head is about 1/2 inch (1.3 cm) wide at the widest point.
Also, sketch the wings on the back of your angel wood carving (photo 16). The back wings are about 1/2 inch (1.3 cm) at the widest point. Hold your knife like a pencil and move it along the guideline of each wing. Make a second slicing cut to remove wood. Or, you can use stop cuts here (or a V-tool).
Now, you will have more access to remove wood to shape the back of the angel’s head (photo 17). The end grain on the top will be the most challenging wood to remove. Take your time and check for symmetry on both sides of the head. You will also need to reduce some wood from the back of the body (note: you may have to re-separate the wings).
When you are done, the back of your angel wood carving should look something like photo 18.
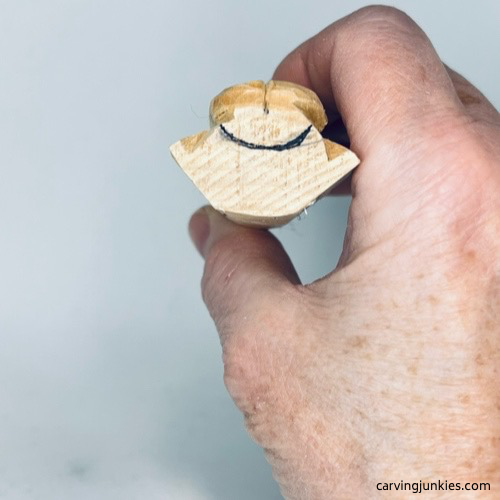 15. Guideline for back of head is drawn
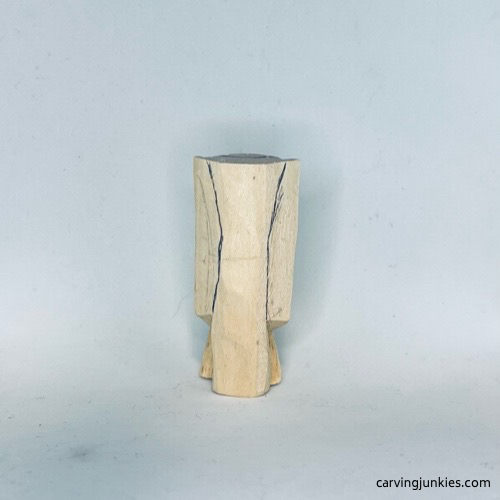 16. Back wings are sketched
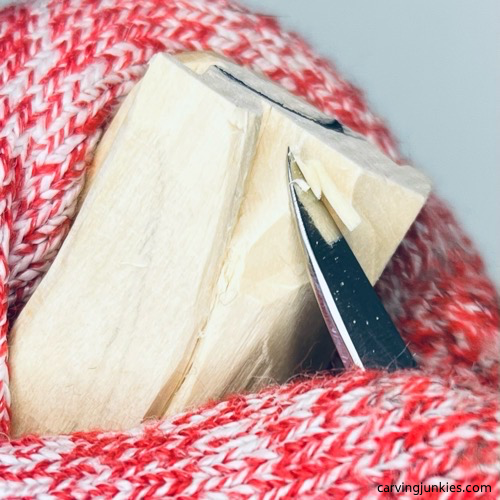 17. Shaping the back of the head
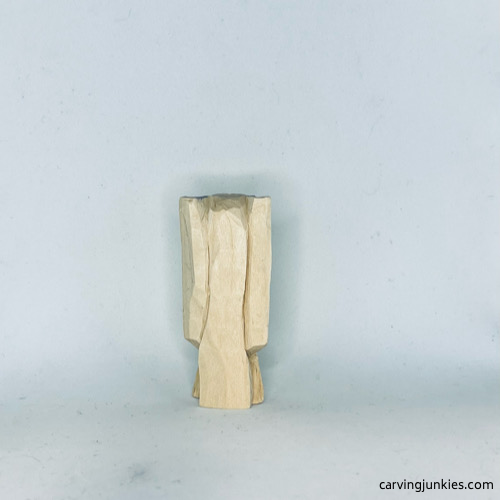 18. Back wings are carved
Refine the details on your angel wood carving
Mark the wood that you will remove to fully separate the top of the wings on your angel wood carving (photo 19). Removing this wood is the most challenging part of this angel wood carving. I used a wide V-cut (photo 20), rocking my knife back and forth to go as deep as I could on each side. I then removed a little wood at a time from each side to avoid cracking the wood (or worse, chipping my knife). Take your time here.
Next, add a line on the back where you will carve the hairline (photo 21). You want the hair to be the same length on the back and the front. Use stop cuts to separate the hairline. This will give you more access to remove wood—and shape the hair and the back of the body.
After you noodle the final shape of your angel wood carving, sketch the feather guidelines on the wings that you will wood burn (photos 22,23). I also added diagonal lines with my wood burner (visible in photos 24-28) to make the wings look more like feathers—and to add interest. If you don’t have a wood burner, you can (very carefully) make shallow V-cuts. Be very careful here not to break the wings. Another option is to paint the lines, or leave the wings plain.
I also used a wood burner to create the eye-line and eyelashes, mouth, and to accent all the cuts. You could also paint these details later—or carve the facial lines with a very sharp detail knife—aand use brown paint to highlight your cuts. Be mindful of the wood grain as you carve. Tip: carve from one side—stop in the middle—and carve from the other side to avoid splitting the wood.
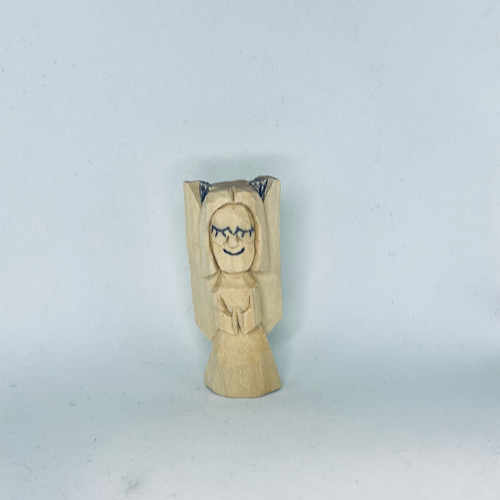 19. Wood is marked for removal on wing tops
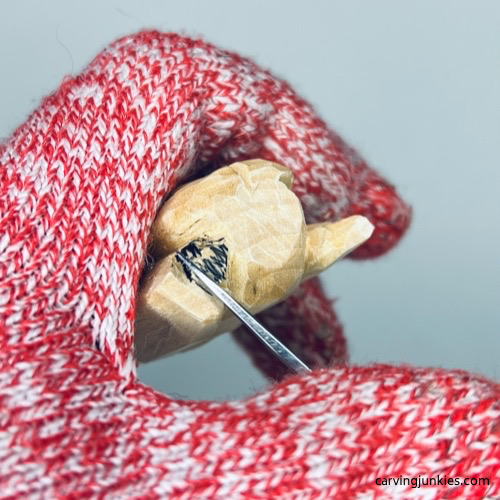 20. Making a deep V cut
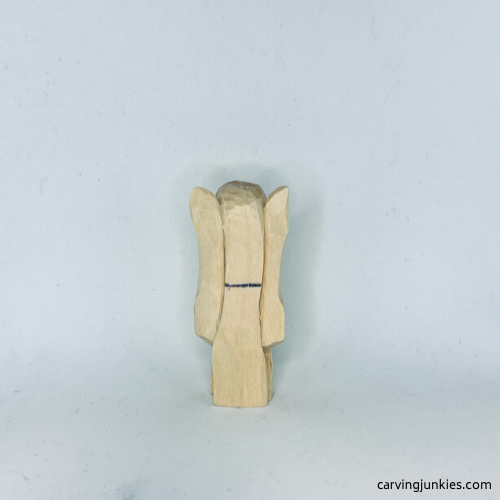 21. Back of hairline
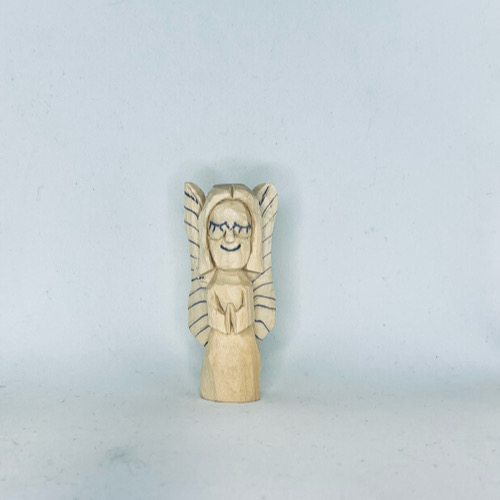 22. Feather guidelines on front
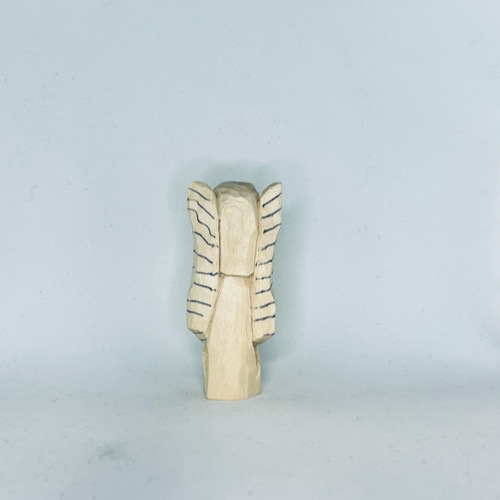 23. Back feather guidelines
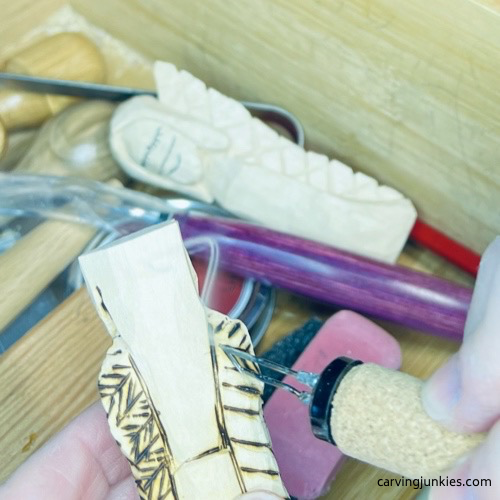 24. Wood burning the feathers
Painting your angel wood carving
If you’re new to wood carving, check out our page about painting a wood carving. Here are the acrylic paints you can use to get the same look as this angel wood carving. Unless noted, all paints were diluted with water to create a wash.
Feel free to use whatever paint brushes you want. I like angled brushes for getting into crevices.
- Wings: I used Minwax wood finish (golden oak). Another option is to make a super diluted wash with light brown paint or burnt umber.
- Flesh on face and hands: Wash blend with 2 drops of FolkArt ochre and 1 drop of of Windsor & Newton red iron oxide.
- Hair: First layer with FolkArt ochre wash and a second layer (after fully dry) with Ceramcoat yellow wash.
- Cheeks: Windsor & Newton red iron oxide (very diluted with water) and applied in several coats.
- Dress: CraftSmart vanilla wash. Dry brush with FolkArt steel gray.
- Finish: After 24 hours, I applied Howard’s Feed-N-Wax with a paint brush and let it dry for 20 minutes. Then, I polished the piece with a shoe brush.
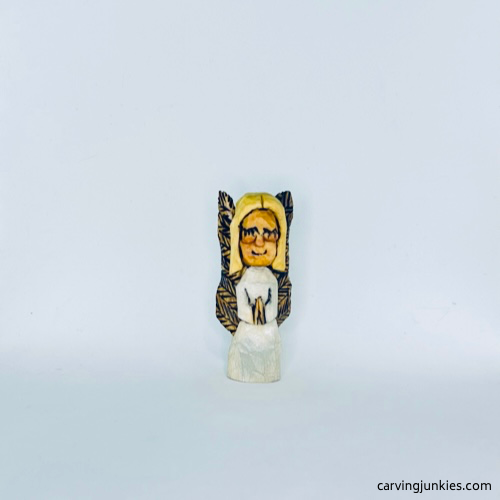 25. Front of painted angel wood carving
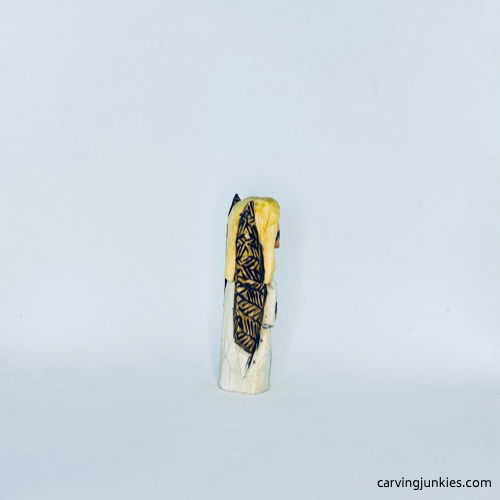 26. Right view of painted angel wood carving
 27. Left view of angel wood carving
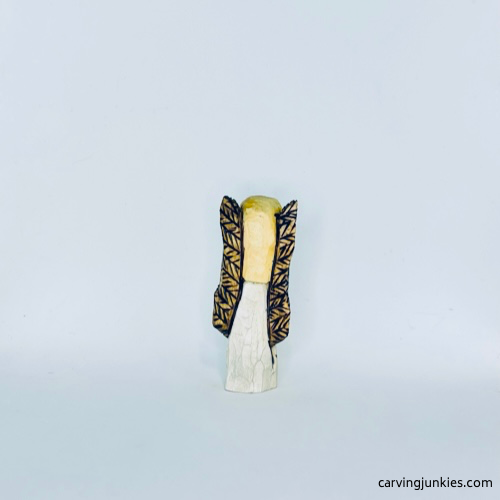 28. Back view of painted angel wood carving
Angel wood carving pattern
If you prefer using a pattern to wood carve, photocopy this pattern to size to fit your wood block.
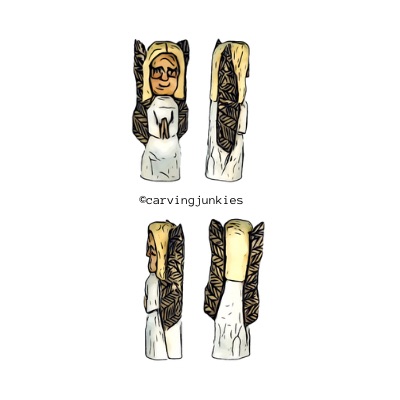
Angle wood carving tutorial summary
- This pocket-sized angel wood carving is perfect to give as a gift—or to watch over your home.
- You can add the feather-like design to the wings with a wood burner (or carve the lines and use brown paint), or leave the wings plain.
- You can also adapt the pattern to make other angels with different facial and wing features.
Get 50 Wood Carving & Painting Tips
FREE when you join our free Covered in Chips Club
Your information is 100% private and is never shared. Unsubscribe anytime. See our Privacy Policy .
Share page on:
Home | Privacy Policy | Terms of Use | Contact | Sitemap

